Basketball Post 3-Tier Setup...Comments?

Homebrew Talk - Beer, Wine, Mead, & Cider Brewing Discussion Forum

Help Support Homebrew Talk - Beer, Wine, Mead, & Cider Brewing Discussion Forum:

This site may earn a commission from merchant affiliate links, including eBay, Amazon, and others.

Ace_Club

Well-Known Member
Joined
Sep 21, 2008
Messages
43,816
Reaction score
2,373
Location
Chicago, IL
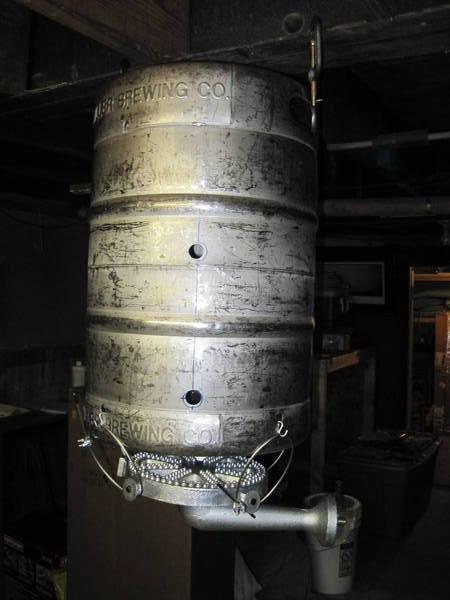
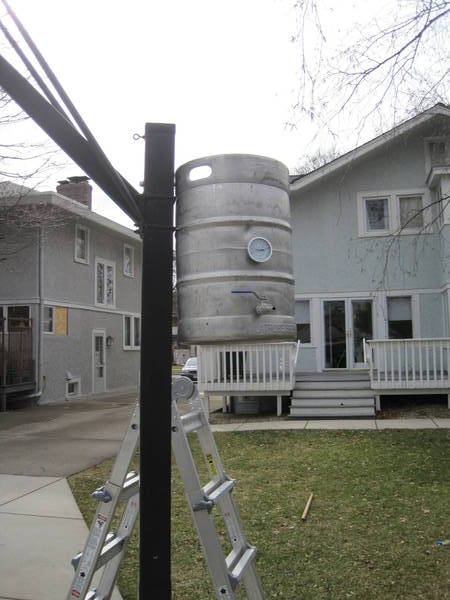
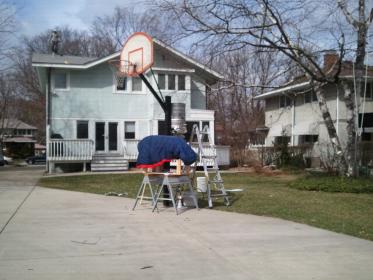
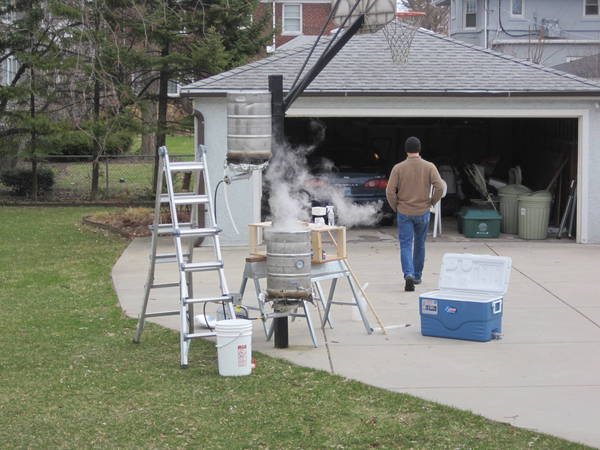
So, after looking at the simple setup that WortMonger uses for his 3-tier system (i.e., one center steel tube with the kegs bolted to it), I was looking at building one. This is when I noticed the already installed, 9' tall steel tube in my driveway. Is there any reason I couldn't just drill holes into the existing basketball post for the bolted keg attachments and use it as a brew stand? The only issue I can think of off-hand is that the paint that it is currently coated with may not stand up to the heat.
 
my friend bent his basketball pole by hanging on the rim. they are not thick at all. my friend weighs around 175. if you are only doing 5 gallon batches, its nowhere near that weight, and you will not have the leverage he did, but its something i would look into.

it seems like an OK idea, but how close to the pole would the burner be? would it weaken the pole? the theory behind this is good, i would double check some safety issues though.
 
Chop the pole to the height you need. Drill and and install whatever bolts/hardware you need. Then fill the pole with cement. That should take care of any strength issues.
 
I'd like to continue to use it as a basketball hoop. I figure on brewdays I can hang up the keggles and brew. Then, take them down to clean and store in the garage. But you are right, I don't see why I couldn't take the cap off the main post and pour some concrete down into it to add additional strength.
 
Dan, you gonna sit out there in the driveway and brew in our winter weather? I take it SWMBO is objecting to a brew-stand "space" in the basement or garage?


Short answer from my shaky physics recollection is you will be fine doing 10-15 gallon batches on a post like that anchored several feet into the earth in concrete. You are adding the loads close to the anchor point, close to the center of gravity of the post, and adding static load, as opposed to some guy hanging on the rim, which is something I am almost certain you've never done! :p

Hah!

I don't plan to do much brewing over the winter. Seeing as how my basement has low ceilings and is filled with asbestos insulation, I'm not too keen on brewing down there. Plus, my desire to have an all-gravity system automatically rules out the basement. The garage would be no better as it's detached, uninsulated and would only provide a wind blockage for winter brewing. However, my plan would be to brew like crazy in October/November so that the pipeline takes me through to the spring, thus being able to spend the cold Chicago winter comfortably buzzed in my recliner.

I wasn't terribly worried about the forces on the pole due to the kegs hanging from it. I'm just looking for any reasons that I may have overlooked as to why it may be a bad idea (e.g., like the paint).

Otherwise, I'm pretty excited that I have a pre-installed brewstand sitting in my driveway. :rockin:
 
Man, you are hoping your beer lasts you from Mid-Nov through end of March? That is AMBITIOUS! LOL!

Are you tied to 3-tier? You can do a single (or double) tier in your basement (asbestos be damned) or garage with a single pump. That time off over the holidays is quite useful for brewing!
 
Man, you are hoping your beer lasts you from Mid-Nov through end of March? That is AMBITIOUS! LOL!

Are you tied to 3-tier? You can do a single (or double) tier in your basement (asbestos be damned) or garage with a single pump. That time off over the holidays is quite useful for brewing!

7 kegs, plus bottles (mead, beer and wine), plus a few beers in secondaries. I should be fine. I drink, but I'm not a drunk. :cross:

For now I'm tied to 3-tier. But the good thing about going this way is that my expenses for my stand are pretty much $0.00, so if I decide to add a pump later on, I can look into going double- or single-tier with no problem.
 
So, I've been making slow progress in getting this build done. However, the weather is getting warmer and I've committed to having it done and my first AG brew in the new rig on March 25th. So, all the items have been slowly being delivered to my home and the last major piece of work left is to drill the two mounting holes into the basketball post for the HLT and BK. I decided to go with a cooler MLT that will rest on saw horses for the time being.

That being said, the biggest problem I had to face design-wise was how to mount the burners. I didn't want to fabricate something to hang off of the basketball post, so I decided to hang them off of the bottom of the kegs. I was able to find 25' of 1/8" wire rope on Amazon for $0.85 so I went with it.

I cut 2' sections of the wire rope and clamped them together into loops. I added large washers to the burners mounting locations to allow for a place for the wire rope to hook onto.

Here's an image of the proof-of-concept test with the keg hanging from an I-beam in my basement:

IMG_20232.JPG


Closeup of the burner configuration:

IMG_20252.JPG


Yesterday I also finished putting together the propane manifold that will provide gas to the burners on the HLT and BK. Seen here:

IMG_20221.JPG


So, as mentioned earlier, I've still got to get the mounting holes in the basketball post drilled out. The post is 4" x 4" tube steel and I'll be using 1/2" SS machine bolts (7" long) to mount the kegs. I ran some rough numbers and the bolts are capable of holding ~8,000 lbs. in shear, so a full keggle will be no problem.

Anyways, off to make more progress.
 
Ace,

The design looks like it should work. I would add some wind shields around the burner. This should help give a better distribution of the heat over the entire keg.
 
Ace,

The design looks like it should work. I would add some wind shields around the burner. This should help give a better distribution of the heat over the entire keg.

Windshields will be fabricated from aluminum foil. Cheap and easy to make. :D

In other news, the mounting holes for the keggles were drilled into the basket ball post today. I was pleasantly surprised to find that the previous owner of my house had filled the entire post with concrete. Had to run out to get a 1/2" masonry bit to finish the job, but it is now done and we are a go for the dry run next weekend!

The dry run will consist of leak testing all three vessels, leak testing the propane manifold and making sure both burners work. I will also be testing the thermal mass value of my Coleman Xtreme 70 qt. cooler for use in my brewing spreadsheet.
 
It was a busy weekend. The BK and the MLT were both leak tested. Both held up fine, although the MLT had to be reassembled due to a very slow leak.

Here's the BK during the leak test:

IMG_2026.JPG


Here's the MLT just after reassembly and ready for the second leak test:

IMG_2028.JPG


IMG_2030.JPG


Additionally, the mounting holes were drill in the BK and HLT. This will allow them to be mounted to the basketball post via the 1/2" diameter hex bolts. The rain did clear up enough on Sunday for me to take a keg out to the post and test it in both locations. Below is a picture of one of the keggles hanging from the HLT location on the basketball post.

IMG_2031.JPG


So far, the plan is to have the inaugural brew this Friday. The forecast is predicting some chilly temps (~39F), but that will have to do! :D
 
Looks like you drilled a hole through the kettle and have a bolt going through the kettle and post?
 
Looks like you drilled a hole through the kettle and have a bolt going through the kettle and post?

Yep. 1/2" hex bolt holds the keggle to the post. Those bolts can hold ~8k pounds in shear, so a fully loaded keggle should be no problem.
 
Unique idea, for sure.
However, it just seems more comical than practical.
Maybe I'm missing something. :confused:
If you could please explain why you want to do it this way.

The immobility will eventually be a nuisance, for sure... mainly because of the inconvenience of having to brew all the way out there on the sidewalk.
Have you considered building a brewstand?
It's pretty easy, ya know!

It allowed me to switch to 3-tier AG with items that I already had installed. The brewing is in my driveway (not the sidewalk), and the ability to bolt the kegs up, brew, and then dismantle allows for great flexibility with little to no stand costs.
 
Ah, I see.
Sounds good to me.
I agree on the flexibility, and if money's an issue, then this makes sense.
I'm looking forward to pics of brew day.

Not so much money as time (which equals money, so nevermind). The time it would take me to get around to designing and building a stand would mean no AG brewing for a while (I'm a lazy bastard).

This required drilling two holes and buying some bolts and nuts. Now I'm good for AG brewing. :D

11 gallons of Haus Pale Ale this Friday! :ban:
 
I'd look into bolting a top and bottom "hook" to the post so that you don't need to unbolt anything to install/teardown the brewery.

I'd thought about that, but especially for the BK mounting location, I don't want anything sticking out of the post. I've got two little ones who tear ass around the yard, and the last thing I'd want is for one of them to get caught up on that.

It might be plausible for the upper mounting location, I'd just have to find one that I'd be certain could take the load of the full keggle + burner.
 
Just go with it. Ignore all the nay sayers on here. You've got an idea and design that, albeit a bit ugly, looks like it will work just fine and fits your needs, budget, and timeframe. Happy brewing!
 
First brew on the new system is in the books. 11 gallons of Haus Pale Ale.

The brew day went well, found a couple things that I'll need to change (longer supply hose, hop spider). The biggest thing that went wrong was that I oversparged. I thought I was keeping a pretty good eye on the level indicator, but I ended up with 15 gallons in the BK (should have been 13). So, it took an extra hour to get down to the correct post-boil volume.

In the end, I got 85% mash efficiency, didn't lose a single degree during the mash and am very happy with the way things went. Pictures below:

Heating the strike water. The MLT stand is empty so that I could keep the tun at 70F as long as possible due to the 34F weather I was brewing in.

IMG_2038.JPG


The view from the garage as I'm waiting on the mash. The MLT was wrapped in a mummy bag to aid in maintaining temps:

ForumRunner_20110325_105501.jpg


Mash done and the boil has begun!

IMG_2042.JPG
 
Cool, do they rock at all, beings they are only mounted on one bolt? Maybe you could get away with using some cotter pins for easy removal/ attachment.

I personally have a three tier keggle system, this allows me to heat my mash, i recommend it if you are looking into an upgrade. I get pretty good results with US two row using a step mash method, that and i don't trust plastic. :( Oh and the stainless keg actually holds heat better than you might think.

They are rock solid once the bolt is tightened down. I add a couple washers in between the keg and post to account for the ridges in the keg wall so that it hangs straight when the bolt is tightened.

I have an extra keg that I can use, but for now the cooler works wonders. It's 70 qt. so that I can accommodate huge grain loads, and during my first batch it didn't lose a single degree during the 60 minute mash while in 34F degree weather.
 
Just brewed my second batch on this setup and it worked great! I fabricated some new wind-shields out of aluminum duct work and they work much better than the aluminum foil.

I added a hop spider to the overall setup which helped immensely.

For the next brew, I need to adjust the wire rope hangers for the burners to get them a little closer to the bottom of the kettles. I also need to make some better adjustments to the propane since I seem to be using quite a bit for each batch.
 
I wonder if I could recycle the portable basketball pole sitting unused on my back patio for a similar rig. I think I could widen the wheel base and fill the pole with concrete. Then I would have a mobile 3-tiered brewing rig for very little cost! Hmmm, may have to put some thought into this idea!
 
I wonder if I could recycle the portable basketball pole sitting unused on my back patio for a similar rig. I think I could widen the wheel base and fill the pole with concrete. Then I would have a mobile 3-tiered brewing rig for very little cost! Hmmm, may have to put some thought into this idea!

I don't see why you couldn't. What's the pole constructed of?
 
Is it round or square?

I'm guessing if you fill it with concrete it will be plenty strong enough. Although the added weight will decrease the portability.
 
Is it round or square?

I'm guessing if you fill it with concrete it will be plenty strong enough. Although the added weight will decrease the portability.
Yes, it's round and would become heavy when filled with concrete. I'll have to decide if that would be a show stopper.
 
Yes, it's round and would become heavy when filled with concrete. I'll have to decide if that would be a show stopper.

It's hard to say if that will work well or not. From the portable hoops I've seen in the past, the pole is either at an angle (which will present it's own unique issues) or it is not centered on the base. Keep us posted as to what happens, though.
 
It's hard to say if that will work well or not. From the portable hoops I've seen in the past, the pole is either at an angle (which will present it's own unique issues) or it is not centered on the base. Keep us posted as to what happens, though.
I decided to go a different direction. I've started to build a rig out of extra wood I had. It will be a 3-tiered system designed to be mobile. The HLT will be stacked above the BK. The MLT will be a cooler sitting on a folding shelf off to the side recycled from a folding utility table. It will look just like the one here, only in wood. I will line the wood around the burners with concrete backer board. I'll post pics when it is done.
 
Brewed a Fat Tire clone on the system on 6-28-11. I'm glad to say that I was able to better control the burners (BG-14s) by adjusting them so that they were a little closer to the bottoms of the keggles and by fiddling with the propane adjustments.

Previously I was almost burning through a full tank during a 10-gallon session. This time around I used less than half of a tank during the whole brew day.

Overall the system is working very well right now. I collected 25 gallons of water from the IC and ran the hose around the yard the rest of the time. I then used the collected water over the next couple of days to water my garden and hops. In the future, I think I'll need a couple 55 gallon trash cans to collect the water to reduce the waste.
 
Nice idea. Watch out for too much drinking while you brew so a game of H-O-R-S-E doesn't break out during the session.

:off: 
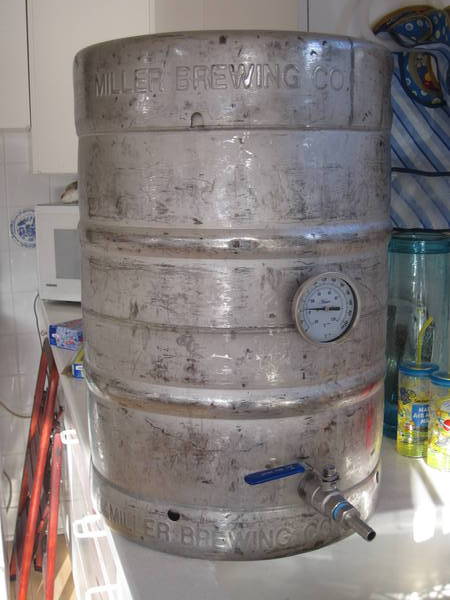
I'm the most jealous of the Miller Keggle (it's my last name).
 
Back
Top