Help Wiring Honeywell Y8610U Gas Control Valve and Pilot Burner

Homebrew Talk - Beer, Wine, Mead, & Cider Brewing Discussion Forum

Help Support Homebrew Talk - Beer, Wine, Mead, & Cider Brewing Discussion Forum:

This site may earn a commission from merchant affiliate links, including eBay, Amazon, and others.

cdburg

Well-Known Member
Joined
Sep 7, 2006
Messages
362
Reaction score
7
Location
Sacramento
Hello Everyone,

I'm hoping that someone who has completed a similar project or has HVAC experience may be able to help.

I'm in the finishing stages of a B3 1100/Brutus hybrid. I decided to go with the ranco controller and honeywell gas control valve combination More Beer uses, but I'm having trouble getting the gas control valve and pilot burner to work.

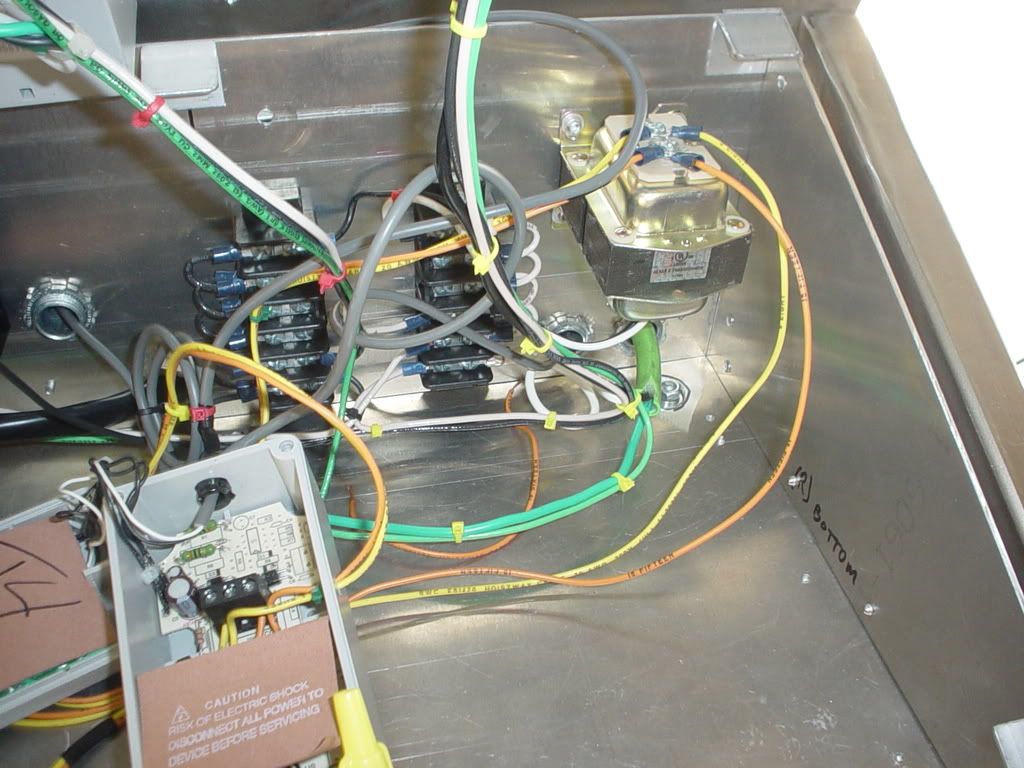
I'm running 120v through a 24v transformer.

Wiring_Pictures005.jpg


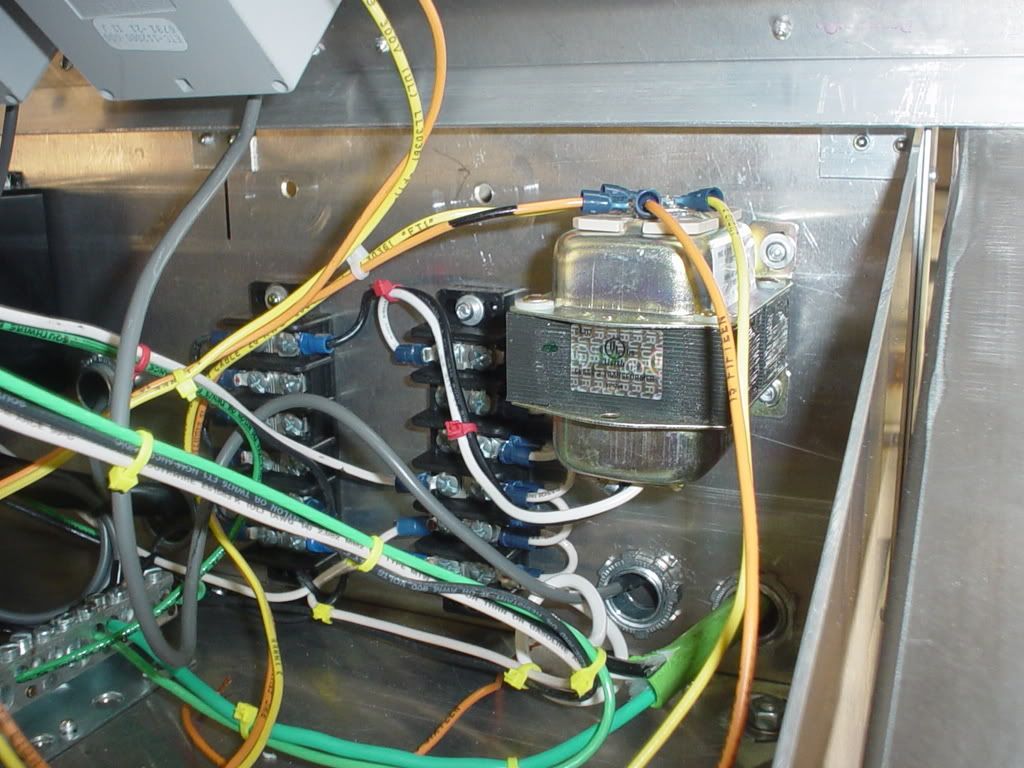
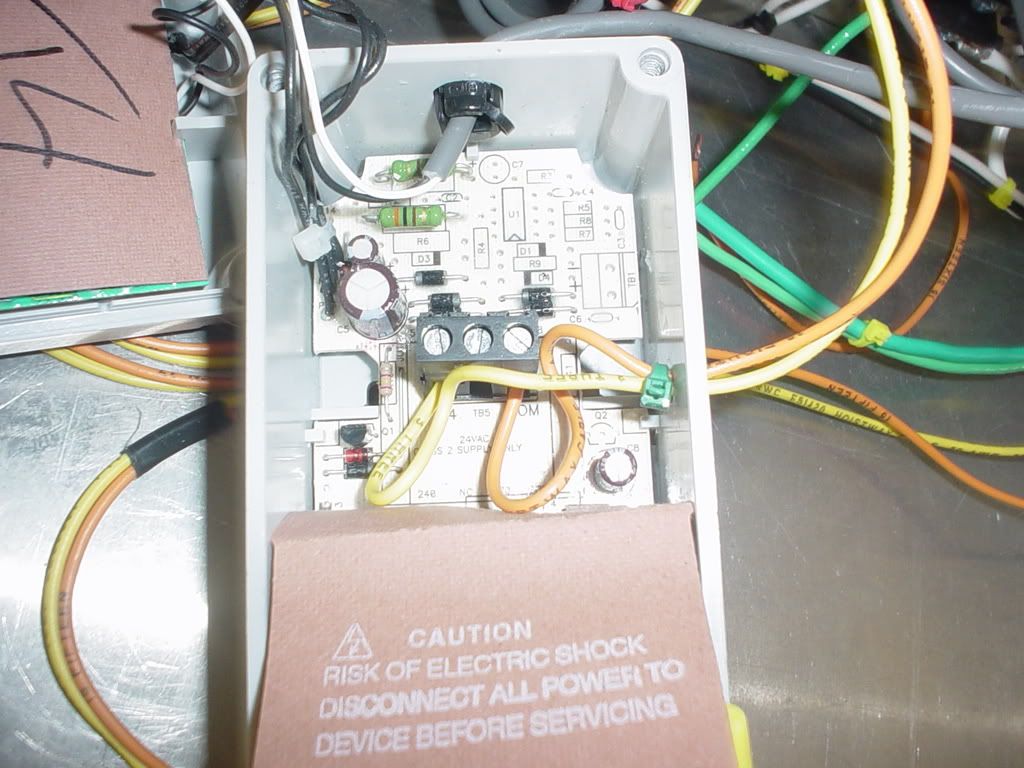
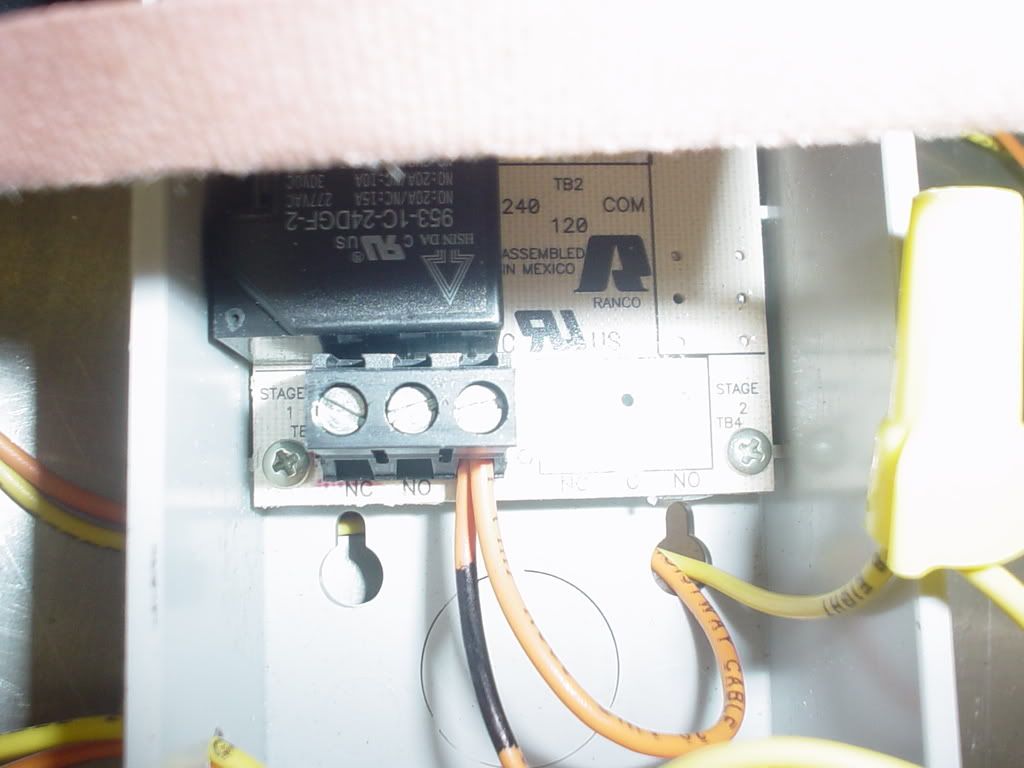
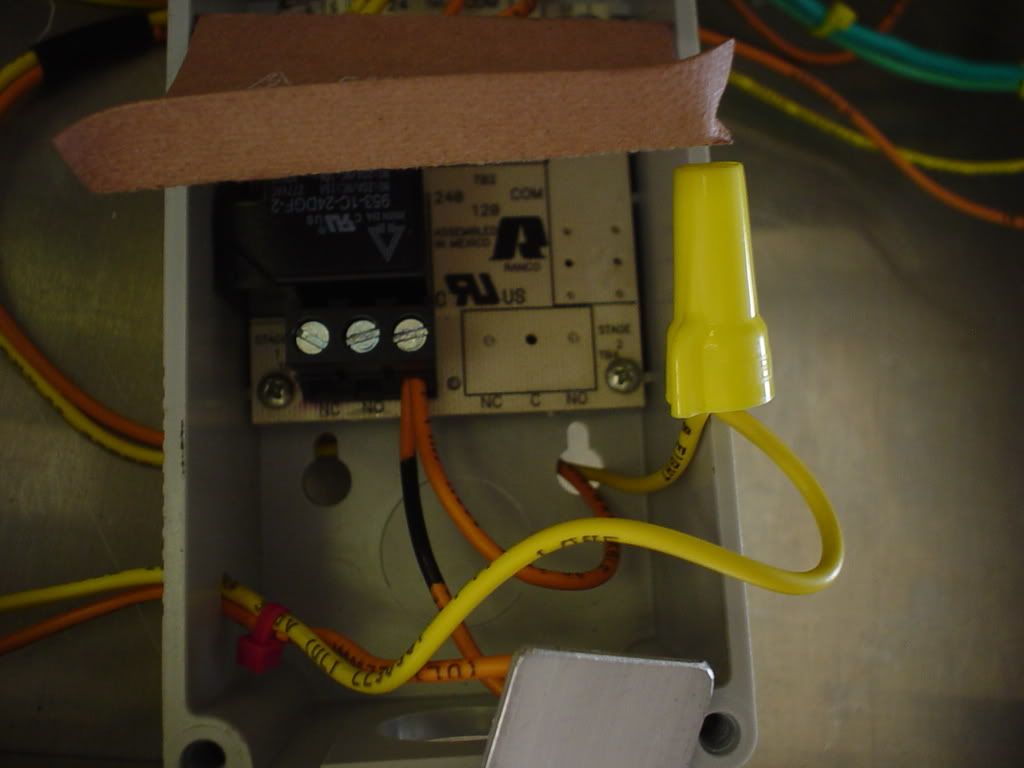
That goes into a 24v Ranco controller and then to the wiring harness for the Honeywell valve.

Wiring_Pictures007.jpg


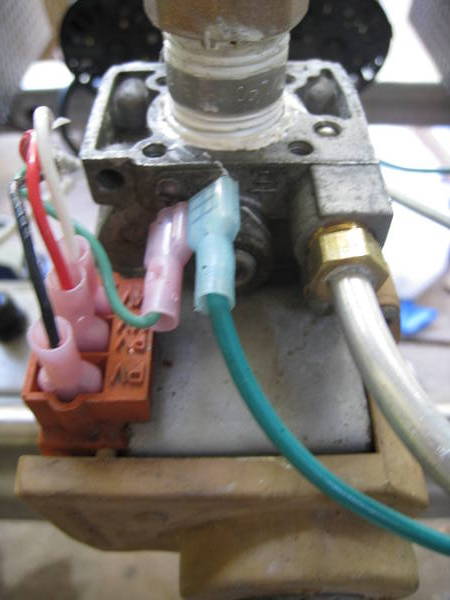
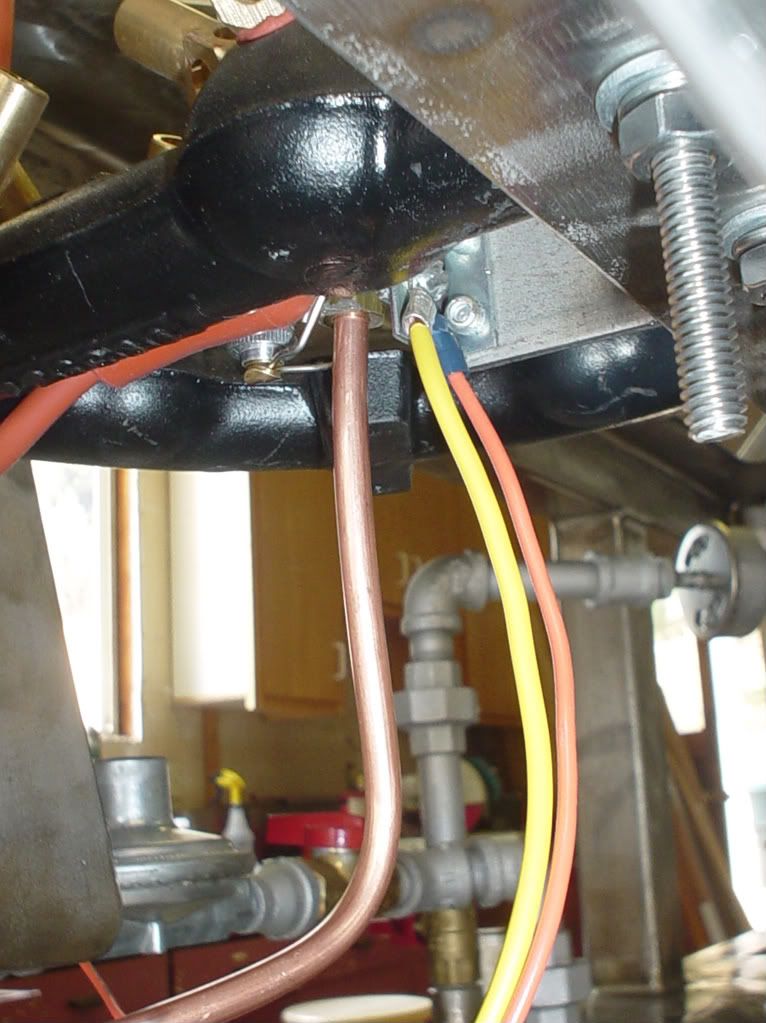
From the harness, I've got the corresponding wires running to the control valve.

Wiring_Pictures001.jpg


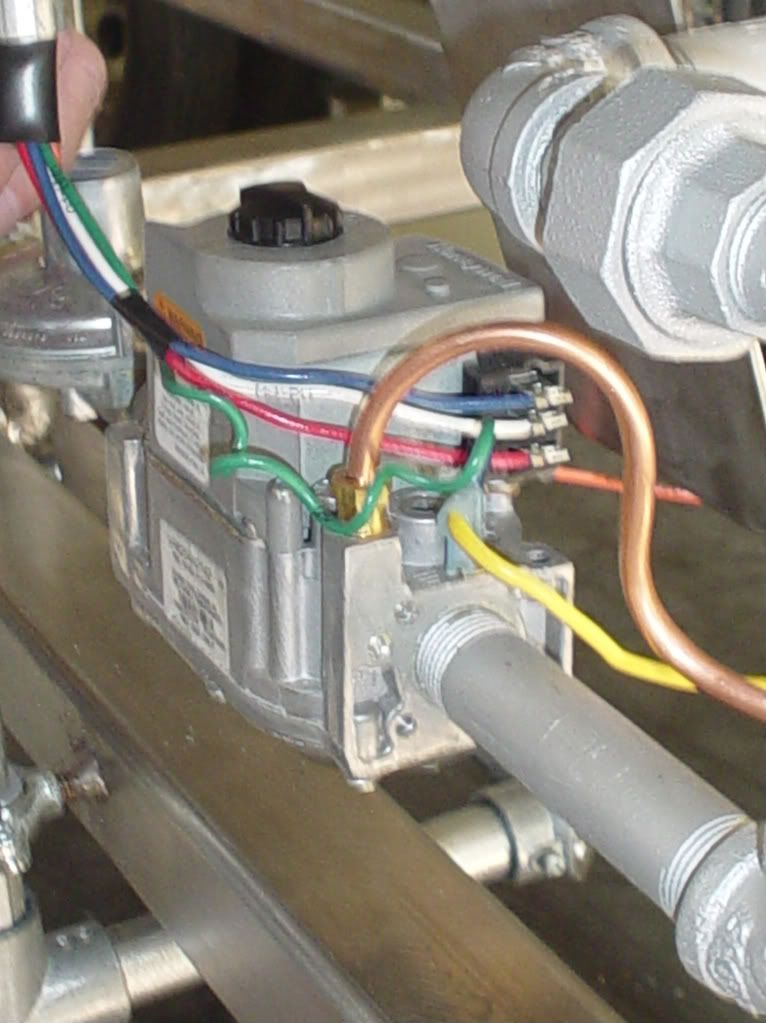
Two grounds then go from the control valve to the pilot burner bracket, which is attached to the frame.

Wiring_Pictures002.jpg


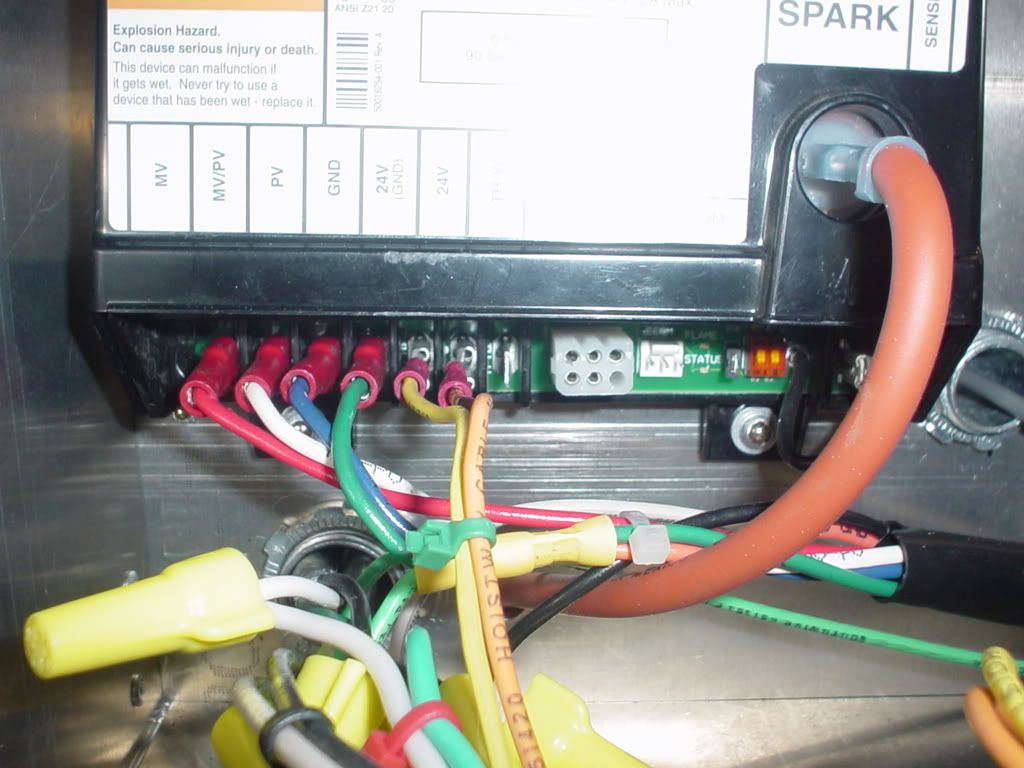
The Ranco has power, and I've used a voltage meter to make sure I've got power at the 24v line in the harness. Even so, when the Ranco temperature it set to "heat" and the desired temp is set above the current temp, nothing happens.

Right now, I'm just trying to get the pilot burner igniter to spark. I don't want to introduce propane until I have a spark. Any ideas? I can post pictures of any additional wiring or parts if needed.

Thanks in advance for your help.
 
How have you wired the 24V to the ignition module?, looks like you have it connected directly to the transformer. If that was the case the module needs to have one of the 24V lines routed through the Common-Normaly open contacts on the ranco so it only gets power on a call for heat. If wired like that check the input power connections on the module. What is the part number for the ignition module?, might have been set for fan switch interlock and will not fire unless jumpered. Here is a link to the manual, it appears that you have to switch power on/of to the TH/W terminal to the left of the 24V source with the ranco controllerhttp://customer.honeywell.com/techlit/pdf/70-0000s/70-2313.pdf
 
that looks like what we call the "Honeywell Smart Valve"
If it is the same one intended for furnaces or powervent water heaters, I will be looking for a signal from a pressure switch confirming proper draft to the flue.

that curcuit needs to be jumped. The manual should give you the firing sequence. Follow the steps until you find what requirement the control board doesn't see.
 
I have two sets of lines coming off the 24v transformer:

Wiring_Pictures001-1.jpg

(Both lines coming off the 24v transformer)

One set of lines power the 24v (ETC-112000) ranco controller.

Wiring_Pictures002-1.jpg

(The top line to power the Ranco controller)

In the second, separate 24v lines, one wire runs in to the common (hot) terminal at the bottom set of Ranco controller connections. The other wire runs directly to the 24v ground terminal on the 8610 module.

Wiring_Pictures003-1.jpg

Wiring_Pictures005-1.jpg

(2 shots of the bottom terminals in the controller - One routes to the common. The second [with the wire nut] just goes through the controller directly to the controller harness.)

I'm using the S8610U module. Right now, I'm not using the TH/W terminal for anything. Nothing is plugged into it, and the wire in the harness is not routing to anything. I'm not sure how it should be used...

Thanks again for your help.
 
Thanks kladue! I took the "commercial water heater" instructions from the honeywell manual link you sent and we used that to wire from the ranco to the wiring harness. We've got spark now. Next test will be with the propane.

Thanks again for your help. It saved what was looking like an unproductive Sunday!
 
Update after testing with propane - The spark definitely works as it should, however, the Ranco doesn't appear to be controlling the gas valve itself. Does anyone have any advice on which terminals in the ranco we should be running through?

Thanks again.
 
Nevermind again. I changed the wiring to go in the common and out the normally open and everything works like a charm. Thanks again to both of you for your help.
 
Nevermind again. I changed the wiring to go in the common and out the normally open and everything works like a charm. Thanks again to both of you for your help.

Yep. That's the setup. Congrats on the spark ignition. I am definitely glad I went that route. Just curious about the two ground wires to the burner. I have the ground wire going from the module to the valve and then one wire from the valve to the burner. There are two ground terminals on the valve.

Can we see pictures of the whole rig?
 
On the honeywell module there is a connection called "burner ground". I used the wire in the factory harness to connect the burner ground connection to the burner mounting bracket. The other ground is the typical burner ground between the burner mounting bracket and the double ground connection on the module.

It seems a bit redundant to me also, but I figured it was better to be safe than sorry. Does anyone know if one of the two can be removed?

There's a little more polishing left to get the stainless where I want it to be. I want to get that done before I post the final pictures of the rig. I want it to look nice and shiny in the pictures. :rockin:

I should have the final shots up next weekend for anyone who is interested. I also tried to document as much of the build as possible in pictures. I put those pictures in 16 Google Picasa albums, one documenting each day of the build. If anyone wants that level of detail, I can post links.

I hear you on the polishing. It's a huge PITA IMO. I used an angle grinder with 3m discs. I shoulda done it before I started mounting stuff on the rig.

I have mine run like this; one to module, one to burner), which was blessed by my engineer friend. Yes, please post links to pics. Thanks.

IMG_01941.jpg
 
The polishing is definitely a huge PITA. The design we settled on used a lot of seam welds that all needed to be ground and then sanded before polishing. I've been grinding and sanding for weeks. When it's all done though, it should look very nice.

I'll post the final pictures when it's all polished, probably next weekend. Thanks again for your help.
 
Time to dig up my own ancient post to see if anyone has thoughts on troubleshooting an issue with the Honeywell valve. During my last brew day, I ran into an issue with the valve not lighting the pilot. The auto spark ran, but the valve never seemed to recognize the spark and turn on the gas to the pilot light. I was able to hold a flame from a lighter over the sensor to get the valve to turn on the main gas, so the brew day wasn't lost.

I disconnected and reattached all of the wires on the valve, and it didn't change anything. It doesn't seem to be a loose connection. Any thoughts on troubleshooting the pilot gas supply?
 
In case it helps anyone down the road, check your pilot burner orifice first, to make sure it's clear.

I took apart the entire Honeywell valve setup (controller and valve) and swapped out the thermocouple, and it didn't change anything. Only then did I think to check the pilot burner. The orifice inside it was completely blocked. I cleaned it out, and the problem is solved. On the bright side, I now have backup parts for the entire automated burner set up.

Time to dig up my own ancient post to see if anyone has thoughts on troubleshooting an issue with the Honeywell valve. During my last brew day, I ran into an issue with the valve not lighting the pilot. The auto spark ran, but the valve never seemed to recognize the spark and turn on the gas to the pilot light. I was able to hold a flame from a lighter over the sensor to get the valve to turn on the main gas, so the brew day wasn't lost.

I disconnected and reattached all of the wires on the valve, and it didn't change anything. It doesn't seem to be a loose connection. Any thoughts on troubleshooting the pilot gas supply?
 
Yep. That's the setup. Congrats on the spark ignition. I am definitely glad I went that route. Just curious about the two ground wires to the burner. I have the ground wire going from the module to the valve and then one wire from the valve to the burner. There are two ground terminals on the valve.

Can we see pictures of the whole rig?

Korndog;
I ran to this thread while I was looking for help to get my Honeywell Y8610U to work. I'm using a Mypin PID that I wired and seem to work fine. the valve I bout to my knowledge is low pressure valve, that is connected to a propane cylinder via an adjustable regulator and I put less than one PSI through to the valve. the valve is working in starting sparks and lighting up the pilot. but the burner is not catching on fire, the valve is not letting propane go through to the burner (just to the pilot!).
the way I connected it is as followe:
1- three wires from servo PV/PVMV/ and MV to the corresponding name / port on valve.
2- from 24VAC transformer through PID black and white( donot know which is common and which is the other) to the servo GRN24 and TH-W, and finally the spark to the spark plug (red silicon cable). I wired nothing to the GRN on the servo, nothing to the ground of the valve and no ground going to the pilot.

my question is: what would the reason be for the valve not allowing propane pass to the burner? could it be the GRD connection?

servo.jpg


Valve.jpg
 
If you are getting ignition then clearly the heat demand circuit is working so it is a question as to whether the control module is proving the pilot flame successfully, commanding the main valve to open and if so whether the main valve is responding. If the pilot flame is proven to the controller's satisfaction it will apply 24 V across the MV and MV/PV terminals. Check for that with a voltmeter. If that signal is not present then the module is bad (it either does not sense the flame or does not respond properly when it does) and needs to be replaced. If it launches the main valve signal correctly but the valve does not open it is defective i.e. stuck or coil burned out. The coil resistance is about 300Ω which you can check with an ohm meter between the MV and MV/PV terminals with the plug pulled off the module.
 

Latest posts

Back
Top