Basement Electric Brewery

Homebrew Talk - Beer, Wine, Mead, & Cider Brewing Discussion Forum

Help Support Homebrew Talk - Beer, Wine, Mead, & Cider Brewing Discussion Forum:

This site may earn a commission from merchant affiliate links, including eBay, Amazon, and others.
Great build!
The adventure is half the fun...

hey, the electrical panel, is that a sub-panel just for the brewery?
 
Weezy said:
Great build!
The adventure is half the fun...

hey, the electrical panel, is that a sub-panel just for the brewery?

Yes. I brought in an additional 200 amps of service to the home. I have a finished off section of the basement and another unfinished area along with the brewery room.All basement power runs off that panel.
 
Brewed my first beer on the system yesterday. All went well. Really pleased with it all. Effortless to brew on and hit all my #'s perfectly.

ForumRunner_20130217_174134.png


ForumRunner_20130217_174156.png
 
Not to speak for OP or anything, but they look to me like wooden Lazy Susan boards. (Meaning, the round board you buy, then screw the hardware onto the bottom of, to create your own Lazy Susan.)
 
I would normally agree with you, but that looks like really, really thick cork. Like, as thick as a wooden Lazy Susan kit from the hardware store. ;) (I am looking at first pic, post #83)
 
Yes. Its actually wood pieces I found at home depot. I've been to several different home depots and noticed they have these avail at every single one in the lumber section. I just happend to walk past them and saw that they were 17.5 in diameter,, which is the exact width of the 20 gal blichmann kettles. Its a perfect fit. And they're only $7 a pop.
 
Thought I would post that the condensation on the vent hood was pretty substantial during the boil. Fortunately I built edging/lips around the bottom of the hood vent to catch the runoff. If I hadn't done this, there would have been condensation dripping off all over the kettles and table and floor. I certainly recommend, if you build your own hood vent, make sure you build in lips around the bottom to catch the condensation drip. Not one drop of runoff hit the table or kettles. I did have to take a towel and soak up the water out of the edging. Thinking I'll drill a small hole on one corner, slightly tilt the hood and then connect in some vinyl tubing so the moisture drains out. Overall, it works well and if you are thinking of building an eHERMS system do not overlook having something like this in your build.
 
Thought I would post that the condensation on the vent hood was pretty substantial during the boil. Fortunately I built edging/lips around the bottom of the hood vent to catch the runoff. If I hadn't done this, there would have been condensation dripping off all over the kettles and table and floor. I certainly recommend, if you build your own hood vent, make sure you build in lips around the bottom to catch the condensation drip. Not one drop of runoff hit the table or kettles. I did have to take a towel and soak up the water out of the edging. Thinking I'll drill a small hole on one corner, slightly tilt the hood and then connect in some vinyl tubing so the moisture drains out. Overall, it works well and if you are thinking of building an eHERMS system do not overlook having something like this in your build.
Great job on the build, it looks fantastic.

And yes to this. I get a fair amount of condensation in the hood, but I wipe it down with a few paper towels during the boil and I get by. Also, while you're wiping down the underside of your hood, don't be tempted to check the suction of your hood by waving the paper towel near the duct opening. The suction is plenty strong and you'll only end up having to take apart your duct work and retrieve the paper towel from the inline fan during your boil. It's no fun.
 
I guess I will close this thread out with these photos of the system in action. Amazing how well it works. 95% efficiency every time. Brewing a hefe in this photo with no rice hulls. Effortless !

ForumRunner_20130303_144941.png


ForumRunner_20130303_144956.png


ForumRunner_20130303_145015.png
 
KCHomebrew,

Nice work, really like what you have done :mug:
I am looking to do something similar.
EBC III & a two vesel version, tryign to do one pump.

I am in the planing stage, two bare walls in a basement, trying to come up with a budget & realistic time frame.( i'd like to brew on mine by x-mas 2014 )

And I was wondering if you had any words of wisdom ?
How long did it take you - from begiing to end ?
Anything you would do different ?
Hoe much did the whole thing cost you ?
Anything you have changed since your last post ?
Do you like the EBC III ?

How is the brewing going ?! :ban:

Thanks
Steve
 
I guess I will close this thread out with these photos of the system in action. Amazing how well it works. 95% efficiency every time. Brewing a hefe in this photo with no rice hulls. Effortless !

I'm amazed at the 95% efficiency numbers. That's what Kal claims too. I still haven't had a chance to use mine yet. The electrician is supposed to hook up my circuit tonight so I should be able to brew this weekend and test it out. What kind of crush do you use? Course or fine?.
 
KCHomebrew,

Nice work, really like what you have done :mug:
I am looking to do something similar.
EBC III & a two vesel version, tryign to do one pump.

I am in the planing stage, two bare walls in a basement, trying to come up with a budget & realistic time frame.( i'd like to brew on mine by x-mas 2014 )

And I was wondering if you had any words of wisdom ?
How long did it take you - from begiing to end ?
Anything you would do different ?
Hoe much did the whole thing cost you ?
Anything you have changed since your last post ?
Do you like the EBC III ?

How is the brewing going ?! :ban:

Thanks
Steve

Good luck with the build you have planned. Let's see, I'll try to answer all of your questions:

any words of wisdom ? - yes. you mentioned you are doing a 2 vessel system. I would find a way to make it a 3 vessel system. I think 2 would be awfully tough to use. I don't know what your budget is, but I would strongly suggest saving your money till you can EXACTLY what you want. Do not settle for cheap alternatives. Sure, it might take longer to save, but it will be worth it when you have everything you want.

How long did it take you - from begiing to end ? For me, it was nearly 2 years in planning and saving $. Once I saved enough $, I had to start a total remodel of the room (electrical upgrade, plumbing, windows, drywall, ventilation, etc. ). The remodel/build started in Oct. 2012 and my first brew was Feb. 2013. Prior to that I brewed outdoors on a 3 tier gravity propane system.

Anything you would do different ? Actually, yes. There is. I would get Stout tanks for the boil kettle and the HLT. I would stick with Blichmann for the mash tun though (the false bottom works amazingly...no stuck sparges). The reason I would do Stout tanks is for the triclover heating element port that quickly disconnects for cleaning. Also, the already integrated HERMS coil on the HLT is nice. All in all, the easy removal of the heating element through the integrated element port would make cleanup a hell of a lot easier. Also, I like the trub filter that Brewers Hardware sells that fits easily with the Stout tanks (nothing like that for Blichmann unless you concoct an adapter set up.

Hoe much did the whole thing cost you ? You can probably guess. Whatever a room remodel is, plus power upgrade (220amp service added) and plumbing and then all the equipment. You get the idea.

Anything you have changed since your last post ? Yes. I bought a hop stopper and a blichmann hop rocket. I actually have been using a stainless steel scrubby as the filter on the boil kettle and is does just fine as long as you bag the hops. I've realized that the hoppy flavor/aroma will be better if I let the hops swim free in the boil. I also bought kegging equipment and the blichmann counter pressure bottle filler.

Do you like the EBC III ? Yes. I love it. It works perfectly and I highly recommend it. It's built very well and shows no signs of issues after a full year of use.

How is the brewing going ?! - It's all going well. Building/acquiring this system is one of the best decisions I've ever made and the most fun I've had in quite some time. Cool in the summer. Warm in the winter. Highly accurate with hitting all my numbers. Consistency and repeatability of my brews is perfect. Overall effortless with brew days and cleanup is much easier and less stressful. Oh yeah...and I'm making great beer with all of it.

Much thanks to Kal and his awesome website of course. None of this would be possible without access to all of the great info he provides.

Feel free to let me know if you have any questions.
 
I'm amazed at the 95% efficiency numbers. That's what Kal claims too. I still haven't had a chance to use mine yet. The electrician is supposed to hook up my circuit tonight so I should be able to brew this weekend and test it out. What kind of crush do you use? Course or fine?.

Yeah, I was skeptical at first until I saw it first hand. I've had a few come out around 95%. Kal mentions his crush is coarse and sets the gap at .045. Mine is default at .039. But, the Kal HERMS systems are so efficient that you can go a bit more loose to ensure no stuck spurges. After doing many brews in 2013, I more consistently hit 90% efficiency on my system. Not sure why Kal gets a bit more out of it (perhaps setting to .045 would solve that ?). But I never dip under 90%. It's pretty much spot on each time at 90%. Kal claims the system never gets stuck...but I've had stuck spurges on pumpkin ales and high gravity saisons that use a lot of wheat. As such, I use a small amount of rice hulls on high gravity brews with lots of wheat or pumpkin, etc. Otherwise, basic wheat beers sparge just fine without rice hulls. It's a great system. All the hype is real.
 
KCHomeBrew

Thank you for your insight. I appreciate your input.
I am kinda stuck with certain space restrictions, and that is why I am going 2 vessel.
I do like your idea about the Stout Tanks BK !
I am also a real fan of Kal's website, but have never liked the way the elements are mounted in the kettles, And thought they would be a pain to clean with elements still installed.

And having been shocked numerous times in my life, I like the idea of the EBC III.
Not having to build me own, in the right price range, not too many bright lights to distract me !
And because I only need to heat one element at a time with 2 vessel brewing.

Thanks for your reply.
Hopefully I will be posting my basment Ebrewery build out soon.

Steve
 
Great build out! I just realized that HighGravity is just up the turnpike from me. I may really consider an E setup since I was primarily afraid of the controller.
 
I see you have a high gravity controller have you used it yet and do you like it ?


Sent from my iPhone using Home Brew
 
Update to this build. I sold my Blichmann system and currently have the EBC III control box and heating elements built by Spike Innovations up for sale here: https://www.homebrewtalk.com/f16/e-herms-kal-clone-system-sale-kansas-city-mo-area-495450/

I switched to a 1bbl Stout Tanks system and am building heating elements that work with the Brewers Hardware tri clover element adapter. I also have Spike Innovations building out a 50amp control box and tri clover temp probes. Lastly, I've upgraded to some conical fermenters with plans to build in a chilling/glycol system. Will probably have to wait for the glycol chilling system (costs some serious $) but will use a mini-fridge with a bucket of water in it that pumps out to the chilling coils. More to come on that. Lastly, I'll be switching from corny kegs to kegging with actual 1/6 bbl sankey kegs.

Main reasons for the switch to a larger system is the ability to brew a larger batch if I so choose, while also still having the flexibility to do 5gal. and 10gal. batches. The 1bbl system allows me to do that. I also like the fact that the Stout Tanks have tri clover fittings. In particular, this will make cleaning the heating elements way easier. Also, cleaning the equipment in general will be much easier since there are no weldless fittings to deal with.

With that said, my brew room has been a mess for about a month while I work through all of this. I've been so busy with other items and obtaining all the right fittings and items for this system that I haven't brewed since the first week of Oct. I'm probably looking at mid Dec. till the entire build out is completed and I'll certainly post some photos once that's completed. Atleast I hope I have it up and running by then since I need to get a couple of beers going for NHC entry. I guess it's good to take a break once in awhile.

In learning about Stout Tanks, tri clover fittings, and working on a system this size, I'd say there is a lack of information that is out there. Or, at the very least, the information is scattered and hard to find. As such, I'll document as much as I can about the items I struggled to understand and how I've worked through it so that there are usable solutions out there for anyone building something similar.
 
I switched to a 1bbl Stout Tanks system and am building heating elements that work with the Brewers Hardware tri clover element adapter.

Main reasons for the switch to a larger system is the ability to brew a larger batch if I so choose, while also still having the flexibility to do 5gal. and 10gal. batches. The 1bbl system allows me to do that.

You can brew 5 gallon batches with 40 gallon kettles? On my 20 gallon Stout mash tun if I go with less that 1.5 qts/pound of grain liquor to mash in I don't even hit the temp sensor. I am amazed you'll be able to hit it in kettles twice the size!!

Also with the ports slowdown on the west coast I wonder what that will do to delivery time?
 
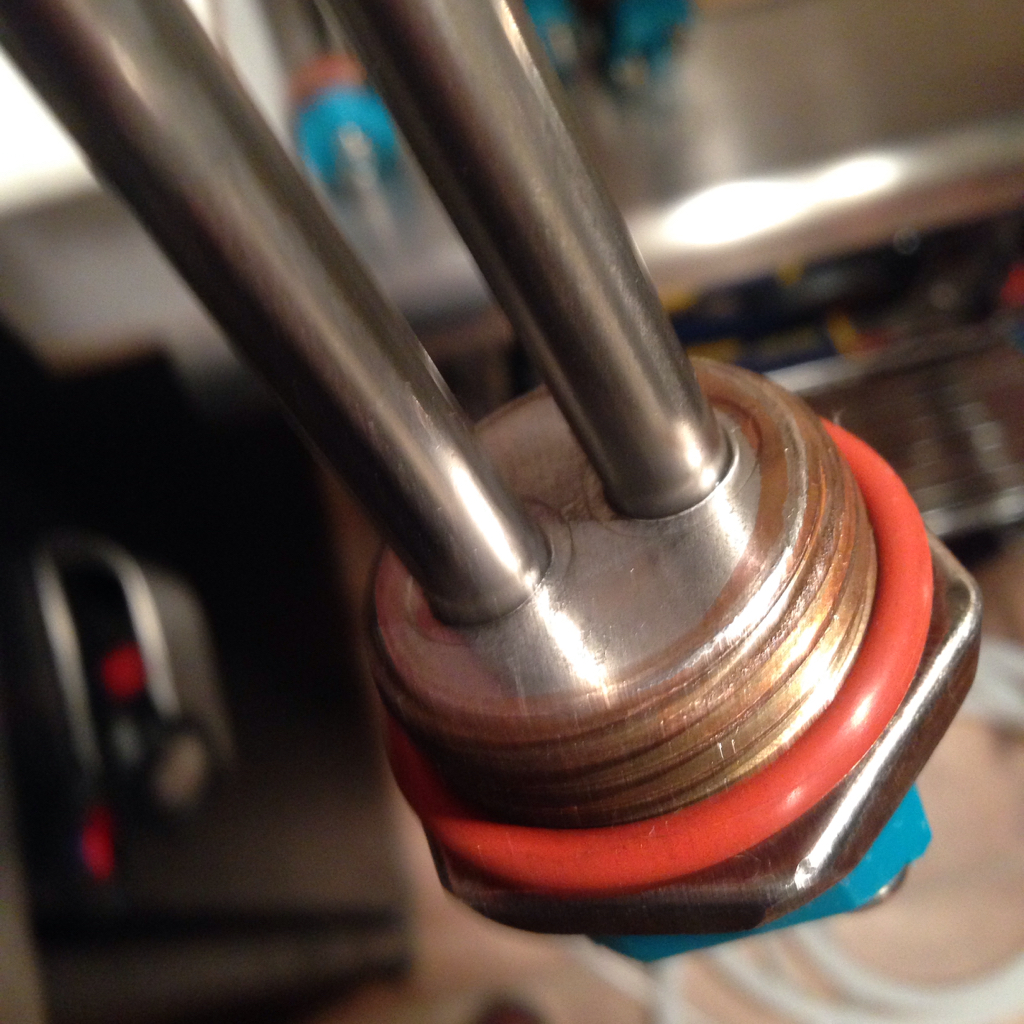
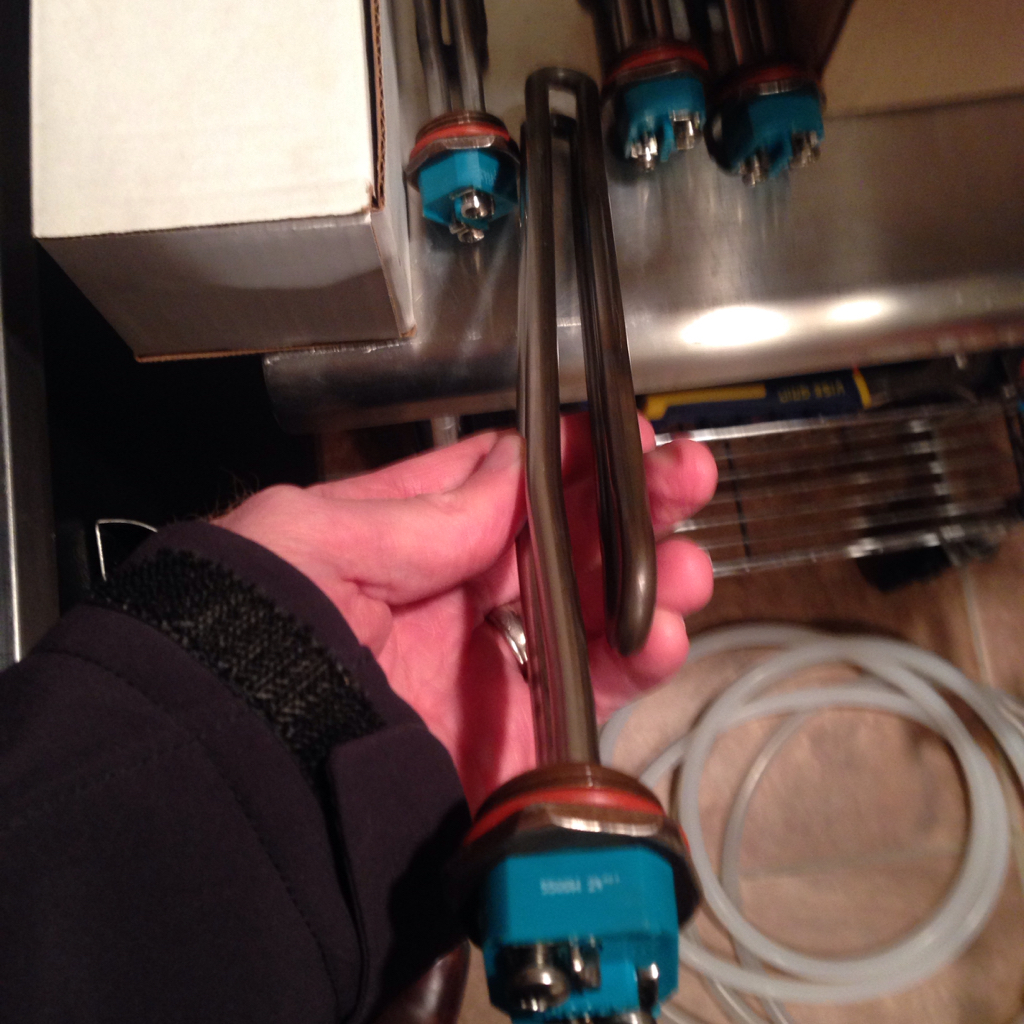
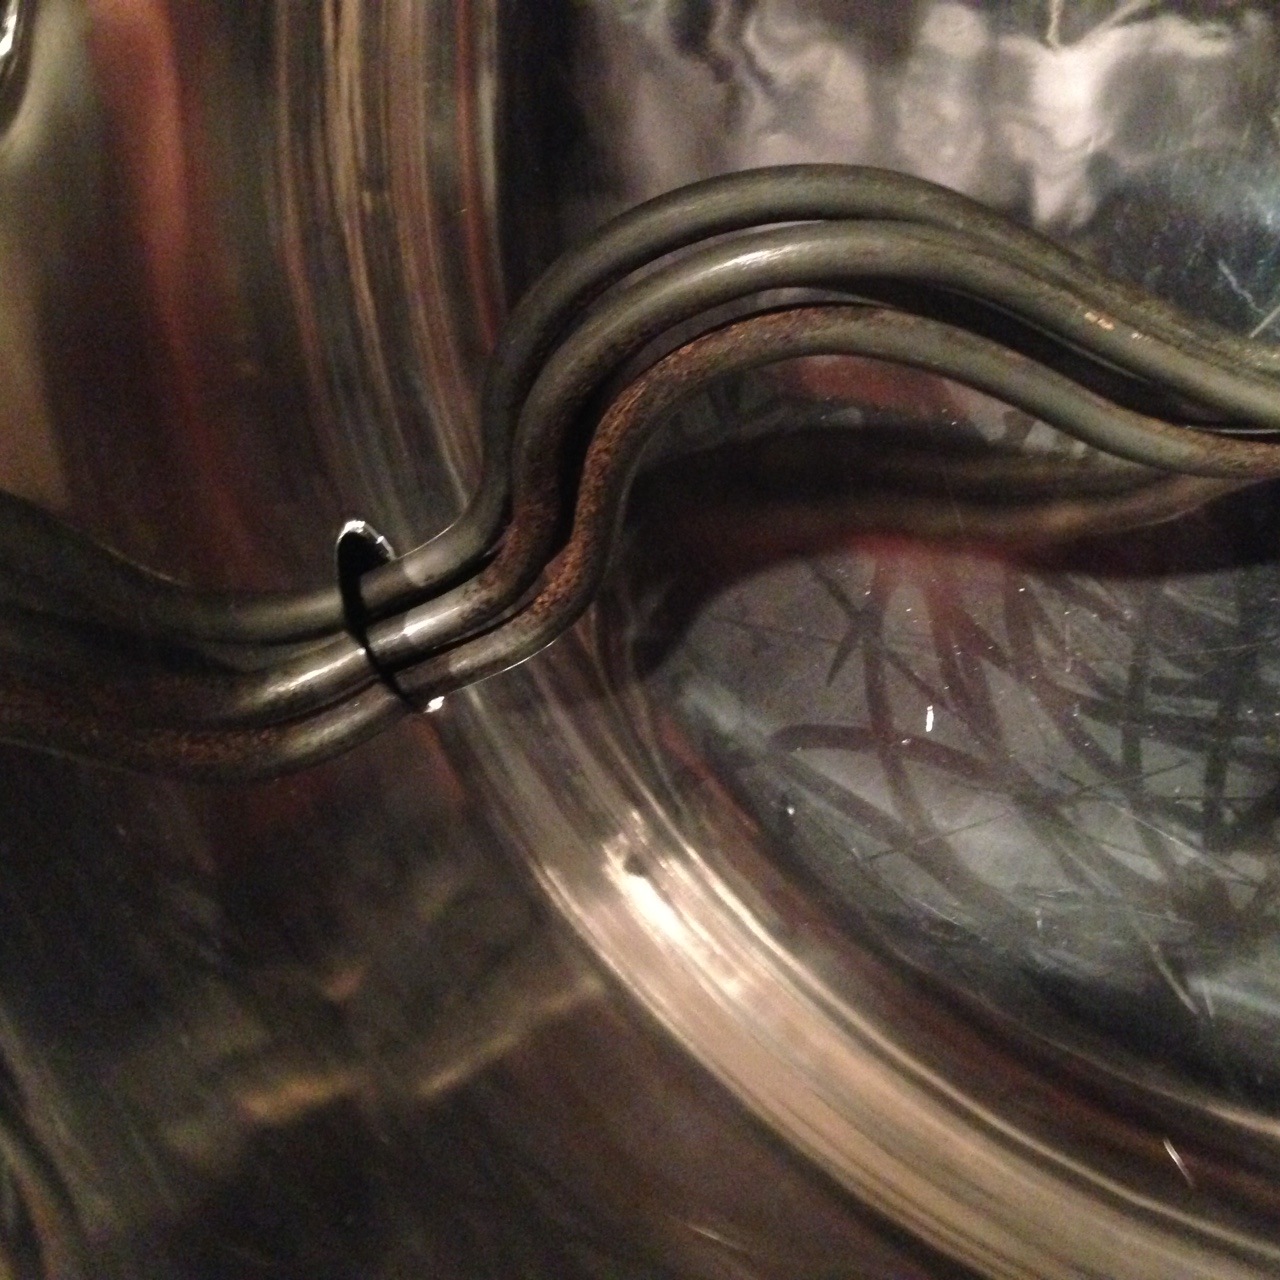
First up is discussing the build of the heating elements. I wanted to have a heating element housing/connection that was rounded and worked quick and easy with connecting to a tri-clover port. Using a j-box assembly on a tri clover port, in my opinion, makes connecting and tightening difficult. It's hard to tighten the clamp between the small area of the box and tri clover port (very small area and unless you have really small fingers or hands, then it's tough to do). The other item is that the cord on the box sort of keeps the j-box weighted down and makes it difficult to line up your gasket and adapter with the port. Lastly, if you use a ripple element, it won't fit all the way through the element port. The ripple element will touch the inner part of the port. And while that's probably not an issue and does nothing to impede the brewing process, I feel like I wanted a system where everything cleanly fits and doesn't rub or touch other items in the kettle. Here's a couple of photos of what I'm talking about:

IMG_1819-2.jpg


IMG_1817-3.jpg
 
The solution for the heating element was based on a couple of threads that I read through. As follows:
https://www.homebrewtalk.com/f170/bolts-electric-brewery-build-335868/index4.html
and
https://www.homebrewtalk.com/f170/my-build-450349/index13.html

As a result, I ordered the Brewers Hardware tri clover element adapter and found these lovely all stainless steel (yes, the base is stainless steel) 5500w heating element from Brew Hardware. I'll be picking up some 10/3 cable and building these out. I have 4 total elements that need to be built. Here's a picture of the heating elements from Brew Hardware (still waiting for the element adapters to arrive).

1.jpg


2.jpg
 
You can brew 5 gallon batches with 40 gallon kettles? On my 20 gallon Stout mash tun if I go with less that 1.5 qts/pound of grain liquor to mash in I don't even hit the temp sensor. I am amazed you'll be able to hit it in kettles twice the size!!

Also with the ports slowdown on the west coast I wonder what that will do to delivery time?
I won't hit the temp sensors on a 5 gal batch. So, there is a bit of flying blind. Funny you mention that because on my old 20gal Blichmann system I installed the temp probes just a hair too high to pick up a reading on the mash temp for a 5 gal. batch. As such, I'd have to do sort of let the HERMS run non stop (which isn't a big deal...but probably puts more use than needed on the pumps). Most of the time I just did 10gal. batches. So, for this one, yeah....same thing. I'm going to have to guess if I do 5 gal. batches, which is fine. Not a big deal. I probably won't do many 5gal. batches anyway. Should work just fine on 10gal. batches though.
 
You can brew 5 gallon batches with 40 gallon kettles? On my 20 gallon Stout mash tun if I go with less that 1.5 qts/pound of grain liquor to mash in I don't even hit the temp sensor. I am amazed you'll be able to hit it in kettles twice the size!!

Also with the ports slowdown on the west coast I wonder what that will do to delivery time?


Also, on delivery times, I've not experienced any issues with anything I've ordered.
 
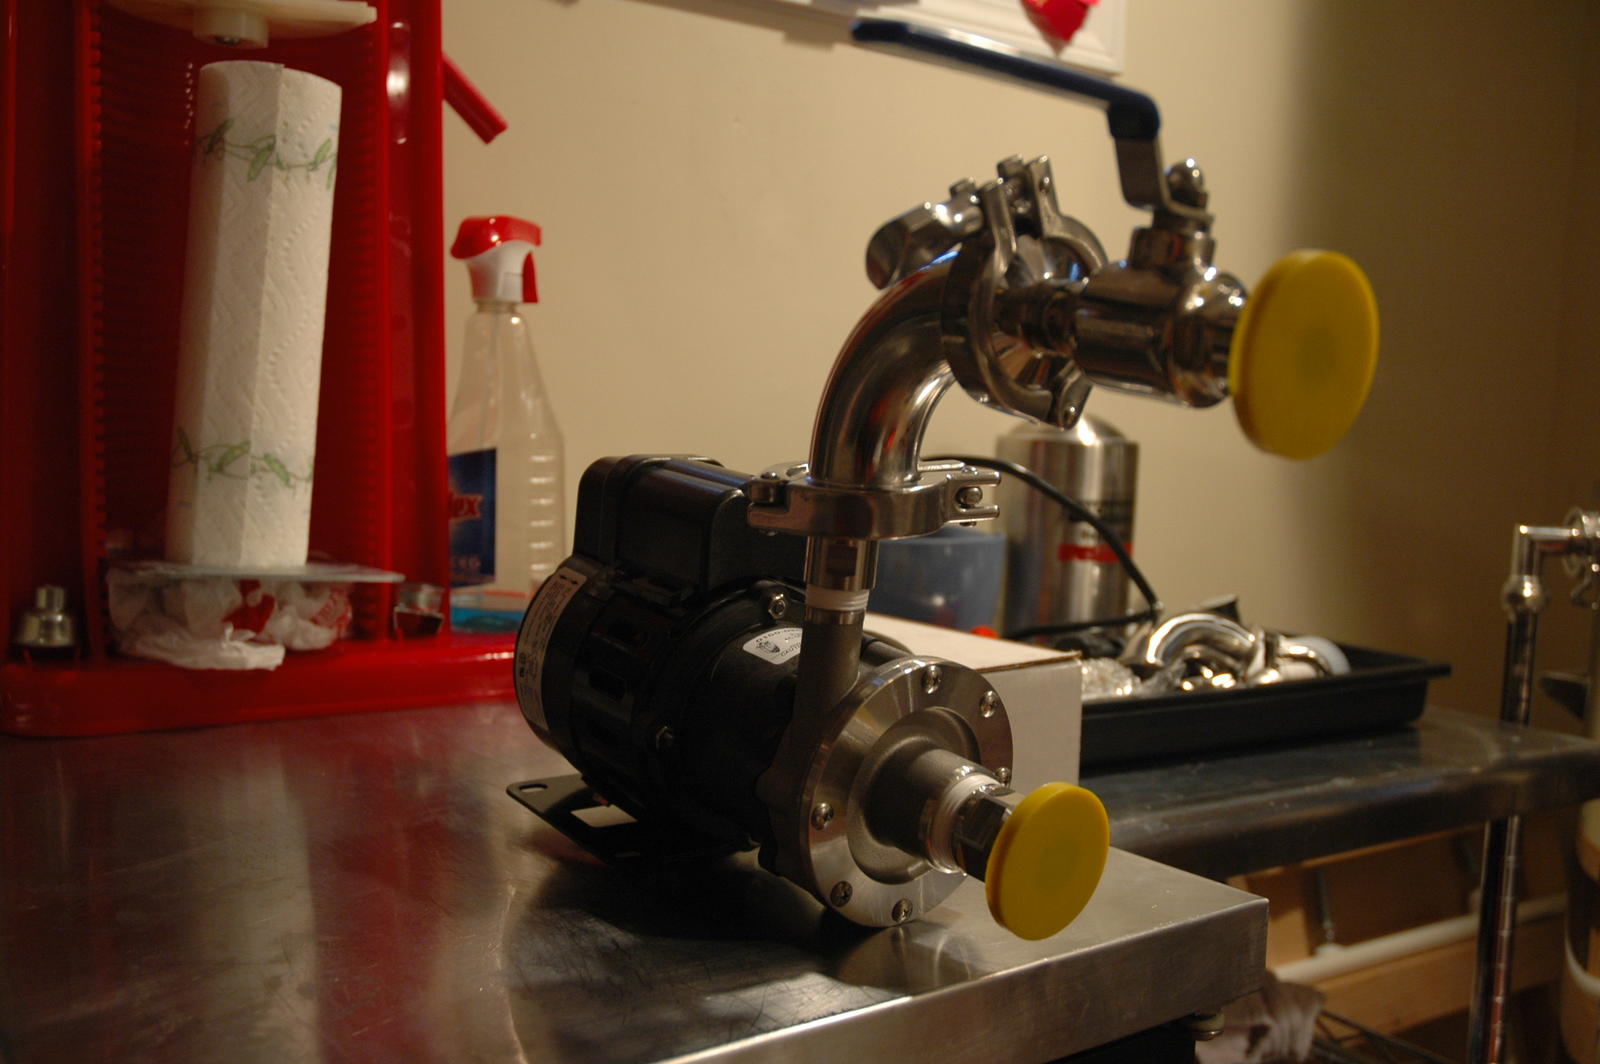
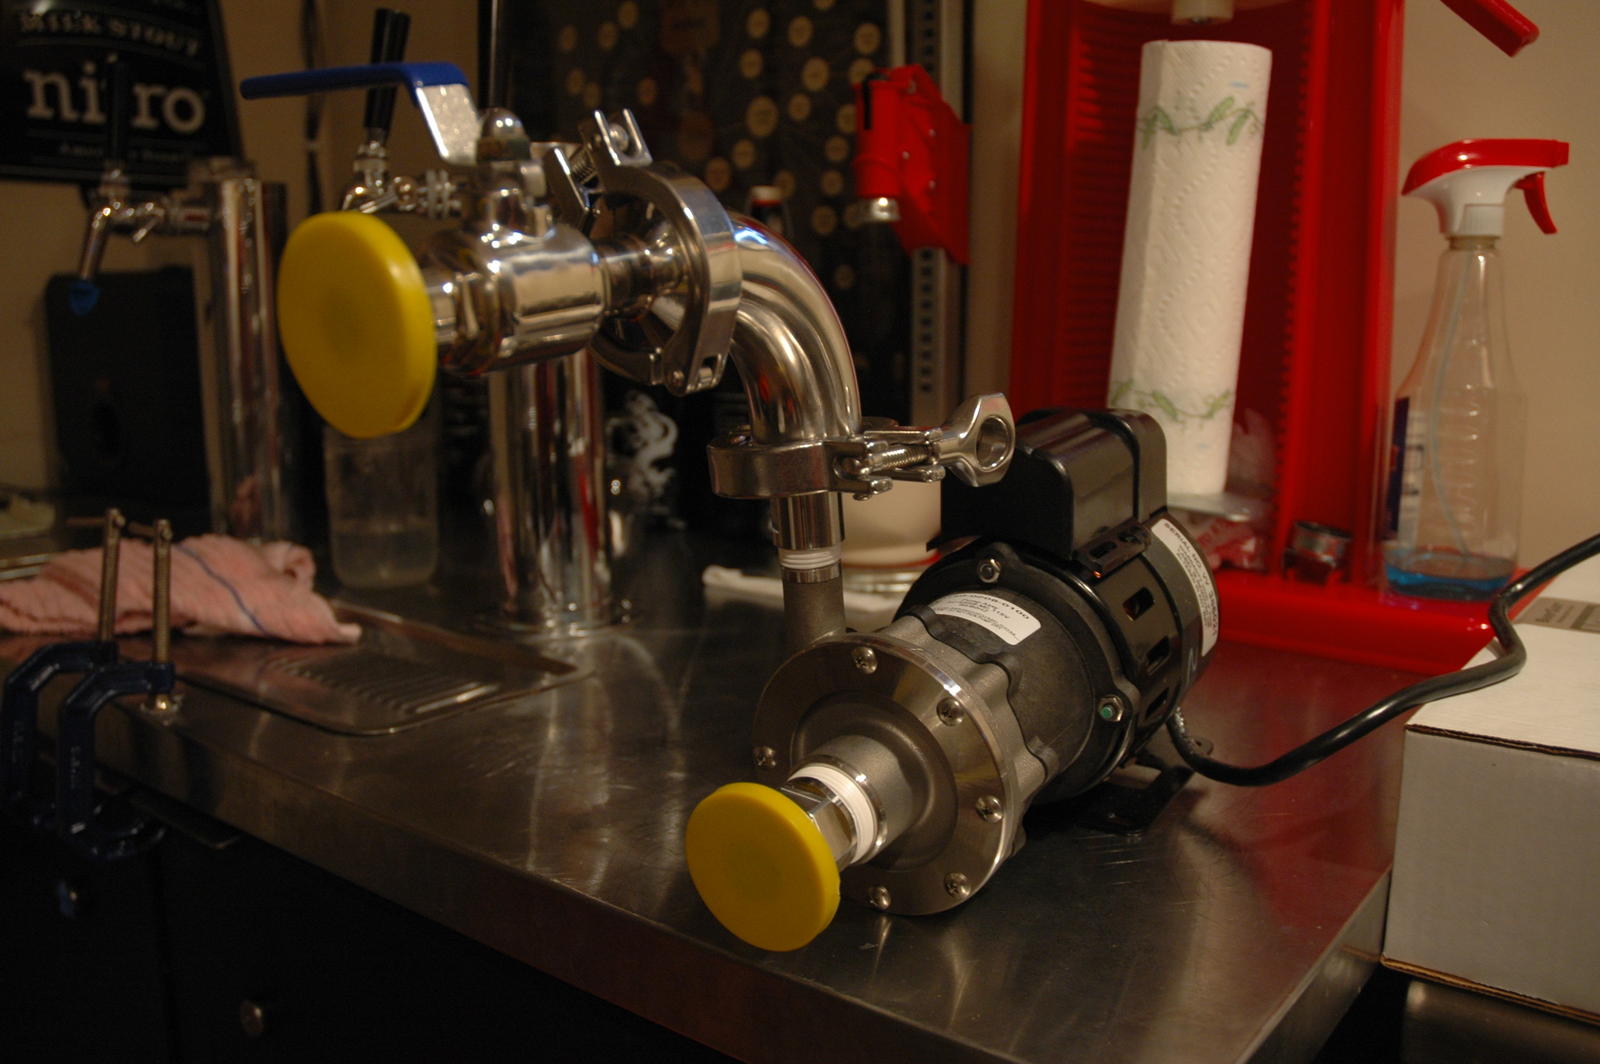
Another item I ran into while planning this brewery was the ability to whirlpool a large batch (20gal to 1bbl). I ran some water trials with my chugger pumps on 20gal. and 40gal. amount and it failed to effectively create a good whirlpool. Sadly enough, that meant I had to purchase a larger pump (more $). So, I purchased a March Nano Brewery pump. In reading up on this pump, you've got to think about the fitting sizes and hose sizes you use on the inlet portion of the pump. It's a 1" inlet and a 1/2" outlet. Great thread here where March Pumps actually provides some detail on how to properly use these pumps: https://www.homebrewtalk.com/f11/new-march-nano-pump-240026/

With all of that in mind, I used a 1" tri clover threaded inlet piece and then used 1/2" outlet threads. Connected with a 90 degree elbow and a 3/4" (5/8" ID) ball valve that will run the whirlpool on the boil kettle. I'll be using 3/4" ID silicone tubing for the inlet (along with 3/4" tri clover barbs on the BK outlet and pump inlet) and then using 1/2" braided silicone tubing for the outlet that feeds the tangential inlet on the BK. If anyone has ideas on a pump housing that I could build for this thing, let me know. I'm in search of a plastic tool box that would fit it. Haven't found one yet. Might just make a wood enclosure with caster wheels. Here's a pic of this huge pump:

DSC_0119.jpg


DSC_0120.jpg
 
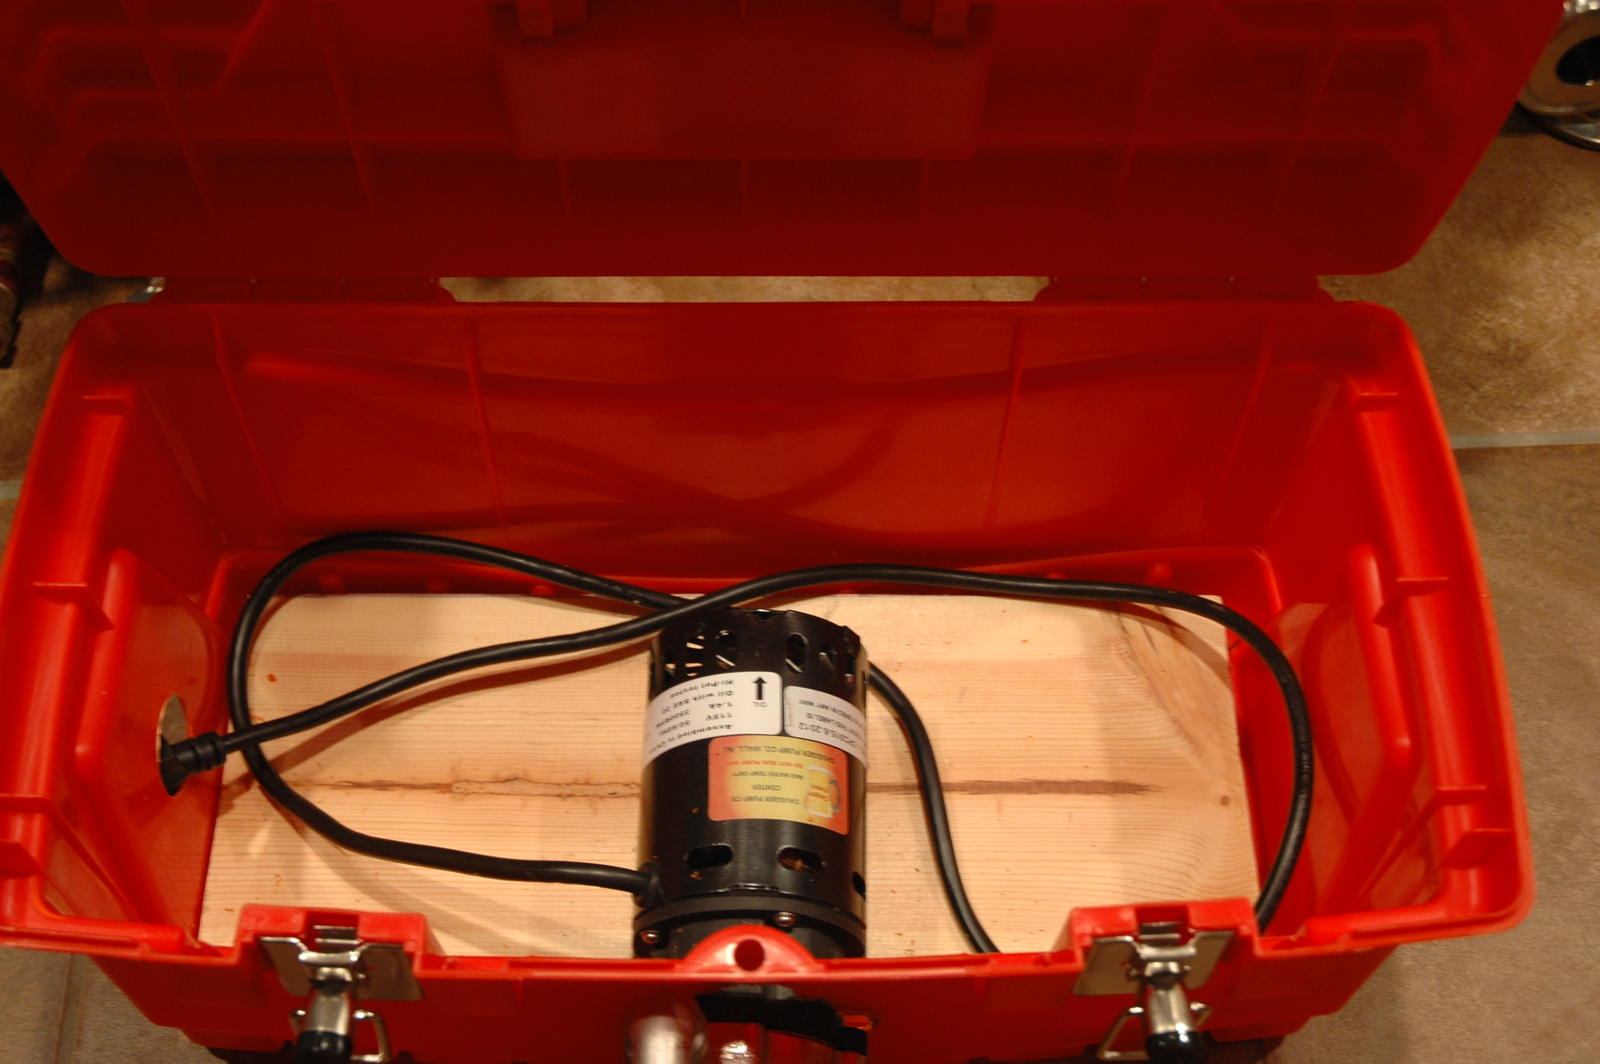
Also built two housing boxes for the chugger pumps. Not quite done yet. What I plan to do is install twist lock outlet connectors on the tool box and then will have twist lock connection cords that I can plug into the tool boxes and run to the control panel. Here's what I've built (used the home depot homer boxes).

DSC_0121.jpg


DSC_0122.jpg
 
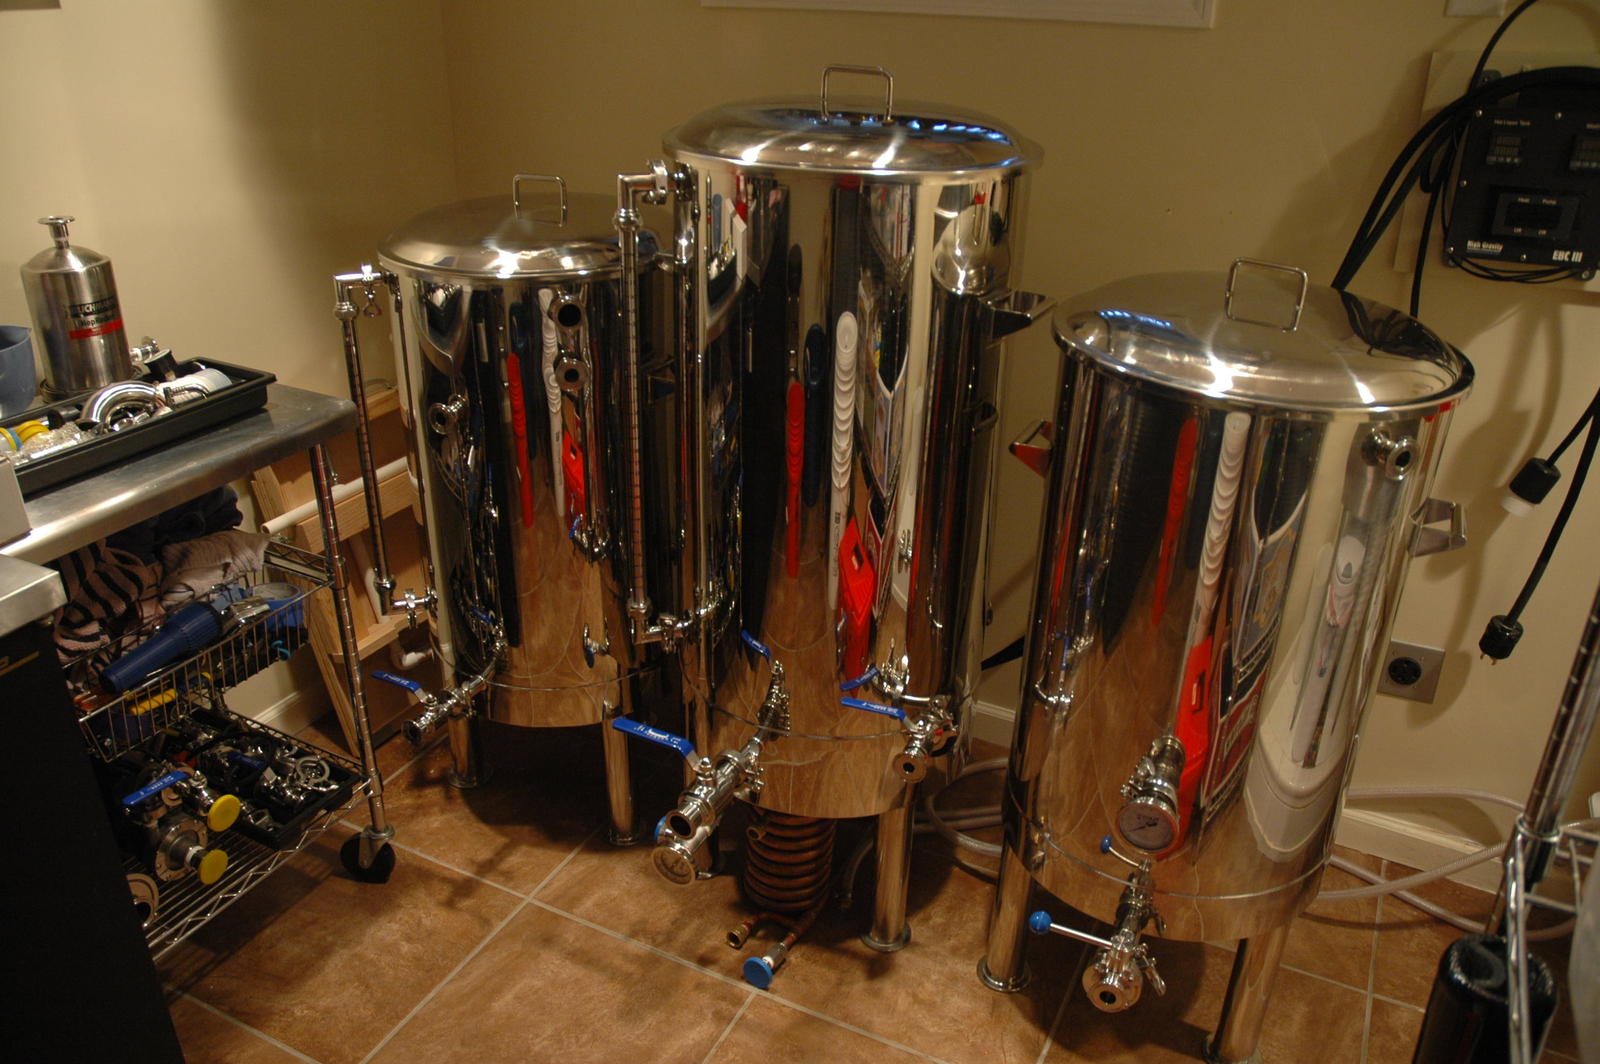
And I guess I ought to post a pic of the kettles I'm using. I need to think through how I'm going to mount the chillzilla. I'll probably find a way to mount it to the stainless steel cart that you see to your left in the photo.

DSC_0123.jpg
 
I'm surprised the chuggers didn't work. It doesn't need to be a vortex to get the trub and hops to cone-up. You can do it with a mash paddle and not a lot of stirring.
 
I'm surprised the chuggers didn't work. It doesn't need to be a vortex to get the trub and hops to cone-up. You can do it with a mash paddle and not a lot of stirring.


It was pretty weak at 40gallons of liquid. It worked okay at 20. Definitely need more horse power once you get above 20.


Sent from my iPhone using Home Brew
 
Spent time tonight wiring up the element adapter housing and heating elements with 10/3 600v cord. Here's some photos. You'll need a needle nose plyer to tighten the grounding screw on the housing.
View attachment ImageUploadedByHome Brew1416635598.216700.jpgView attachment ImageUploadedByHome Brew1416635615.425491.jpgView attachment ImageUploadedByHome Brew1416635625.876975.jpgView attachment ImageUploadedByHome Brew1416635636.620538.jpgView attachment ImageUploadedByHome Brew1416635647.165865.jpgView attachment ImageUploadedByHome Brew1416635673.015645.jpgView attachment ImageUploadedByHome Brew1416635682.996235.jpgView attachment ImageUploadedByHome Brew1416635692.875521.jpg

I water proof tested all of them and they are sealed good. I think the key to a good tight seal is making sure an oring is applied to the base of the element before screwing it into the housing adapter. Next step is testing these out in water this weekend. Hope it all goes well. If so I'll for sure be doing my first test brew on this system.


Sent from my iPhone using Home Brew
 
Did a full water test of system today. Tested grounding of the elements with a multimeter and everything looked good. Still sort of makes you nervous when you fire it up for the first time. Test run was great. Heated 10 gal in HLT to 150f and transferred to mlt and transferred to BK and heated to boil and then tested whirlpool on the nano pump. All worked well. Excited to finally get a brew day in over thanksgiving ! Will be even more excited when my 50amp box is ready and I can test run a 1bbl brew day. View attachment ImageUploadedByHome Brew1416786552.471709.jpgView attachment ImageUploadedByHome Brew1416786566.924549.jpg

Sent from my iPhone using Home Brew
 

Attachments

  • ImageUploadedByHome Brew1416786583.538858.jpg
    855.2 KB · Views: 642
Another item I ran into while planning this brewery was the ability to whirlpool a large batch (20gal to 1bbl). I ran some water trials with my chugger pumps on 20gal. and 40gal. amount and it failed to effectively create a good whirlpool. Sadly enough, that meant I had to purchase a larger pump (more $). So, I purchased a March Nano Brewery pump. In reading up on this pump, you've got to think about the fitting sizes and hose sizes you use on the inlet portion of the pump. It's a 1" inlet and a 1/2" outlet. Great thread here where March Pumps actually provides some detail on how to properly use these pumps:

With all of that in mind, I used a 1" tri clover threaded inlet piece and then used 1/2" outlet threads. Connected with a 90 degree elbow and a 3/4" (5/8" ID) ball valve that will run the whirlpool on the boil kettle. I'll be using 3/4" ID silicone tubing for the inlet (along with 3/4" tri clover barbs on the BK outlet and pump inlet) and then using 1/2" braided silicone tubing for the outlet that feeds the tangential inlet on the BK. If anyone has ideas on a pump housing that I could build for this thing, let me know. I'm in search of a plastic tool box that would fit it. Haven't found one yet. Might just make a wood enclosure with caster wheels. Here's a pic of this huge pump:


If you want to get every last bit out of the nano pump find a weldor and have tri clamp fittings mated right up to the volute and discharge port. I can do full throttle whirlpool with these now right after flame out now whereas with any fittings or 1/2" id hose(or 3/4"id) on the suction side it would cavitate a bit and I would have to throttle it back.

http://s9.photobucket.com/user/w_strassburg/media/Beer/1023132207a.jpg.html
 
If you want to get every last bit out of the nano pump find a weldor and have tri clamp fittings mated right up to the volute and discharge port. I can do full throttle whirlpool with these now right after flame out now whereas with any fittings or 1/2" id hose(or 3/4"id) on the suction side it would cavitate a bit and I would have to throttle it back.


http://s9.photobucket.com/user/w_strassburg/media/Beer/1023132207a.jpg.html


Great idea. I'll eventually look into that. I will say that I did a full throttle on the suction side with a 3/4 inlet and 3/4 hose and didn't get any cavitation. The outlet is 1/2 and I'm glad I used the 1/2 silibraid hose because I could tell there was some significant pressure. I think regular silicone hose would probably bust. But so far so good !


Sent from my iPhone using Home Brew
 
Did my first brew on the system today. Got 95% efficiency. All went well. I was really impressed with how well the whirlpool process worked. Trub and hops went right into a cone in the middle. Sort of a bummer but one of my chigger pumps died. Good thing I had the March nano pump and the other chugger. Guess I'll have to buy another one. View attachment ImageUploadedByHome Brew1418619377.884299.jpgView attachment ImageUploadedByHome Brew1418619420.940054.jpgView attachment ImageUploadedByHome Brew1418619439.600442.jpg


Sent from my iPhone using Home Brew
 
Back
Top