Modobrew's Electric Brewery Build

Homebrew Talk - Beer, Wine, Mead, & Cider Brewing Discussion Forum

Help Support Homebrew Talk - Beer, Wine, Mead, & Cider Brewing Discussion Forum:

This site may earn a commission from merchant affiliate links, including eBay, Amazon, and others.

modobrew

Well-Known Member
Joined
Aug 3, 2007
Messages
199
Reaction score
33
Location
Raleigh
Long time propane brewer here who has decided to make the switch to electric. My main reason for the switch is to ease my brew days and to get rid of the hassles of keeping tanks filled. i have a 2 yr old at home and another on the way so anything to allow me to be efficient and keep brewing is definitely needed.

So I'll be using this thread to document my electric brewery build.

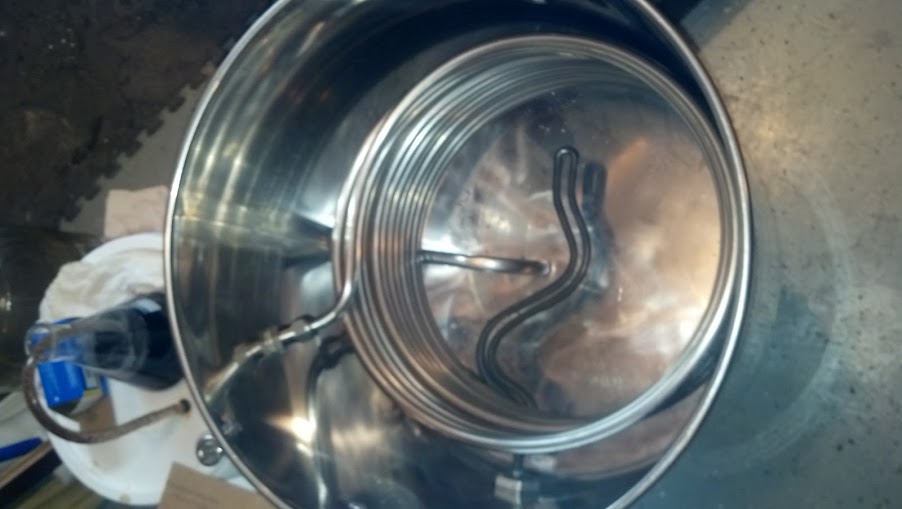
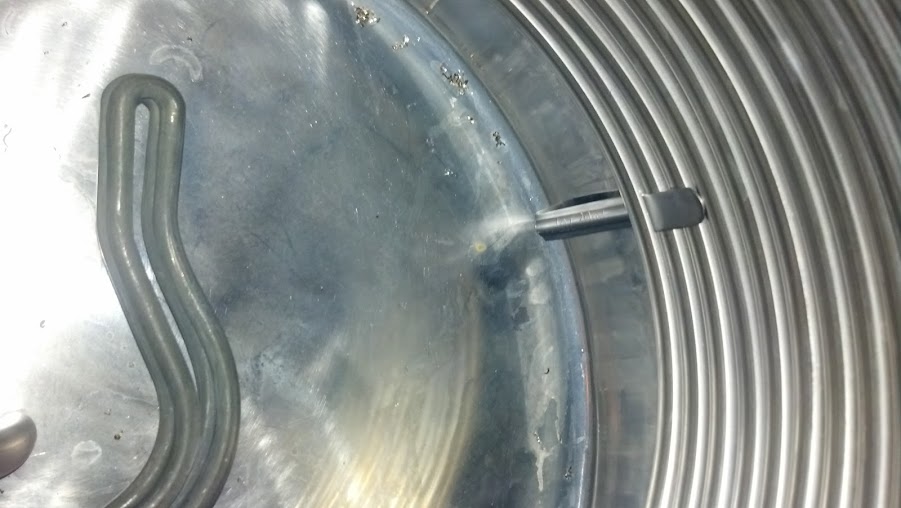
These goodies came in last week!
image-1359406305.jpg


More to follow!
 
Congrats! You will love it! (brewed a kolsch on mine today) :)

You might want to take a min and check out two of my threads. One has a title like "Anyone in RI tried building Kals electric brewery" and the other is "mistakes I made while building kals electric brewery." It will be a journey and I'm sure you will succeed but I hope my pain can save you a few lost hours here and there. Feel free to pm if you have questions along the way.

Good Luck!
 
Good luck! If you need a hand with anything let me know. I'm in the Raleigh/Durham area and built an eHerms as well.
 
Thanks for the info NewBrewB, I'll definitely look it over to make sure I dont make the same mistakes.

Durhamite, I might be PMing you with some questions should they arise. My first test is going to be getting the 240V to my garage. If you have any recommendations feel free to shoot them my way. I have looked at both wiring straight from the breaker box (adding a 30A GFI breaker) or the spa panel option. Still not sure which way I want to do it.
 
I dont plan on being in my house for more than another 2-3 years, so I didnt really care to pay to wire in an outlet in my garage. My laundry room is beside my garage door...so I made an extension cord that goes from my dryer outlet to the spa panel in my garage. I just bought this: http://www.amazon.com/gp/product/B000BQO824/ref=oh_o06_s00_i00_details and cut the ends off of it and put a 4 prong 30amp dryer plug on one end.

It's 10/3.

On brewday, I take the baseplate(?) off the garage doorway so that I can close the garage door over the extension cord.
 
Last edited by a moderator:
Update: 3 of these bad boys came in this weekend! I hope to start assembling fittings/elements/etc. tomorrow. Time is hard to come by right now. For reference I included a Teflon tape spool in the photo for size comparison. These monsters are huge! 80 qt stainless from Concord.

image-2093689404.jpg
 
I dont plan on being in my house for more than another 2-3 years, so I didnt really care to pay to wire in an outlet in my garage. My laundry room is beside my garage door...so I made an extension cord that goes from my dryer outlet to the spa panel in my garage. I just bought this: http://www.amazon.com/gp/product/B000BQO824/ref=oh_o06_s00_i00_details and cut the ends off of it and put a 4 prong 30amp dryer plug on one end.

It's 10/3.

On brewday, I take the baseplate(?) off the garage doorway so that I can close the garage door over the extension cord.


For the record, I just reread my post and it looked like I said I still use the original plug on one end. That's definitely not the case (and not recommended OR sufficient for the amperage).

The other end goes to a spa panel.
 
Last edited by a moderator:
Over the weekend I was able to drill out the two 2 gang electrical boxes and start assembling the electrical cords for the elements. I also started wrapping all fittings with Teflon tape and putting them together as groups.

image-1321604250.jpg

image-3851287340.jpg

Tonight, I was finally able to get some more work done. I had a few hiccups earlier, ordered lock nuts on eBay (from china) and they wouldn't screw onto the nipple further than three turns. Had to order new ones from adventures in homebrewing. Then noticed the nipples I ordered from bargain fittings wouldn't work correctly either, bummer, back to the interwebz to order some different ones from AiH.

Finally, I received everything very quickly and was able to put them to good use tonight. I managed to get the hot lauter tun 90% completed.

image-1568816509.jpg

image-2481946064.jpg

image-1538066365.jpg

I haven't installed the HERMS coil yet cause I still need to tighten the element box down and also install my dip tube. Hope to get some SS tubing ordered this week for dip tubes.

image-3461216131.jpg

image-1836814112.jpg

Up next, hopefully the mash tun. That one should be pretty easy. So far I am very pleased with the work I've completed. Just wish I had more time to work on it, but my family comes first.
 
All in good time. This isnt a 'weekend DIY' project. :)

Be sure to leak test the HLT with only the element installed before installing the HERMS coil. Once you tighten the compression fittings ($30) you dont want to have to pull the coil to mess with the element again.

Press-on and good luck!
 
Good luck installing the coil - that was the biggest PITA for me... trying to get both fittings tight. My advice - make sure the coil is flush and installed the way you want before you crank down on it - mine was a bit askew and it crimped the fittings a bit and required some time with a dremel and sanding tool to get everything back to have it fit flush.

Enjoy the rest of the build!
-Kevin
 
What size HERMS coil did you get? I'm building a HERMS system right now and have the exact pot (Concord 80qt) you do. I bought the 14" coil from stainlessbrewing and it just barely fit in the pot. I had to put the coil into the pot with compressions on and thread the nipple through the hole onto the compressions. If I mounted the nipple/valve and tried to put the coil onto that, there wasn't enough room. But I got it to work...
 
All in good time. This isnt a 'weekend DIY' project. :)

Be sure to leak test the HLT with only the element installed before installing the HERMS coil. Once you tighten the compression fittings ($30) you dont want to have to pull the coil to mess with the element again.

Press-on and good luck!

Very good suggestion. note to self, must check for leaks before installing HERMS!

I agree, patience, patience, patience! haha, I'm just really ready to brew on this system.

:mug:

What size HERMS coil did you get? I'm building a HERMS system right now and have the exact pot (Concord 80qt) you do. I bought the 14" coil from stainlessbrewing and it just barely fit in the pot. I had to put the coil into the pot with compressions on and thread the nipple through the hole onto the compressions. If I mounted the nipple/valve and tried to put the coil onto that, there wasn't enough room. But I got it to work...

I have the exact same coil. I noticed last night it looks like it might be tough to get in there. I may end up cutting a little bit off the ends to make it a little easier to install. I'll keep ya updated.
 
If you try to cut off a bit, it will probably not be perfectly round anymore and then you will not be able to attach the compression fittings.... Caution.
 
NewBrewB said:
If you try to cut off a bit, it will probably not be perfectly round anymore and then you will not be able to attach the compression fittings.... Caution.

Thanks for the bit of info. You think even with a tube cutter, and taking time, it still would end up not being round? Now you have me questioning myself. Haha
 
Well the tube cutter should do it. I couldnt find an affordable tube cutter for stainless steel. To cut my dip tubes, I ended up turning a dowel to fit inside and then cutting them with a saw w/ metal cutting blade.....despite the dowels, they were compressed out of round so I had to bend them round by tapping it against a stainless steel cone (lathe tailstock)

Maybe it will not be an issue for you
 
Good luck installing the coil - that was the biggest PITA for me... trying to get both fittings tight. My advice - make sure the coil is flush and installed the way you want before you crank down on it - mine was a bit askew and it crimped the fittings a bit and required some time with a dremel and sanding tool to get everything back to have it fit flush.

Enjoy the rest of the build!
-Kevin

Hmm. Well, I guess that's a good argument for a copper HERMS coil then. Copper is a heck of a lot easier to compress.
 
You're very limited to cut anymore off the ends, maybe 1/2" and then it starts to turn into the bend. You can slide the nut and ferrules to get an idea how much room you have to play with. Anything from before the bend down the coil turn more oval the smaller diameter coil you go. Fittings can be smacked on and then set but it can be tricky. Something that makes installation so much easier is to set the ferrules onto the tubing outside of the pot instead of inside. Once they are set you can unscrew the body, install the fitting to the pot and then insert your tubing and snug the nuts up. The manufacturer require a 1-1/4" turn after you get the nut finger tight to install the ferrules correctly.
 
You're very limited to cut anymore off the ends, maybe 1/2" and then it starts to turn into the bend. You can slide the nut and ferrules to get an idea how much room you have to play with. Anything from before the bend down the coil turn more oval the smaller diameter coil you go. Fittings can be smacked on and then set but it can be tricky. Something that makes installation so much easier is to set the ferrules onto the tubing outside of the pot instead of inside. Once they are set you can unscrew the body, install the fitting to the pot and then insert your tubing and snug the nuts up. The manufacturer require a 1-1/4" turn after you get the nut finger tight to install the ferrules correctly.

Thanks for this response Zach. I didn't realize it was going to be such a hassle to get this installed. Had I known I would have had you either make a smaller diameter, or bend the ends a little differently. Oh well, now I know. I'll make this work some way or another. You're work is incredible and I definitely recommend you to anyone on here looking for any SS tubing. :rockin:

I'm going to try my luck at making some dip tubes, however, if I fail, you will be getting another order from me. I believe that would be order number 4 from me! QUIT TAKING MY MONEY! :D haha
 
Don't be scared, just dive in and do it. Take your time and think things through though before you start cutting and bending things. Do the things I mentioned above and it shouldn't be that bad.
 
I'll definitely give the recommendations a try. I believe someone else in here also mentioned adding the ferrules outside the pot, then trying to install it. maybe that will work. I sure hope so!

Going to be doing a leak test tonight. If no leak, dip tube, then HERMS will go in next.
 
The reason I said it was tough was reaching my fat hands into the pot to get to the bottom fitting to tighten it. Pain in the ass! Definitely set the ferrules first, outside the pot. It'll make sure everything is square and true.
 
Leak test was a success last night. I now need to install dip tube and then try my hands at installing the HERMS. Thanks again everyone for the suggestions!
 
You're very limited to cut anymore off the ends, maybe 1/2" and then it starts to turn into the bend. You can slide the nut and ferrules to get an idea how much room you have to play with. Anything from before the bend down the coil turn more oval the smaller diameter coil you go. Fittings can be smacked on and then set but it can be tricky. Something that makes installation so much easier is to set the ferrules onto the tubing outside of the pot instead of inside. Once they are set you can unscrew the body, install the fitting to the pot and then insert your tubing and snug the nuts up. The manufacturer require a 1-1/4" turn after you get the nut finger tight to install the ferrules correctly.

I agree with what Zach says.. My coil from him was a tight fit and I had to seperate the comp fitting to get them on, but worked well once I did.

2013-03-05_08-21-47_729.jpg


Only thing I did that i have not seen other people do was a back support for the Herms coil. I was not really happy with how it sagged. (more to do with the thin walls of the pot than the HERMs coil construction.) so i went to my local restaurant supply and bought a stainless ladle cut the handle off and made a rear support for the coil.. Worked out pretty well IMO. and was only like 2 bucks

2013-03-05_19-41-24_886.jpg


I just bent the ladle handle back over on itself and wedge it between the coils..
 
I'm having a hard time telling but are your bulk heads going like this, locknut with oring onto close nipple, kettle wall, washer, compression fitting?

I'm currently working on a system very similar to yours and just got to thinking about how to do my bulkheads as non bulky as I can.

Great looking build so far!
 
I agree with what Zach says.. My coil from him was a tight fit and I had to seperate the comp fitting to get them on, but worked well once I did.

2013-03-05_08-21-47_729.jpg


Only thing I did that i have not seen other people do was a back support for the Herms coil. I was not really happy with how it sagged. (more to do with the thin walls of the pot than the HERMs coil construction.) so i went to my local restaurant supply and bought a stainless ladle cut the handle off and made a rear support for the coil.. Worked out pretty well IMO. and was only like 2 bucks

2013-03-05_19-41-24_886.jpg


I just bent the ladle handle back over on itself and wedge it between the coils..

I got a 50 foot coil sized at 12.5 inches going into a 18 inch pot, so room is not an issue, but I like the HEX Stand you made...might have to steal that idea.

Tim
 
thirstyutahn said:
I'm having a hard time telling but are your bulk heads going like this, locknut with oring onto close nipple, kettle wall, washer, compression fitting?

I'm currently working on a system very similar to yours and just got to thinking about how to do my bulkheads as non bulky as I can.

Great looking build so far!

When I did my bulkheads I didn't use any close nipples, I have the npt part of the compression fitting passing through the kettle wall, and I copied kal's bulkhead otherwise. So it goes compression fitting, washer, kettle wall, washer, oring, locknut and then ball valve. The ball valve only has a few threads to go on to but it doesn't leak at all
 
I agree with what Zach says.. My coil from him was a tight fit and I had to seperate the comp fitting to get them on, but worked well once I did.

Only thing I did that i have not seen other people do was a back support for the Herms coil. I was not really happy with how it sagged. (more to do with the thin walls of the pot than the HERMs coil construction.) so i went to my local restaurant supply and bought a stainless ladle cut the handle off and made a rear support for the coil.. Worked out pretty well IMO. and was only like 2 bucks

I just bent the ladle handle back over on itself and wedge it between the coils..

I really like your idea with the ladle. That's pretty creative and a cheap solution. Btw, what kettle are you using? I wonder if I am going to have issues with it sagging with my kettle walls.

I'm having a hard time telling but are your bulk heads going like this, locknut with oring onto close nipple, kettle wall, washer, compression fitting?

I'm currently working on a system very similar to yours and just got to thinking about how to do my bulkheads as non bulky as I can.

Great looking build so far!

Not sure if your question was directed at me or not, but I'll go ahead answer anyways. You were close, it goes; locknut with o-ring, washer that is just slightly larger than the o-ring all on close nipple, kettle wall, washer, and then compression fitting. The extra washer on the outside of the kettle wall keeps the o-ring from compressing too much as you tighten everything down. It's the same method Blichmann uses on their kettles. Got the idea from Kal's build.

And thanks, I can't wait to get it all completed!
 
The question was directed at you modo but its always good to hear what other people are doing too.

Thanks mrwizard and modo that was very helpful!
 
Oh and modo I also meant to ask where did you end up buying your locknuts, orings and washers? I noticed ya said the Chinese locknuts and some aih ones didn't work.

Also are the nipples 1.125" ?

Thanks
 
thirstyutahn said:
Oh and modo I also meant to ask where did you end up buying your locknuts, orings and washers? I noticed ya said the Chinese locknuts and some aih ones didn't work.

Also are the nipples 1.125" ?

Thanks

No worries. I bought the locknuts and nipples from AiH. I bought the washers and orings from McMaster-Carr. The links are on Kal's parts list I believe.

The nipples are ~1.125" long if that is what you were asking.

image-1879667817.jpg

The nipple on top is the original from Bargain Fittings. The one on bottom is the new one from AiH. You can see the difference in the middle of the nipple. Even though it doesn't look like it, they are the same length.
 
A little more progress today. I got the electrical box wired up seeing some continuity issues as can be seen in the images below. It's not quite reading zero ohms, and tends to fluctuate some. Anyone care to chime in?

image-4141043152.jpg

image-615722716.jpg

image-2957991657.jpg

image-1093446513.jpg

Also tried to set the ferrules on my HERMS coil. Waiting on dip tube and the HTL will be complete.

image-2255733012.jpg
 
Modo... They are king cooker models 15 gallon. Got them off amazon.. Can't complain they were under $100 each.
 
No worries. I bought the locknuts and nipples from AiH. I bought the washers and orings from McMaster-Carr. The links are on Kal's parts list I believe.

The nipples are ~1.125" long if that is what you were asking.

The nipple on top is the original from Bargain Fittings. The one on bottom is the new one from AiH. You can see the difference in the middle of the nipple. Even though it doesn't look like it, they are the same length.

Thanks man.

Ya I've had a couple issues in the past with parts from different places that didn't fit. From your pictures it looked like the nipples were long so i thought id ask. Interesting that those close nipples you originally got had a flat spot.
 
No problem.


Yeah I'm not sure why they had that flat spot on them either. Pretty upset since I bought 10 of them and then had to replace them. Go with AiH and you should be good.
 
A little more progress today. I got the electrical box wired up seeing some continuity issues as can be seen in the images below. It's not quite reading zero ohms, and tends to fluctuate some. Anyone care to chime in?
If it's only a fraction of an ohm you're likely reading the resistance of your test leads, and/or the meter's slightly off. Try holding one test lead against another and you'll likely see the same

0 ohms is basically not possible. Anything under an ohm or two is basically a short.

Kal
 
If it's only a fraction of an ohm you're likely reading the resistance of your test leads, and/or the meter's slightly off. Try holding one test lead against another and you'll likely see the same

0 ohms is basically not possible. Anything under an ohm or two is basically a short.

Kal

Thanks Kal for the response. That's what I thought might be going on, I just wanted to make sure. It kept starting off reading above 1 ohm, but then would quickly jump down to the readings you saw above. I'm out of town for the week, but as soon as I get home, i will definitely test the the leads against one another.

Your site is amazing. The electronic copy was also great to have since I have been traveling a lot. It provided some reading material while on the plane!
 
Let us know what you find when you get back, but it all sounds completely normal. Good luck!

Kal
 
Small update for now. Finally home from traveling for work. Came home last week to see some goodies waiting on me. Hopstopper from Kal's site and sight glasses and thermometers from Bobby_M over at brewhardware.com. Excellent service from both and highly recommend!

image-4042756597.jpg

I got around today to installing the sight glass and thermometer on my HLT. Have to say that I'm very pleased with the way everything is coming together on these kettles. Just waiting to order dip tubes and a recirc arm from Zach at Stainlessbrewing.com to finish the HLT.

image-3942841428.jpg

image-2588267309.jpg

I started punching some holes in another kettle to make my BK. I then realized I'm 5 washers short....off to McMaster-Carr.com I go. Oh well, guess I'll get back to it on Monday.

image-984512511.jpg

image-1609717638.jpg

Cheers!
 
Looks great! Thanks for sharing the pics - keep them coming! I've seen probably thousands of pictures of builds in progress and it never gets old.

Kal
 
Back
Top