Here is my keezer. Fun, challenging, rewarding. 2 months, $600.00, later...https://www.homebrewtalk.com/attach...ent.php?attachmentid=25149&stc=1&d=1304044565


Here is my keezer. Fun, challenging, rewarding. 2 months, $600.00, later
")
I appreciate the feedback, and Quaffer, I would love to share details. Your post was my inspiration, and I studied your post for hours to prepare for mine. Your parts list was invaluable! In the DIY forum, I posted detailed instructions and parts list.
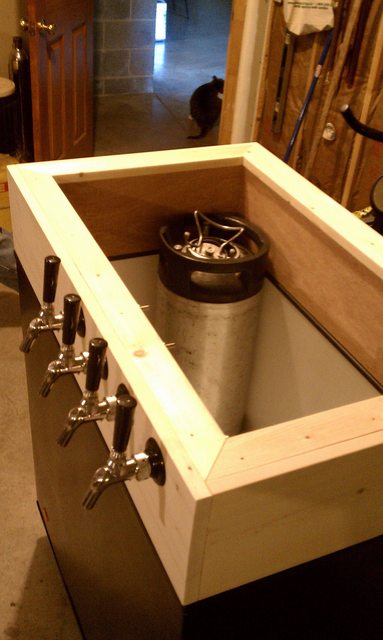
The inside and top lip is covered in black aluminum siding, I picked up about $25 bucks worth at a aluminum siding company. I ruined many piece before I got it right.
Quaffer, I saw your keezer in last months Brew Mag. Is that you standing next to you keezer. If so, great, nice to put a face behind your inspiration.
Thanks again,
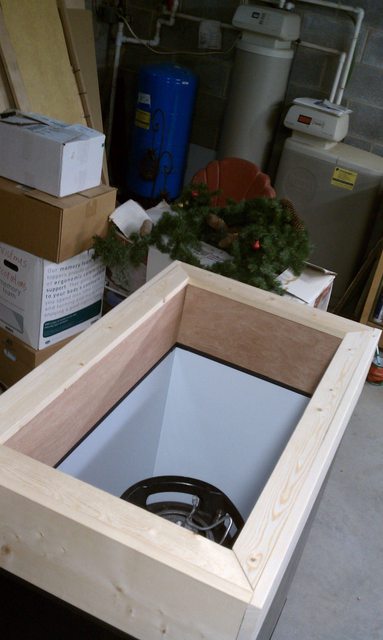
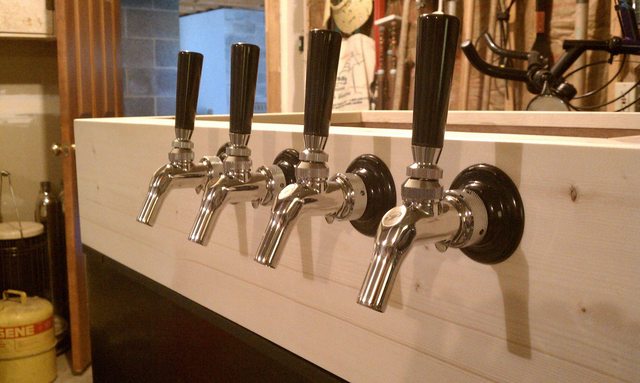
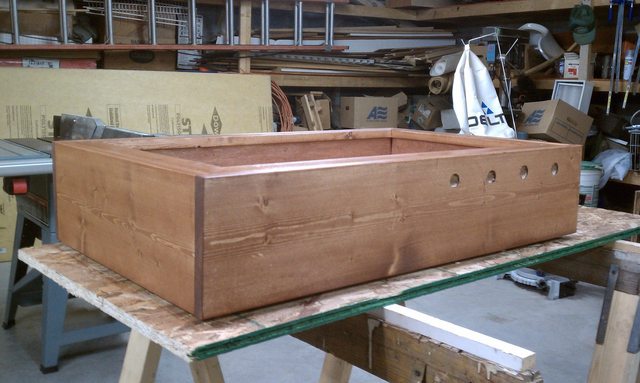
Below you will see my conversion of a chest freezer into a kegerator or keezer...
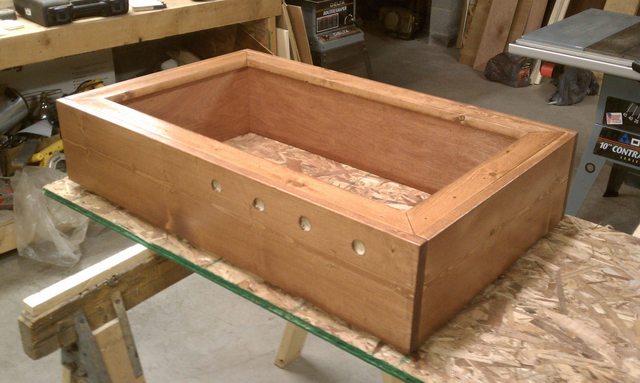
The wood for the collar is from a reuse-center in Ann Arbor, Mi. I found two 10 foot pieces of walnut that were close in size. Later on a plainer was used and a sanded to create a 1.2 x 8. Hard woods like walnut have killer grove patterns and a natural color worth the extra money. No stain, just three coats of a low gloss satin polyurethane.
It was challenging to find other hard woods or even soft woods like Western Hem or Hem Fir at local lumber yards. I almost went with a Hem Fir.
Hey, this is awesome!
One question- why mess with the thermostat etc and a love controller when you can just wire it up so that you plug the freezer into an outlet controlled by the temp controller seen in the "ebay aquarium temp controller build" thread?
One could do that. The probe wire may be a little easier to handle if the controller is built in. That pesky little wire is driving me nuts. I am going to fix its location somehow so it won't get in my way anymore.
Quaffer,
What are the dimensions of the wood used for the collar (length of each of the sides)? I am terrible with wood work (never done any actually) so I will probably have to get someone to help me with that but would like to know how to tell them to cut it..
why miter the inside part that nobody will see, and not the exterior of the collar??
I saw this one in BYO, congrats on the recognition.... made me really think towards a chest freezer, although I am only on my second brew at this time, id love to start some Lagers. I'll be setting one of these up soon, just waiting on a good check in a few weeks... ill be reading the rest of this thread and studying up. I may have some questions for the people here on HBT as i start
I was just curious on one part of this.... I read that you said ""The boards are Western Hemlock 2x8, thinned down to 1.25" thickness on a table saw."", how were you able to thin them down on a table saw? .. that just seems like it would be quite difficult if even possible.
I didn't read the whole thread to forgive me but I have a few questions about the controller.
-Does the controller come with all the wires you need to hook it up or do you have to buy a extension cord, cut off the ends, and use the 3 wires inside it? If so, what gauge wire is it?
Just omit the fan and the 6V power supply.-I am going to add the fan at a later date, how would that change your wiring diagram?
-Your wiring diagram says the fan is hooked up to a 6VDC supply, do you have spec's on it and where you got it?
I pushed the 2x8 boards through with the 2" side down to the table, 8" side against the fence. The blade cuts through about half of the board so it has to be flipped over to do the other side.
I do wood working all the time, your a very brave man!
I went to ebay and all I can find are 6vdc power supplies that plug into a wall..
Brave of foolhardy, I don't know which. All fingers still attached.
my temp controller has settings for the temperature and temperature differential (how far you let the temperature get from your set temp before it kicks on) I was wondering if anyone is using this type, what settings there usingwhat exactly are you talking about?
hoplover said:my temp controller has settings for the temperature and temperature differential (how far you let the temperature get from your set temp before it kicks on) I was wondering if anyone is using this type, what settings there using
my temp controller has settings for the temperature and temperature differential (how far you let the temperature get from your set temp before it kicks on) I was wondering if anyone is using this type, what settings there using
If you hinge the lid to the collar, what are you guys doing with the holes that are left behind on the freezer exterior from the hinge when it was originally mounted to it?
I've heard of "planing' boards on a band saw ... never on a table saw ... you must have some very skinny push sticks!
If you hinge the lid to the collar, what are you guys doing with the holes that are left behind on the freezer exterior from the hinge when it was originally mounted to it?
To run power to the fan, i wonder if you can cut a hole in the hump on the inside of the freezer, under that is the compressor, and run a the wire to the fan, through that hole, and out. Silicone that hole and be good to go?
Enter your email address to join: