Closed-system pressurized fermentation technique!

Homebrew Talk - Beer, Wine, Mead, & Cider Brewing Discussion Forum

Help Support Homebrew Talk - Beer, Wine, Mead, & Cider Brewing Discussion Forum:

This site may earn a commission from merchant affiliate links, including eBay, Amazon, and others.

What do you guys think about pressure fermentations? Time for a poll.

  • I've done it and I liked it just fine!

  • I've done it, nothing wrong with it, but prefer normal fermentation techniques.

  • I've done it, hate it, and never will do it again!

  • I've never done it, but it is on my list!

  • I've never done anything. I only brew beer in my mind.


Results are only viewable after voting.
I just wanted to let everyone know how this turned out. After 8 days on the above schedule, it dryed out to 1.016 (71% attenuation) and is clear as a bell. In fact, most people liked it more than the same recipe brewed 3 months ago!

The last two days, I dropped it to 31 to let the yeast drop out.

I am very happy with these results.
So... you're sayin' another one is order in the future?:rockin:

LOL, I am in love with this technique if you couldn't tell!!! Brew-On:ban:
 
Wortmonger,

When you first posted about this, I would have never, in my wildest dreams, have imagined this thread would become what it is today. IMHO, this thead is a model for all future threads on HBT to emulate. It starts with a man and an idea and evolves with time as if it were a panel of friendly researchers developing a project. The overall tone, to me, is "let's perfect this technique", and it has continued from 2007 up to the present. The thread demonstrates no "one upsmanship" and no p***ing contests.
I have read this thread as it evolved, and today, reread it in its entirety. It reminds me of the old brewingtechniques.com. Clean, cordial, and informative.
Thank you, and all the contributers to the thread, for a most intresting development of the technique.
 
Well, this post is in sorrow, and hopefully others can learn.

I am using BrewersHardware Sanke fermenter cap ala-Lamar style with the push on fittings and relief valve from Grangier.

I made a 11g Oktoberfest ale, 1.056 OG, pitched 2 packs of S04. I set the initial psi to 2, temp to 68. It got a little colder ( some overshoot in the cooler ) down to 62, but I let it warm up a bit. The following morning, I found that the pushon fitting on the racking cane had blown off, and there was enough fermenting beer to force most of it out.

I am not sure how the PRV failed, but it can happen. I'll be doing a lager to replace this, and I will do this pressurized to help with preventing diacetyl.

kegblow.jpg
 
I made a 11g Oktoberfest ale, 1.056 OG, pitched 2 packs of S04. I set the initial psi to 2, temp to 68. It got a little colder ( some overshoot in the cooler ) down to 62, but I let it warm up a bit. The following morning, I found that the pushon fitting on the racking cane had blown off, and there was enough fermenting beer to force most of it out.

I am not sure how the PRV failed, but it can happen.

Sorry to hear about your wort loss! :(

Ya, if you don't fully seat the push-to-connect fitting it won't "bite" the tubing correctly. Most of those fittings are rated for 60+ PSI, so it's not a design problem but I can certainly see how it happended. :)

After pitching the yeast, I temporarily pressurize the keg to ~2 PSI and check for leaks by spraying starsan on the fittings. That way, I'm positive there are no leaks and I didn't forget to connect something. It also allows me to calibrate the pressure relief valve.

I'll be doing a lager to replace this, and I will do this pressurized to help with preventing diacetyl.

If you're using a lager yeast known for producing a lot of sulphur, I recommend leaving the pressure low (e.g., <= 2 PSI) until the 80% attenuation mark. Otherwise, the excess sulphur won't be allowed to escape.
 
Wortmonger,

When you first posted about this, I would have never, in my wildest dreams, have imagined this thread would become what it is today. IMHO, this thead is a model for all future threads on HBT to emulate. It starts with a man and an idea and evolves with time as if it were a panel of friendly researchers developing a project. The overall tone, to me, is "let's perfect this technique", and it has continued from 2007 up to the present. The thread demonstrates no "one upsmanship" and no p***ing contests.
I have read this thread as it evolved, and today, reread it in its entirety. It reminds me of the old brewingtechniques.com. Clean, cordial, and informative.
Thank you, and all the contributers to the thread, for a most intresting development of the technique.
Thank you, this is exactly the tone I wanted when I wrote this thread initially. It wasn't my idea, but it also wasn't currently being done where we HBTer's could evaluate it. This thread has been so exciting for me... I even got to meet Teri Fahrendorf (one of the people who initially inspired me to try this).

I love how we here at HBT can hash and re-hash without it turning into a pissing contest. I have stated, and will continue to state, that this is not the best technique... that it doesn't make the best beer... that it is another way for making beer, and IMHO a very easy way at that. Sure it requires some special equipment, but if you keg you probably have all but the adjustable pressure relief valve (and that isn't absolutely necessary if you check up on your beer everyday and release the pressure).

At this point, other people trying the technique and posting here are exactly what I wanted. You could start your own thread, but what is the point? This way I feel as others come up with other techniques to add or other ways to do certain things, all of it is right here... easy for a newer person to read and relate to. If there is any contest to this thread, I would say it is to contribute and give others the chance to choose based on all our combined experience with Le' Technique.:rockin: One up me/him/her... we dare ya (and are looking forward to reading about it;))!!!
LooyvilleLarry said:
Well, this post is in sorrow, and hopefully others can learn.

I am using BrewersHardware Sanke fermenter cap ala-Lamar style with the push on fittings and relief valve from Grangier.

I made a 11g Oktoberfest ale, 1.056 OG, pitched 2 packs of S04. I set the initial psi to 2, temp to 68. It got a little colder ( some overshoot in the cooler ) down to 62, but I let it warm up a bit. The following morning, I found that the pushon fitting on the racking cane had blown off, and there was enough fermenting beer to force most of it out.

I am not sure how the PRV failed, but it can happen. I'll be doing a lager to replace this, and I will do this pressurized to help with preventing diacetyl.
Man that sucks a$$!!! Remember, it doesn't prevent diacetyl... only helps with faster cleanup after the fermentation is ending. It does slow down ester production, but it actually increases diacetyl production initially. I had to really worry when I was first reading about this, but then Kaisers contributions showed me the graph that pointed out how fast it cleaned up at the end. This is my main concern with making sure you let the yeast finish their job before you crash them. I always taste now before I crash, just in case.
lamarguy said:
After pitching the yeast, I temporarily pressurize the keg to ~2 PSI and check for leaks by spraying starsan on the fittings. That way, I'm positive there are no leaks and I didn't forget to connect something. It also allows me to calibrate the pressure relief valve.

If you're using a lager yeast known for producing a lot of sulphur, I recommend leaving the pressure low (e.g., <= 2 PSI) until the 80% attenuation mark. Otherwise, the excess sulphur won't be allowed to escape.
I wish I would have pressurized this last batch before fermentation (would have let me know I had a spunding leak). Also, you are right about calibrating your spunding valve. I always have to guess when I am lazy and don't do a pressure check with another keg or something. Good to put into your routine for sure!

I just finished a Czech pilsner yeast beer, and I had all my pressure going out at the beginning. I think you are right, as I had no sulphur in the beer at all but the chest freezer smelled like a rotten egg during primary. I would hate to get that stuff locked into a finished beer, YUCK!!!!
 
Wow, it is amazing how fast lagers change. I think I am waiting on chill haze to settle, lol. When I first threw it in my kegerator, it was good just cloudy. Now, two weeks later... fan-fooking-tastic! I can't wait to pitch on this yeast cake and rocket out another one, only this time with a working spunding valve :)
 
My Oktoberfest is ROCKIN ! Here we are, less than 4 weeks in and it is so tasty, carbed, and clearing very nicely. I hope there is some left by the party :)
 
Hey WortMonger, what lager recipe did you use and did you make any particular changes to your fermentation schedule? Did you stay in primary, do a DA rest, then lager all in one fermentation vessel? I'm prepping for my first lager and want to use my closed pressure rig.
 
flananuts - I know you asked WM about this, and I'd like to see his reply as well.
I am in the lagering stage of my Oktoberfest lager ( Jamil's Marazan with some minor tweaks), and I did it all in a keg.

I brought the keg up slowly for a 3 day D-rest (even though I could not taste any diacetyl) when the ferm was 75% through. I think the ability to get a sample without introducing contamination risk is awesome.

The beer is nice right now, very drinkable, and fairly clear. Brewed on labor day, and hit the target FG on spot.
 
flananuts said:
Hey WortMonger, what lager recipe did you use and did you make any particular changes to your fermentation schedule? Did you stay in primary, do a DA rest, then lager all in one fermentation vessel? I'm prepping for my first lager and want to use my closed pressure rig.
I did a version of an American/Canadian pilsner; 18# Pilsner, 3.6# carapils, 3# flaked corn, and 3 pounds of Munton's extra light DME (used 1.5# for a starter, then 1.5# for carbonation [another side note, using DME to carbonate is not a good idea]). 15 gallon "end" recipe with Brewer's Gold (9.1%) at 60 min, Gr. Tradition (6.2%) at 30 min, and Gr. Select (4.7%) at 10 min. I used my WLP802 Czech Pils starter like an ingredient in the recipe, or a RWS if you will. I brewed a 12.5 gallon recipe and added that to a keg (at 45*F) with 1 gallon of pre-boiled water, then added the starter.

I was using a brand new spunding valve, and apparently it had a leak. I had the thing set to 7 psi (I believe) and the fermentation freezer set to 50*F (natural ramp from 45*F), it was going great. Took a gravity sample and saw I was a couple points shy of predicted finish, so I cranked the release shut on the SV and added 2 degrees to the thermostat to start my D-rest. I did another 2 degrees for two more days to get me to 56*F from 50*F primary temperature.

After the D-rest, I went to go check on my pressure. I was hoping for enough to carbonate, but all of it had leaked out. I untapped the keg hoping to trap enough CO2 to carb, but to no avail. I then lagered the beer on top of the yeast for a couple of weeks. Well, lesson learned about the SV. I boiled the remaining 1.5# of DME in about 2 quarts of water, added to another keg, then transferred into the new keg. Sealed it back up, and then attached my newly checked spunding valve to watch the pressure build. I rolled the keg into the house and let it sit at room temperature. This took forever to get me to carbonation volumes with DME (next time this happens I'm using corn sugar).

After it was carbonated, I let it mature for a couple of months then tapped for serving. It took until the last 10-12 pints to pour a crystal clear beverage that didn't look like chill-haze, but a very great beer.

LooyvilleLarry said:
I brought the keg up slowly for a 3 day D-rest (even though I could not taste any diacetyl) when the ferm was 75% through. I think the ability to get a sample without introducing contamination risk is awesome.
Yeah, I couldn't taste any diacetyl but would rather be safe. I love getting samples with this technique. Sooooo easy!:rockin: Just brewed a simple Pilsner only recipe Saturday. Same hops, same yeast, so can't wait to taste this one. It will be carbonated too, lol.
 
I've read almost this entire thread without finding my question, so here goes. If I'm filling five gallon cornies from my sanke, how will I know when the first corny is full if I'm counter pressure filling it?

Probably a dumb question, but since I'm still in the planning stages, figured I'd ask those with a few brews under their belt this way.
 
I've read almost this entire thread without finding my question, so here goes. If I'm filling five gallon cornies from my 11 gallon sanke, how will I know when the first corny is full if I'm counter pressure filling it?

You can weigh the keg or, if the beer is cold, watch the frost line.
 
Weigh the keg as you are filling it. There are programs that will tell you, or you could figure it out for your vessel. Just put your keg on the scale and start filling until you reach your numbers. Sorry such a short response, but I just checked my threads and have to go. Hope to talk more later.
 
Or, and I say a better approach, is to fill both kegs at the same time using a Tee. This way, it should eliminate any differences between the two vessels.
 
Or, and I say a better approach, is to fill both kegs at the same time using a Tee. This way, it should eliminate any differences between the two vessels.

I appreciate the ideas. The tee seems like a really smart way to go, although it would require me to build two spund valves. one for each corny.. Getting kinda pricey.

Is it possible to fill cornys from your sanke while you have the lid open? I mean, will it foam like mad if you ferment no higher than 7psi? I'm less concerned about contamination and carbonation. Spent some $$$ this month already on two spund valves. Third isn't likely to happen.

Thanks for the suggestions.
 
If you are filling from a sanke (presumed), make the T to 2xBlack (out) connectors x 1 connector to the sanke.

Purge the cornies with co2, then when you start to transfer, open the relief valve on the cornies.

The incoming beer goes to the bottom, pushing the CO2 out as it fills.
 
When you say, "open the relief valve on the cornies" do you mean a spunding valve? Or are you just saying that once the transfer starts I can release the pressure entirely in the destination kegs?

I'm thinking that I may not need spund valves to counter pressure fill my kegs. I suppose I can just hook the cornies up to my regulator set at 7 psi, and then set my sanke to 9 psi with a different co2 tank and regulator, which I do have.

Would this work? I have sanke spund valve and one corny spund valve. I'd like to use the "tee" filling idea posted above.
 
When you say, "open the relief valve on the cornies" do you mean a spunding valve? Or are you just saying that once the transfer starts I can release the pressure entirely in the destination kegs?
The relief valve in the center of the corny lid, no spunding valve needed.
I'm thinking that I may not need spund valves to counter pressure fill my kegs. I suppose I can just hook the cornies up to my regulator set at 7 psi, and then set my sanke to 9 psi with a different co2 tank and regulator, which I do have.

Would this work? I have sanke spund valve and one corny spund valve. I'd like to use the "tee" filling idea posted above.

Yes, that is exactly right.
 
How are you guys oxygenating your wort prior to pitch?
I recirculate back into my kettle during the big chill and have a Venturi device on the end of my kettle return hose. Works like a charm with tons of foam. Then, when I am knocking out to my fermenter it gets another last oxygenation with the same hose setup. Then I seal up the keg and attach my spunding valve.

On another note, this last lager I did on Saturday still hasn't done much other than a little psst when I release the tap connector relief valve. It is going so slow... I figured this one would be a rocket with all the yeast left in there from the first lager. Time will tell and pressure will tell me when it starts. Just wish it would do its thing already. This many years of brewing and I still want it to hurry up!:D
 
I have read all 39 pages of this and have found it to be a very interesting idea. I am wondering about building a spunding valve modified sanke tap so I can ferment in a sanke. I ferment out in my garage (nowhere near my keezer and CO2).
But I was thinking for transfer to Corny kegs would I need to have my CO2 tank out there. Since the fermentation process has created CO2 (and carbed the beer) Couldn't I just put a gas line with corny gas post on a T before the spunding valve and a beer post on the beer out line. Wouldn't that work to equalize the pressure in the 2 vessels for counterpressure filling? Since the sanke fermenter would have enough initial pressure in it to pressurize the beer line, couldn't I just connect to the gas post to equalize the pressure between them, then hook up the beer out to the corny beer post and then place the corny lower than the Sanke to fill?
Would this work or have I got this confused?
 
When you say, "open the relief valve on the cornies" do you mean a spunding valve? Or are you just saying that once the transfer starts I can release the pressure entirely in the destination kegs?

I'm thinking that I may not need spund valves to counter pressure fill my kegs. I suppose I can just hook the cornies up to my regulator set at 7 psi, and then set my sanke to 9 psi with a different co2 tank and regulator, which I do have.

Would this work? I have sanke spund valve and one corny spund valve. I'd like to use the "tee" filling idea posted above.

I thought I'd report on my 3 kegs at once in tandem Corny filling from a Sanke fermenter method since the topic has come up. I alluded to it about 3 pages ago. I've tested it a couple times with water, flat beer, and closed system carb'd beer. It is working well so far. I should probably do a new thread with this, but since it came up...

I thought of this and kind of hoped it would work since it didn't seem anyone else had done it on this forum (having asked a couple times). After going thru with it, I did notice that several commercial breweries do this. Notably, in my area, Cooperstown Brewery. They call it the "Octopus" and fill 7 kegs at a time right from the brite tank.

Anyhoo, the concept is that if you have your 3 kegs pressurized exactly the same, you can counterpressure fill at the exact same pace and end up with (near) equal volume transfer per keg. I do this by way of two items-

On the liquid side:
3 way pneumatic manifold (~$8 McMaster) that splits the input three ways at the same exact angle. I went with this instead of a cross because I figured two out of the three feeds would be at 90 degree angles and the third would be straight and I'd end up with unequal transfers (I'd love it if a fluid dynamicist would prove me wrong, I dunno). If you are trying to do just 2 kegs from a Sanke like the previous poster, I think a tee would be great.

On the gas side:
3 way gas manifold that has NO check valves in the shutoffs (since it is operating in the reverse direction it would in a kegerator). That's terminated with a corny post - so I could hop-scotch my spunding valve to and fro.


Technique:
1) Purge the 3 cornys at once and send out any remaining Starsan and pressurize to ~8 PSI.
2) Put the spunding valve on the gas manifold and calibrate to the kegs.
3) Hook up 'The Octopus' to the fermenter- without hooking up the three liquid ball locks (they are acting as a shut-off).
4) Hook up the gas to the fermenter and pressurize to the same PSI.
5) Put disconnects on the liquid in of each keg. Nothing happens since they are both at ~8 PSI.
6) Crank up the CO2 a couple PSI and watch the fun start. Alternately, turn down the spunding valve. Still not sure which is better, if one is.
7) Watch the frost line and drink a beer. Shut off CO2 when fermenter is empty.

Generally, I get about a quart margin-of-error of being exactly the same volume per keg. And then I have equal headroom in the kegs to force carb (which I can do 3 at once with the same manifold) or whatever I want to do. Also, I have tested this just filling two kegs and it works the same. Since the ball lock connectors are like shutoffs, it works just as well with a pair (gas/liq) just hangin out.

The part number for the pneumatic fitting from McMaster is: 5465K71. Unfortunately it's Aluminum. Stainless manifolds like this are real pricy.

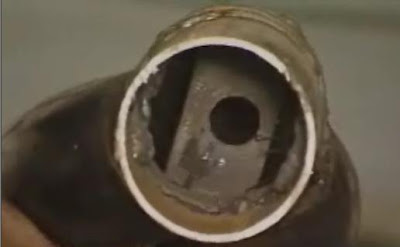
Here are a few pics. The first is the liquid side (which is terminated with tri-clamp). I can do a video if anyone's interested. I'll be transferring in couple days- cold crashing right now.

SDIM1723.jpg


SDIM1727.jpg
 
I have read all 39 pages of this and have found it to be a very interesting idea. I am wondering about building a spunding valve modified sanke tap so I can ferment in a sanke. I ferment out in my garage (nowhere near my keezer and CO2).
But I was thinking for transfer to Corny kegs would I need to have my CO2 tank out there. Since the fermentation process has created CO2 (and carbed the beer) Couldn't I just put a gas line with corny gas post on a T before the spunding valve and a beer post on the beer out line. Wouldn't that work to equalize the pressure in the 2 vessels for counterpressure filling? Since the sanke fermenter would have enough initial pressure in it to pressurize the beer line, couldn't I just connect to the gas post to equalize the pressure between them, then hook up the beer out to the corny beer post and then place the corny lower than the Sanke to fill?
Would this work or have I got this confused?
I'm not quite clear on what you are asking/wanting to do. I am not very good with reading about things I don't use very often, like cornies. I hope someone can answer your specific questions. Other than that, SankeyPankey has a cool idea.
 
I'm not quite clear on what you are asking/wanting to do. I am not very good with reading about things I don't use very often, like cornies. I hope someone can answer your specific questions. Other than that, SankeyPankey has a cool idea.

I quess what I am saying is couldn't you just use the natural pressure in the fermenter to pressurize the receiving vessel, then connect the beer line and open the relief valve on the receiver?
 
Sure, give me a couple days to cold crash.

Here's a question for the crowd before I do that.

I have a piece of tubing at the end of my spunding valve, so I can catch any (if any) liquid in a tray.

How do I get it to stop singing at me? It's a constant A flat. Any clues?


I quess what I am saying is couldn't you just use the natural pressure in the fermenter to pressurize the receiving vessel, then connect the beer line and open the relief valve on the receiver?

I think that would work. This is kind of what I do, but not for the same reason. I use a 3 gal corny as a blow-off top cropper and then I take the blow-off tube and harvest from the bottom dump. (You'll see in my vid). A yeast brink, of sorts.

Long story short, I put the spunding valve on the 3 gal corny at .5 PSI to act as an airlock. It's not needed since the blowoff bubbles out the beverage dip tube, but I figure to keep oxygen away from the yeast. I could naturally carb my primary from the blow-off vessel by just turning up the valve if I wanted, but haven't tried that yet. For your method, then remove and jumper liquid out to liquid out and release pressure from the receiver with the spunding valve (more gentle/measurable than using the PRV on the lid-to avoid foaming).

I think using blowoff CO2 to purge ox from receiving kegs is a good idea. You'd have to avoid collecting trub like I am doing on purpose.

That's like the Reinheitsgebot version of kegging!
 
I quess what I am saying is couldn't you just use the natural pressure in the fermenter to pressurize the receiving vessel, then connect the beer line and open the relief valve on the receiver?
Oh, I get it. The only problem I see is that when you release that much pressure from your fermenter, you are going to get CO2 inside the beer to come out of suspension causing sediment to stir up. Collecting CO2 the way SankePankey does, via a spunding valve on another keg inline after your fermenting keg, is the only way to utilize the free CO2 and let the fermenter sediment stay as still as possible. If you were filtering or something it wouldn't be an issue, but I like to keep everything made in the fermenter... in the fermenter until I am ready to transfer. It is just too easy to read my spunding valve on the fermenter and then match the target keg to its pressure and fill without worrying about sediment getting stirred up. I go slow and only increase the pressure a little when I see the beer slow in the lines during transfer.

SankePankey, how much are you fermenting in what size keg? Also, how much yeast are you collecting in your blow-off keg? I have been wanting to do this, but my freezer doesn't allo me enough room for another keg in there. I would have loved to collect the krausening yeast on my lager for the next batch, talk about easy... just collect in a sealed keg and wait to tap it for the next batch, if enough is collected that is.
 
SankePankey, how much are you fermenting in what size keg? Also, how much yeast are you collecting in your blow-off keg? I have been wanting to do this, but my freezer doesn't allo me enough room for another keg in there. I would have loved to collect the krausening yeast on my lager for the next batch, talk about easy... just collect in a sealed keg and wait to tap it for the next batch, if enough is collected that is.

Never thought of that re: sediment. I do have to depressurize before the transfer w/ my setup but didn't notice all that much sediment in the transfer.

I'm fermenting in a 15.5 Gal converted sanke (made by synergymetalworking) with a 4" TriClamp on top with corny posts and a thermowell, and a 1.5" bottom Tri-Clamp dump. I have custom corny post to tri-clamp adapters made by brewershardware for the most sanitary/threadless I/O for the keg. They are sweet. I use the gas one for blow-off and the bev one for the corny and then emptying the fermenter. My routine is to unclamp the blow-off from the fermenter and put it on it's bottom dump and collect bottom yeast. Then I put the regular post back on and put the spunding valve on the fermenter. In that scenario, I have to depressurize the kegs. This is why I haven't done a full pressure ferment with the yeast collector, cause I think the depressurization would kill yeasts. In stead, I just start my pressure ferment after high krausen. My Wit carbed fully at least but that's because it was a long ferment. My last with WLP 001 was already almost finished by the time I did that, so I nixed it and am boost carbing in the primary (try that with a conical!). All in all I'm very happy with the flexibility the whole getup permits. It may be overkill with the custom fittings, but I just wasn't going to be comfortable with blow-off going thru a post with a poppit. To small ID, may get clogged, catastrophic failure of the vessel and all.

I'm averaging about 13.5 Gal of wort and I will go higher. The amount of blow-off I get depends on the yeast. I haven't done lagers yet with this setup. With ales, I can see pushing it to 14 or 14.5 gals. My thought is I could get some different length gas dip tubes cut for better top cropping collection per different volumes. With the real sticky caked yeast, I'm not getting a whole bunch of bottom crop, so I'd need a little more from the top. With Belgain Wit, I got a ton of bottom yeast like 4 pints. Pacman was sort of in the middle - 2 pints- definitely way more than a pitchable amount. Real sticky ones, I may have to get out the spatula at the end of ferment, then push it into the corny. Maybe not do a pressure ferment with those, since you'd have to slowly depressurize the keg over a couple days after transfer to not kill the yeast, right?

Oh, and my chamber is a 7.2 cu ft Magic Chef chest freezer and I put the corny on the compressor hump. I also have a 15 gal corny keg I am making another chamber for it. For that I'll use a 5 gal for the collector since I won't be harvesting from the bottom like the Sanke fermenter. I'll probably do more of my Lagers in that one. I can fit 4 X 5 gal cornies and the 15 gal in the one 7.2 cu ft freezer. Crikey! Put the whole thing on heavy duty casters so I just roll the chamber away from the boil kettle rather than lift full kegs into a chest freezer. Makes for easy agitation too.
 
so it looks like I might finally be joining the club. I may be buying a 15G corny, so has anyone used the Ball Lock Adjustable Pressure Valve w/Gauge at midwest?

http://new.midwestsupplies.com/ball-lock-adjustable-pressure-valve-w-gauge.html

also, I like lamarguys filter setup, I might have to steal that idea, have you tried dryhopping in the filter yet? and I wonder how pellet hops would do.
 
I may be buying a 15G corny,
Can't wait to use mine.
Pros- Very well priced. "Very" light (easily half the weight of the Sanke). Big rubber base.
Cons- Tall. I had to make a 1 X 10 collar for my chest freezer- no biggie.
No bottom dump (well, like my sanke). Hard to reach bottom to harvest. Might have to change forum name.

I am going to be using it more as a lager primary. That way I can top crop right into another 15 gallons I make a week later (3 x 5 gal cornies) and be able to lager them at the same time.
 
so it looks like I might finally be joining the club. I may be buying a 15G corny, so has anyone used the Ball Lock Adjustable Pressure Valve w/Gauge at midwest?

http://new.midwestsupplies.com/ball-lock-adjustable-pressure-valve-w-gauge.html

also, I like lamarguys filter setup, I might have to steal that idea, have you tried dryhopping in the filter yet? and I wonder how pellet hops would do.
HB,

I have that Ball Lock Adjustable Pressure Valve w/Gauge I bought from my lhbs and it doesn't work well for spunding. I'm about to build my own much like everyone else on this thread. I can not seem to get it to work on very low pressures at all. Maybe replace the spring with a weaker one but for the money I wouldn't buy it again.

just my 2c's
 
Can't wait to use mine.
Pros- Very well priced. "Very" light (easily half the weight of the Sanke). Big rubber base.
Cons- Tall. I had to make a 1 X 10 collar for my chest freezer- no biggie.
No bottom dump (well, like my sanke). Hard to reach bottom to harvest. Might have to change forum name.

I am going to be using it more as a lager primary. That way I can top crop right into another 15 gallons I make a week later (3 x 5 gal cornies) and be able to lager them at the same time.

yeah, I measured my freezer and it is 27", so even with a 10" collar, I am looking at 37", that is cutting it really close. Do we know if these are really 36" or like 35.5 or something?

HB,

I have that Ball Lock Adjustable Pressure Valve w/Gauge I bought from my lhbs and it doesn't work well for spunding. I'm about to build my own much like everyone else on this thread. I can not seem to get it to work on very low pressures at all. Maybe replace the spring with a weaker one but for the money I wouldn't buy it again.

just my 2c's

I think I'll looking into the mcmaster parts
 
also, I like lamarguys filter setup, I might have to steal that idea, have you tried dryhopping in the filter yet? and I wonder how pellet hops would do.

I assume you mean using it like a Randall? Yes, but not for "normal" dry hopping.

It takes a certain amount of time (days) and temperature (room temperature) to extract the appropriate flavors/aromas from hops. An inline dry hop filter doesn't provide for enough contact time and, assuming the beer is near room temperature, would result in excessive foaming. :(

that's what I thought, but thought I would ask.

So are you guys just dumping in hops to the kegs? I am thinking this would be a nice way to speed up the process, drop in the hops with like a couple of gravity points left, leave for a few days even raising the temp like a D rest and then start the crash cool.
 
Back
Top