Show us your Kegerator

Homebrew Talk - Beer, Wine, Mead, & Cider Brewing Discussion Forum

Help Support Homebrew Talk - Beer, Wine, Mead, & Cider Brewing Discussion Forum:

This site may earn a commission from merchant affiliate links, including eBay, Amazon, and others.
-Can I put the Co2 in the freezer and plumb the lines into the fridge?
-Do you need a fancy distribution manifold or can you make one out of brass pipe and check valves?
-Should I get rid of the shelving on the inside of the door and put up some masonite?

these are questions that I would also like to know the answer to.
 
Here's a look at the kegerator I made some time ago. I chose a chest freezer as the foundation for the kegerator to keep things simple and compact. I learned that chest freezers maintain a more consistent temperature with the door open for any period of time, such as when I'm using my BeerGun to bottle from a keg. I chose the collar approach rather than a tower to keep things a little more simple. The tower can pose challenges in maintaining a consistent temperature to the faucet and affects ease of opening the lid and keeping it open. I'm opening the thing more than you might think... sometimes just to admire it! :)

I started with the Holiday 5.3 cu ft chest freezer from Lowes. I made the collar and rolling bottom tray from hardwood and painted them to compliment the freezer finish. No one can believe they are made from wood, they look like painted metal. The collar is mounted with a proprietary system I designed to make it easy to install and completely removable without any damage to the freezer. The freezer simply sits on the caster mounted bottom tray and lifts off if necessary.

I used pretty high quality components, including Vent-Matic faucets and stainless shanks with removable ends attached with wing nuts for easy removal for a thorough cleaning.

The CO2 distributor has an additional 4th port for other temporary uses even while there are three kegs attached. I also have a dual regulator setup, which allows me to push wine at a lower pressure through one of the faucets. It's all perfectly balanced with tubing lengths calculated to produce the perfect pour without an any excessive foaming.

A digital temp controller on the back and a nice big stainless drip tray on the front makes it all functional.

IMG_0189.jpg

IMG_0188.jpg

IMG_0195.jpg


I'm curious if anyone thinks there a market for selling a collar and tray conversion kit comprised of what you see here without the freezer, CO2 bottle/regulator, kegs and drip tray? It would sure make putting a quality kegerator together a lot easier. Could make them to suit larger freezer models with more faucets as well. What do you all think?

Thanks.
 
Nice + very professional looking KeggieMaker! I prefer DIY but I'm sure there is a little bit of a niche market there between DIY and pre-built; Just not sure how much... Try a poll in the kegging or equipment/sanitation section to get a feel maybe?
 
I'm curious if anyone thinks there a market for selling a collar and tray conversion kit comprised of what you see here without the freezer, CO2 bottle/regulator, kegs and drip tray? It would sure make putting a quality kegerator together a lot easier. Could make them to suit larger freezer models with more faucets as well. What do you all think?

Thanks.

Yes. I will buy it immediately. I don't have time right now to mess with it, and couldn't do such a nice job anyway. Please PM me the cost and lead time for a 13.8 Kenmore.

Dimensions:
Height: 35 in.
Depth: 29-1/2 in.
Width: 48 in.

Thanks
KD
 
I'm curious if anyone thinks there a market for selling a collar and tray conversion kit comprised of what you see here without the freezer, CO2 bottle/regulator, kegs and drip tray? It would sure make putting a quality kegerator together a lot easier. Could make them to suit larger freezer models with more faucets as well. What do you all think?
Thanks.

I've had several people ask me to build them one like mine but once I tell them the cost (roughly $800 for all new parts including freezer for a 5 tap), they usually shy away. There is a market for homebrewers and beer lovers, but for the average person that doesn't need variety (the "I only drink Bud Light" crowd), there's not much. I had considered doing this on craigslist but gave up the notion when I realized how much I would have to charge...

Your method of selling everything but the freezer and doing it over the internet might be a very good idea though. The only problem I see is that there is still a lot of work involved with actually attaching it to the freezer.
 
I finally have pics! We've been working hard since summer finishing our basement. The kegerator is a Summit SBC490-BISSTB, which is basically a standard kegerator designed to fit completely built-in under a counter with zero clearance. Stainless tower from Keg Connection. Perlick faucets. The counter is black emerald pearl granite 18x26 tile and the backsplash is lightly tinted clear glass tile. I've been running soda water at 35 psi on the right and beer at 10 psi on the left.

051-1.jpg


050.jpg


042-1.jpg


046-1.jpg
 
053-1.jpg

At night! We have Ikea LED lights in the cabinets that can be changed to any one of 7 different colors, or even cycle through colors, it's pretty cool.

056-2.jpg

My 2 year old, dangerously close to those taps! Heh. He loves getting daddy to pour him a pop (soda water in tiny little play cups).

Oh, and if you look at the very first picture above, you'll see a tiny white square below the left side of the door. That's a child safety strap designed for ovens and refrigerators, which is a bit tricky to open. My son can't open the fridge to mess around in there. If I'm worried that he's going to get up and start pulling tap handles (which hasn't happened yet), I can just pull the liquid couplers off the corneys and lock the door.
 
I finally have pics! We've been working hard since summer finishing our basement. The kegerator is a Summit SBC490-BISSTB, which is basically a standard kegerator designed to fit completely built-in under a counter with zero clearance. Stainless tower from Keg Connection. Perlick faucets. The counter is black emerald pearl granite 18x26 tile and the backsplash is lightly tinted clear glass tile. I've been running soda water at 35 psi on the right and beer at 10 psi on the left.

Very Nice bar BrewThunda. You do all the work yourself? Very Clean.
 
That thing next to the sink is an icemaker! Makes up to 50 lbs of ice a day. It's a trip - it actually makes rectangular sheets of ice, then slides it on to a heated grid . . and ice cubes fall out the bottom.

We hired electricians and drywallers. My father in law did a ton of the work himself. He's a carpet and tile guy by trade and also did general carpentry and framing and stuff. I carried stuff, painted, dug out an easement window, did some wiring and wrote a lot of checks.
 
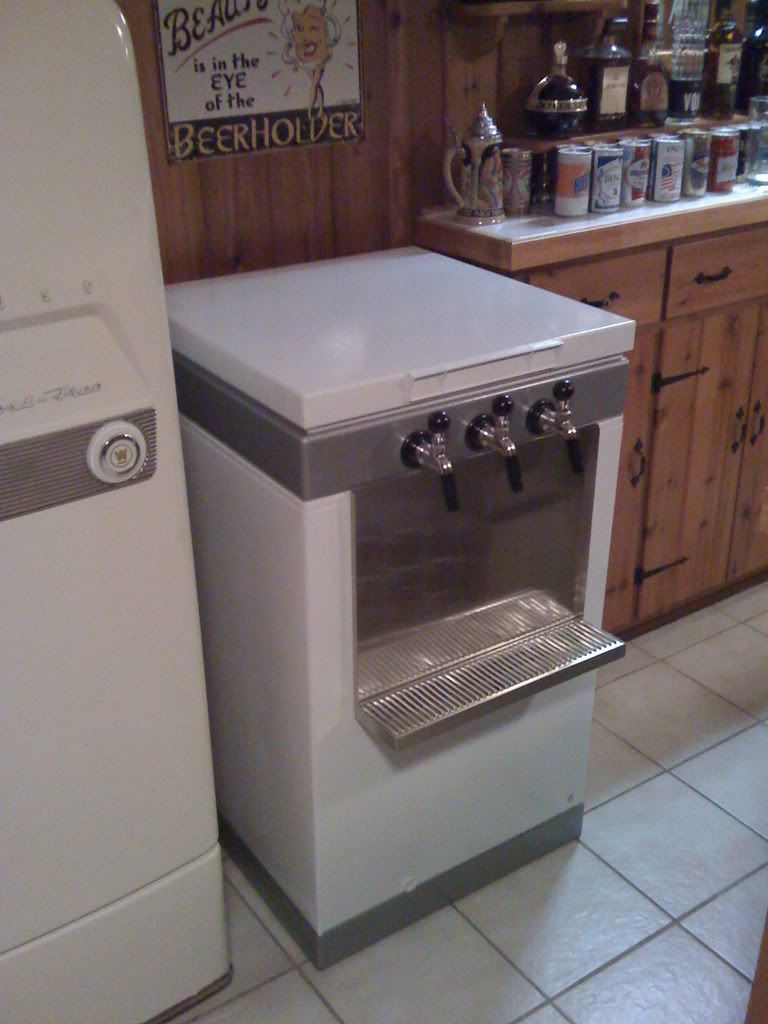
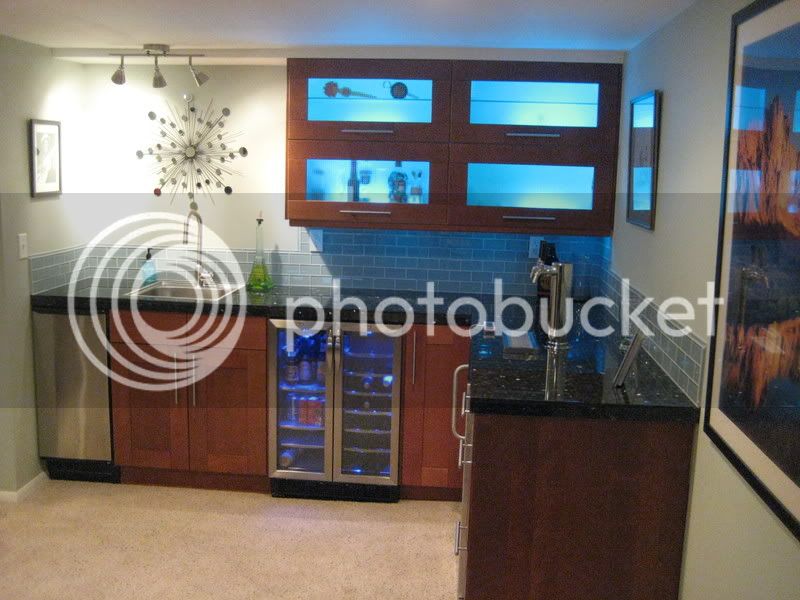
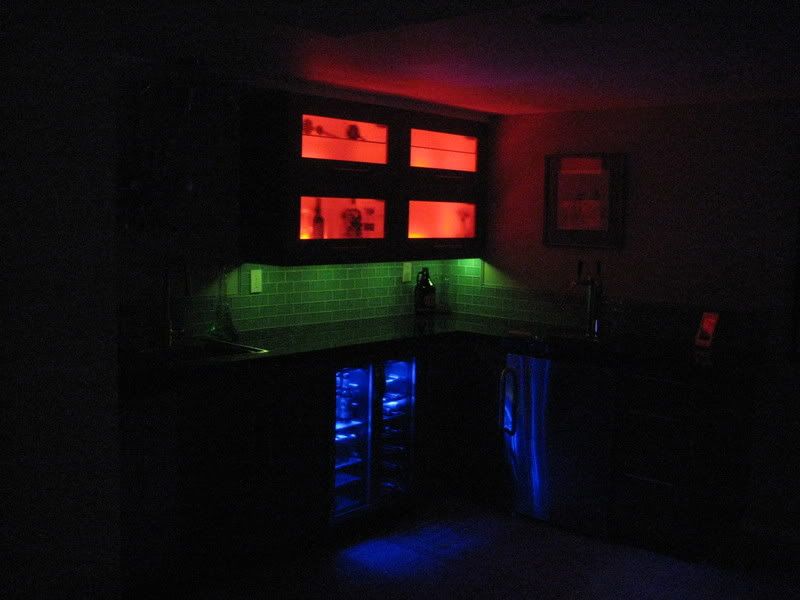
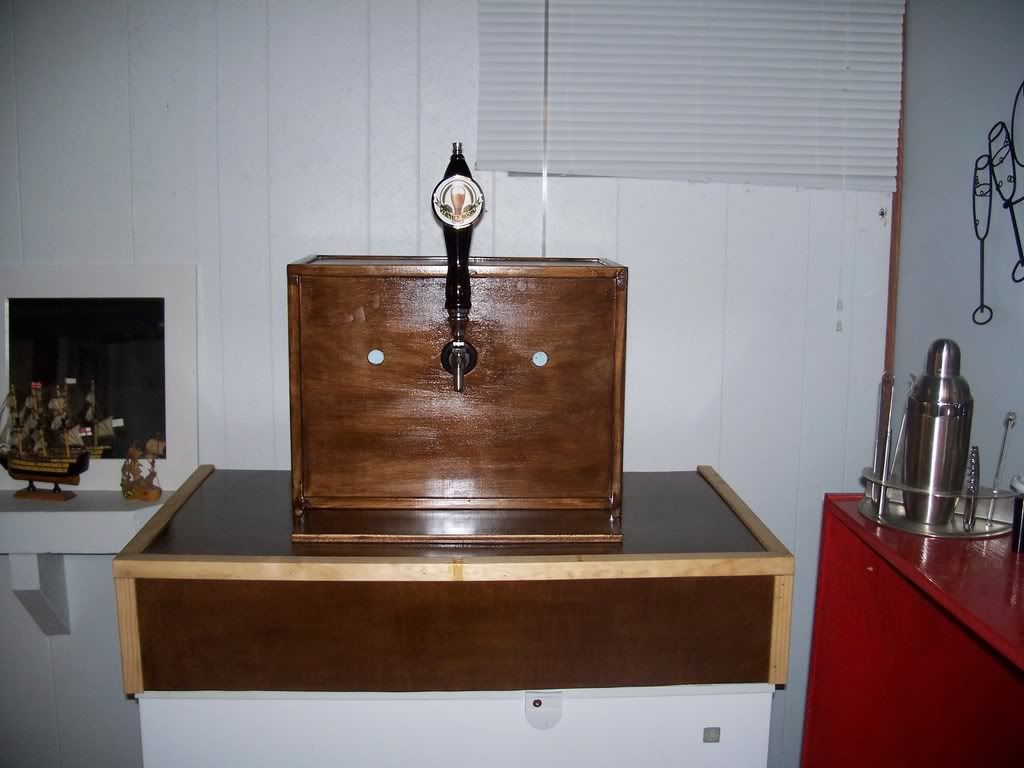
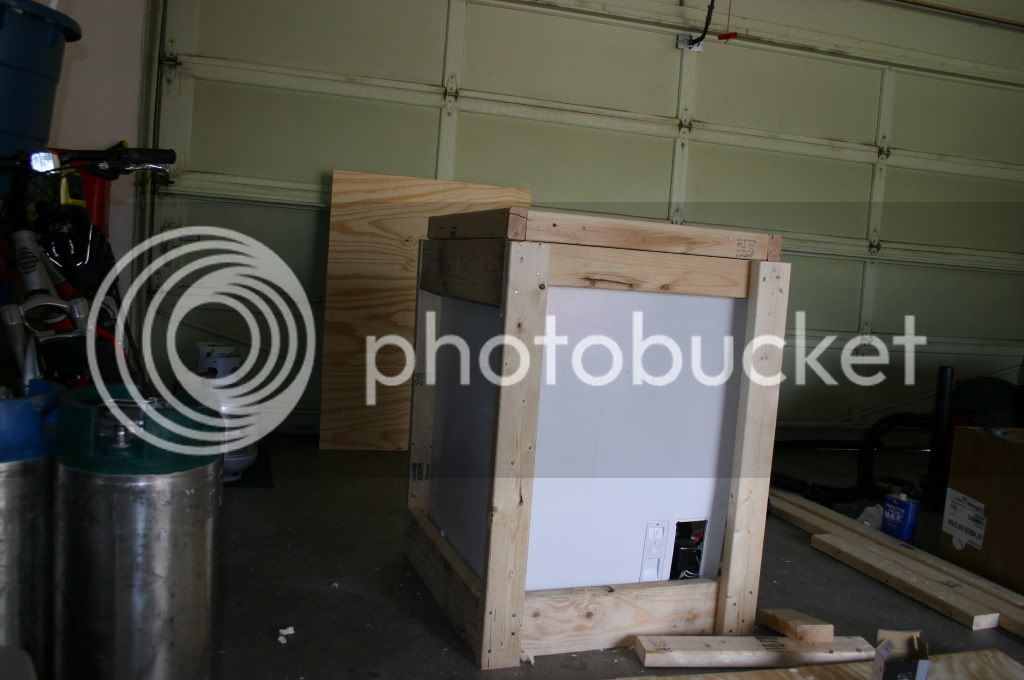
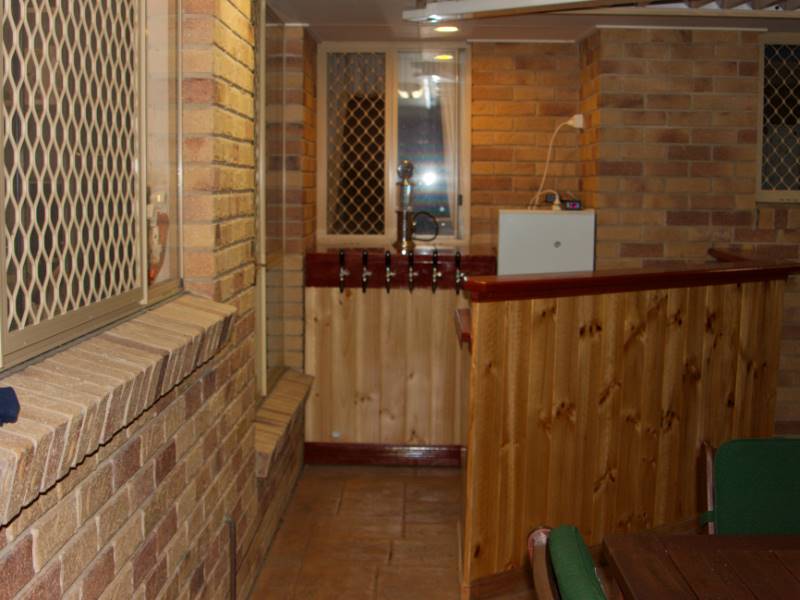
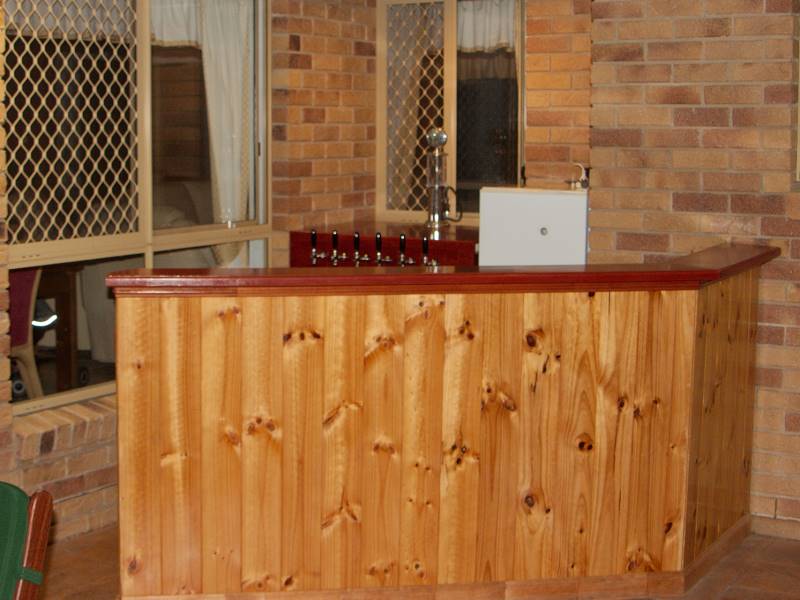
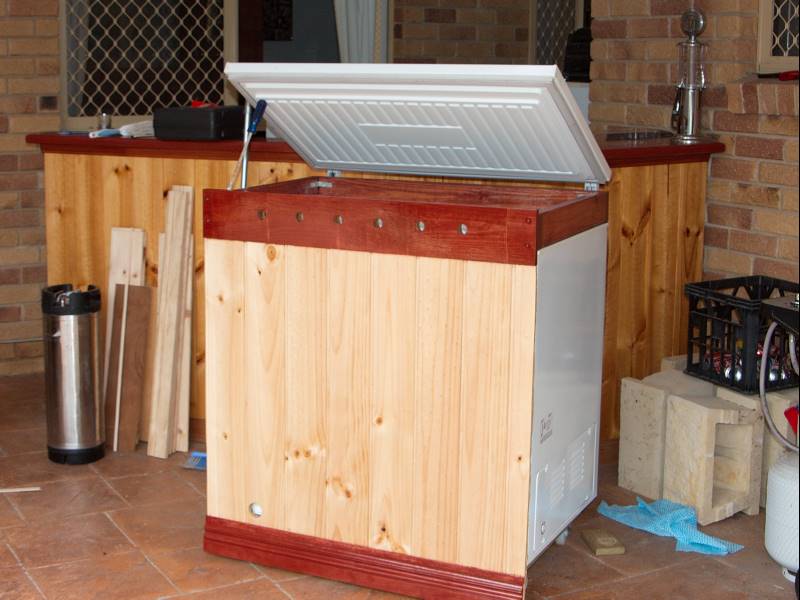
I'll go ahead and post mine. Figures I gotta follow one like Brew Thunders. It's not complete but as complete as it will be for tonight public revealing for new years.
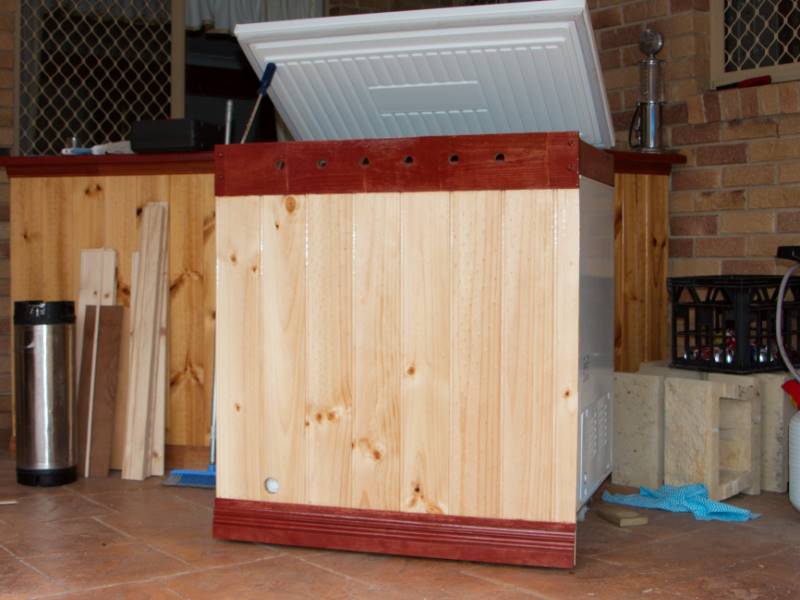
One more perlick coming Monday the 5th via UPS and 1 to go. Then finish trim work, redo trim work on tap box to match trim on lid. Decided i liked the color scheme after tap box was all mounted and stained. Then build a skirt for the roller base.
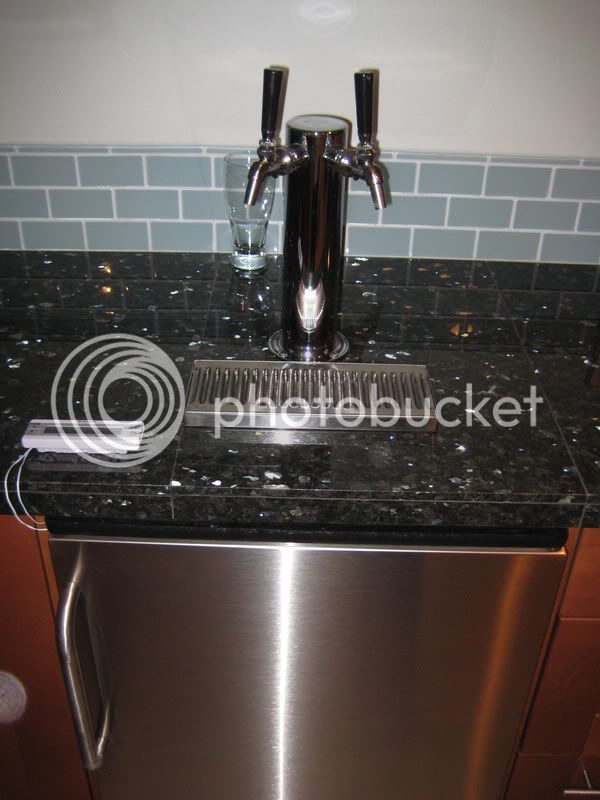
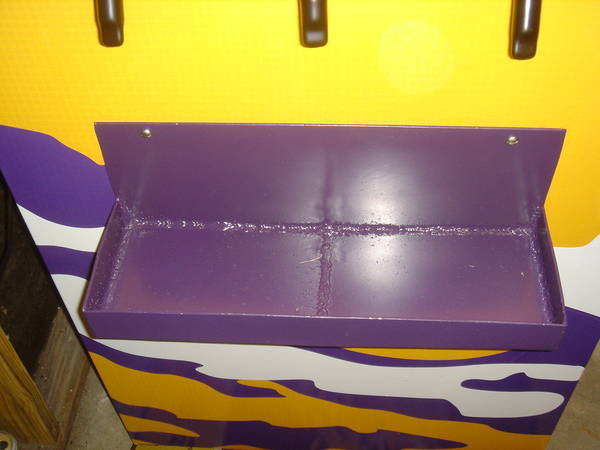
Then order Drip tray and trim around that.
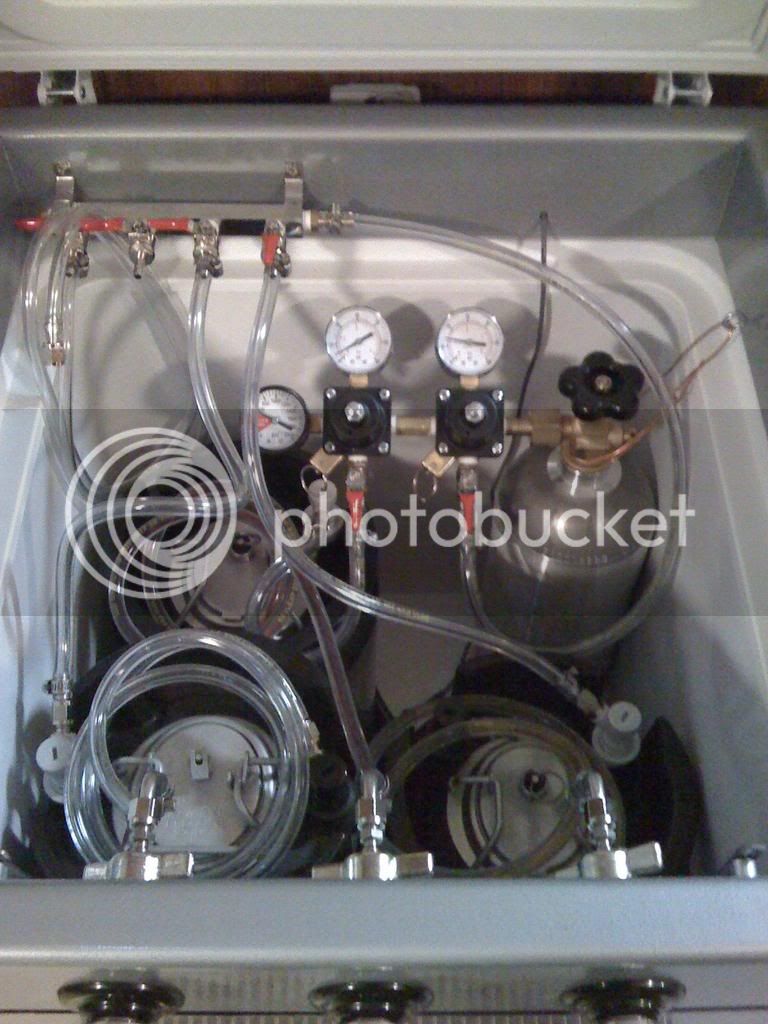
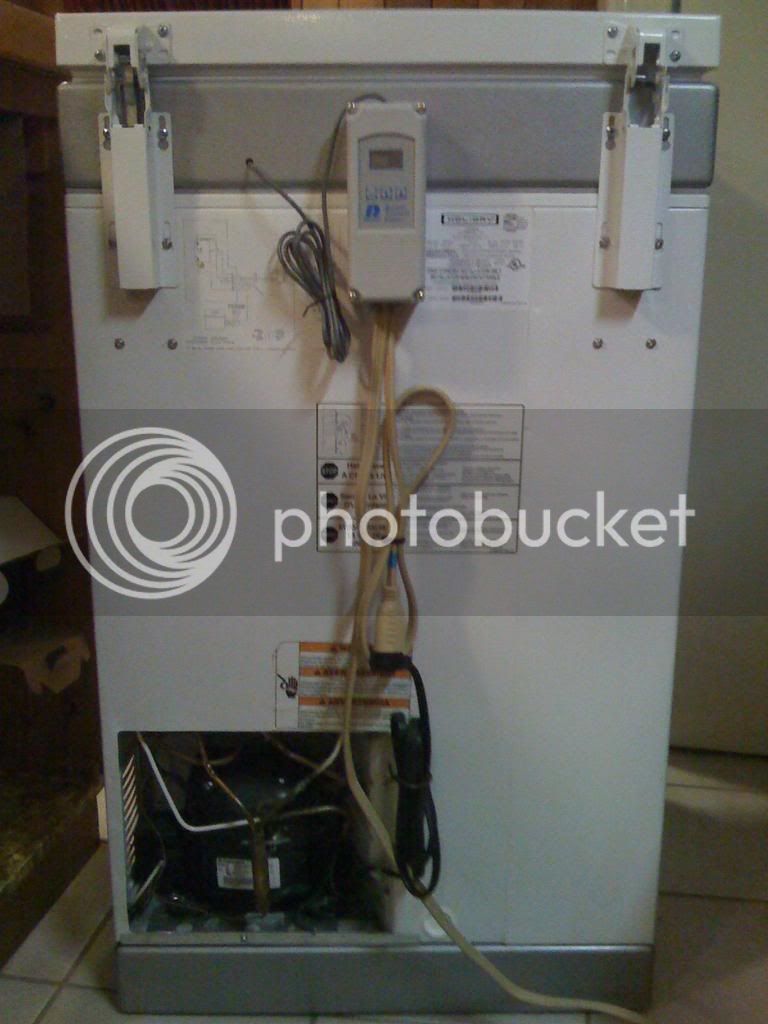
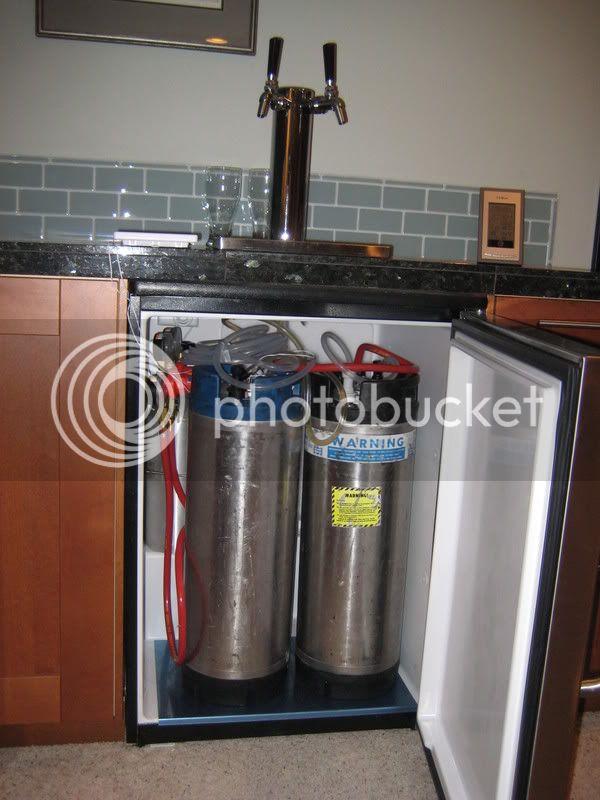
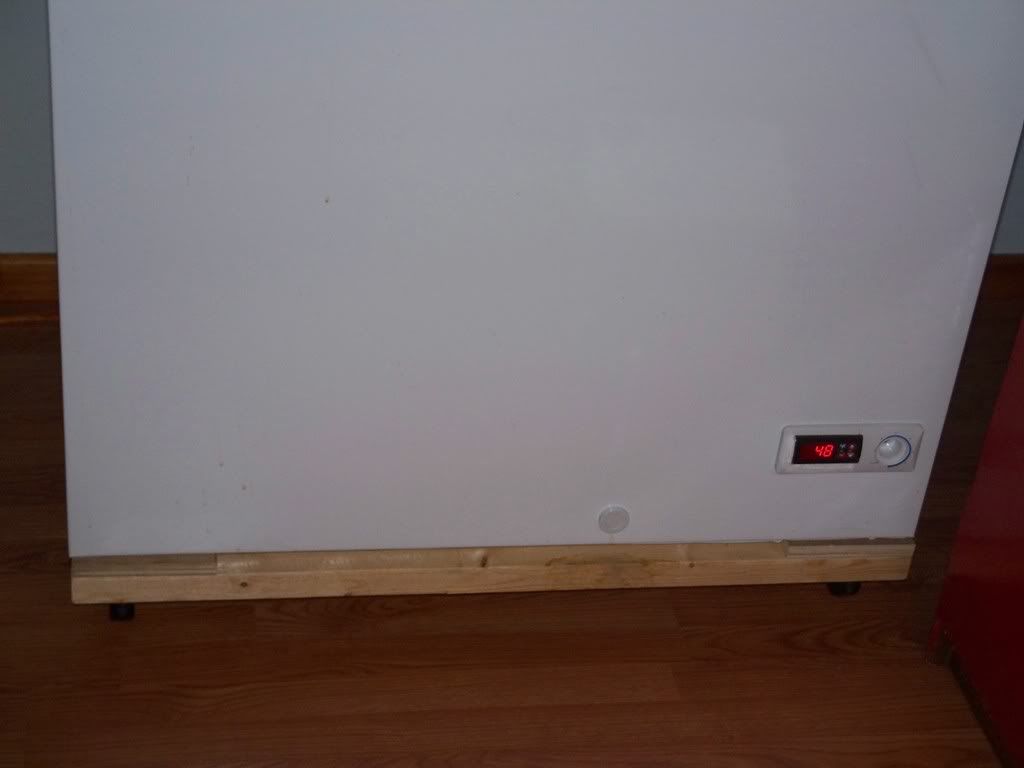
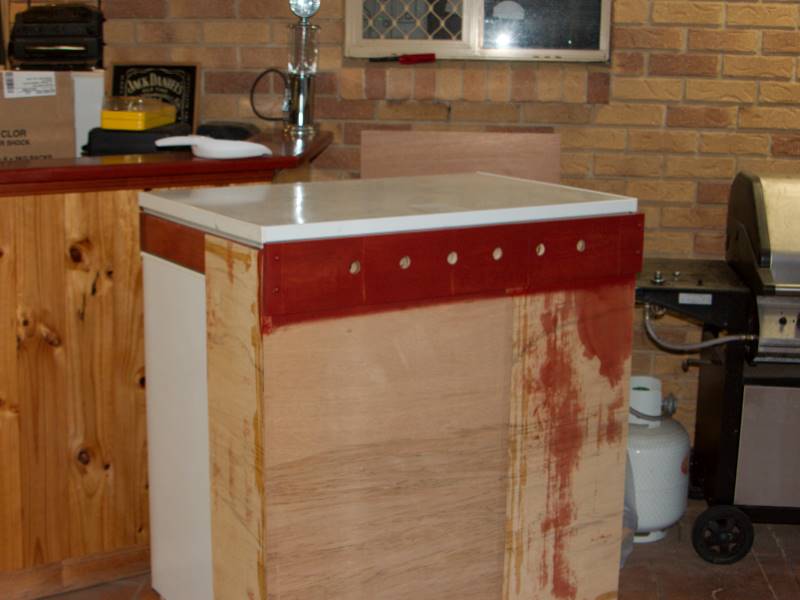
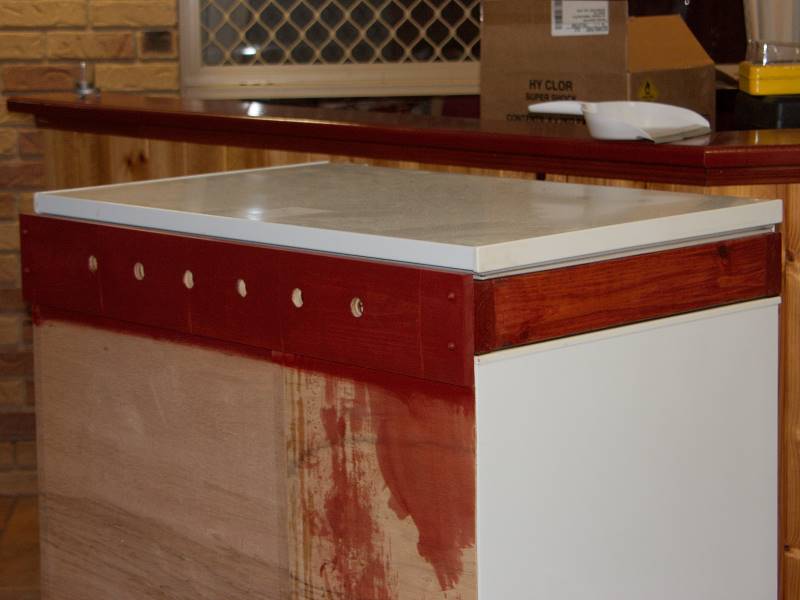
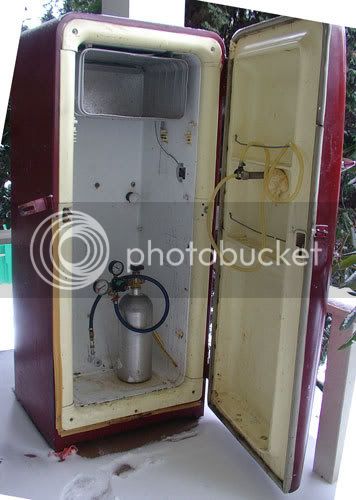
It is capable of holding 4 cornies and co2 inside. plus beer I plan on storing. The lid is heavy but not to the point where it's a big deal to load unload cornies as they float. Used a Love controller for temp mounted in place of the old one.
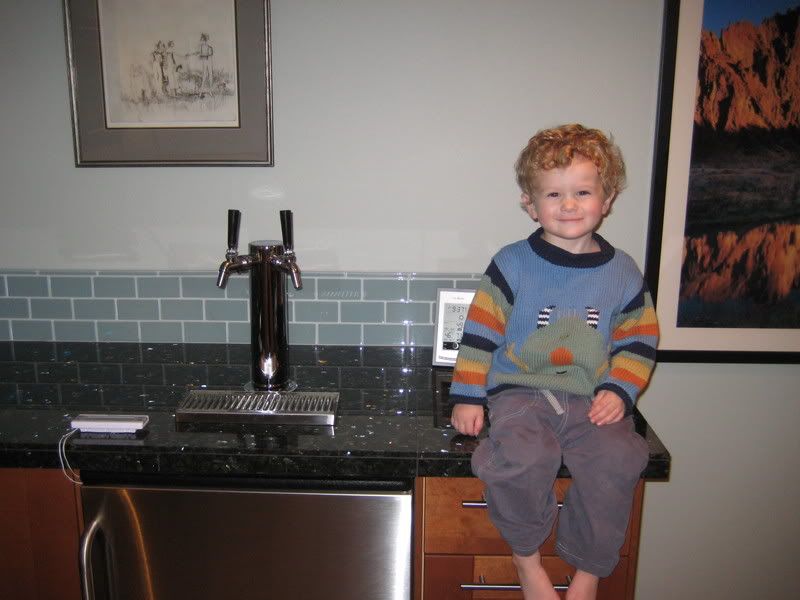
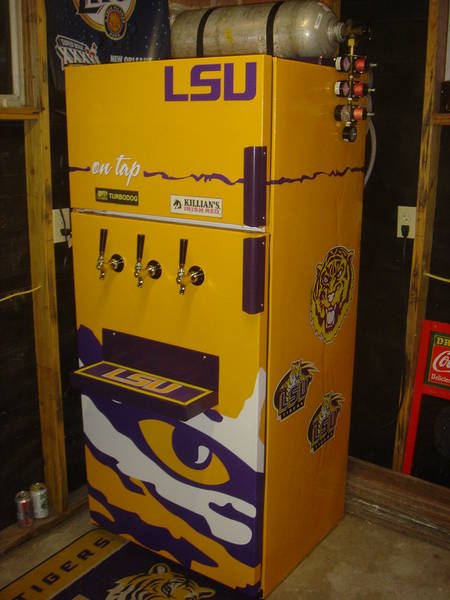
Here goes. Wow, I'm finally posting in this thread, what a day! Anyways, enough of my celebration, here are pics. The only part that really matters to this thread.

The two blue holes are for the other tap handles. Blue is just the foam showing through

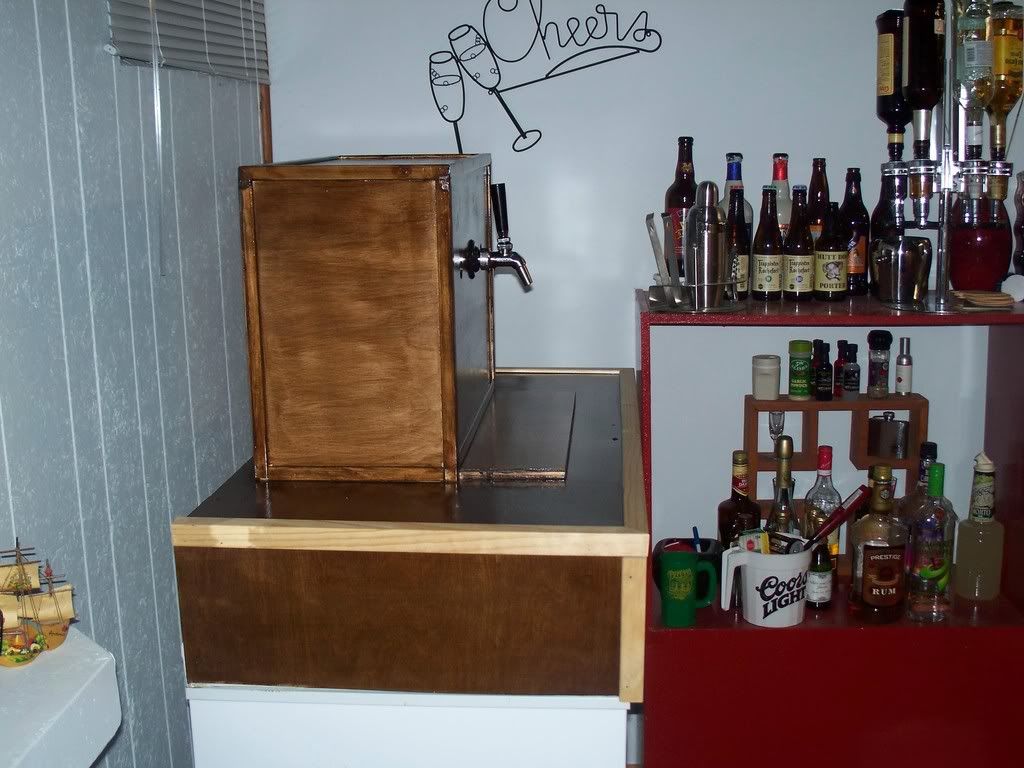
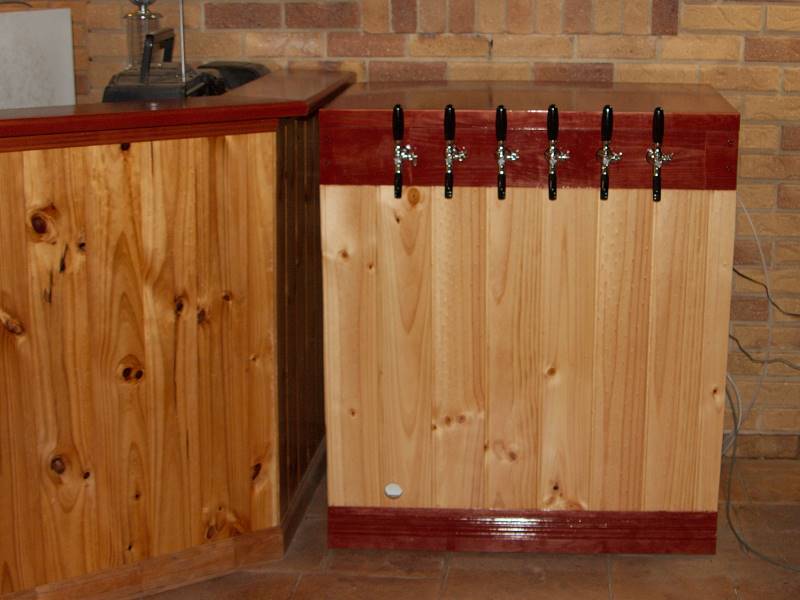
Front View with my Custom Tap Handle I got for Christmas
100_5565.jpg


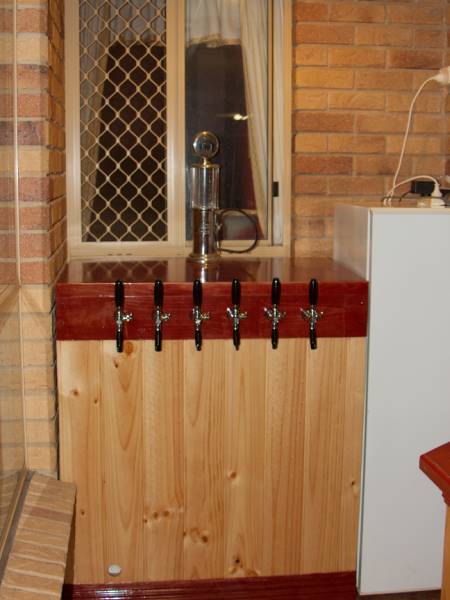
Side View showing the standard Black Plastic Tap Handle
100_5564.jpg


Love Controller
100_5563.jpg


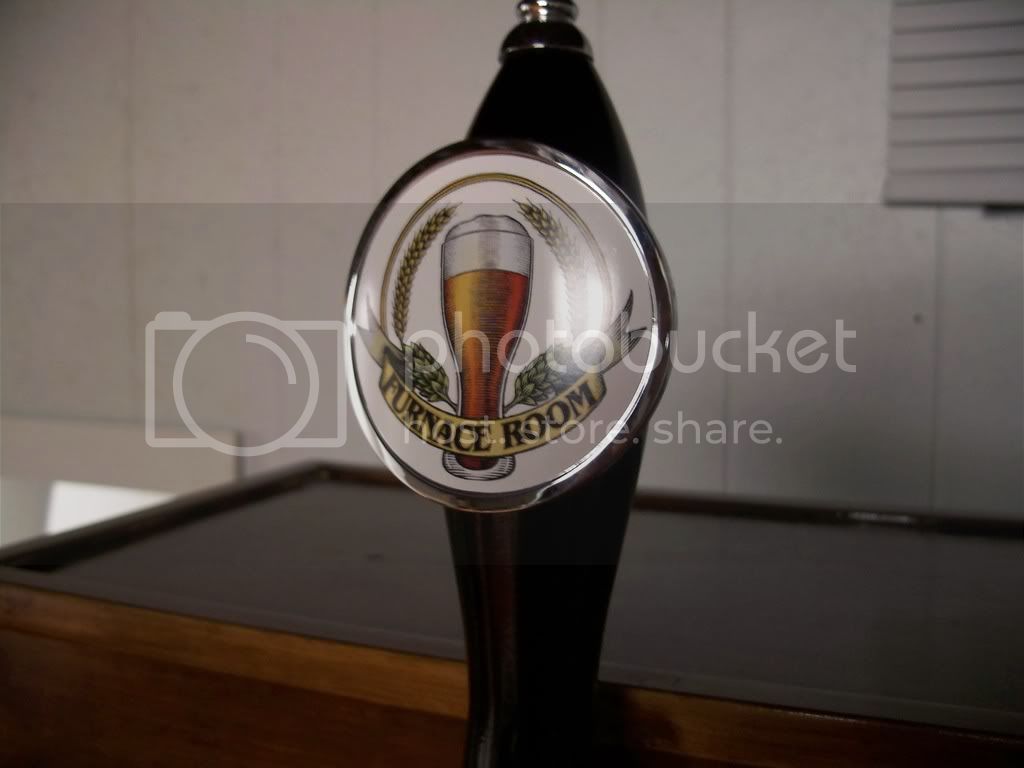
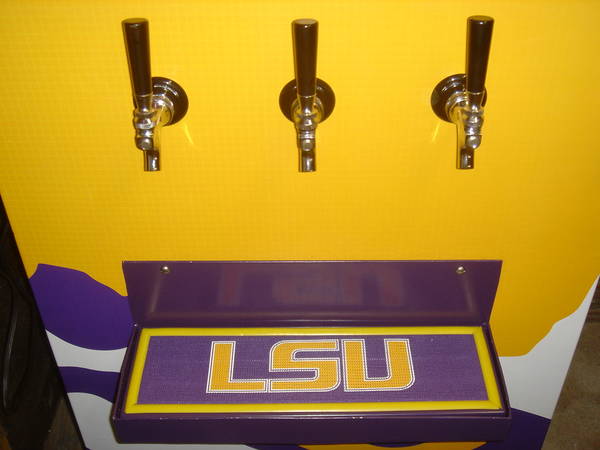
Closeup of my FR Tap Handle (Aint she purdy)
100_5567.jpg
 
I really like how you placed the love controller in the freezer, looks very professional. Mine just sits on the floor next to the freezer I need to emulate what you did.
 
Thanks. Always good to hear compliments. I just used a razor knife to cut out the size square, then adhesive to hold it in place. The bracket for the love wouldn't squeese tight enough hence the adhesive. The probe length was perfect length to go from there, behind the fridge and up into the color. although it only sticks about a foot or so down into the fridge. Doesn't seem to a problem so far. ran t kegs through with a picnick tap previously. we'll see how it goes with beer on this setup. Currently holding a modified Apfelwein for New Years Eve tonight.
 
I'm curious if anyone thinks there a market for selling a collar and tray conversion kit comprised of what you see here without the freezer, CO2 bottle/regulator, kegs and drip tray? It would sure make putting a quality kegerator together a lot easier. Could make them to suit larger freezer models with more faucets as well. What do you all think?

Thanks.

Absolutely. I want to build a collar for my freezer, but don't really have the tools or time. And I can't imagine I'm the only one who feels this way!

P.S. feel free to PM me if you're serious about doing something like that...
 
It's been a while since I logged in here..this is the only shot of the build that I could find. It's a pretty simple 2x4 frame and the freezer is supported by a smaller box at the bottom. Funny, I built it right after I bought a framing nailer, so it's held together with 3 inch nails. An admitted overkill, but I wanted to play. I did leave the gaps around, to allow for air flow. I read a lot of posts about problems with over heating and such.

As for the lid, it was pretty light and flimsy, so I've beefed it up, added some wheels to make it easier to move, and plan to add a 3rd tap to my tower. All in all, it's not too heavy and easy enough to open and close.
IMG_1825.jpg
 
Absolutely. I want to build a collar for my freezer, but don't really have the tools or time. And I can't imagine I'm the only one who feels this way!

P.S. feel free to PM me if you're serious about doing something like that...

I appreciate the encouragement from everyone who has responded to my post back on page 61 of this thread. I am in the early stages of mass producing a chest freezer kegerator conversion kit. The Holiday 5.3 cu ft version will be the initial offering, essentially as you see it. I'll be glad to keep you all posted when I can share more information.
 
Hi guys,

I am only new to home brewing (been brewing spirits only up until until 8 weeks ago) but am very enthusiastic!

Ok.. So I might have got a little carried away...

Criteria 1: Must be on wheels to move around easy.
Criteria 2: Must look like it was meant to be there.
Criteria 3: Must not look like a chest freezer at all!
Criteria 4: Must not damage the chest freezer in any way! (This was my wifes demand).
Criteria 5: Must be able to drain using the drainage plug.


So... Here is my new setup. I finished it last night.

2009_01_02_1918.jpg


2009_01_02_1925.jpg


2009_01_02_1921.jpg


2009_01_02_1929.jpg
 
Holly smokes... that looks like Furniture!!! Dang nice job!!. The wife must be happy!
 
i thought you had to be careful about putting siding or other such things on keezers since air had to pass along the outside for heat exchange, or am i wrong?
 
i thought you had to be careful about putting siding or other such things on keezers since air had to pass along the outside for heat exchange, or am i wrong?

The panneling is mainly on the front with a slight bit on the left to stiffen up the front. The air vents for the compressor are on the right and have not been blocked.

Here are some more pictures to give a better idea:

2008_12_27_1893.jpg

The front has thin ply sheet draped down from the collar so I did not have to damage the freezer. The left side has a piece to hold the ply rigid.

2008_12_27_1895.jpg

The right side has nothing. (the ply was also my work bench cover for staining and so forth. It did not need to look pretty.

2008_12_30_1909.jpg

You can see the vent holes for the compressor.

2008_12_30_1913.jpg

All panels were glued on to the ply. This makes for easy removal if necessary (not that it will ever happen!!)

So far I have had no problems with heat.. Time will tell though. The spot where it sits has a small gap down the side which I hope is enough! There is also a big hole at the back and I have left quite a bit of clearance at the back for ventilation.
 
This is my new 3 tap LSU kegerator that I just finished building. I bought the fridge for $20 off Craigslist. It had been poorly spray painted, so I wrapped the entire fridge with graphics. The drip tray was welded out of 1/8" aluminum, and features a removable printed mesh insert. I removed the interior door panel and replaced it with a piece of plastic sheeting to free up more space inside the fridge. The drip tray drains into a Tide bottle (perfect fit.)

showphoto.php


showphoto.php


showphoto.php


showphoto.php
 
This is my new 3 tap LSU kegerator that I just finished building. I bought the fridge for $20 off Craigslist. It had been poorly spray painted, so I wrapped the entire fridge with graphics. The drip tray was welded out of 1/8" aluminum, and features a removable printed mesh insert. I removed the interior door panel and replaced it with a piece of plastic sheeting to free up more space inside the fridge. The drip tray drains into a Tide bottle (perfect fit.)


DSC08508.JPG


DSC08506.JPG


DSC08505.JPG


DSC08484.JPG
 
Very nice! Mine looks like a turd compared to it.

Can you lay a CO2 bottle down like that? I thought the liquid CO2 would run into and ruin the regulators.

DSC08508.JPG
 
i'm the new proud caretaker of this old gem. she's in the kitchen now awaiting her makeover. not too pretty right now. i'll clean her up as best as i can, replace the lines, put on a different tap handle, might screw on a driptray -- not sure if i want to mess up her svelte figure.

i had intended to build one originally, so i have a bunch of extra parts, so i may end up swapping out the tap, although the one that's on there now should clean up just fine. i also have a temp regulator that might help her out.

the guy i bought it from had it for 15 years and used it lovingly (and frequently from what i can tell). it came with the co2/regulator and extra tap handles and commercial taps too, including one for Guinness (as well as the Guinness handle!).

here's the new queen of the house:

kegerator1.jpg


kegerator2.jpg


:)
 
Well I have been using it for about 2 weeks now like that with no problems, but after doing a little research online, it does appear that you are not supposed to operate a regulator with the CO2 tank sideways. I will have to make some modifications to it. Thank you for bringing that to my attention.


Very nice! Mine looks like a turd compared to it.

Can you lay a CO2 bottle down like that? I thought the liquid CO2 would run into and ruin the regulators.

DSC08508.JPG
 
I saw your SCORE post (you still suck btw); I can't wait to see this finished- Keep posting!
 
Back
Top