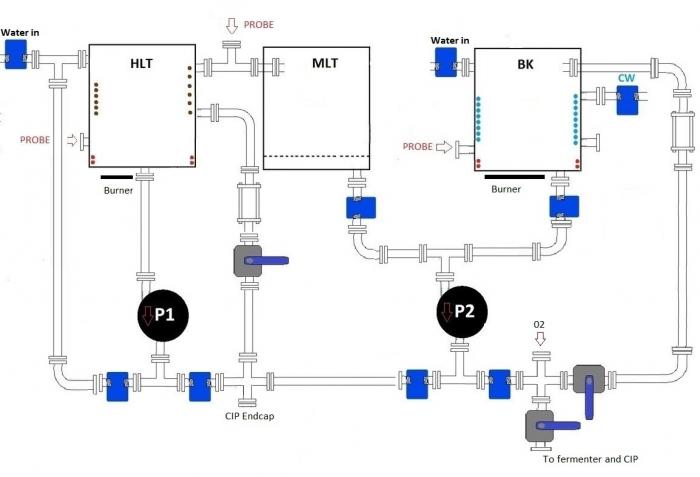
My insane 25 Gal, 100 Percent Hard Plumbed Tri-Clover, Automated Tippy Build

Homebrew Talk - Beer, Wine, Mead, & Cider Brewing Discussion Forum

Help Support Homebrew Talk - Beer, Wine, Mead, & Cider Brewing Discussion Forum:

This site may earn a commission from merchant affiliate links, including eBay, Amazon, and others.

kickflip_mj

Well-Known Member
Joined
Jan 8, 2008
Messages
1,116
Reaction score
120
First off I could not stand keeping this a secret for any longer.

A little back ground: I have been brewing for about 9 years now, don’t tell the authorities because I was only 18 when I started. I jumped into AG a year later. Then someone on HBT inspired me to build my first partially AG automated rig, which consisted of a few love controllers, welded stand and 5 gal pots, pump, two burners and a separate HEX. This was pretty impressive for my first stand. It took me two years to build and, I had it all the way through college. To say the least my friends loved all the beer on tap.

The perfectionist that I am started to show its true colors when I kept finding the smallest flaws in what many would consider a perfect rig. Little things such as copper piping, cleaning, and not all fittings were welded, amateur automation, etc. So I started dreaming up a build that would become the build of all builds. Except for a few that we all know.

What I wanted:
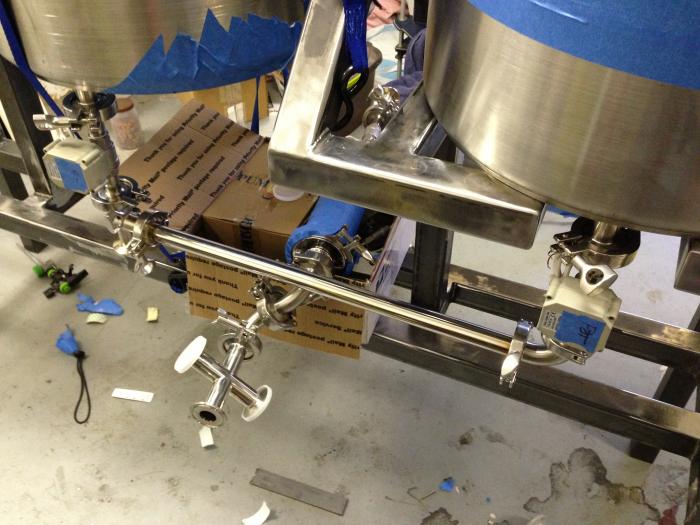
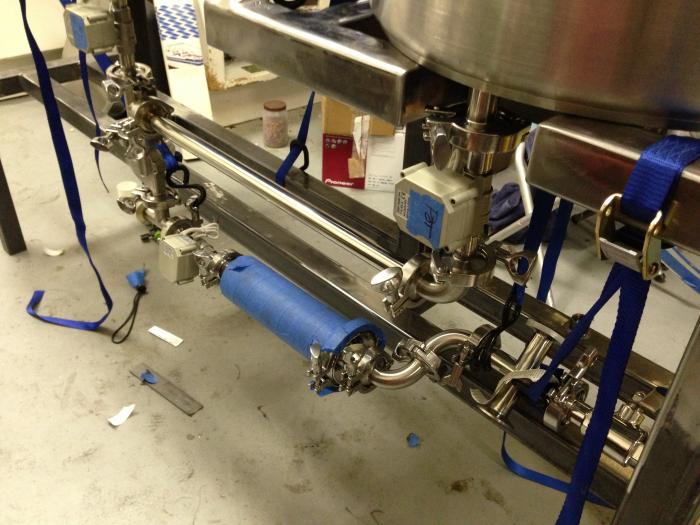
Hard plumbed Tri clovers
Auto Valves
Stainless Pumps
Sight Glasses
3X 26 gal pots
HEX
Almost 90 percent automated
Tippy Dump
Volume measurement
CIP with separate pump and filter
Bottom Draining tanks
Hard plumbed water and filters
O2 tank
Probably run brewtroller with Beagle bone Black
The list goes on and on

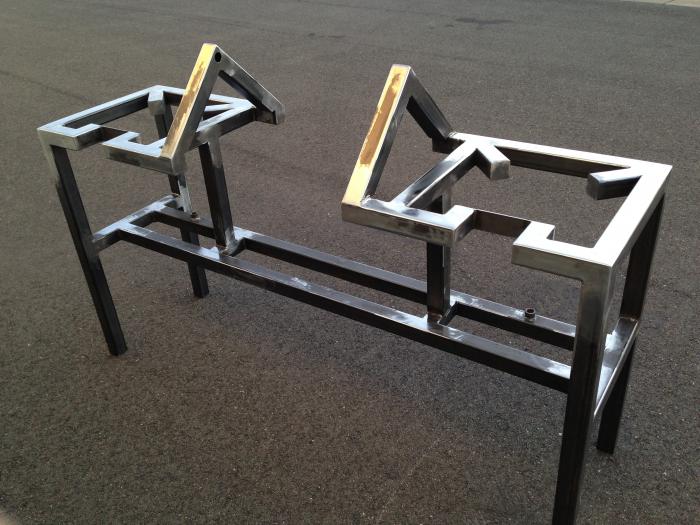
I went out and Purchased a Mig welder and later purchased a tig
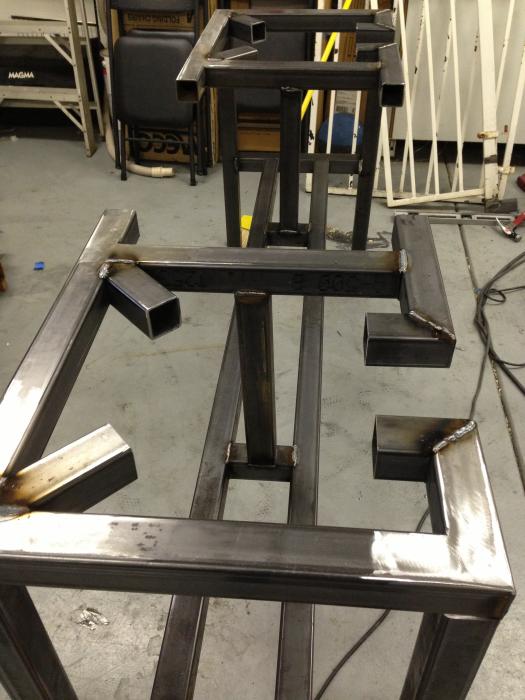
image (8).jpg


image (9).jpg


image.jpg


image (7).jpg


image (2).jpg
 
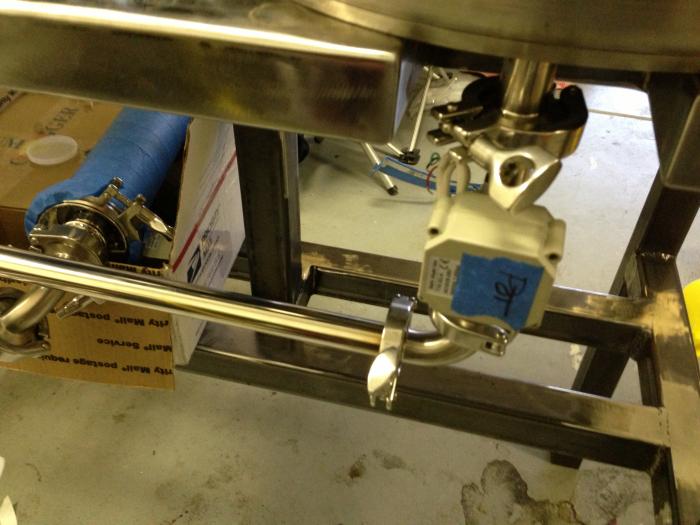
Mash tun, Pump Head, Brewers hardware inline filter, to Whirlpool return

image (4).jpg
 
Hopefully this week I should have more parts TC clamps so I can continue, Kinda at a stand still. Brewers Hardware has been amazing with this build. Putting up with an order a week.lol
 
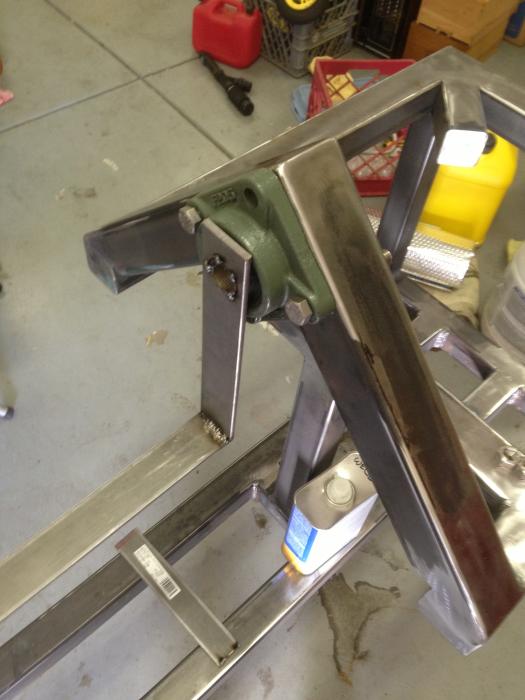
Pray tell--what is that greenish rotating devive you are using for the tippy dump? Could be the key to a relatively easy conversion :)
 
Go big or go home!

Nice build, dude.

One thing, are those tippy dump joints relatively heat resistant? Looks like greased zerks that could leak all over the place when heated up?

I've never heard of the tippy dump before but looks cool. I use an overhead hoist to grab the spent out mash tun and put it on a hand truck for removal. Anyway, nice going on the build,

Best,
 
Peter,

those valves are the same ones they carry on brewtrollers site except I ordered them from china.
 
Radical and Northcal,
those are pillow blocks, i got them off amazon for 12 bucks and cut them down. Basically just large bearings. I'm not concerned about them not being oiled. I just want them to spin so I can tip my mash tun over and dump my spent grains into a trash can. They system is highly over engineered so can move up to 55 gal tanks at some point.
 
Posterguy, you can't expect it to be easy to clean. That's why I am going with spray balls in every tank and a 60+psi pump at the bottom of the stand. Makes for easy cleaning after the mash tun is empty
 
The parts list is almost non existent because of how expensive and how many connections there are, when I get done with some stuff I will start.
 
Ok something you guys can help me with... How do I connect a stainless endcap to copper CFC after I drill it out? Silver Solder, Braze?
 
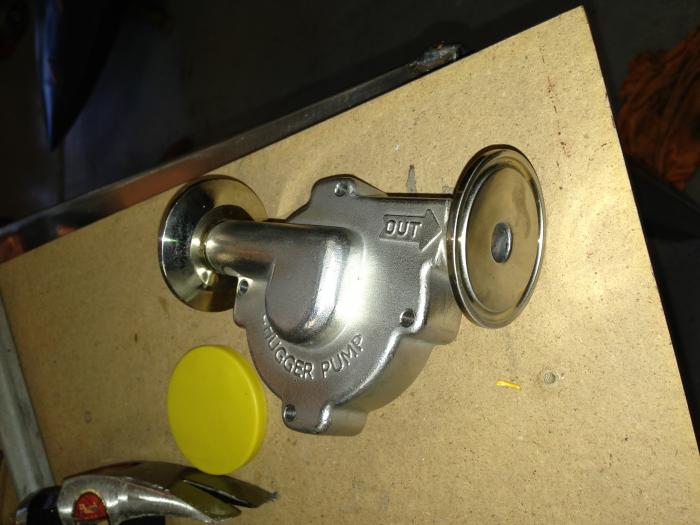
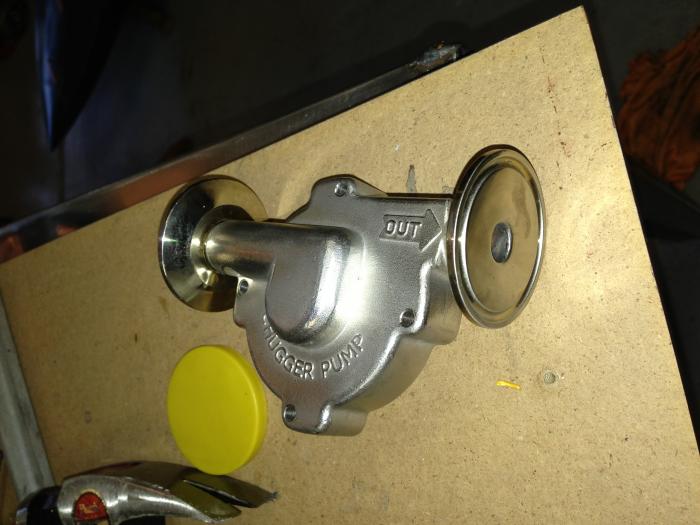
Details on the modified chugger pump head? Is it welded drilled and tapped for NPT tri-clamp fittings?
 
Details on the modified chugger pump head? Is it welded drilled and tapped for NPT tri-clamp fittings?

I just welded two tri clamp end caps onto a center inlet chugger head for a HBT member and it ended up looking similar to this one. The owner drilled the holes in the end caps, removed the threads on the ends of the ports, and I welded and ground the faces of the end caps.
 
Kev is right, I took two end caps, drilled a 3/8ths hole through them using a hole saw and lots of oil. Cut half the threads off both sides, ground down for a snug fit and then tig welded the flange, then smoothed it out.
 
Loving it man! Nice work! Garage should be stitched up next week and I can get back to finishing my crazy project.
 
Yeah bean I want to say 72" by 22"? Would you like the actual frame plans?
 
kickflip_mj said:
The parts list is almost non existent because of how expensive and how many connections there are, when I get done with some stuff I will start.

Yeah i can imagine... I only ask because someday i want to build the ultimate set up my self and i like what you got going on. I will be following until the end!
 
Stainless brewing, I will definitely need a coil from you and two special order dip tubes. We are all winning here.lol
 
I'm getting ready to build a stand for myself and ditch the turkey fryer. It's got the job done for years but it takes forever to set things up and I just don't have the time anymore. Where did you come up with the stand design? Did you design it yourself?
 
I spent about a month just designing the plumbing and piping layout, to work with the frame. A design like this cant just work with a basic frame and work the plumbing around it. On top of it everything had to flow right, and take account volume losses in certain stages of brewing. When you add a filter inline, you worry about priming, or you worry about clogs. etc. Then you have the CIP that takes some serious thought to get it to drain properly.

When I set out to design this stand I wanted to take away a lot of the hands on approach when brewing. I don't like the idea of having to watch something for 6 hours and cleaning the whole time. Brewtroller and Raspberry Pi should help with this, and maybe some engineers I know.

I work from home, but that doesn't mean Im not insanely busy. I wanted a design and stand that I could monitor off my computer/ ipad. Set the mash temps, walk downstairs, mash in and let the rig carry on from their, hopefully all the way to the chilling phase. Ideally having a hop dropper would be integrated.
 
Back
Top