You are using an out of date browser. It may not display this or other websites correctly.
You should upgrade or use an alternative browser.
You should upgrade or use an alternative browser.
Vintage 1954 Frigidaire Kegerator Build
- Thread starter schmidty65
- Start date

Help Support Homebrew Talk - Beer, Wine, Mead, & Cider Brewing Discussion Forum:
This site may earn a commission from merchant affiliate
links, including eBay, Amazon, and others.
carlisle_bob
Well-Known Member
a nice 50's gold pinstripe about 3/8" wide would be great between the white/blue border
Hi
Gold, silver or maybe black with a few red threads in it....
If the boundary gets covered in chrome, don't sweat it. If not then you need to work something out.
Bob
OP
OP
Today is a good day.
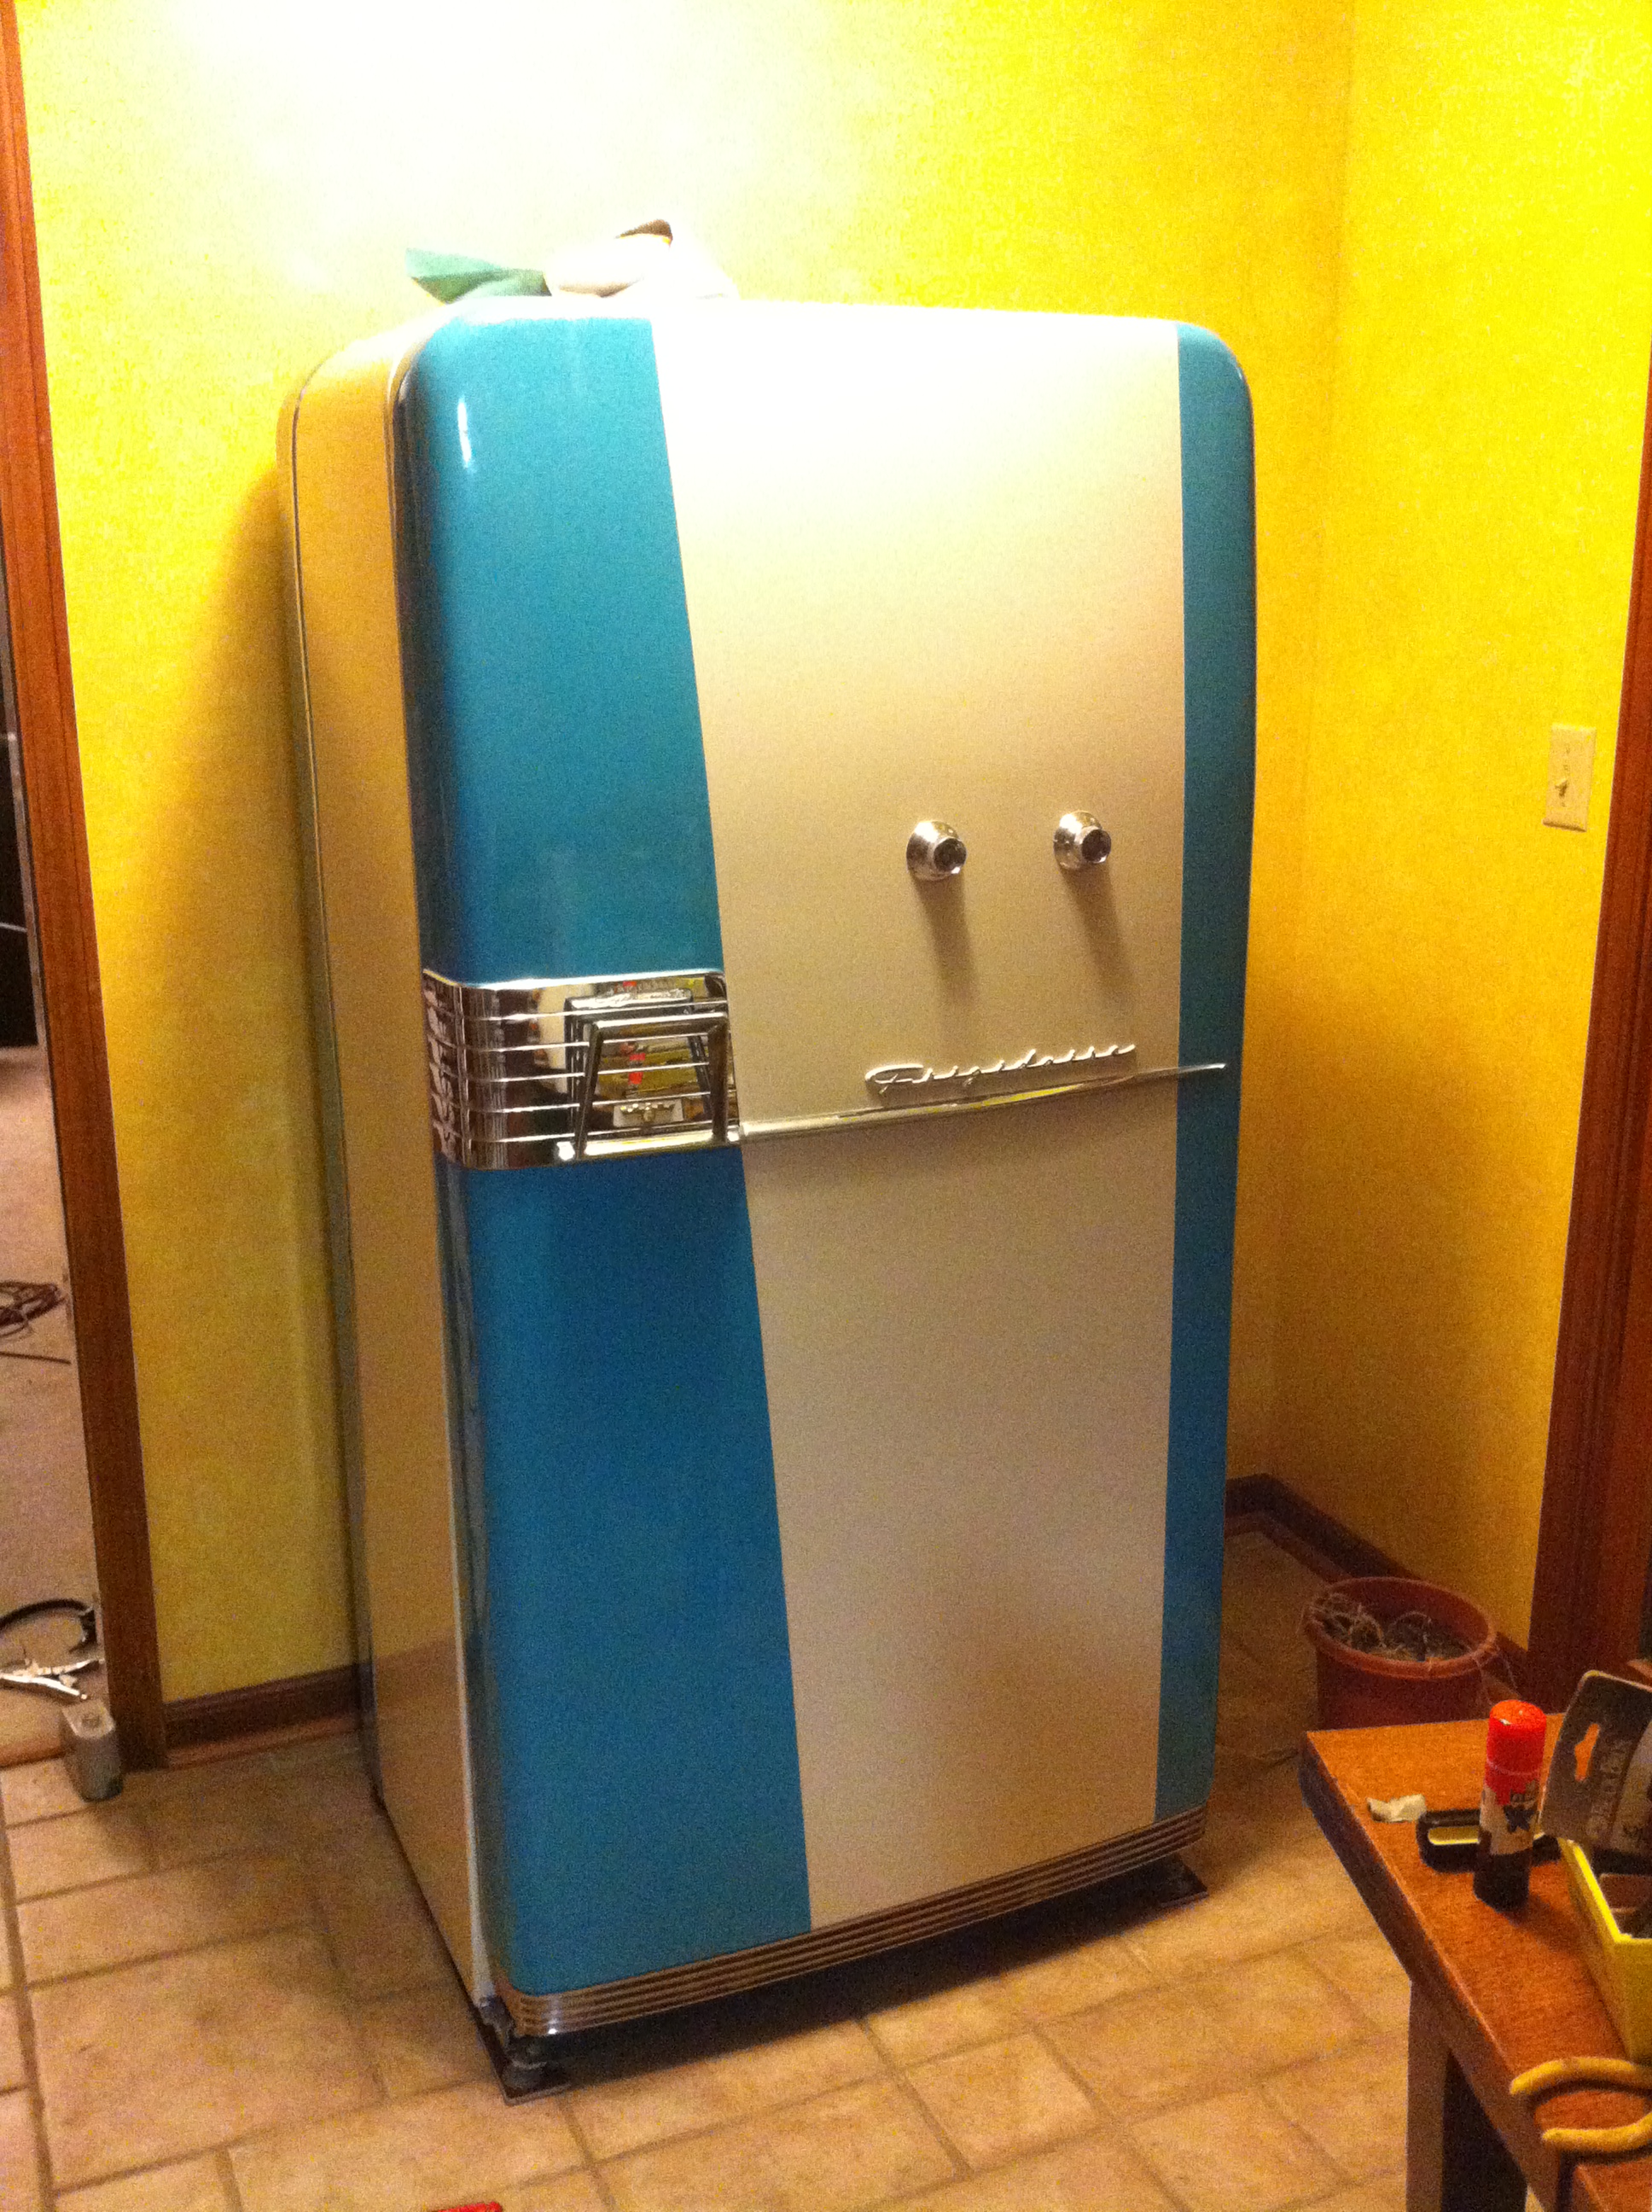
I decided to try to soften out the slight remaining tape marks in the off-white appliance enamel, so I took some 2000 grit and wet sanded until it smoothed out. Since that dulled the finish there, I went ahead and wet sanded the whole thing with 2000 grit, followed by Meguiar's Machine Glaze on a 6" foam polishing pad attached to my trusty Makita (bought it in college, and it's still cranking away. But I digress...).
Here is the door after buffing and wiping off the film:

... and a view to enjoy the shine ...

Here's a similar shot along the side of the fridge body:
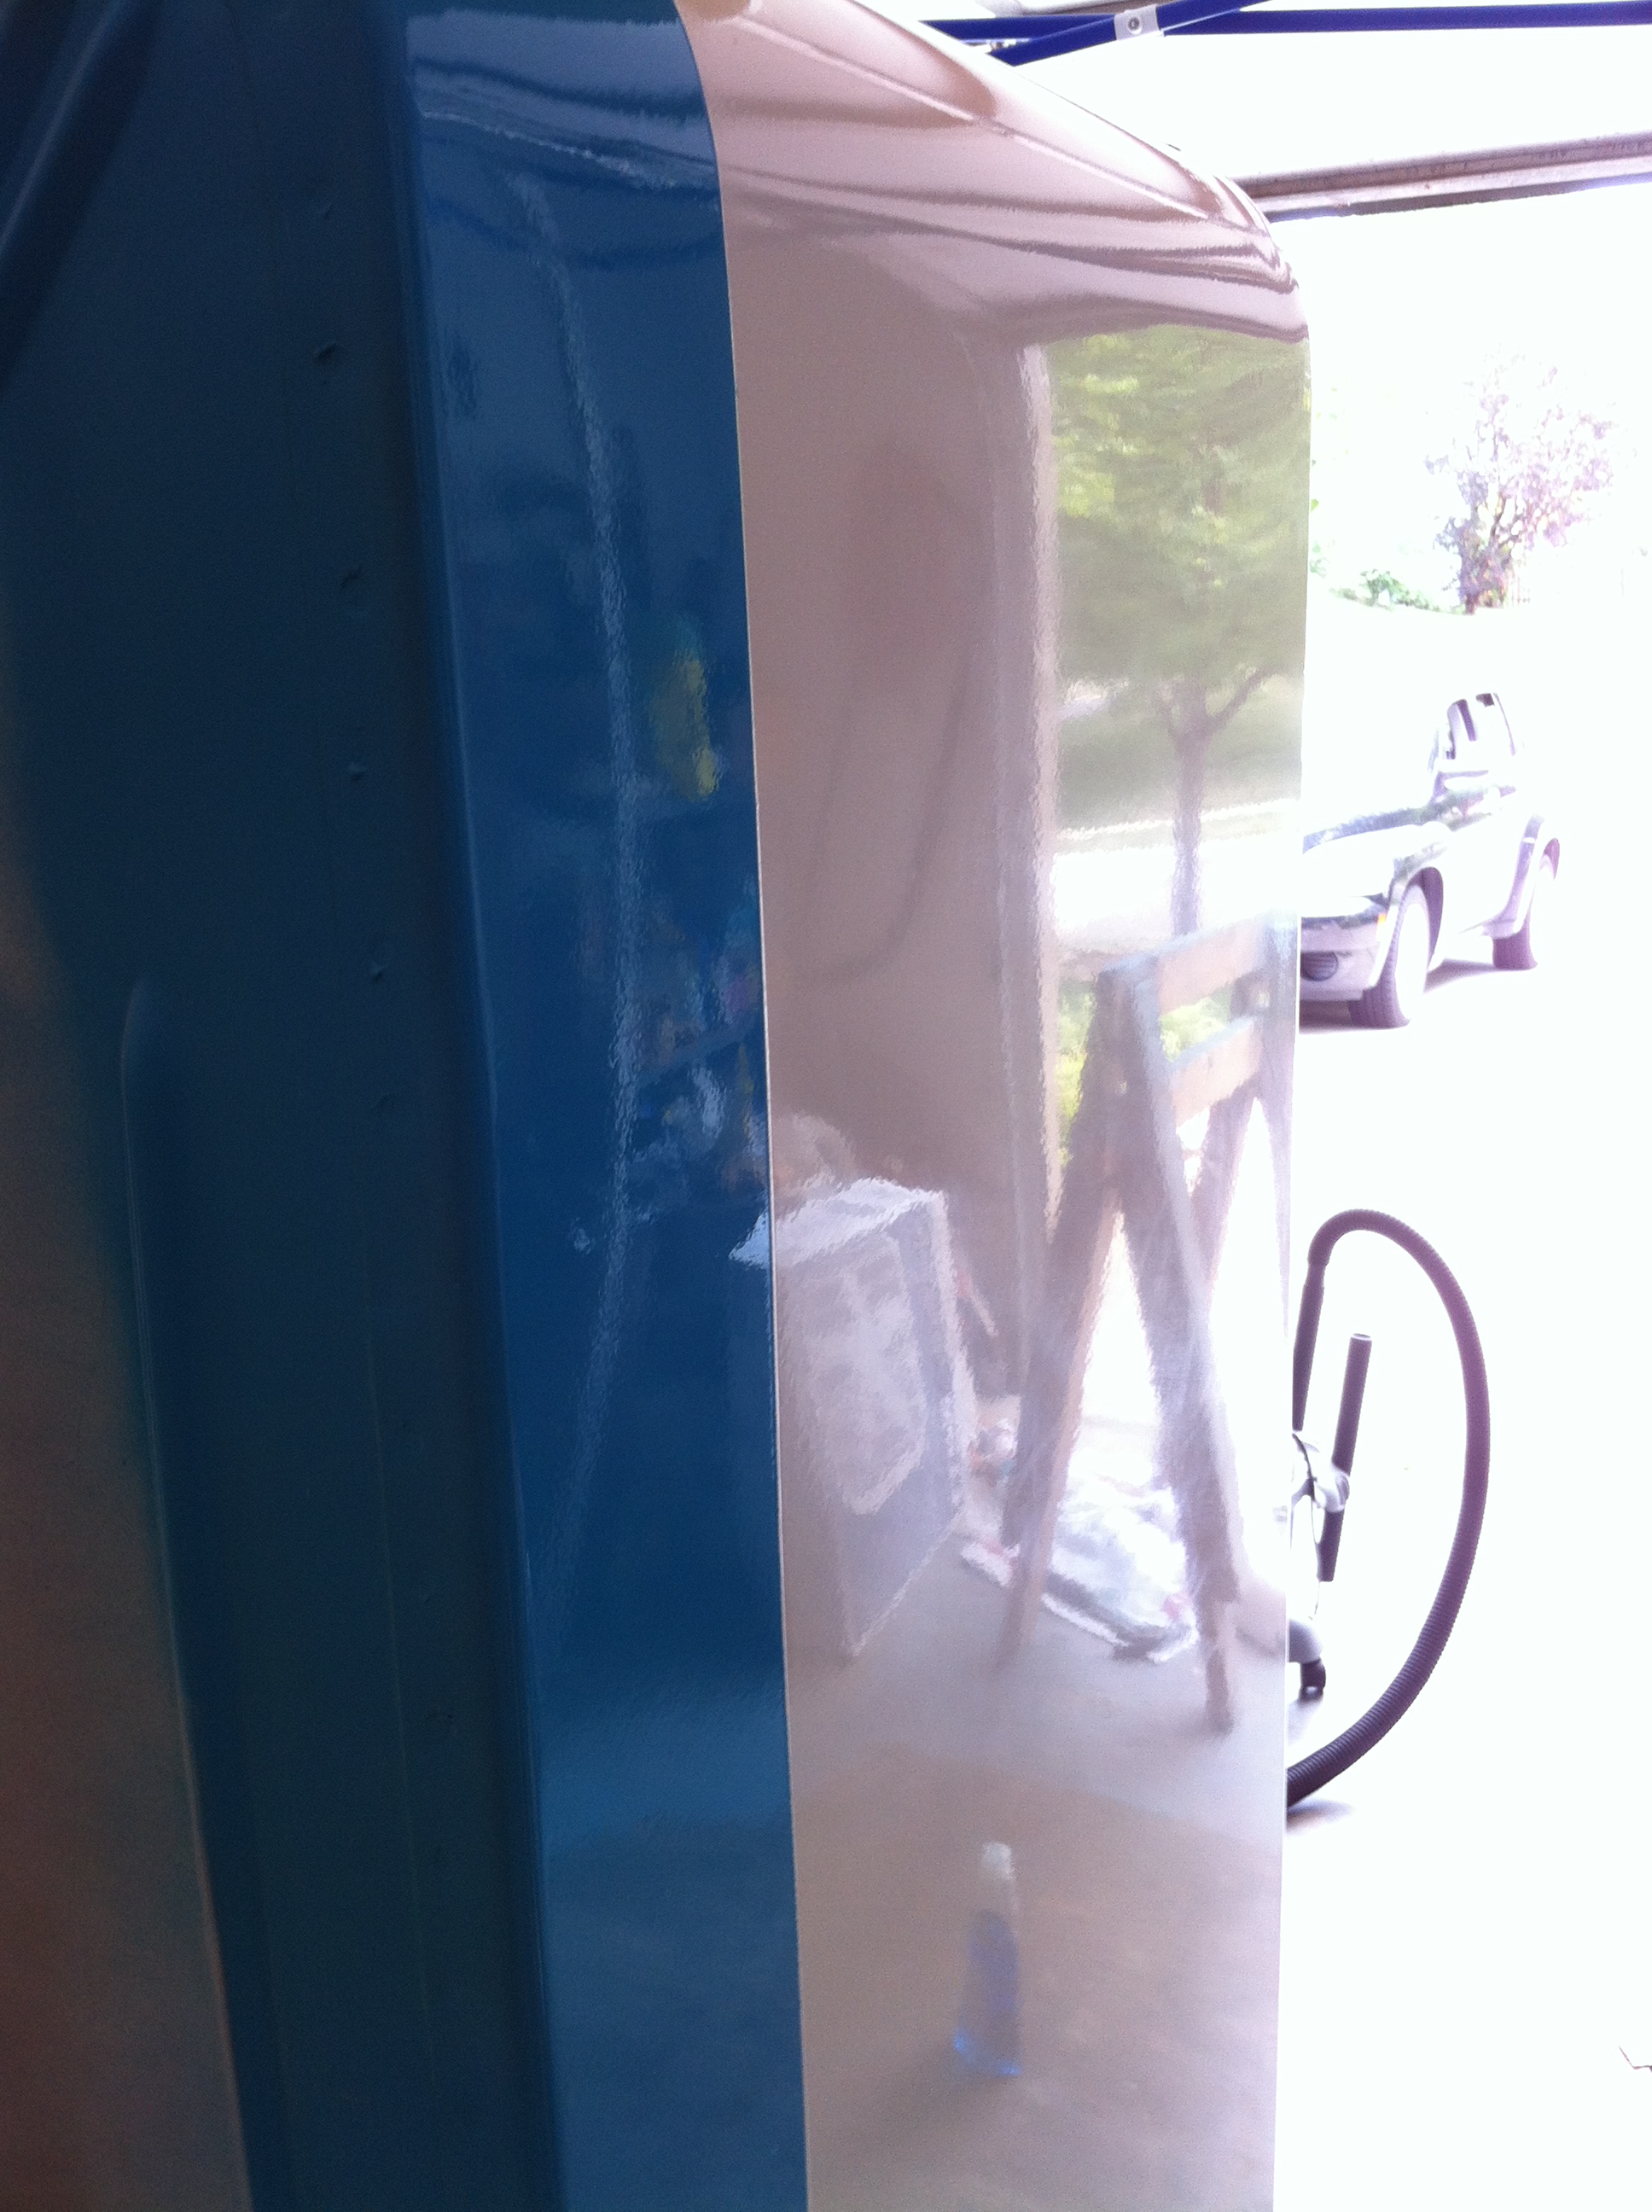
There are still a few spots where the tape marks show but they're close enough to the boundary that's going to have chrome that they're a non-issue. Plus, I didn't want to risk going too deep and through the paint.
SO: I flipped on the TV as I'm posting this and Chitty Chitty Bang Bang is on. This song is playing: "From the ashes of disaster, grow the roses of success." Fitting, I think.
(and shut up; it's a classic.) :fro:
I deem painting DONE!
Time to go brew my Cream Ale.
I decided to try to soften out the slight remaining tape marks in the off-white appliance enamel, so I took some 2000 grit and wet sanded until it smoothed out. Since that dulled the finish there, I went ahead and wet sanded the whole thing with 2000 grit, followed by Meguiar's Machine Glaze on a 6" foam polishing pad attached to my trusty Makita (bought it in college, and it's still cranking away. But I digress...).
Here is the door after buffing and wiping off the film:
... and a view to enjoy the shine ...
Here's a similar shot along the side of the fridge body:
There are still a few spots where the tape marks show but they're close enough to the boundary that's going to have chrome that they're a non-issue. Plus, I didn't want to risk going too deep and through the paint.
SO: I flipped on the TV as I'm posting this and Chitty Chitty Bang Bang is on. This song is playing: "From the ashes of disaster, grow the roses of success." Fitting, I think.
(and shut up; it's a classic.) :fro:
I deem painting DONE!
Time to go brew my Cream Ale.
carlisle_bob
Well-Known Member
Hi
Boy that looks good !!!
You sure you don't want to put at least one clear coat over the whole thing?
Yea, I know it's *wonderful* to say "I'm done with the spray paint". I'd love to get my garage back as well. Maybe someday. I's 11AM so back to the fresh ground coffee ...
Bob
Boy that looks good !!!
You sure you don't want to put at least one clear coat over the whole thing?
Yea, I know it's *wonderful* to say "I'm done with the spray paint". I'd love to get my garage back as well. Maybe someday. I's 11AM so back to the fresh ground coffee ...
Bob
OP
OP
Lol, I hear you, Bob.You sure you don't want to put at least one clear coat over the whole thing?
Yea, I know it's *wonderful* to say "I'm done with the spray paint". I'd love to get my garage back as well. Maybe someday. I's 11AM so back to the fresh ground coffee ...
I'm going to go with the extra strength in the appliance epoxy enamel I've encountered in the past, coupled with my knowledge of myself (the more I over-work something past a certain point, the more I start to mess it up), and call it good. I'd have to wait 3 or 4 more days to put that final coat on anyway (can't re-coat the appliance epoxy until after a week if you don't do it within 1/2 hour), and then I'd need to rough everything back up, apply, and then re-buff everything. I've also decided that I don't want to get it to where I'm afraid for anybody to touch it--since it will be the cause of its own scuffing, etc (dispensing the substance that impairs the users' judgement)...
But we'll see.
")
So here's a new poser for you guys out there. Since I removed the butter conditioner, I now have a potential source of electricity in the door. I was going to just cap off the ends and reserve in case I or someone else ever wanted to take it back to 'before', but just for fun, any thoughts on a use for that? Example: connecting it to a micro-strip of LED lights that attach to the underside of the door, thus lighting the floor and the base shoe of the fridge...
Ready, go...
rockinmarty
Big Member
I do love highly polished chrome:rockin:
carlisle_bob
Well-Known Member
Hi
I think you want to wait a bit before you clear coat regardless of what the paint says on the label. The last thing in the world you want to discover is that you have a "special case" and everything has run all together....
Bob
.... who just put down another coat about 4 hours early.. do as I say / not as I do.
OP
OP
As is, I still can't find a tray I like the look of. They are all so... square. I might end up having to cut a stainless mixing bowl in half to fabricate a drip tray. If you have any luck finding something that looks good, please share!
Hey Kerber--I'm working up a tweak on my drip tray. I'm going to keep it quiet for now, in case I don't like how it turns out, but stay tuned.
OP
OP
OK; after some time to let the paint try and cure, etc., and beginning the build for The King and I set (I knew that was going to get in my way, hence my rush earlier), I started re-assembling this beast.
First, I needed to drill the holes for the shanks in the inner door panel. To try and figure out the best way to do this without tilting the drill, I opted to trace the shanks on the back of a piece of tape:

Then I rolled up a little piece of tape, just to stick it on the end of the shank:
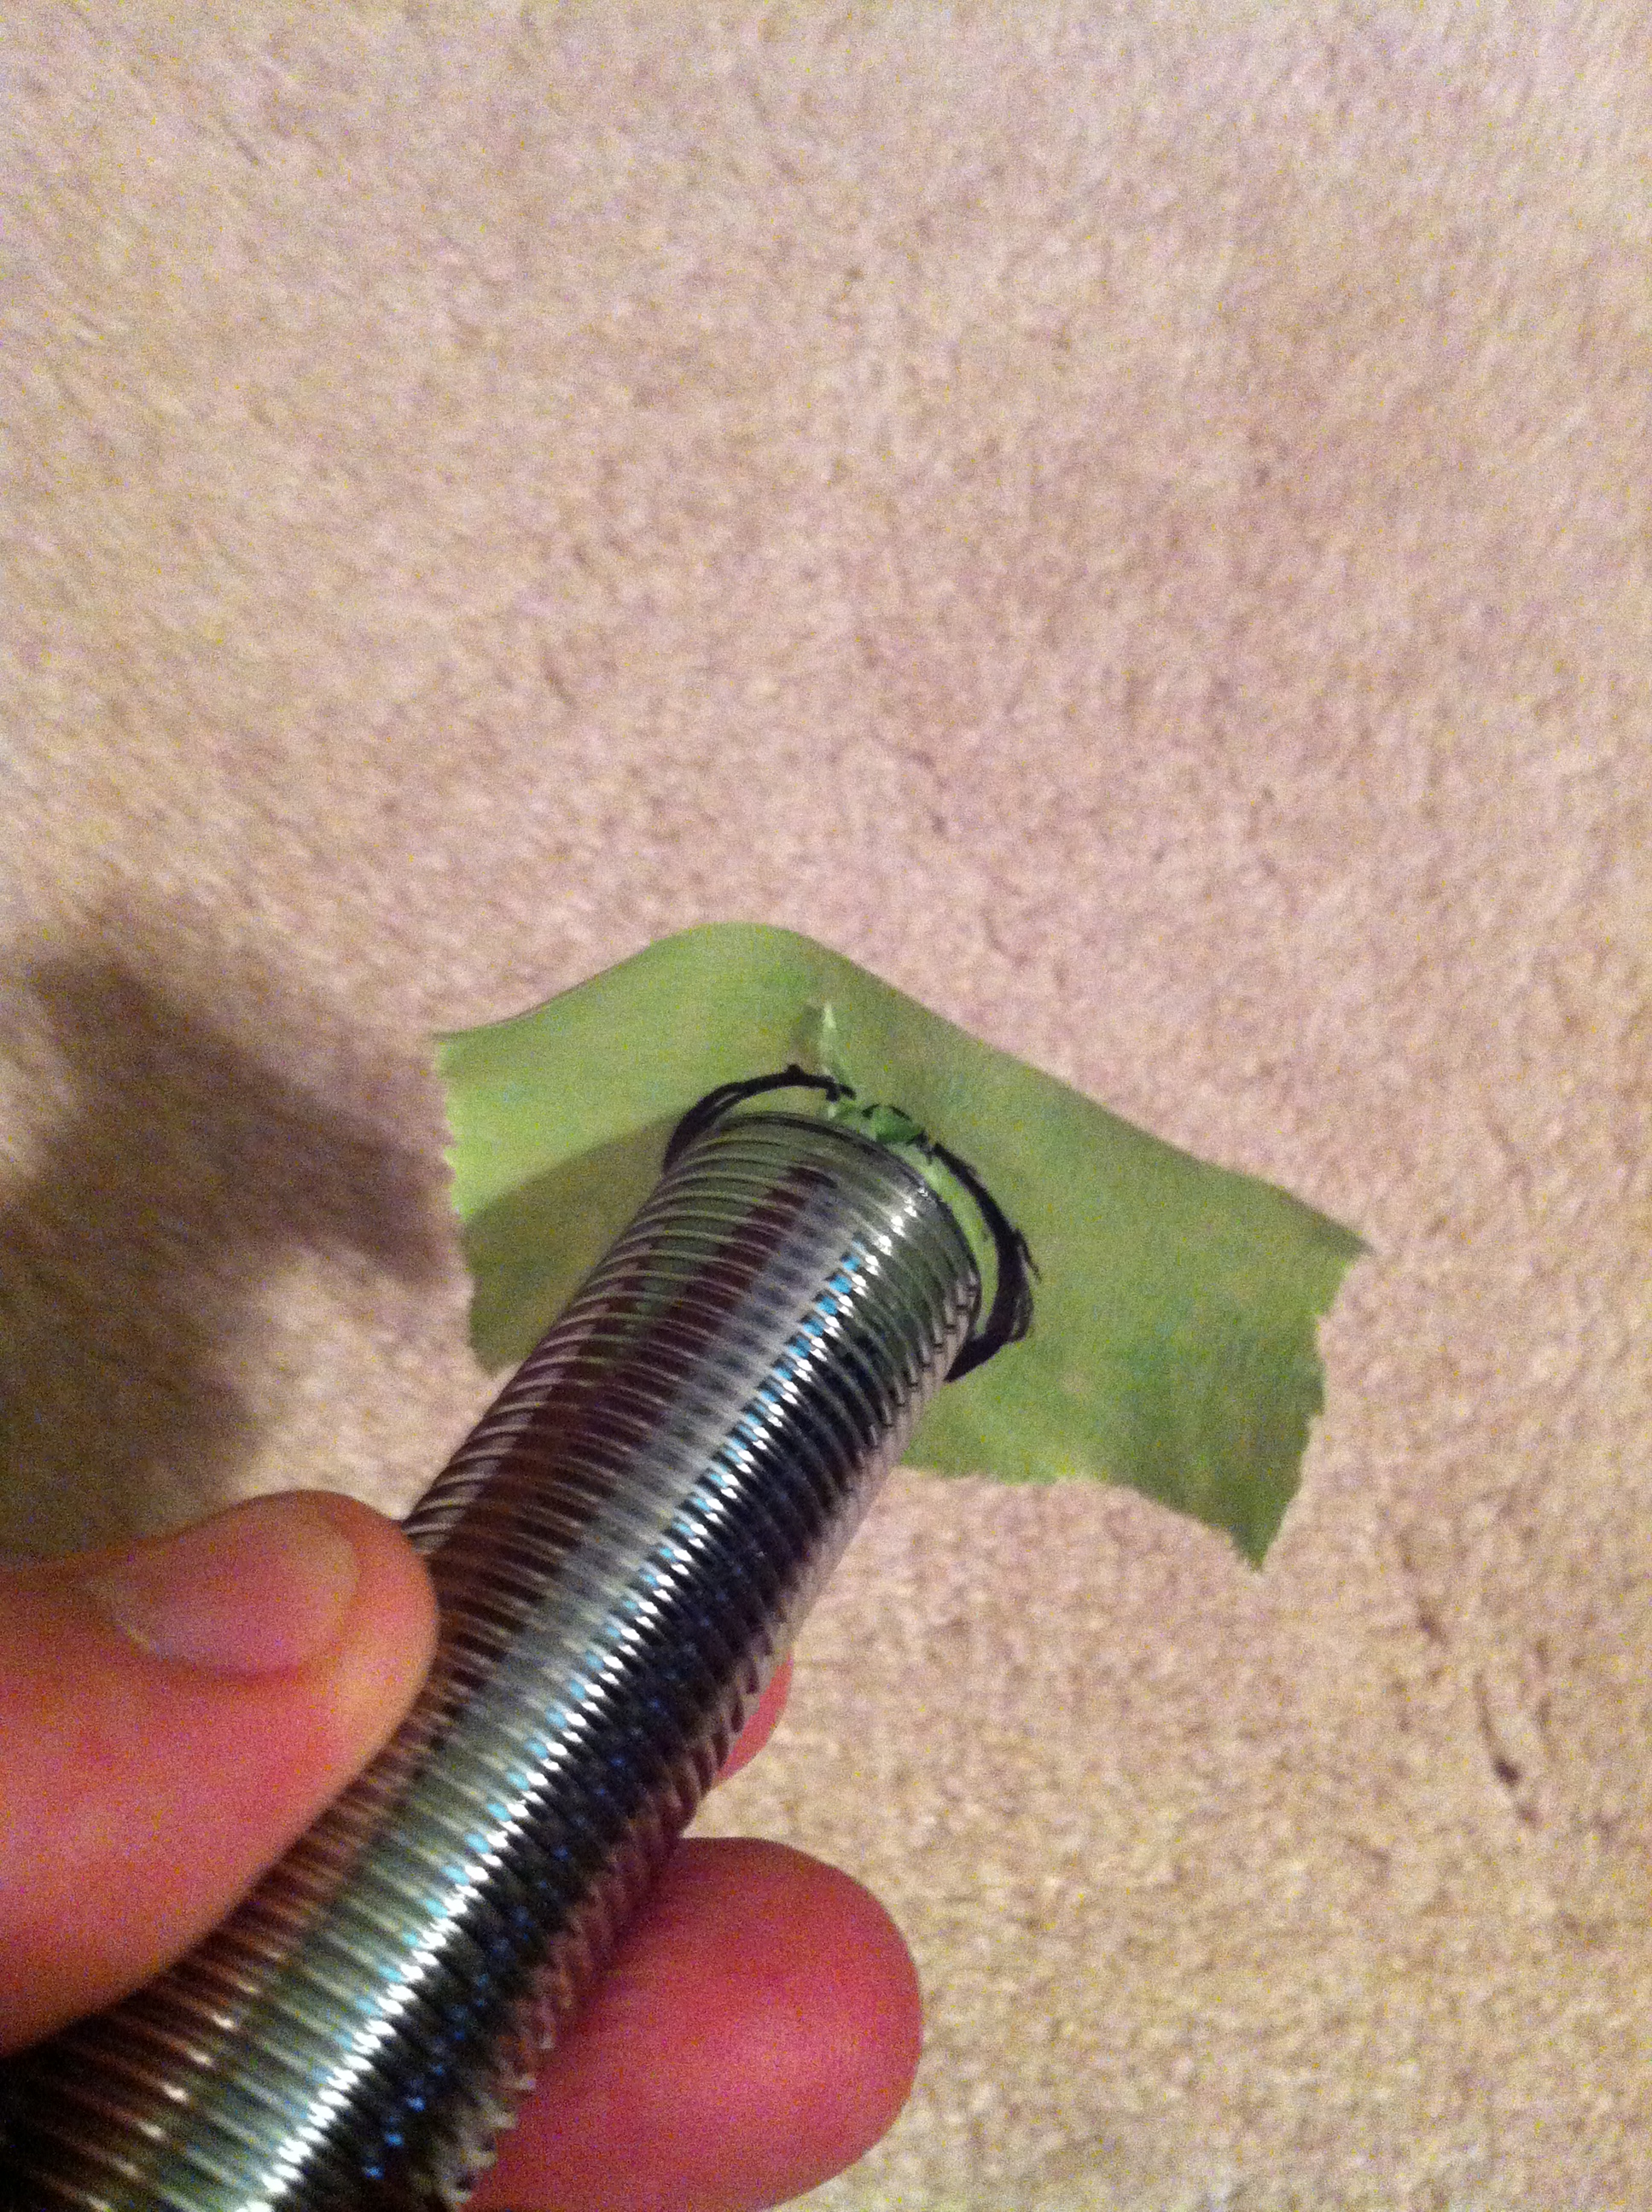
I reattached the inner panel to the door with just a few screws to hold it in place. Then I stuck the shanks through the front of the door, trying to keep them as straight as possible, and using the flange to help with that. When it met the back of the inner panel, I gave it an extra little push and pulled the shank back out. The tape stayed on the back of the panel, as hoped:

A little measuring to double-check and tweak the location just a bit, and I was set to drill the holes. I couldn't have asked for better positioning:

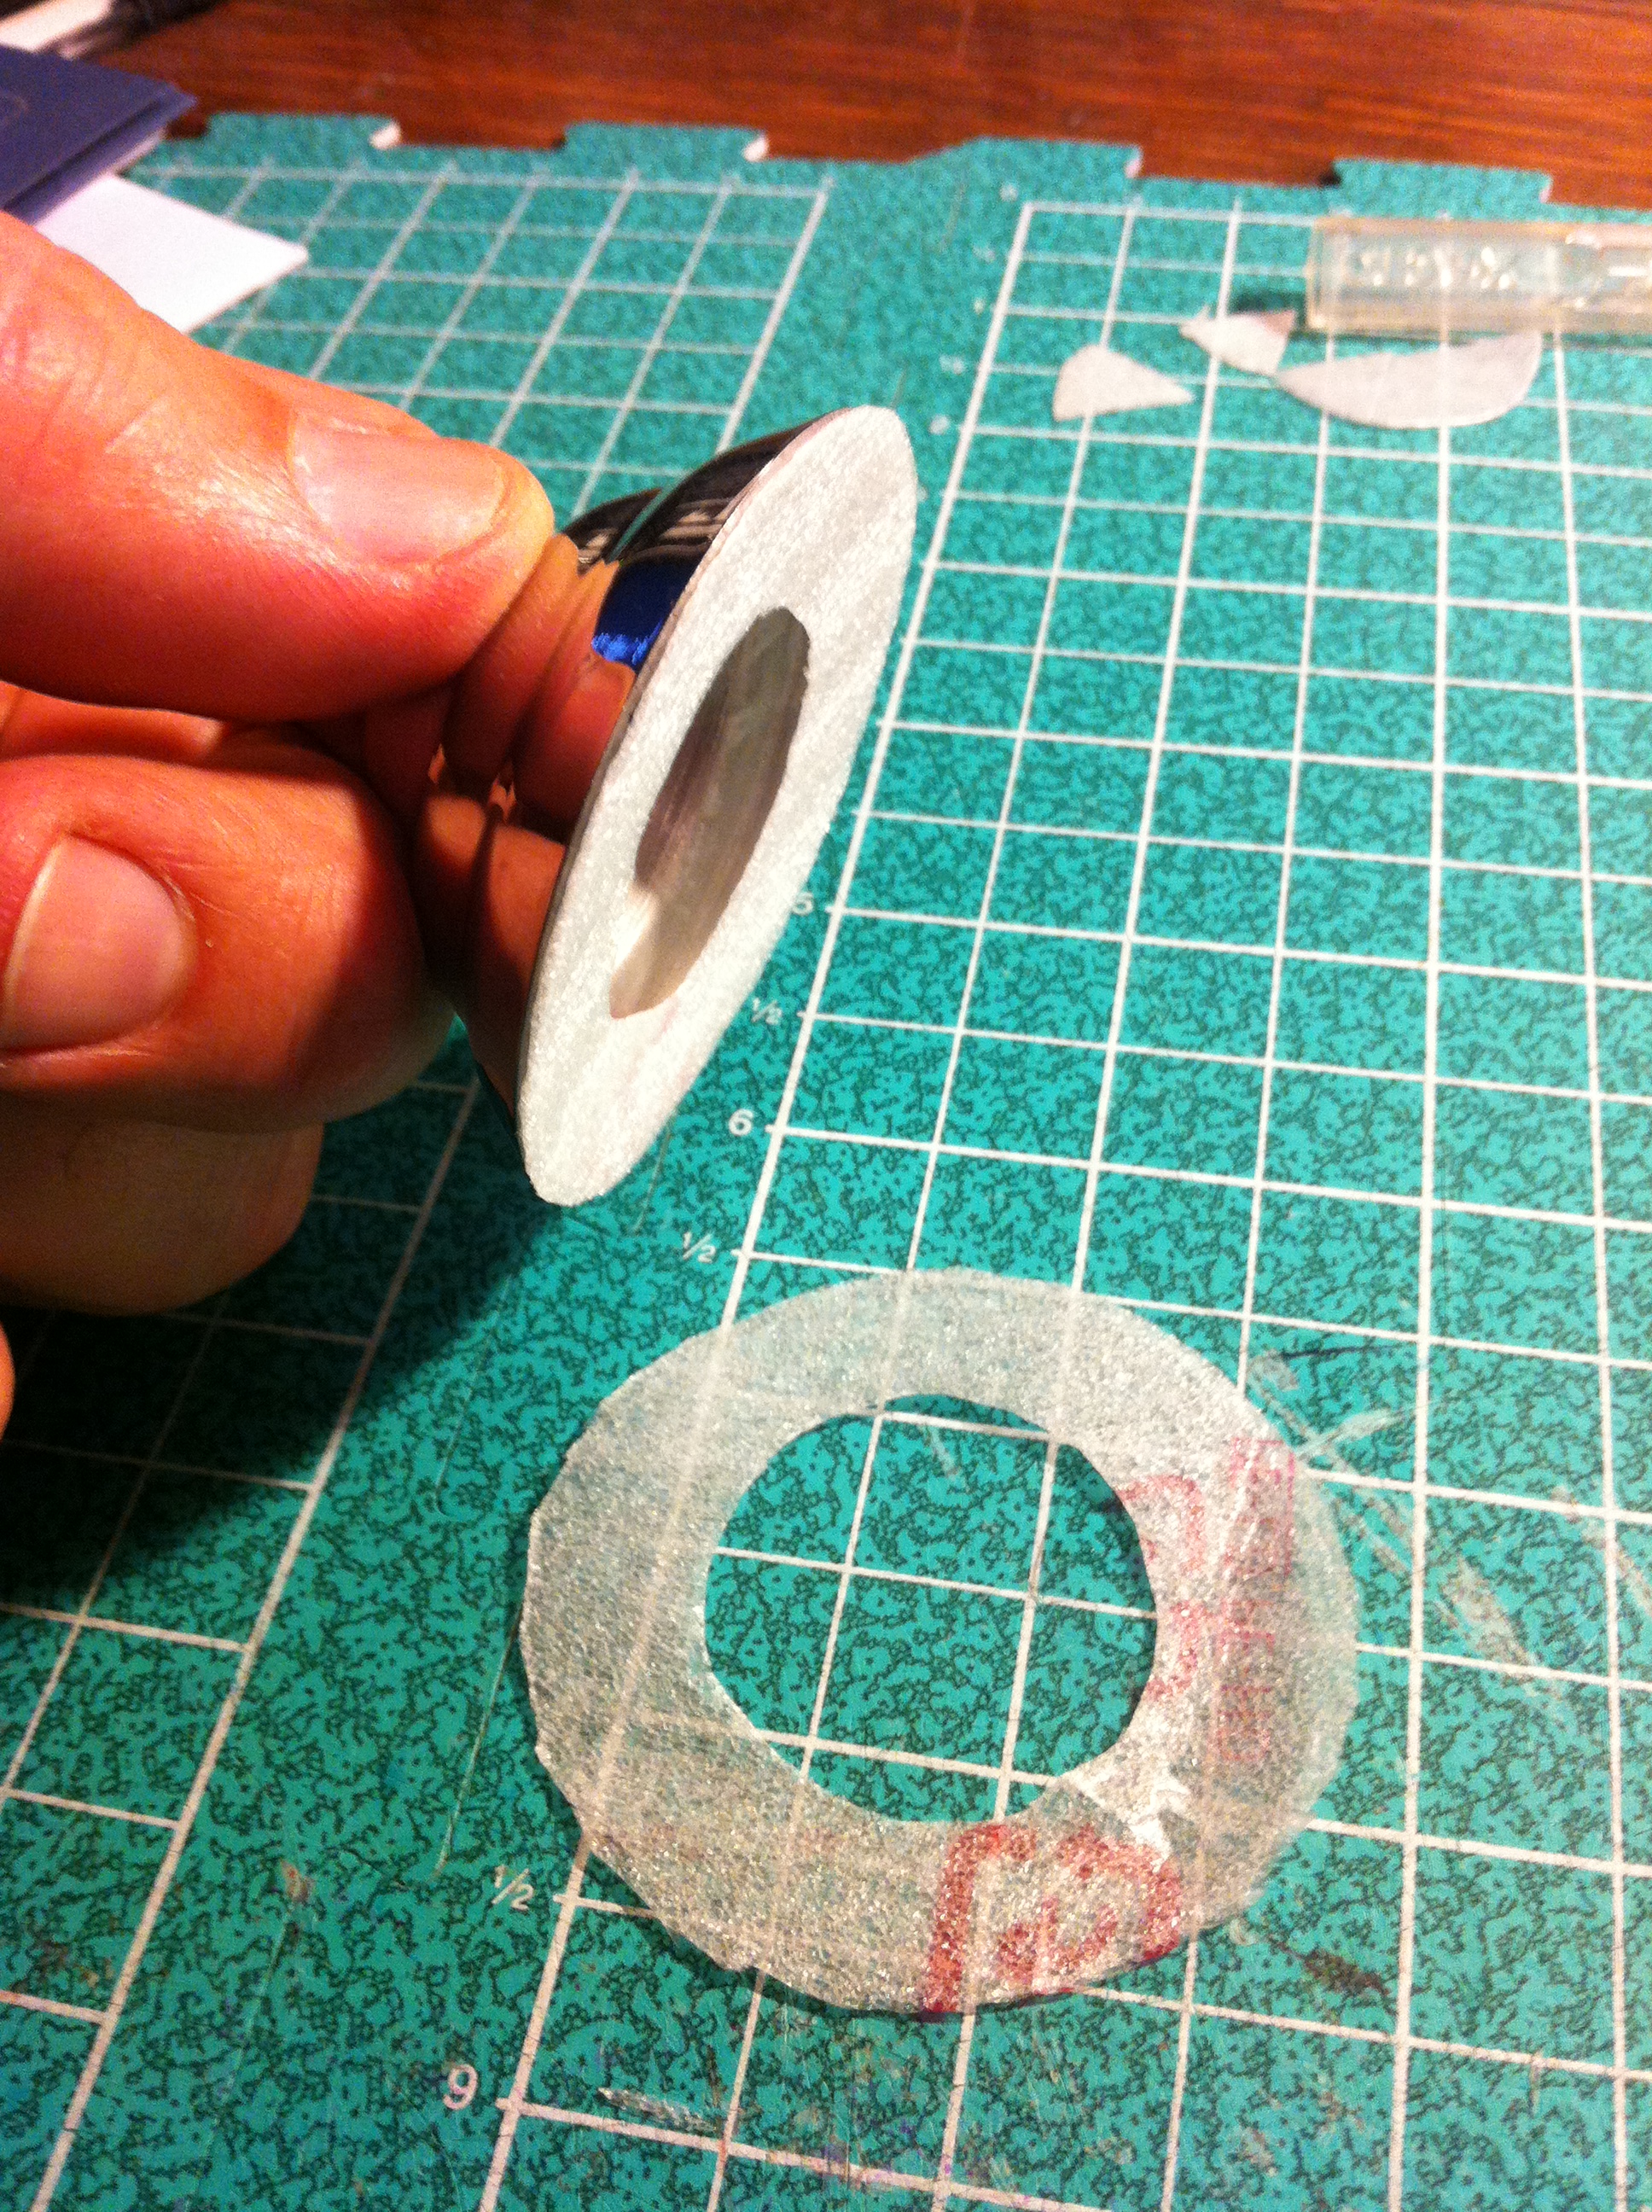
Because I noticed how much sharper the edges of the stainless flanges are than the black plastic ones, I wanted to try and at least buffer the paint job from them a little. I cut some of that thin foam that comes around electronic equipment (TVs, stereos, etc.) to try and protect it a little:
I primed a piece of luan I had laying around and ran the shanks through the door and that, because it flexed to the shape of the door but also gave more reinforcement to the metal of the door. I then started pre-cutting pieces of 1" foam board to fit, including drilling holes for the shanks. I built these up in layers, using spray foam to fill the gaps between and around the edges of the door. I meant to get more pics of this, but it became a race with time as everything started expanding. Here's the beginning, though:

And before I knew what hit me, the whole thing was insulated and re-attached.

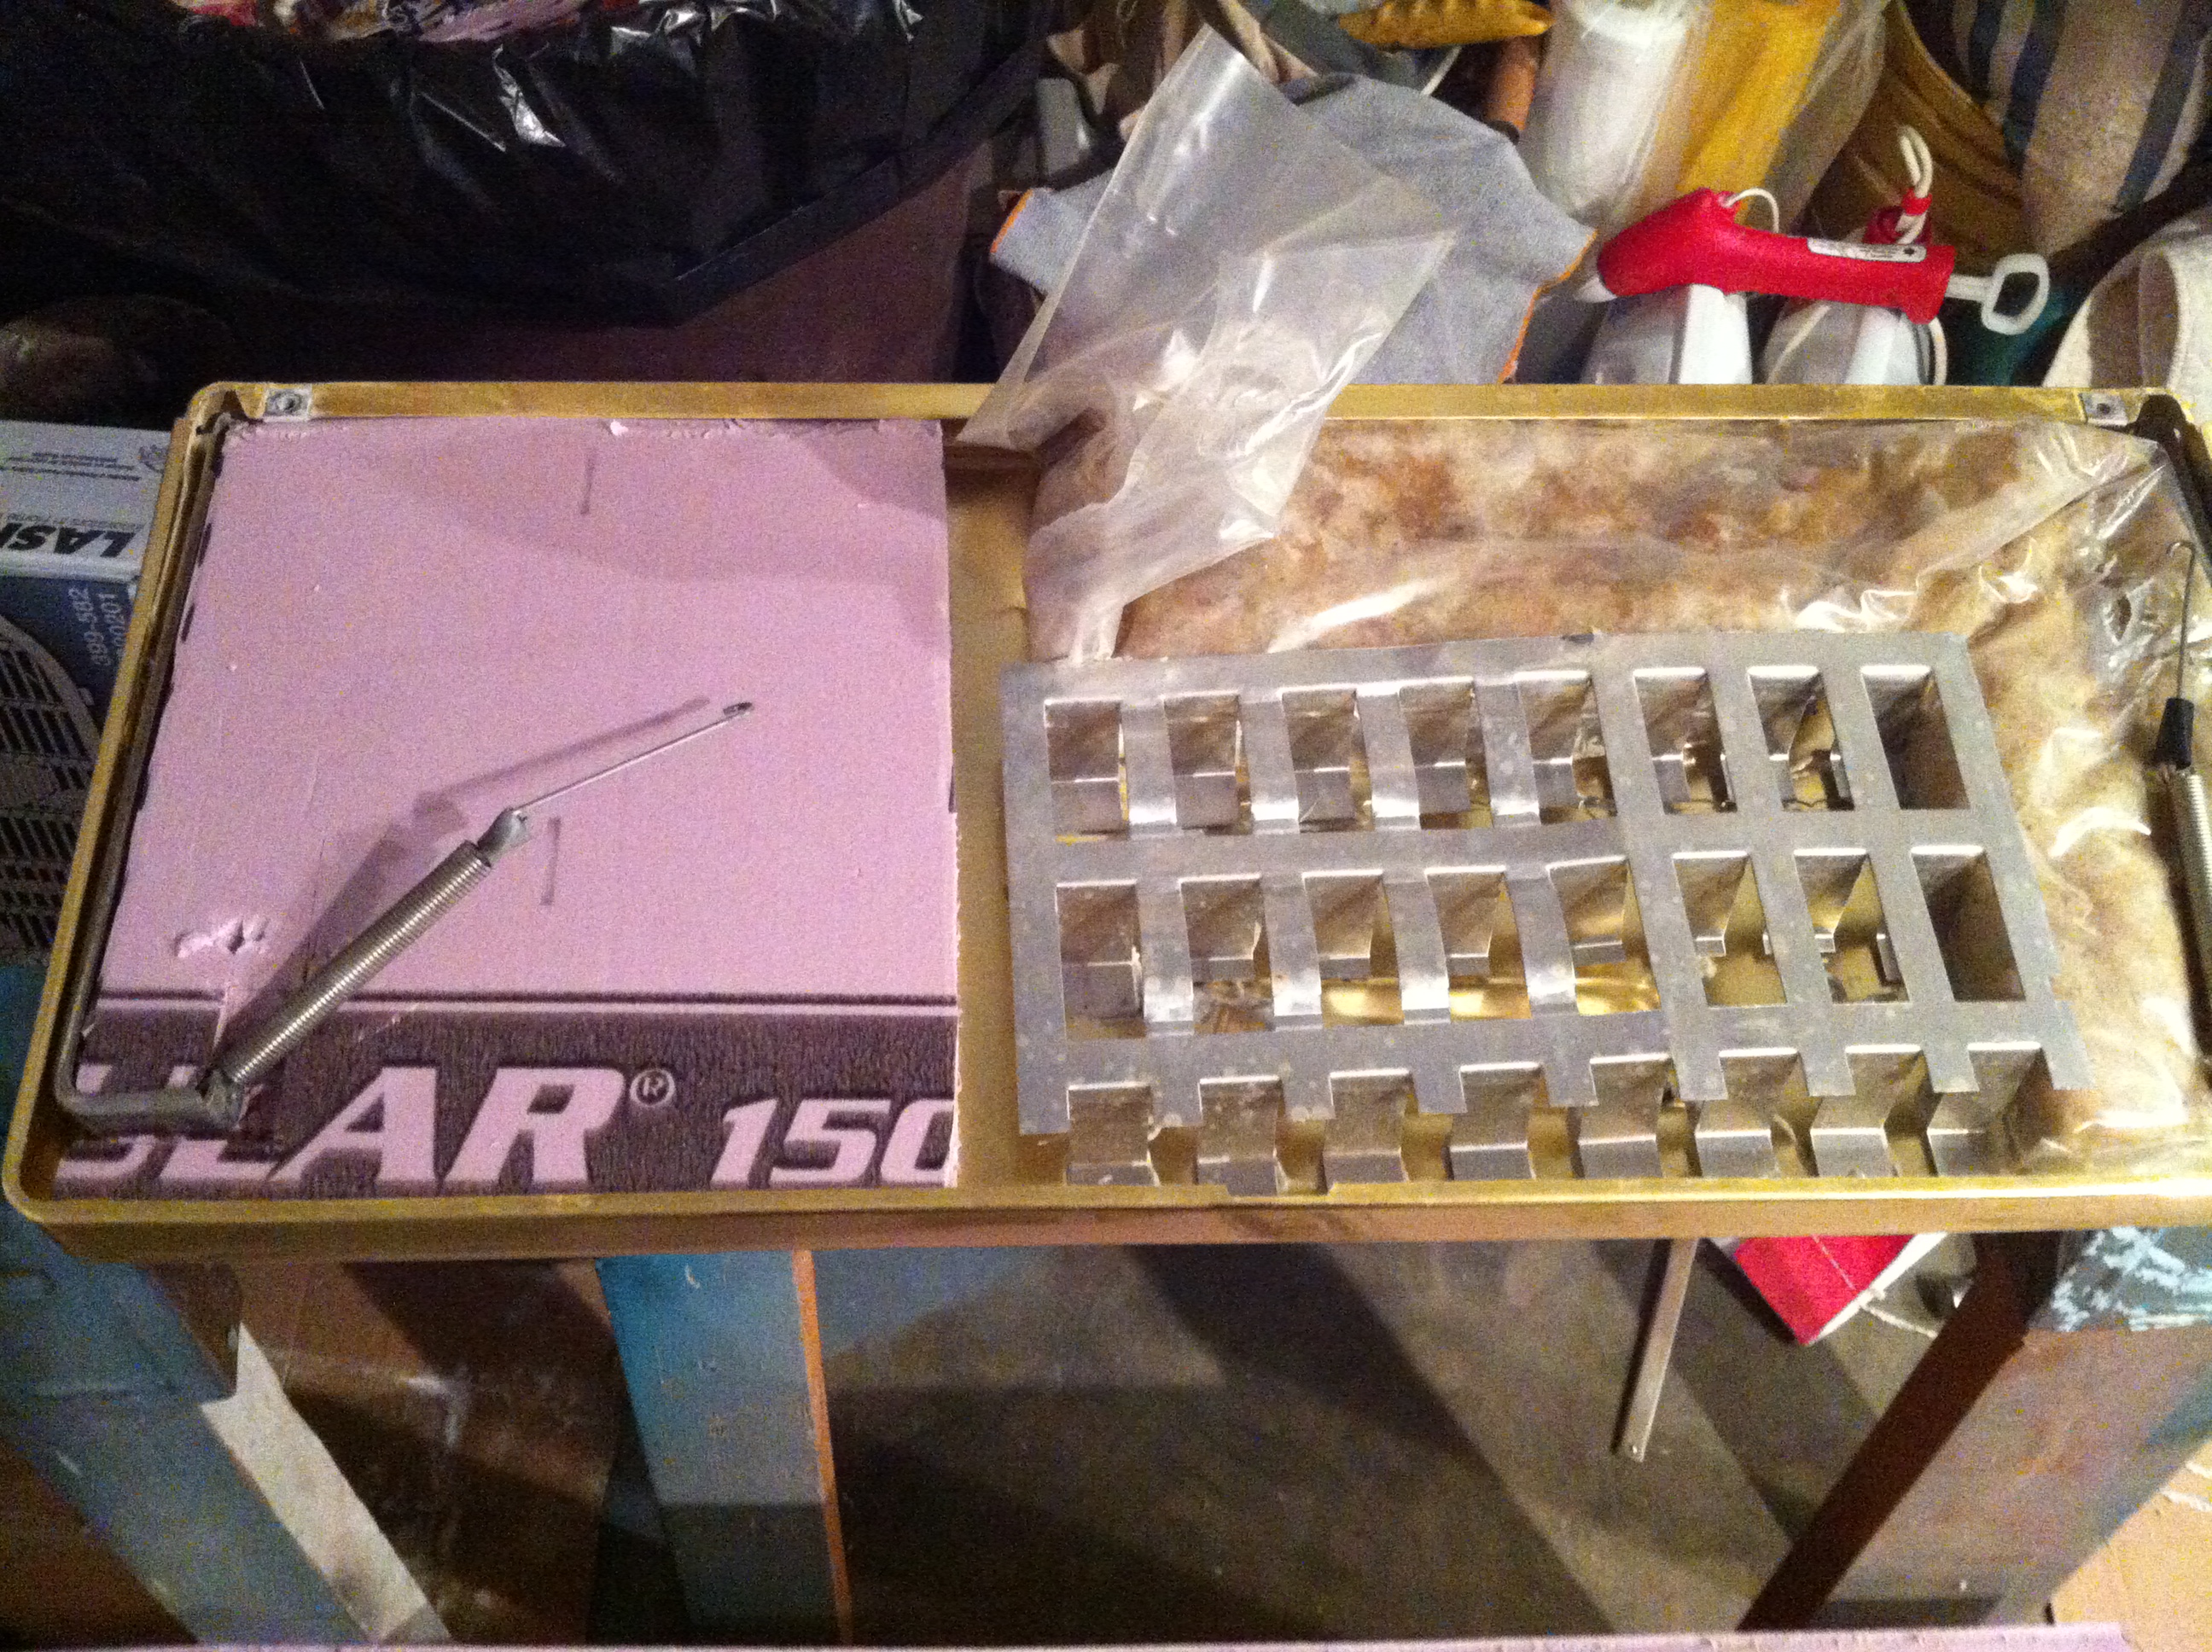
While that was setting up, I decided to look at the freezer door, which had one spring that had come undone. When I took it apart to fix it, I noticed the insulation there was more of the old fiber/wool stuff, sealed int plastic to keep moisture out. Great idea, until it gets a small puncture or moisture gets in. Now it was just a must generator. So I replaced it with foam board as well. Here's the first chunk replaced, and you can see some of the old stuff.
Once the foam had some time to set up, I took the screws out of the inner panel and reattached the gasket. Then I got the door reattached (a major pain with one person), and here it is in its final home:
Then I attached the Perlicks and chrome handles; that was enough for last night, and I crashed.
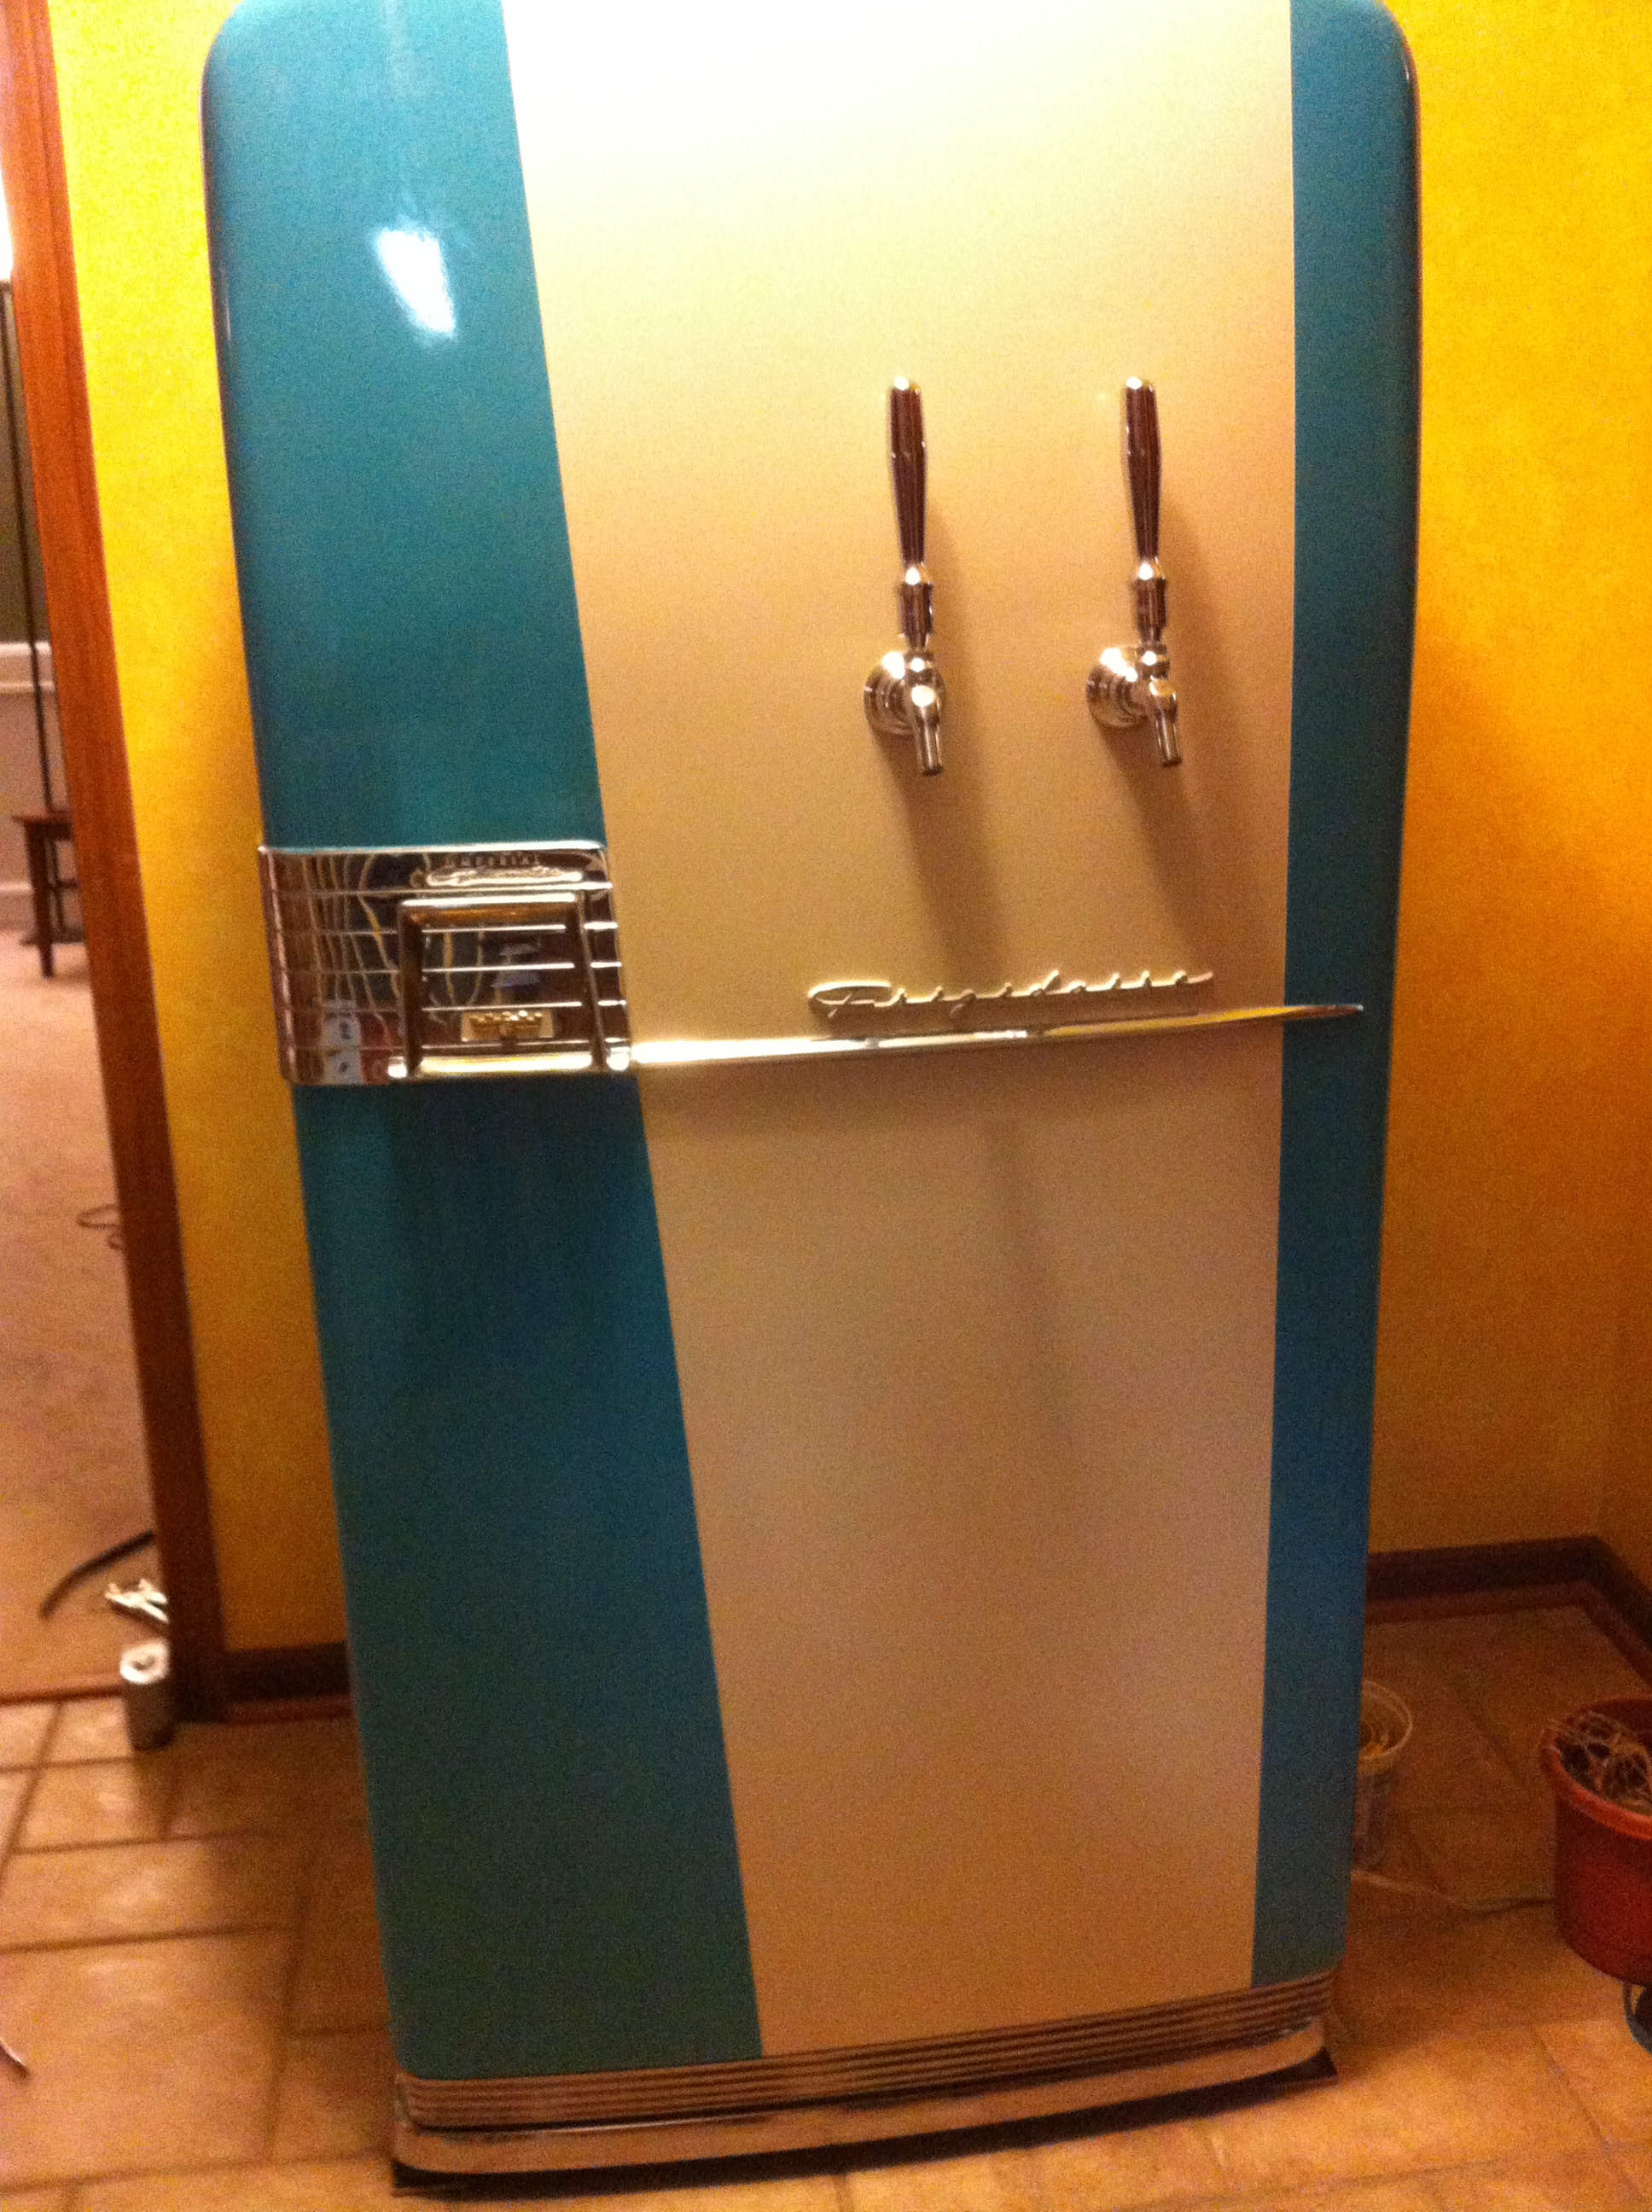
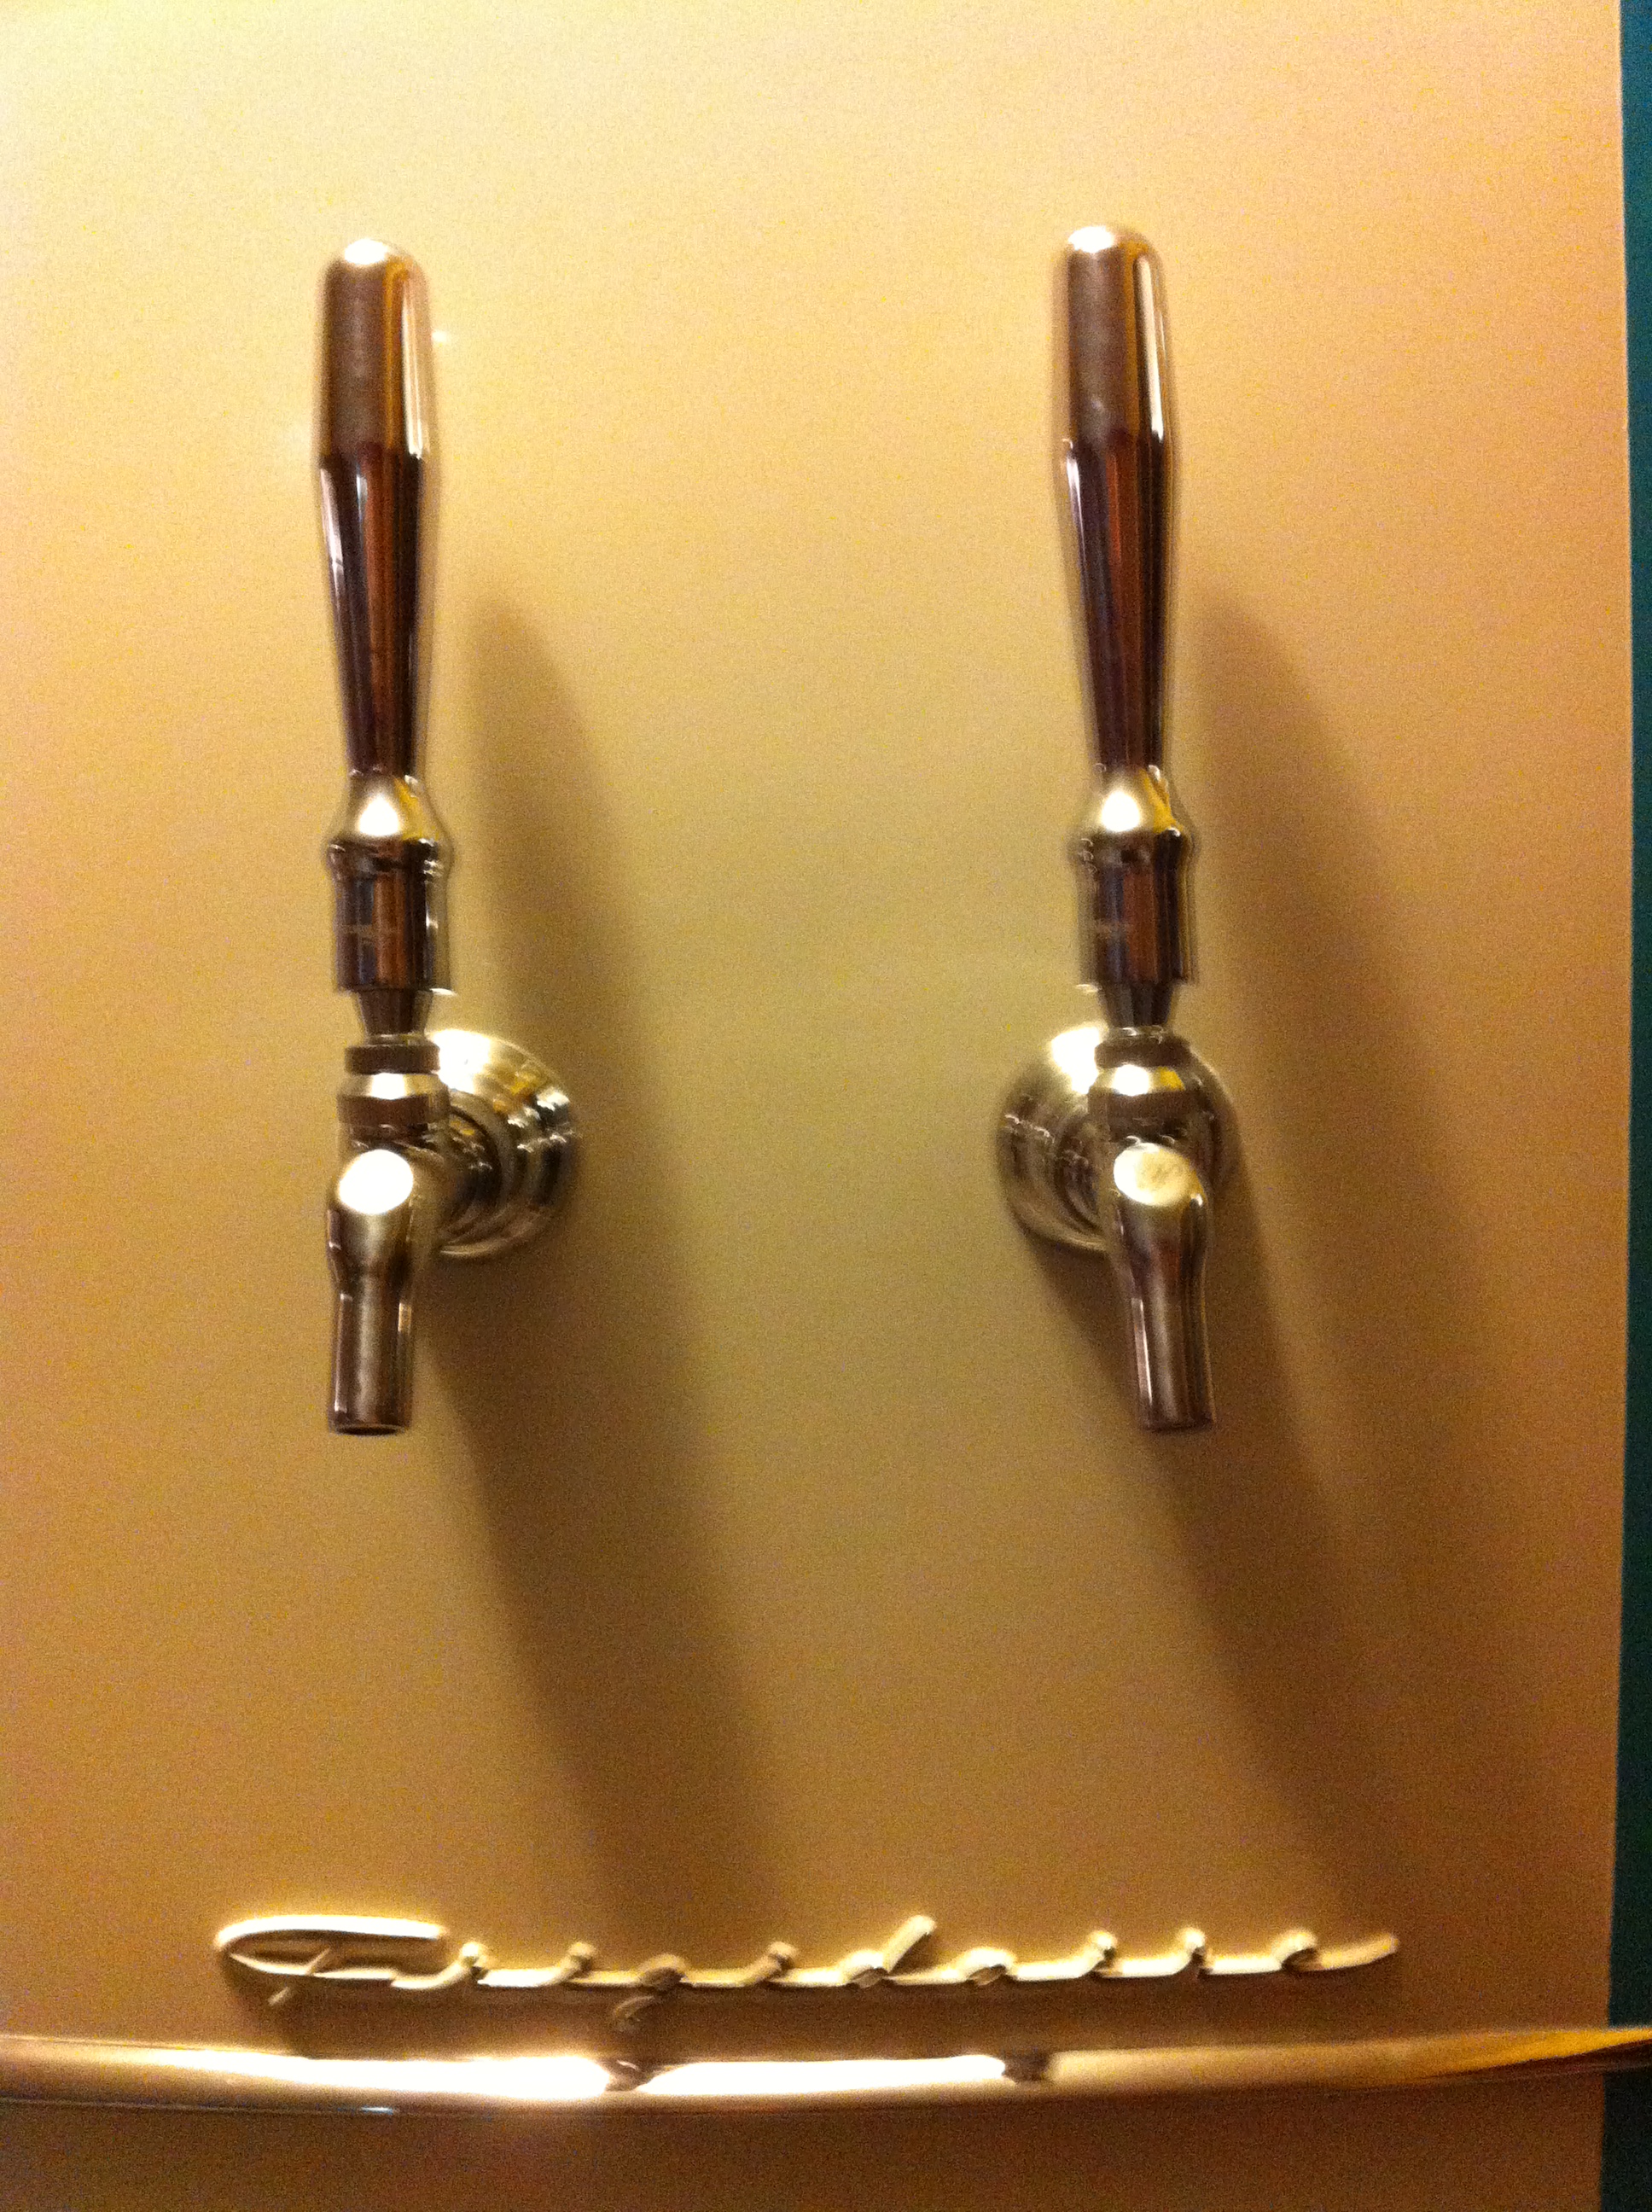
This morning, I buffed out another place that got a little roughed up somewhere over the last week, then attached the chrome strips to the paint borders:
So now the exterior is pretty much done, except for the drip tray. I'll post what I did there in a single post once it's done. Next, time for connections (and beer!)!
First, I needed to drill the holes for the shanks in the inner door panel. To try and figure out the best way to do this without tilting the drill, I opted to trace the shanks on the back of a piece of tape:
Then I rolled up a little piece of tape, just to stick it on the end of the shank:
I reattached the inner panel to the door with just a few screws to hold it in place. Then I stuck the shanks through the front of the door, trying to keep them as straight as possible, and using the flange to help with that. When it met the back of the inner panel, I gave it an extra little push and pulled the shank back out. The tape stayed on the back of the panel, as hoped:
A little measuring to double-check and tweak the location just a bit, and I was set to drill the holes. I couldn't have asked for better positioning:
Because I noticed how much sharper the edges of the stainless flanges are than the black plastic ones, I wanted to try and at least buffer the paint job from them a little. I cut some of that thin foam that comes around electronic equipment (TVs, stereos, etc.) to try and protect it a little:
I primed a piece of luan I had laying around and ran the shanks through the door and that, because it flexed to the shape of the door but also gave more reinforcement to the metal of the door. I then started pre-cutting pieces of 1" foam board to fit, including drilling holes for the shanks. I built these up in layers, using spray foam to fill the gaps between and around the edges of the door. I meant to get more pics of this, but it became a race with time as everything started expanding. Here's the beginning, though:
And before I knew what hit me, the whole thing was insulated and re-attached.
While that was setting up, I decided to look at the freezer door, which had one spring that had come undone. When I took it apart to fix it, I noticed the insulation there was more of the old fiber/wool stuff, sealed int plastic to keep moisture out. Great idea, until it gets a small puncture or moisture gets in. Now it was just a must generator. So I replaced it with foam board as well. Here's the first chunk replaced, and you can see some of the old stuff.
Once the foam had some time to set up, I took the screws out of the inner panel and reattached the gasket. Then I got the door reattached (a major pain with one person), and here it is in its final home:
Then I attached the Perlicks and chrome handles; that was enough for last night, and I crashed.
This morning, I buffed out another place that got a little roughed up somewhere over the last week, then attached the chrome strips to the paint borders:
So now the exterior is pretty much done, except for the drip tray. I'll post what I did there in a single post once it's done. Next, time for connections (and beer!)!
Schumed
Well-Known Member
Great work ...truly Epic
That is a beautiful piece of work - one that I would be proud to display. Well done and many happy years of use.
carlisle_bob
Well-Known Member
Hi
Very nice look. Great job !!!!
Bob
Very nice look. Great job !!!!
Bob
LoneTreeFarms
Well-Known Member
agreed this thing is turning into a real beauty.
greenbirds
Well-Known Member
- Joined
- May 15, 2008
- Messages
- 441
- Reaction score
- 9
Great work. That is something to be proud of.
flushdrew42
Well-Known Member
amazing. nicely done. it's like bringing life to an old car.... way to go.
OP
OP
Looks great, man! Where did you pick up the chrome trim? Is it self adhesive or did you use some kind of glue?
Thanks! I found it on eBay--they have different widths, and it's self-adhesive. I used 15mm and 10mm. Comes from Hong Kong, but it came pretty quickly.
jlb307
Well-Known Member
i weep at my own inferiority.
impressive, sir!
impressive, sir!
OP
OP
OK, so I'm wrapping up the drip tray, but in the meantime I got the keg of Saison hooked up and running. Here's the first full draft out of the kegerator:

Happy 4th everybody!

Happy 4th everybody!
carlisle_bob
Well-Known Member
OK, so I'm wrapping up the drip tray, but in the meantime I got the keg of Saison hooked up and running. Here's the first full draft out of the kegerator:
Happy 4th everybody!
Hi
Everything goes better with a glass of beer
.... looks great.Bob
jlb307
Well-Known Member
this is truly an awesome build! gave me some ideas of my own.
real quick, what kind of paint are you using?
also, what are the interior dimensions of your fridge?
got my eyes on an old kelvinator cm-r from the '50's that i'm negotiating, and the interior dimensions are 25-1/2" wide X 52" high X 15" deep.
does that sound doable for three kegs, or would that be pushing it?
OP
OP
this is truly an awesome build! gave me some ideas of my own.
real quick, what kind of paint are you using?
also, what are the interior dimensions of your fridge?
got my eyes on an old kelvinator cm-r from the '50's that i'm negotiating, and the interior dimensions are 25-1/2" wide X 52" high X 15" deep.
does that sound doable for three kegs, or would that be pushing it?
Thanks! Mine is roughly 24" wide X 34-1/2" high X 15" deep. I wasn't able to fit 3 in mine, but I left the shelf tracks on the sides, which probably ate up an additional inch or two. I might also have been able to fit 3 if I had taken some of the door shelving out. Yours sounds wider, and you may be able to fit them it that one. Mine are pin locks; I think they're a bit wider but shorter than the ball locks, so if you have ball locks plus the extra width, that might be enough. You might try making three cardboard cutouts of the outline of the base of your kegs and take them to the fridge to see if they would fit.
Are you looking at putting the CO2 tank inside, too? With your additional height, you may be able to fit a 5 pounder above the kegs; just don't lay it down.
Hope this helps. Post pics if you get it!
GulfCoastGirl
Well-Known Member
I loved following this thread! Your Kegerator looks amazing
I have a question about the paint you used. I get that you used Appliance paint for the white; but what type of paint did you use for the Blue? I know you can't use latex paint for appliances and appliance paint only comes in 4 or 5 boring colors.... so what did you use for the blue?
Was it automotive paint or did you (can you) have appliance paint mixed to make any color like you can with latex paint? I've read a bunch of stuff on the internet about painting appliances, but they all talk about the importance of using appliance paint but never address the issue of getting colors outside the White, Black, Almond colors that they come in.
I'm getting ready to convert a chest freezer to a keezer and it will be a boring white chest freezer with collar at first.... but eventually I'll want to paint it.
Thanks
OP
OP
Thanks, GulfCoastGirl! It's been an adventure, for sure. I actually used 'bisquit' appliance paint for the white part--white was too bright, and almond was too, well, almond. This was right in between; I got it at Lowe's.
For the blue, it was actually a Valspar spray paint, also from Lowe's. I had wanted to use the Rustoleum 2x, but their blue was just a little too blue; the one I chose was more aqua (EDIT: I read on some appliance link that the Rustoleum 2x could be used). I used the 2x clearcoat, though. I actually did encounter some weird stuff with it, though; the tape issue I documented, but ehen I still had other blemishes that I had to buff out (I think I mentioned that, too) after I moved it into the house. I don't know how those happened. I got a weird crackly effect when I was working on the drip tray (I'll add the whole section on that soon; I finally finished it!), so I think there are some issues with that. When I was getting all the buffing compound and various grit papers at O'Reilly auto parts, I noticed a good section of auto touch-up spray paints. You might check there for a better color selection as well as clear coat. I'm guessing it might behave a little better; plus you could get some of the metal flake finishes if you want. I think that's the way I'd go if I ever do another one. For sure I would rough up the surface a bit first, then prime, paint, and 3 coats of clear. Then you can go through the stages of increasing grit. I copied a really good summary (well, it's still like 4 pages long) from a
guy by the handle 'Kong' on an automotive painting thread I happened to find; it was invaluable and made all the difference to the finishing steps. When you get to that stage, PM me and I'll send it to you. Hope this helps!
jlb307
Well-Known Member
Thanks! Mine is roughly 24" wide X 34-1/2" high X 15" deep. I wasn't able to fit 3 in mine, but I left the shelf tracks on the sides, which probably ate up an additional inch or two. I might also have been able to fit 3 if I had taken some of the door shelving out. Yours sounds wider, and you may be able to fit them it that one. Mine are pin locks; I think they're a bit wider but shorter than the ball locks, so if you have ball locks plus the extra width, that might be enough. You might try making three cardboard cutouts of the outline of the base of your kegs and take them to the fridge to see if they would fit.
Are you looking at putting the CO2 tank inside, too? With your additional height, you may be able to fit a 5 pounder above the kegs; just don't lay it down.
Hope this helps. Post pics if you get it!
Didn't get the Kelvinator, but I DID score a 1950 Westinghouse for $25!:rockin: Picking it up Monday.
Best part? It already had a tap in the door!!!
Such a sweet old couple, too. They're moving, and they said, "you're getting a good friend. It held many a keg in its day."
I almost want to give them more than the $25 they are asking!
Brewologist
Member
Just saw a pic of this kegerator on Facebook. Very cool! Great job on the reconstruction and conversion. That's a big project.
BeerGuy1000
Well-Known Member
Looks amazing great job
Schmidty, the kegerator looks incredible! Did you ever finalize a drip tray and if so any chance you could post a pic or two? I haven't seen many drip trays that would look good on a vintage fridge so would be interested to see what you came up with.
Tupperwolf
Well-Known Member
- Joined
- Jan 12, 2013
- Messages
- 271
- Reaction score
- 35
This is absolutely amazing! It's like a '57 Chevy with a perfect paint job. Oozes style and class from top to bottom, and those taps and handles are so perfect!
OP
OP
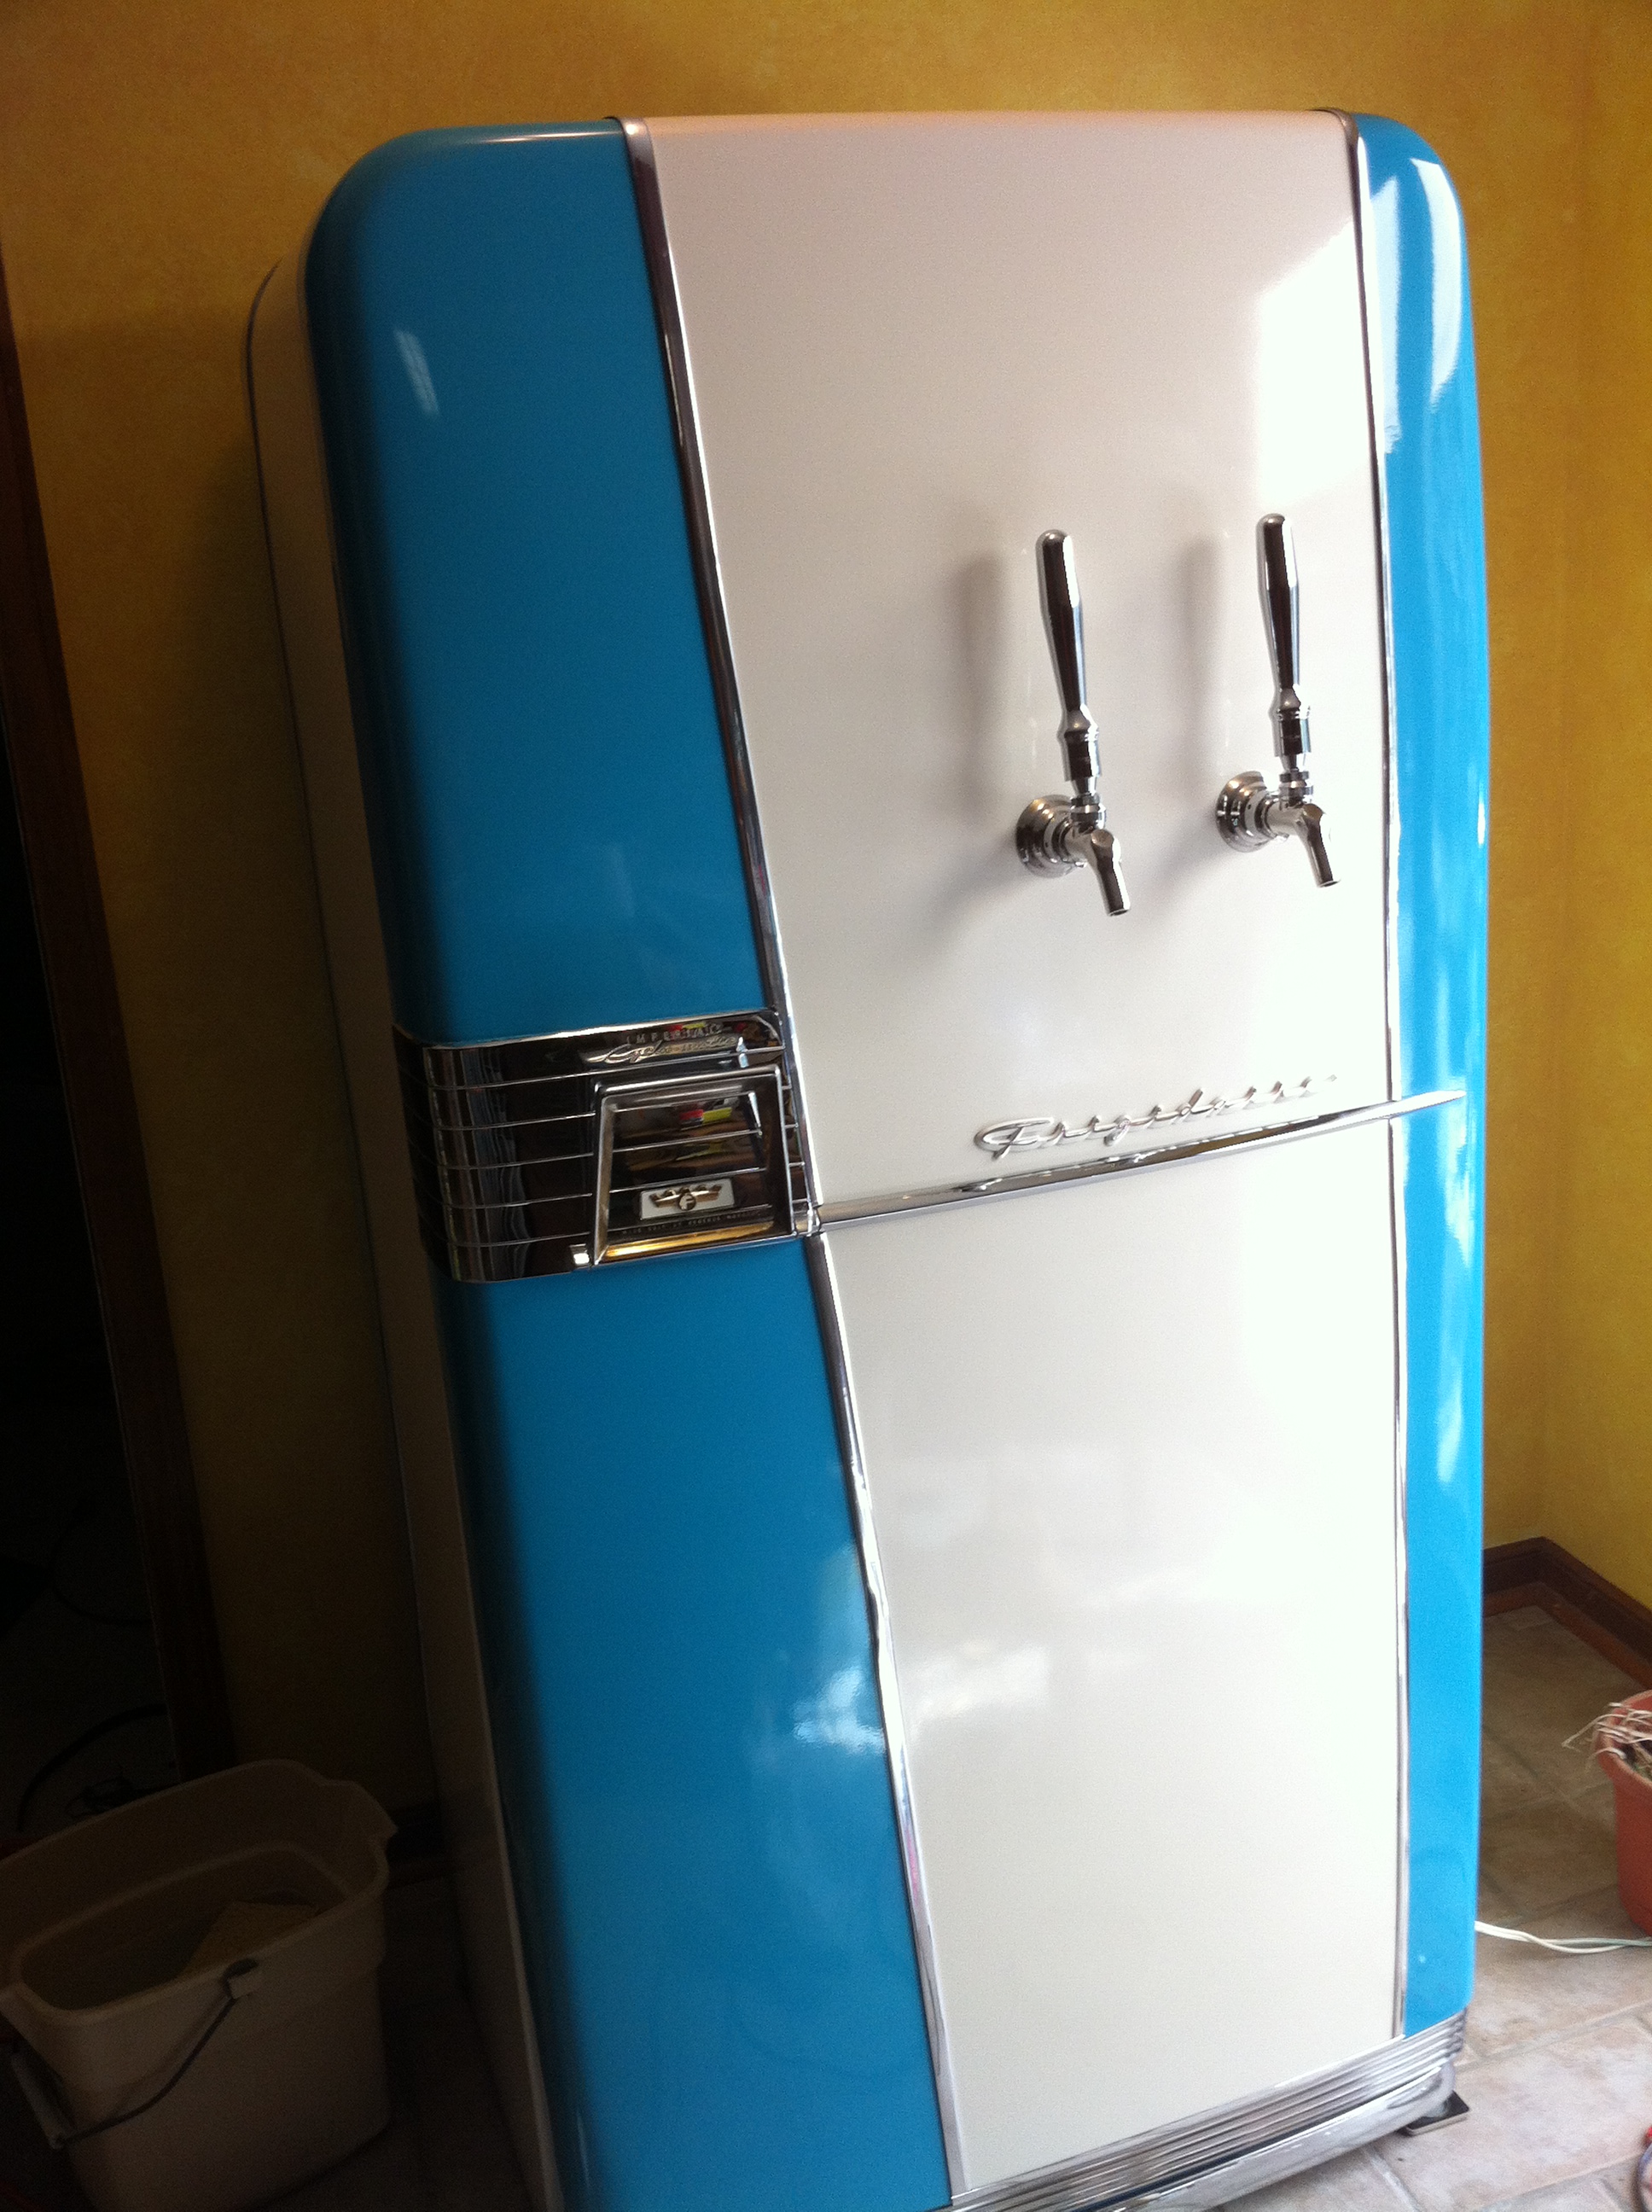
Thanks, guys; I've really enjoyed it! Yes, fosaisu, I did come up with a drip tray; the initial fridge project was done in a rush before things got busy, and things have been busy since. I was just thinking about how I need to get those pics posted the other day. I will do so shortly with details. In the meantime, here's one I just snapped the other day with the drip tray attached. It's a little hard to tell, but I curved it to kind of mimic the bottom chrome apron. More to come!

Very nice looking and great attention to detail!
I have a newish full size fridge in the garage and I couldn't bring myself to putting wholes in it as I think I wouldn't be happy with it. Instead I picked up a chest freezer and made a keezer out of it for the basement. I think something like this would be a nice addition to the garage.
Cheers,
- Destin
OP
OP
Very nice looking and great attention to detail!
I have a newish full size fridge in the garage and I couldn't bring myself to putting wholes in it as I think I wouldn't be happy with it. Instead I picked up a chest freezer and made a keezer out of it for the basement. I think something like this would be a nice addition to the garage.
Cheers,
- Destin
Oh, THIS baby replaced the kitchen table!
It's a little hard to tell, but I curved it to kind of mimic the bottom chrome apron.
I'm really curious to know where you got that! I've been looking and HOPING I wouldn't have to fabricate one for mine.
That is pretty dope.
One more question, what length shanks did you use? Obviously this will vary fridge-to-fridge but just trying to get a sense of what you used there. I'm working on a '49 Crosley Shelvador and hoping I can get away with 4" stainless shanks (they're less than half the price of 6"s at ritebrew.com, and although I know people often recommend using the longest available shanks to keep the taps cool, space will be at a premium since I'm hoping to mount my taps higher on the fridge and therefore have to worry about running into the freezer compartment door if the shanks are too long).
Similar threads
- Replies
- 9
- Views
- 854
