50 foot 1/2 inch SS coil

Homebrew Talk - Beer, Wine, Mead, & Cider Brewing Discussion Forum

Help Support Homebrew Talk - Beer, Wine, Mead, & Cider Brewing Discussion Forum:

This site may earn a commission from merchant affiliate links, including eBay, Amazon, and others.
OK I made one the other day, it turned out pretty good, only thing was the bottom bend didn't turn out as I would have wanted it to, out side of that, looks really good. I used 3/8s in place of the half inch.
 
???? Is this a -"Ban the use of copper" post?

If so, most of the world is in serious trouble.

Just saying...

That reminds me of the Simpsons episode where the kids watched this video at school. It showed what the world would be like in a world with no zinc. :D
 
try using an adjustable wrench opened to the exact OD of the tubing (set it on unkinked tubing) and you can work it around small kinks and "re- round" the tubing. It takes a little practice to work them out- and real bad kinks are probably goners, but you can fix the little ones...
 
try using an adjustable wrench opened to the exact OD of the tubing (set it on unkinked tubing) and you can work it around small kinks and "re- round" the tubing. It takes a little practice to work them out- and real bad kinks are probably goners, but you can fix the little ones...

Nice I will have to give at a try, I only got one in mine, where the bottom coil comes back to the top.
 
Texan has my coil, we talked on the phone, he's feeling a bit under the weather so I told him no rush. He's going to send me pics when he's done and I'll post them here.
 
man up get your a@@ in the shop.. LOL

how it's nothing serious, and you feel better fast
 
Going to try bending a piece of 3/4" OD with a stick of 1/2" OD inside...in an OD around 11".... wish me luck! I coiled up a piece of 1/2" x .035 304/304L welded tube around a 12" piece of pipe, not to hard. The picture below that is with a tube bender but it would be a lot of labor to coil up a 20ft piece.
picture011jz.jpg

By zjosey at 2012-02-13
picture020in.jpg

By zjosey at 2012-02-14

The tube already had the dents in it before it was bent.
 
Well I tried...:( no luck as I got greedy. I was however to bend the 3/4" with 1/2" inside into a 12"OD with no kinks but the 3/4" started to collapse. I think 3/8" inside 5/8" in a 10-12"od would work though but it seems everyone wants 1/2" for the wort to flow through.
picture021xe.jpg

By zjosey at 2012-02-14
picture022jx.jpg

By zjosey at 2012-02-14
picture023wh.jpg

By zjosey at 2012-02-14
 
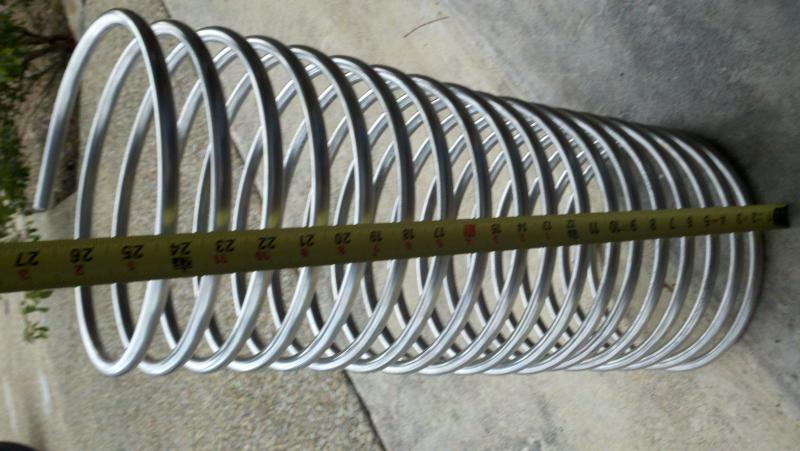
Well I am back in action.

I am posting the before and after pictures for your scrutiny!

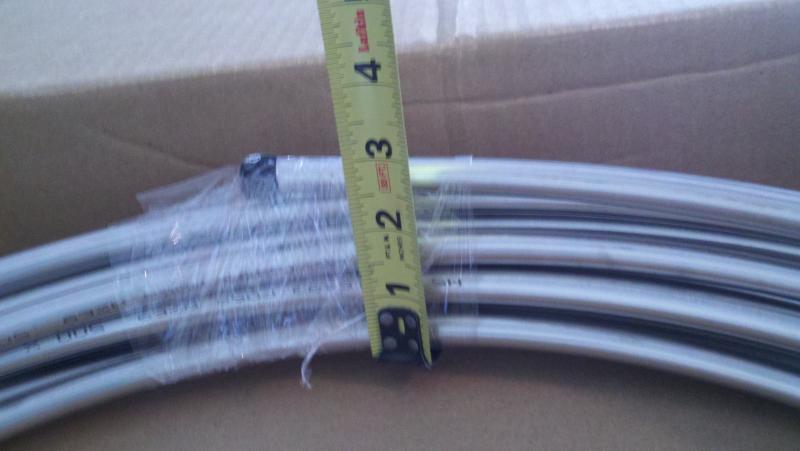
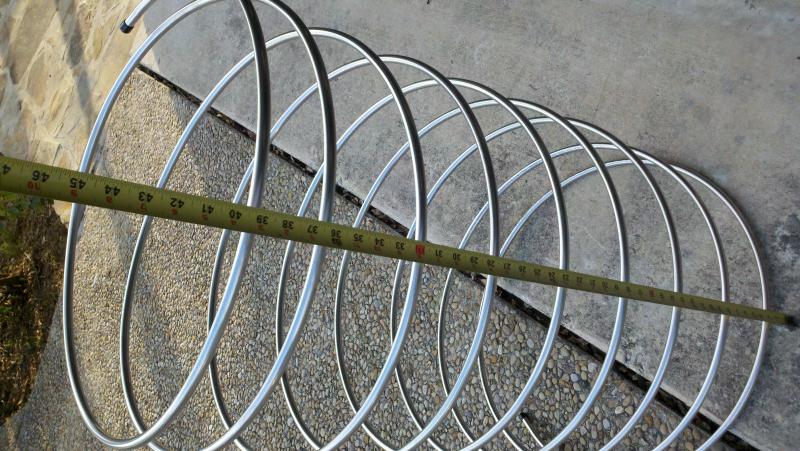
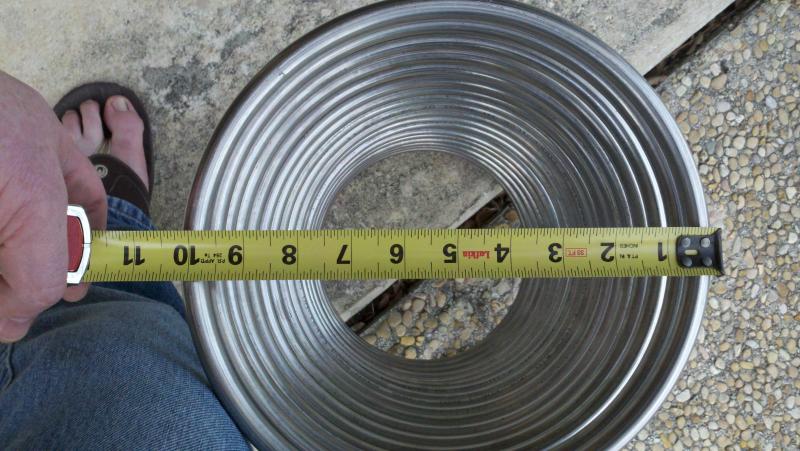
This is the coil as shipped diameter -

box tube diameter.jpg
 
Talking with Akthor on the phone, he told me that his fitting from the side of the keg to the center of his 90 degree fitting was 2 1/2".

I made his coil as close to 10" as I could to hopefully center his coil in the keg. ( 2.5 x 2 = 5" less the 15 keg ID = 10" or there about)
 
Wow, that looks amazing! Nice job bending that in such a consistent manner. How much time do you have invested in this?
 
I'm so excited!!!!! :ban::ban::ban::ban::ban::ban::ban::ban::ban::ban::ban:

Yes if I had seen pictures of peoples HERMS mounted with the 90 degree compression fittings I would have bought them originally and we could have made my coil wider but I scored straight fittings for cheap on Ebay thinking I was doing my HLT like the Electric Brewery one.

I didn't want to rebuy 90 deg fittings so I decided to use a couple 90 NPT street elbows to mount the coil using the straight compression fittings (pic below) so that it doesn't have to cross straight across the coil to the wall. So my fittings will extend about 2.5" out from the keg wall hence we had to make the coil 10" So it goes from outside the keg in: camlock male fitting/weldless bulkhead/90 street elbow/straight compression fitting.

Are there better ways to accomplish this? Yes, but having spent $400 or so on SS valves and fittings already I chose to make what I have work instead of buying more.

I will post pics of it installed when I get it and install it.

BTW John has been very helpful and communicative and his charge for this service is very reasonable. Wish I lived closer to Texas so we could hang out! Great guy to work with! Thanks John!

2012-02-21 14.47.22.jpg
 
Wow, that looks amazing! Nice job bending that in such a consistent manner. How much time do you have invested in this?

Got home from work, 40 minutes to set up (finding tools), 20-30 minutes to coil, then 10 minutes to clean up.

Fair to say 1 to 1.5 hours.
 
Got home from work, 40 minutes to set up (finding tools), 20-30 minutes to coil, then 10 minutes to clean up.

Fair to say 1 to 1.5 hours.

something that I need to talk to you about someday, but I just did one the other day,, looks nothing like yours bt works. :)
 
2 coils and 140 in the hole, Texan please save me from my inability to bend SS. PM me if you aren't to swamped w requests to talk specifics. Your work looks slick
 
I have alot of guys asking for me to bend thier SS coils, and I have a hand written list of them. This is becoming a larger project that I first anticipated and I am in the process of setting up a way to handle requests better.

I don't mind the Pm's just understand that the way I am doing it now is extremely slow due to the business side, not the actual work of coiling. I am going in order of PM's recieved, and being this is a side gig for me that I did not see coming, I am playing catch up.
 
FYI,

Dover97 lives close to the house and he came over to have his coil made. After we finished his coil we put it in his Keggle that he had brought with him.

He had an electric set up with the heating element already installed. This raised his coupling penetration height on his keggle where the coil would attach.

This gave him a 12" height from coil inlet to coil outlet. The 50' coil could be compressed with wires or zip ties to just fit into this dimension but it was a pretty tight fit. We figured that a 25' coil in this application might work better.

He is going to use a tubing cutter to cut his coil down to achieve more of a custom fit to his keggle.
 
Texan said:
FYI,

Dover97 lives close to the house and he came over to have his coil made. After we finished his coil we put it in his Keggle that he had brought with him.

He had an electric set up with the heating element already installed. This raised his coupling penetration height on his keggle where the coil would attach.

This gave him a 12" height from coil inlet to coil outlet. The 50' coil could be compressed with wires or zip ties to just fit into this dimension but it was a pretty tight fit. We figured that a 25' coil in this application might work better.

He is going to use a tubing cutter to cut his coil down to achieve more of a custom fit to his keggle.

Tell Dover97 I'll buy the remaining 25 ft. I have the same electric keggle hlt
 
Great minds think alike I PM'ed him just before you . I have yet to build my hlt so I can be flexible. What do you suggest for hight in a keg glue?
 
Texan said:
Not sure how much he is going to use, we just thought 25' would have fit better.

Forcabrew, what is the distance between your inlet and outlet?

I haven't even drilled my HLT yet for the herms coil so I'm flexible. My last few weeks have been spent building my control box
 
Fellow Brewers. If you are somewhat handy and want to build your own DIY tubing bender/coiling device I have some directions you can download (PDF) on how I built mine. I was able to reduce my 23" diameter coil down to ~11" diameter with no kinks. Cost about $70 for materials, a few tools, and about an hour to build.
Link to Build Instructions: http://home.comcast.net/~bkerby/DIYTubingBender.pdf

coilprogress.JPG

coilhlt.JPG


Enjoy!
 
Wow thanks for sharing V-twin! Does the coil look nice and uniform when it's compressed down to 11"? Like professional looking, if you know what I mean? I was just in Livermore today too.

I was thinking of a way to build something similar, but also motorizing it, and using a rubber or soft plastic pulley that would pull the tubing through, but this seems simple enough that I may not want to motorize it after all.

One last thing, the very last thing on the parts list (1-1/2" x 1/4" x 2ft) doesn't say what it is. Although with a little problem solving I figured out it was the flat steel.
 
Back
Top