This could be tricky (accidental AG convert)

Homebrew Talk - Beer, Wine, Mead, & Cider Brewing Discussion Forum

Help Support Homebrew Talk - Beer, Wine, Mead, & Cider Brewing Discussion Forum:

This site may earn a commission from merchant affiliate links, including eBay, Amazon, and others.

Arneba28

Well-Known Member
Joined
Feb 14, 2008
Messages
2,197
Reaction score
18
Location
Amherst
So I am normally just a Partial Mast brewer without AG equipment. However, I accidentally ordered an AG Kit from Northern Brewer so we are going to try a 9.75# grist without a mlt. So stop me if I am crazy. The original grist was for a dry stout but because I am guessing on bad efficiency I moved 5.5# 2-row to 6.5 to hopefully cover this first time attempt.

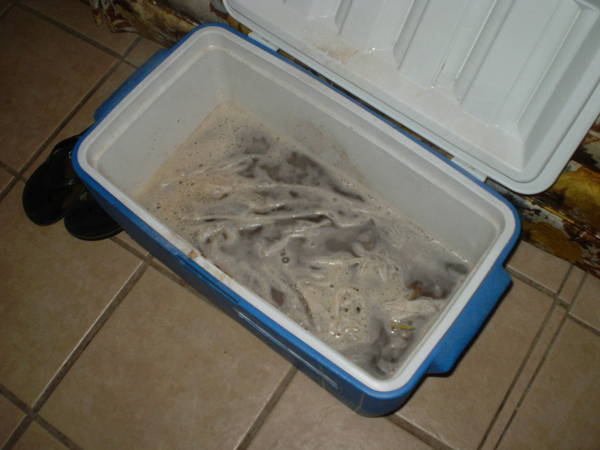
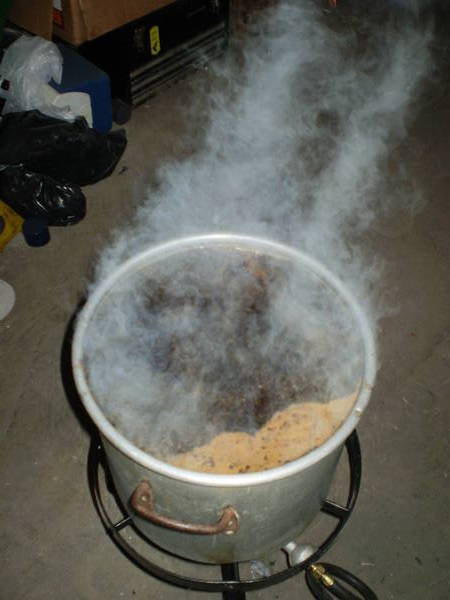
So without a MLT I am going to use my old bottling bucket as to sparge in. I have a huge mesh grain bag that I am going to dump the mash into once I pour it out of the cooler. I am slightly worried about doing this dump but I dont have much choice since its not converted. However, I did manage to get my hands on a propane burner to use for the day:ban: So no stove top boilovers!!!!!

Because I have never done an AG tell me if I am missing anything absolutely vital.

9.75#grist @1.25qt/lb = 12.25qt mass water
with a grain absorption loss of .2 gal/lb = water loss of apx. 2gallons
Leaving me with about 1gallon of runnoff.
So with 1gallon runoff, I will need to sparge with 4.75gallons in order to collect 5.75 gallons for the start of the boil.

Oh and heres the Recipe. This is my third time doing this recipe, except its 2-row instead of DME now. Seriously, the best beer I have ever made, so I am pleased.

6.5# English 2-row
2# Flaked Barley
1# Roasted Barley
.25# English Chocolate malt (500 L:rockin:)

.5oz Galena (60)
.25oz EKG (60)
.75oz EKG (30)

S-05

S-05 or S-04 what do you think?
 
Do you have two large pots? One to mash in one to heat water. If so you should Deathbrewer's AG method. Yours is the perfect application for it and it is easy. With your bump in base malt to account for the possible drop in efficiency you will be fine.

Also if you don't do that method exactly at least make sure you just put the grains in the bag for the whole process and move and sparge through it as needed. The idea of using it as a strainer sounds unwieldy and totally unnecessary.
 
I have an unconverted cooler that I am going to mash in. And I was going to leave everything in the bag for the process just incase my bottling bucket doesnt work as well as I am thinking.
 
This is exactly what I used to do, no worries it works. Its messy, but it works ;)

First line your uncoverted cooler with the bag
DSCN2654.jpg


Then get yourself one of these. Actually get six.
DSCN2663.jpg


Then employ the super advanced sparge mechanism
DSCN2656.jpg
 
Then start the spage. It will be messy, try to get the pot close to the flow, or if you can stick a racking tube up the spigot, go for it.
DSCN2667.jpg


Adjust the flow and unstick the sparge by adjusting the bag in the cooler.
DSCN2664.jpg


My sparge schedule is as follows:

3 to 3.5 gallons of 160 to 165 degree water mixed in with the grain. Stir to make sure there aren't any doughballs. The temp should drop to about 154 or so when you mix it with the room temp grain. If not, keep stirring and add a little cold water until you hit 154. Throw the lid on it and leave it alone for an hour.

In the meantime, heat about 2 gallons of water to 180. Start the sparge and run it until it goes dry. When the 2 gallons reach 180, pour it in and stir it around again. When its mixed, start the sparge again. You can do this one more time (2 gal @ 180) if you need more boil volume.

Good luck!

BTW, you're an all grain brewer now. Welcome to the sickness :p
 
So after a very long, and very nerve racking, FULL, 6 hours, I have 4.6gallons of 1.054 irish stout fermenting.

Things learned.
#1 preheat the cooler more first. I doughed in with a stike temp of 176 and the mash held at 152 for about 20minutes then started dropping quick. about 1deg every 20 min. So I added a qt of 180dF water. Brought it back up to 153, I had to add 2qts one more time, It got sketchy. The cooler is pretty old and didnt seal well and I am sure that didnt help. So I mashed an extra 20 minutes just to make sure and I think it helped alot.

#2 Dont brew when its 8 degrees F outside. Holy Hell was I cold!!

#3 Measure your evaporation rate for the boil duration before you brew. I accounted for 13% and hit 19%. ending result was about 2qts less wort then anticipated.

#4 I hit 75% eff based on what beer tools put.:rockin::rockin::rockin: damn happy about that. That extra grain that I added was not needed.

#5 make sure your bathroom sink faucet doesnt leak everywhere when you hook up your wort chiller(I flooded the hell out of the bathroom and only got the wort down to 120 before I caught the leak. So after almost 3 hours in the garage at 10degF I finally got it down to temp.

#6 START BREW DAY BEFORE 8PM. I stay up late but I didnt want to be up this late brewing. I would have been done by midnight if I hadnt flooded the basement.

All in all, The wort tasted great. I hit a good og, although higher then I had wanted but I am not complaining, just glad that I actually had starch-sugar conversion and no boil overs, burns or stains in the house.

Ill have pictures in a few minutes but there not great.
 
PB290042.JPG

Mashing in. Notice crappy cooler with no spigot or even any drain.

PB290044.JPG

I started losing my mash temp fast. I thought briefly that putting it infront of the fireplace might help. It didnt,lol

PB290045_.JPG

A glorious rolling 5.7gal in a 6gal pot!

PB290049_.JPG

It was only about 15degF in the garage and it was steaming up bad.
 
Nice work for your first all grain, believe me, it gets a hell of a lot easier. I must have spent three weeks reading everything I could before I did my first, hell I even practiced setting up the equipment and visualizing :p Didn't matter though, it ended up being a 9 hour day, boilovers, leaking faucets, and missed numbers. However the next time I did it, it was only a 7 hour day, with only a few catastrophes.

The lessons you learned are good ones, and will improve things immencely. First, get a cooler with a spigot, or at least drill a hole in your existing one. Next, go to your LHBS and get a spigot for a bottling bucket, they're real cheap.
phpThumb.php

Screw this into the hole on your cooler and you're good to go. You don't need a braided hose or anything if you're using a bag in there, but if you want to upgrade, by all means. I use the bag and have had good eff with it, so I don't feel the need to change. The spigot fits racking tubing very nicely, and you'll be amazed at how much a difference running wort cleanly with no splashing or pouring makes.

Next, of course, is a wort chiller. 3 hours for a wort to cool down isn't a good idea, its asking for infection. You can make one on the cheap with some copper tubing and a few attachment parts. We made ours for less than 40 bucks (the copper alone was 35). It has changed the way we brew. We can get an almost rolling boil down to 70 degrees in about 10 to 15 minutes.

After that it's fermentation temp control, but that's another post :p

Congrats again!
 
I have a wort chiller. The problem was the hose I thought was getting a good connection to my sink wasnt. After I set it up I walked away to give it some time. The water in hose popped off and I flooded the bathroom and couldnt get the hose to connect good so I had to go with just letting it chill outside.
 
I have a wort chiller. The problem was the hose I thought was getting a good connection to my sink wasnt. After I set it up I walked away to give it some time. The water in hose popped off and I flooded the bathroom and couldnt get the hose to connect good so I had to go with just letting it chill outside.

Whoops, my bad! Thats what I get for drinking 3 saisons before trolling these boards :drunk:
 
I've made 20 batches in an un-modified cooler by sparging in my bottling bucket. I did use a copper tube that goes into the spigot in the bucket, across the bottom, bent 90°, then a clamped on mesh. I drilled a small bung to hold the tube in the spigot. The tuse goes all the way across to help retain it in the spigot, can't accidentally stir it out. I use a 4qt sauce pan to ladle the soup into the bucket. Oh, I line the bucket with a paint strainer bag from Home Depot.

My recatangular cooler is a size smaller though. More efficient that way. 34 qt? I've done 15# of grain in it, which fills the bucket to the brim. Oh, pour in some of the 176 water first, to pre-heat the corners. The inside are buckling just a bit after 20 hours at 152.
 
Sounds like a success all things considered. My first AG took for freakin' ever because I hadn't put enough holes in my cpvc manifold and had only a trickle of wort. I fixed that problem before the next batch and things went well from then on.
 
Back
Top