Kegerator from Magic Chef MCBR445

Homebrew Talk - Beer, Wine, Mead, & Cider Brewing Discussion Forum

Help Support Homebrew Talk - Beer, Wine, Mead, & Cider Brewing Discussion Forum:

This site may earn a commission from merchant affiliate links, including eBay, Amazon, and others.

rocketman768

Supporting Member
HBT Supporter
Joined
Feb 5, 2008
Messages
1,083
Reaction score
28
Location
Evanston, IL
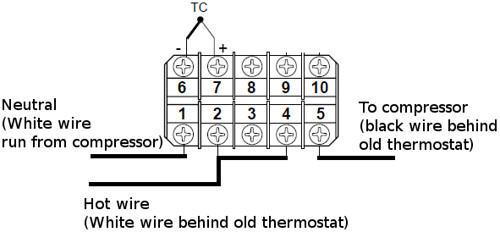
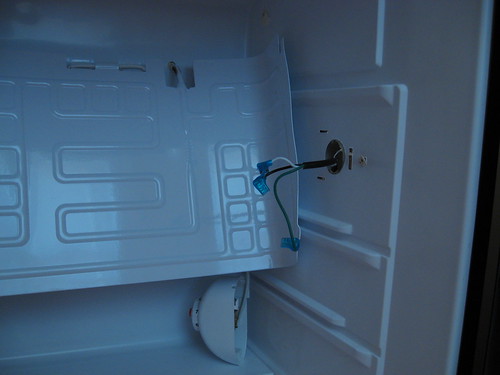
First, gently bent the freezer coils down using some heat applied to the tubing with a lighter (see scorch marks on tube). Also, removed thermostat by prying a plastic strip off the thermostat and removing a screw underneath. The black and white wire need to be shorted together for the compressor to turn on, so these are the inputs to your relay.

4908265909_346113ce9a.jpg


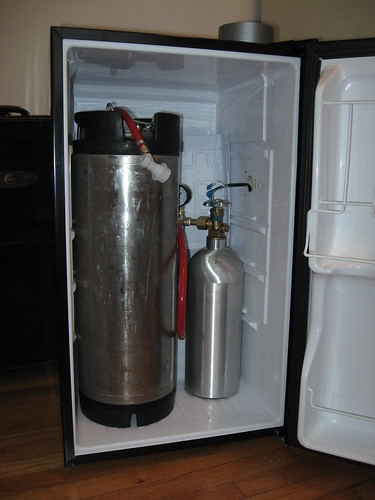
Ok, everything fits now.

4908860168_36c97b4984.jpg


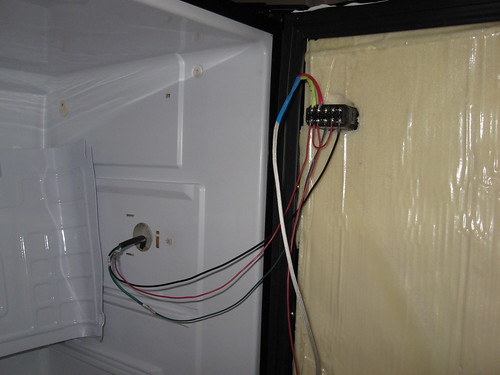
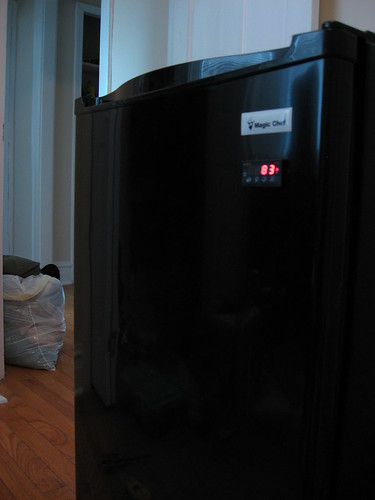
Auber controller all wired up. Cut out the hole in the front of the fridge with a dremel. You need to be precise with this, because the face is maybe only 1/8 inch wider than the rest of the controller. Had to drill a small hole through the hump in the back of the fridge to run a wire that would carry one of the power wires for the controller, since you can use one of the black/white wires that were attached to the old thermostat as the other (see schematic on back of fridge). Also removed the door trays by unscrewing them from the door and pulling the rubber gasket off. Reattached gasket with the screws, hot glue, and waterproof caulk.

4908860348_92b8c96446.jpg


Controller parameters set. It's alive!

4908860432_c66607ae43.jpg
 
How did you wire this up? What voltage do you need to run to it? I love the look and I want to try and build this, any help will be great.
Thanks
 
Is there a "hump" in the back of yours that covers the compressor? And will 2 kegs fit if the CO2 bottle sits on this hump?
 
4956037904_640b9beb0b.jpg


You'll have to run the neutral from outside the fridge. It is safe to drill through the compressor hump to feed the neutral wire. Also, I recommend not to completely remove the plastic tray inside the door by unscrewing it, but to just cut it out. I get a much better seal this way.

Yes, there is a compressor hump, and I think if you bend the freezer coils down far enough, you could sit a 5lb CO2 tank on the hump and have 2 5 gal corny kegs inside.
 
How did you remove the temperature control? I'm starting a kegerator build and dont want to break anything.

Also, did you put in a tower? Are there any lines at all running through the top of the fridge or is it safe to drill because they are all in the freezer tray?
 
There is a YouTube video out there of someone changing this exact model into a kegerator. He was able to fit two cornys and a CO2 tank put had to do some pretty intense modifications.

 
Last edited by a moderator:
I've seen that video. Helpful for sure, but not great on specifics for putting in a tower. Reaaaaally hoping I don't have to buy a 3rd fridge, finding reachable cheap ones in new york is a pain when you don't have a car.

Does anyone have any idea on whether or not I can drill right through the top on this fridge? Help would be hugely appreciated!

I just converted mine over a few days ago (same model) and plan on putting in a tower. I'll let you know how it goes!
 
Does anyone have any idea on whether or not I can drill right through the top on this fridge? Help would be hugely appreciated!

I haven't done it yet, but I think there is a coolant line running across the top. To find it, you can use the cornstarch method, which is roughly as follows:
  1. Mix cornstarch and rubbing alcohol.
  2. Turn on fridge and let run for several minutes so the coolant lines heat up.
  3. Spread mixture on top.
  4. Wherever it dries first should reveal the underlying line.
 
Tried my hand at this and all was going well until I heard "pfffffff...". That damn freezer section is touchy, so be patient and your work should pay off. As for me, I'll be looking for a new fridge. :(
 
Hey All! New to the forums, but this one was a real good help when I decided to finally convert my old Magic Chef Fridge over to a Kegerator. Yes I did end up bricking my first fridge attempt. I could not find any definite pictures of where the coolant lines were for the MCBR440 or 445 series. Well, so that others my learn from my mistakes, please see the pics of a cut up MCBR440 top section and corresponding coolant lines.

IMG_1467.JPG

The coolant lines loop around the top of the fridge in the pattern shown here.

IMG_1468.JPG

Since I killed this fridge, I used the knowledge of where the lines were for my second attempt on a MCBR445 (a slightly newer version of the 440).

IMG_1472.JPG

The second build turned out great. First mico keg is going in this afternoon. Hope this will help out other Kegerator builders.

IMG_1471.JPG
 
Back
Top