Bottling Tips for the Homebrewer

Homebrew Talk - Beer, Wine, Mead, & Cider Brewing Discussion Forum

Help Support Homebrew Talk - Beer, Wine, Mead, & Cider Brewing Discussion Forum:

This site may earn a commission from merchant affiliate links, including eBay, Amazon, and others.
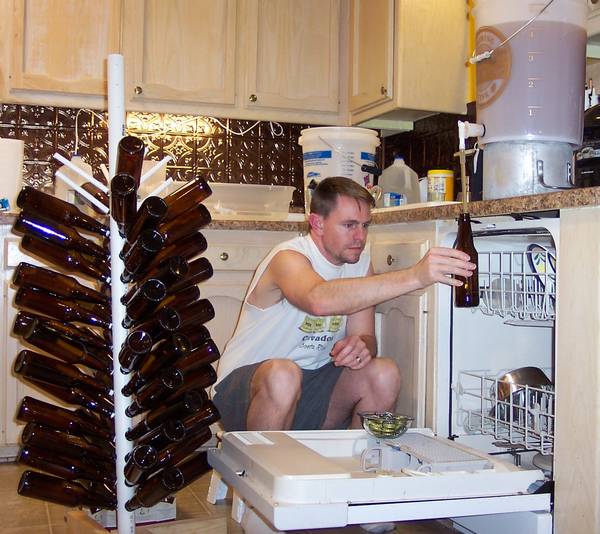
Someone bumped a thread from 2005, and this was one of the posts, some great info on priming sugars.

Many people have been told that priming bottled conditioned beer should not be done with sucrose. Many books state that malt extract is best for priming. Be aware that malt extract will generate break material when boiled, and that the fermentation of malt extract for priming purposes will often generate a krausen/protein ring around the waterline in the bottle, just like it does in your fermenter. Simple sugars don't have this cosmetic problem and the small amount used for priming will not affect the flavor of the beer (Based upon my 15+ years of brewing).

Here are some simple basic rules for Priming :
Using Corn Sugar (Sucrose) - 2/3 cup for bottling and 1/3 cup for Kegging.
Using Cane Sugar (Sucrose)- 2/3 cup for bottling and 1/3 cup for Kegging.
Using Brown Sugar (Sucrose)- 2/3 cup for bott! ling and 1/3 cup for Kegging.
Using Maple Syrup - 1¼ cup for bottling and 5/8 cup for Kegging.
Using Molasses - 1 cup for bottling and ½ cup for Kegging.
Using Honey - 1 cup for bottling and ½ cup for Kegging.

You can prime your beer with any fermentable that you want. Any sugar: Corn Sugar, Cane Sugar, Brown Sugar, Honey, Molasses (if you can get them out of the ground), even Maple Syrup can be used for priming.

The darker sugars can contribute a subtle aftertaste (sometimes desired) and are more appropriate for heavier, darker beers.
Simple sugars, like Corn or Cane Sugar, are used most often though many brewers use dry malt extract too. Ounce for ounce, Cane Sugar generates a bit more carbon dioxide than Corn Sugar, and both pure sugars carbonate more than malt extract, so you will need to take that into account.

Honey is difficult to prime with because there is no standard for concentration.! The gravity of honey is different jar to jar. To use hone y, you will need to dilute it and measure its gravity with a hydrometer. For all sugars in general, you want to add 2-3 gravity points per gallon of beer to prime.

Remember, the above are measurements for a 5 Gallon batch. It is always best to heat up anything that you are using for priming with water. If you are doing less than 5 Gallons at a time, then here are some things to take into account.

5 Gallons will give you...
54 x 12 oz Bottles
40 x 16 oz Bottles
32 x 22 oz Bottles

So divide the number of bottles into whatever you wish to use for priming and that will give you the amount your looking for.

Bottom line: use the sugar that you feel most comfortable with. Each of us has their own favorites.
-->
 
Well I never have used a dip tube on my bottling bucket and haven't even thought about it until I saw this thread today. Only I didn't like the idea of a bubble of air being trapped inside the spigot, and see no way to avoid this with such a small diameter tube going into a large chamber on its way to another small tube. So, I came up with this piece of PVC elbow that is the same diameter, if not larger, than the back of the spigot, and it is threaded so it screws on easily. It sits maybe an eighth of an inch off of the bottom so I will never have to tip the bucket again! This modification costs a whole 58 cents.

http://www.flickr.com/photos/33697914@N08/3258371355/

Elbow Attached on Flickr - Photo Sharing!
 
Well I never have used a dip tube on my bottling bucket and haven't even thought about it until I saw this thread today. Only I didn't like the idea of a bubble of air being trapped inside the spigot, and see no way to avoid this with such a small diameter tube going into a large chamber on its way to another small tube. So, I came up with this piece of PVC elbow that is the same diameter, if not larger, than the back of the spigot, and it is threaded so it screws on easily. It sits maybe an eighth of an inch off of the bottom so I will never have to tip the bucket again! This modification costs a whole 58 cents.

[

That's a friggin' great idea. Last time bottling I had the bucket propped up something slipped and my favorite beer drinking glass got knocked to the floor and shattered.
 
Awesome!!! Nice Mod...

Though honestly I still don't get a bubble or airpocket with mine...I did two batches and stared at it the whole time, and everything was fine.

But cool!!!!


:mug:
 
Well I never have used a dip tube on my bottling bucket and haven't even thought about it until I saw this thread today. Only I didn't like the idea of a bubble of air being trapped inside the spigot, and see no way to avoid this with such a small diameter tube going into a large chamber on its way to another small tube. So, I came up with this piece of PVC elbow that is the same diameter, if not larger, than the back of the spigot, and it is threaded so it screws on easily. It sits maybe an eighth of an inch off of the bottom so I will never have to tip the bucket again! This modification costs a whole 58 cents.

http://www.flickr.com/photos/33697914@N08/3258371355/

Elbow Attached on Flickr - Photo Sharing!


I use the same thing but I used the idea from BrianP (posted the same ting on the bottom of Page 3 of this thread). Dip tube or threaded elbow this is 10X better than using a siphon.
 
I use the same thing but I used the idea from BrianP (posted the same ting on the bottom of Page 3 of this thread). Dip tube or threaded elbow this is 10X better than using a siphon.

I used the threaded PVC elbow idea in my bottling last night and it worked great. The elbow was a bit too long so I did have to hacksaw off about a 1/4 inch but other than that no problems.

I have a question for anyone who cares to give their opinion on method. To sanitize my bottles I used a 5 gallon Homer bucket filled with StarSan solution and submerged as many bottles as I could at a time. I pulled them out, poured out the sanitizer and bottled on top of any bubbles that might be in there.

Over time I noticed the sanitizer getting cloudy and I understand that means the effectiveness is begin reduced. Could this end up posing a problem with the later bottles not being sanitary enough? Probably just me being nervous about my first batch but it never hurts to ask.
 
Over time I noticed the sanitizer getting cloudy and I understand that means the effectiveness is begin reduced. Could this end up posing a problem with the later bottles not being sanitary enough? Probably just me being nervous about my first batch but it never hurts to ask.

You're being nervous..it's not going to loose it's ph efficacy that quicky unless your bottles where stored in a sewer and covered in crap...

But the most effective, chepest (in that you use less sanitizer) and quickest way that I have found is to use the vinator to sanitize with.
 
SWMBO's brother and I just bottled two batches this past week using your tips. We did the bottling at our respective houses with our own equipment that we upgraded. In both cases we did not use the clamps you recommended and had no issues what so ever with any leakage with either bottling bucket. The future health of my back thanks you immeasurably.
:rockin:
 
I just wanted to give a shout out of thanks to Revvy. I had been using these tips except for the dip stick mod. I did that today before bottling. Works fantastic! Much easier than tipping the bucket, and hardly no beer loss. Thanks!!
 
Here's my set-up, havent made the spigot yet but will before the next batch..

I use an old water bottle for a bucket, it is a pain, but it was $5.

I have a gravity bottle spigot hooked up with a short piece of tubing, this allows me to flex it and fill the bottles at a bit of an angle to reduce foaming/airation, etc.

n510441173_1836467_5123.jpg
 
Here's my set-up, havent made the spigot yet but will before the next batch..

I use an old water bottle for a bucket, it is a pain, but it was $5.

What don't you like about the water bottle? It seems like it would be a great cheap alternative...One thing I might do (and I've seen it in bars who use them as ice buckets) would be to punch a couple holes and put a handle on it...


Thanks for sharing! :mug:
 
So I lost my tube that you actually fill the bottles with and I already added the priming sugar to the beer, what should I do? What will happen if I bottle the beer tomorrow? Will I need to add more priming sugar?
 
So I lost my tube that you actually fill the bottles with and I already added the priming sugar to the beer, what should I do? What will happen if I bottle the beer tomorrow? Will I need to add more priming sugar?

Do you still have the bottling hose???

If so I would sanitize it, and (preferably if you have help) carefully bottle by sticking the hose all the way down into the bottle, opening the spigot, filling slowly till it starts to overspill. Then turn off the spigot, and remove the bottle...

Unless you have something you can rig as a spring clamp to open and close the hose easier than using the spigot..

But once you add the priming sugar the process has sort of already begun, and you should see it through in one sitting...

Just next time make sure you have all your parts laid out before you add the priming sugar.

Good luck.
 
I'll try that, I was just going to use the spigot, but I'll try the hose first. Thanks!

Another question in regards to sanitizing, my bottles are soaking in W.A.Y. single step no rinse sanitizer, do I really just dump the water w/ the sanitizer out of the bottle and fill them with beer? I don't have to rinse or dry them?
 
thanks a bunch for this thread Revvy. it made my first bottling day go great. a little running around making sure everything was in place, but i suppose that's to be expected. i used the wand-to-spigot, trimmed 90 deg elbow from lowes that threads on, bottles dishwasher sanitized, filling over the dishwasher door method. it worked like a charm.

i've got 49 bottles trying to seduce me right now.

also racked my second brew, a dunkelweizen, to the secondary i freed up. it actually tasted quite nice (i had to sample the FG sample beer) and had a great hefe smell to it.

anyway, thanks a bunch for all the suggestions! :mug: :mug:

Glad you found the info in here helpful!!!!

:mug:
 
quick question, i had some green bottles from a czech pilsner, staropramen, and while i got the caps on OK, i wasn't 100% sure of the seal. it was almost like there wasn't enough for the capper to hold onto while pressing the cap. anyway, has anyone else had this problem with green pils bottles?
 
This is a great thread lots of good tips. I have one thing I do that makes it easy to identify my beer. I keep a beer log with all details on each beer. I number the beers, when I bottle I just write the number with a sharpie on the cap. Later if I am taking to a party or serving to others at my home, I might make a label based on the info in my log. If HWMBC wants a drink & can't identify the contents we can look at the number on the cap & in my brew log & identify the details. This way we label only when we need to our number system is simple.
 
Excellent Thread Revvy!

Thanks to all the information here I was able to bottle my first batch of home brew without a hitch. Went smoothly and had fun doing it, too. Very excited about getting it into the bottles...I used a sharpy and wrote the initials of the type of beer it is HW and the date I brewed it and the date I bottled it. On the 7th of March it will be 3 weeks in the bottle...As Tom Petty would say "The waiting is the hardest part"....

83.JPG


92.JPG
 
Is that a DIY bottle tree you have there. ^ The trunk looks like a piece of 1 1/2" or so PVC.May I ask what you used for the branches and how you attached it to the legs?
 
Is that a DIY bottle tree you have there. ^ The trunk looks like a piece of 1 1/2" or so PVC.May I ask what you used for the branches and how you did the legs?

+1 that is a pretty massively cool Diy bottle tree!

knightshift, if you got pics and a parts list for the build, it would be cool if you added it to this here thread. I think a lot of people on here would find in valuable.

:mug:
 
I really like the dip tube idea, as tipping the bucket at the end gets tiresome.

The only tip I think I can add is for people who may not want to buy/get/build a bottle tree.

I fill the kitchen sink with sanitizer, and fill it with bottles. Then, as we are dumping the bottles, we shake them a bit to make sure the whole inside gets splashed with sanitizer. Then, I simply put the bottles on the "pins" of a dishwasher rack that has been thoroughly soaked in sanitizer. (Unfortunately, my new house doesn't have a dishwasher, but I got the racks from an appliance repair place-the racks came out of old dishwashers that were going to be junked.)
 
I just bottled my first batch ever yesterday, and i realize now I may have messed up by not mixing the priming sugar in with the brew very well. I poured it into the bottling bucket first, then siphoned in the beer on top. After that I did not mix any further. I am sure the siphoning would have mixed it up to some extent, but I am afraid that the second half went right on top and didn't get mixed well enough... Am I going to have carbonation problems, exploding bottles, etc?

Thanks

I do this quite often actually. Some of my bottles come out creamier with less carb, some of them come out like champagne. Adds variety to a batch and if it's my first time making it, helps me to gauge the level of carbonation i prefer in it.

But for the most part i just stir it gently with my sanitized spoon after siphoning.
 
I just try to lay my tubing in the bucket so that the flow creates a whirlpool effect. It also has the benefit (if you don't move it much) of creating a trub cone in the middle of your bottling bucket where it's easy to leave that stuff behind.
 
One thing I have found to be useful is take a price gun like what you would see at a store and I assign each brew a number. The brew log gets a sticker, the carboy gets one in ferment, and each bottle gets one. This is a fast, easy way to label. In beer smith each brew I do starts with this number in as my assistant brewer allowing me to find them easily in the program.

Another thing I generally do while bottling is bottle 1 beer in a clear bottle and lable it with the brew log (scaled to fit). This allows me to check the color of the beer as well as be used as a quick referance instead of using beersmith.
 
Best thing I ever learned about bottling was to recruit my girlfriend to cap the bottles after I fill them. Cut my time in half! "Save the hassle. Bottle with a friend."
 
I came across this thread a couple weeks ago and when I was at Lowe's last weekend I saw the pvc pipe section and thought, what if I throw a pvc elbow on the threaded end of the spigot instead of the nut? So, I bought a 3/4" pvc elbow threaded on one end and slip on, on the other end. It fits snug to the bottom of the bucket but it has just enough space to start a siphon. I haven't bottled a batch with it yet but I tried it with water and it seems like it will work. Not sure if this has been thrown out as an idea yet but I figured I'd throw it out there.

Thanks for all the other tips! I used all of them when bottling my second batch and it made everything more simple.
 
I was curious if anyone had an estimate of the stopper size for the dip tube? I don't have a store nearby, and have to order online.
 
Thanks for the bottling tips Revvy! Bottling is still a pain, but not as much so. I've still got some more dialing in for the bottling process to do. :)
 
This is my current bottling setup. I use a short-walled "bussing bin" that I got from a restaurant supply store (About $5.00). It will hold 35 bottles at a time, keeps them from falling over, catches any overflow/spillage, and allows for quick transfer back to the counter for capping. I set it on the ground, below my bucket, and then grab a chair, and start filling the bottles one at a time, row by row. I can easily see which bottles have already been filled, and where the fill line is while bottling.

IMG_1364.JPG


I put the bucket on the kitchen counter, and I currently use my auto-siphon for bottling, rather than the spigot (That is soon to change - don't worry!) Once I get the siphon going (with a little help from SWMBO) I can easily fill the bottles, which are loaded into the bussing bin on the floor. I pull up a chair, and go to town! Bottling is relatively quick this way.

IMG_1370.JPG

Cool idea.
 
Back
Top