110v Recirculating eBIAB 2.5 gallon batches

Homebrew Talk - Beer, Wine, Mead, & Cider Brewing Discussion Forum

Help Support Homebrew Talk - Beer, Wine, Mead, & Cider Brewing Discussion Forum:

This site may earn a commission from merchant affiliate links, including eBay, Amazon, and others.
I've ordered nearly everything I need to complete this build. But I want to make my control box more modular.

I'd like to use a computer power cord to hook up the box to the wall. Seems easy enough.
And then, I'd like to plug my element and pump into the box as well.
If I'm not mistaken, my temp probe has an inline disconnect that I can attach/detach from the box.

Does any of this make sense? I'm going to see how far I can get into the wiring process, supplies are in the mail, I'm going to have a friend confirm my results before powering on. I'd just like to get some great help from you folks!

I'm open to suggestions or changes too!

Thanks.

*Edit, I guess the computer cord "inlet" i'm thinking of would be properly called a receptacle? Plug, Connector, Receptacle.

I agree a pc power cord won't work for this. What you need is the twist lock type connectors or there are other type disconnects rated for these amps. And yes your temp probe will have a disconnect built in if you got the deluxe cable from auber.
 
I'm only running about 18A total (element is 2000W at 120V = 16.6A, and pump is 1.4A)

I'm using the original plan of only 1 element. So I need to use 12AWG wire. As long as my plugs and receptacles are rated at 20A they'll be good to use. I DO like the idea of using the twist-lock connectors, but I'm concerned they won't fit in the case. I'm sure I can make an adjustment in the layout other than copying the OP's method.

Would someone mind explaining how the terminal block/bus works? A question was brought up in this thread, but didn't really answer my question completely.

I'd wire all neutral lines to? and then connect that to the neutral line that runs to the wall? same for ground and hot? Sorry my electrical knowledge is lacking.
 
jrb03 said:
I've never seen a 3000w 120v element??? Theoretically it should work the same just make sure your contactor and ssr are rated for 30 amps.

Yep the contactor shown is 30amp 120 and the ssr is 40 amp. The only thing I would add from P-J's diagram would be a 10 amp fuse to the pump. Here's the link for the element I ordered.http://www.patriot-supply.com/products/showitem.cfm/RHEEM_SP10874JH
 
captain_brew said:
I'm only running about 18A total (element is 2000W at 120V = 16.6A, and pump is 1.4A)

I'm using the original plan of only 1 element. So I need to use 12AWG wire. As long as my plugs and receptacles are rated at 20A they'll be good to use. I DO like the idea of using the twist-lock connectors, but I'm concerned they won't fit in the case. I'm sure I can make an adjustment in the layout other than copying the OP's method.

Would someone mind explaining how the terminal block/bus works? A question was brought up in this thread, but didn't really answer my question completely.

I'd wire all neutral lines to? and then connect that to the neutral line that runs to the wall? same for ground and hot? Sorry my electrical knowledge is lacking.

That's correct I used 12g wire as well. I've never seen a 12g computer cord, but sounds like you are already aware of the size you need.

You are correct, if your going to use the the auber project box that I did, twist lock connections will definitely not fit. I had originally planned to use some sort of disconnect for the wires but when I started fitting things together I realized there was no room. If your using the auber box show us what you come up with! I went the easy route and didn't really try to come up with something.

You are correct about the bus strip too. The strip I used has two separate busses. I used one for hot and one for neutral. Your hot and neutral from the wall will get connected on their own bus, therefore distributing current to the other wires you connect to the bus. It's makes for an easier neater install. I didn't have a bus for the ground wires, there are fewer of them and I just wire nutted them together. Make sure you ground your box and kettle! Hope this makes sense, I'm not an electrician either!
 
I have seen people using the switchcraft type connectors for element power. There is some argument as to whether they are up to NEC code but they can handle the voltage and current requirements for this application and are a smaller form factor. If you are using 120v @ 20 amp, then a standard single (or double) 20 amp AC outlet will work.

For power input power, just make the cord permanent to save the cost and space on your panel.
 
So for those of us who are electrically challenged and/or perhaps hoping to save upfront cost, are the pump switch, PID switch and element switch all necessary? Also the E-stop and flash buzzer, although I can see the desire for an E-stop?

I'm wondering, is there some way to just plug in the control box which powers on the PID, set the PID which powers on and off the element, and then plug in the pump separately to turn it on? I guess I'm starting to think about this and want the easiest way to set up a recirculating eBIAB system. Easy in the sense that it is simple to buy, put together and use.

Tell me I don't know what I'm talking about if appropriate, because really.... I don't know what I'm talking about...
 
inhousebrew said:
So for those of us who are electrically challenged and/or perhaps hoping to save upfront cost, are the pump switch, PID switch and element switch all necessary? Also the E-stop and flash buzzer, although I can see the desire for an E-stop?

I'm wondering, is there some way to just plug in the control box which powers on the PID, set the PID which powers on and off the element, and then plug in the pump separately to turn it on? I guess I'm starting to think about this and want the easiest way to set up a recirculating eBIAB system. Easy in the sense that it is simple to buy, put together and use.

Tell me I don't know what I'm talking about if appropriate, because really.... I don't know what I'm talking about...

That's pretty much how my larger setup is. Basic pot control with nothing fancy. It does the job
 
Ranco 1 stage temp controller can handle 15 amps w/ internal relay. This could be used for a basic setup, no control panel required.

To adjust the boil intensity you need a pid or pwm circuit and a ssr. This feature is more critical for higher power 220v heating elements.
 
So is there a reason you guys are putting the inlet for the recirculated mash through the lid rather than at the top on the side? I feel like I would rather have it there, but I'd like to hear if there is a reason not to. I think the whirlpool effect of having it on the side could bring your efficiency up even more.
 
So is there a reason you guys are putting the inlet for the recirculated mash through the lid rather than at the top on the side? I feel like I would rather have it there, but I'd like to hear if there is a reason not to. I think the whirlpool effect of having it on the side could bring your efficiency up even more.

Your return inlet could be mounted to the side w/o issue. I doubt the "whirlpool" effect would have any bearing on your efficiency unfortunately.

The nice thing about returning the wort through the lid, is that it makes it flow right through the grain. If you were returning through the side of the kettle, you would be forced to return the wort outside of the grain bag. The flow directly into the bag continuously agitates the grain; at least in my experience.

Do what works for you though! I'm sure either way will make great beer.
 
Ya I wanted my recirculation to go through the grain bag too, not bypass it. And your not gonna get much whirlpool action with the small pump.
 
Has anyone tried hooking up a shower head type nozzle to the underside of the lid for the recirculation? I think it would be a little better to disperse the recirculated wort rather than having it just pour straight through from a 1/2" fitting. Anyone?

Chad
 
Ordered my electronics yesterday. Still doing some planning for the kettle and all the fittings. My plan is to use this to spray the recirculated wort, similar to the High Gravity kit. Also, I want to use this aerator for when I put the wort into the fermentor. Hoping to get a nice aeration without shaking :ban:
 
Nice schematic P-J!

I'm embarrassed to say I stared at the E-stop for quite a long time and didn't figure it out. Everything else was so simple, in a good way. Showed the schematic to my son and his friend the other night and told them I didn't get the E-stop. They took a quick look at it and were like, "Dad, you're overthinkng this, it provides the path of least resistance to ground" Duh.

Beautiful schematic P-J. I've studied and used many electrical and hydraulic schematics for work over the years, sometimes think I would do "this" or "that" differently. But to come up with a design on my own.. no way.

These electrical brew threads have got me looking back into my old basic electricity and electronics books.
 
Has anyone tried hooking up a shower head type nozzle to the underside of the lid for the recirculation? I think it would be a little better to disperse the recirculated wort rather than having it just pour straight through from a 1/2" fitting. Anyone?

Chad

this might work:

http://www.homebrewstuff.com/siphon-spray-aerator.html
image_617.jpg
 
cmw6300 said:
Has anyone tried hooking up a shower head type nozzle to the underside of the lid for the recirculation? I think it would be a little better to disperse the recirculated wort rather than having it just pour straight through from a 1/2" fitting. Anyone?

Chad

Check out my previous post. I have a link to a mini brass adjustable spray nozzle I'm going to use.
 
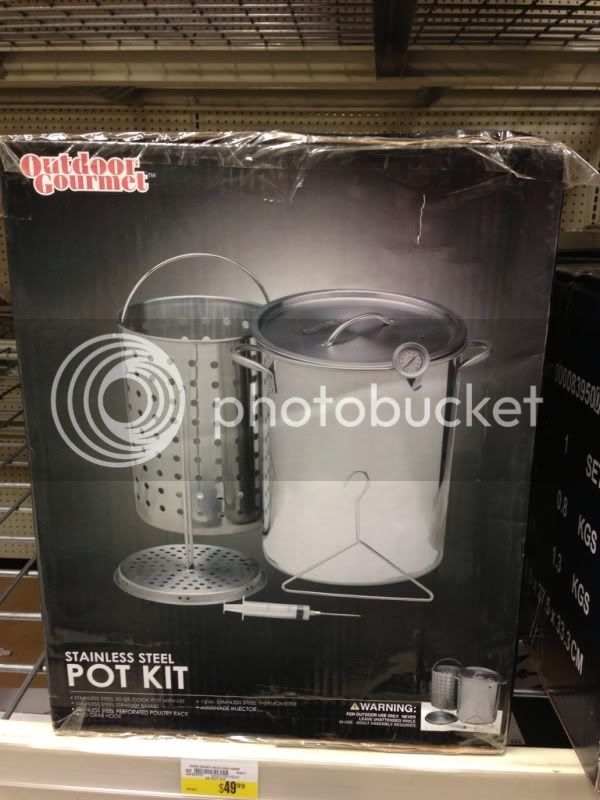
I was in Academy Sports over the weekend and found my tall narrow pot for sale. It's $49, pretty good for the price. I still think this is the perfect size pot for e-small batch.

5C746871-A6D0-4D86-90F2-779245FBD9B4-5845-000002C01B97A43B.jpg
 
So I'm looking more and more into something like this and have been thinking about some of the parts and how I could adjust to my desire. First I don't really feel the need for a sight glass, they are nice, but extra money and cleaning. So that got me thinking about the temperature probe and I've been looking at a few others on the website.

There is this one which is cheap and it says the probe and cable are water immersible and work up to 250*. If this is true could I just drop it in the center of the bag for an accurate reading? But for some reason this seems to easy/good/cheap to be true.

Otherwise, I was thinking about this one which is a 1/2" and I figured I could attach it to a three way pipe joint coming out of the pump. That way I would get the temp of the fresh wort coming out of the pump and could also use it coming out of the plate chiller as well. It's more pricey plus I would need extra tubing, connects and a pipe joint.

Or I could just go your route minus the sight glass.
 
So in regards to wiring the E-Stop switch. I have the auber E-Stop that's listed. It is a switch that has 2 blocks on it. 1 NO, and 1 NC.

1 4
N N
C O
2 3

In the diagram there are just 3 dots in the switch. How do I wire this part? Right now I have the ground going into "3" and the hot line with resistors going into "1".

I think it should be Hot = 4 Ground = 3. Any insight would be greatly appreciated.

Everything else is wired and great! :)

Thanks,
CB
 
So I'm looking more and more into something like this and have been thinking about some of the parts and how I could adjust to my desire. First I don't really feel the need for a sight glass, they are nice, but extra money and cleaning. So that got me thinking about the temperature probe and I've been looking at a few others on the website.

There is this one which is cheap and it says the probe and cable are water immersible and work up to 250*. If this is true could I just drop it in the center of the bag for an accurate reading? But for some reason this seems to easy/good/cheap to be true.

Otherwise, I was thinking about this one which is a 1/2" and I figured I could attach it to a three way pipe joint coming out of the pump. That way I would get the temp of the fresh wort coming out of the pump and could also use it coming out of the plate chiller as well. It's more pricey plus I would need extra tubing, connects and a pipe joint.

Or I could just go your route minus the sight glass.

The T coming to the pump is a great idea and how I was originally going to do it. If you don't want a sight-glass that is definitely the way to go. I'd be real leery of just tossing a probe and cable into the middle of a pot to bounce around and just be in the way. Only negative to the T is the pump has to be on to get a reading, but my pump is always on during strike and mash.
 
I'd be real leery of just tossing a probe and cable into the middle of a pot to bounce around and just be in the way.

Are you leery of the probe being in the way? Or of it not working accurately? It seems easy enough to me: toss it in for strike water, take it out pour you're grain in, mix, put it back in, leave it for the mash and take it out.... Now that I write that it does seem slightly in the way.
 
Also, now that I think about it JRB (and anyone else who does something like this), how do you set the PID for the mash? Do you set it to your desired mash temp, say 152*, hit that temp than dough in? The grain addition would cool it down and it would need to rise back up to your mash temp.

Or set it higher , say 165* for a 154* mash so that when you add grain it cools it down to the mash temp and then you need to reset the PID to hold mash temp?
 
Plug your numbers into one of the many online mash calculators:

Grain weight
Grain temp
Desired mash temp

That will give you your strike temp - which you set the PID to. Before doughing in, set the PID to actual desired mash temp or else the element will try raise it up to strike temp.

In a nutshell:

Heat water to strike temp
Turn PID down to mash temp
Add grain
Relax for an hour ;)
 
to strike temp.

In a nutshell:

Heat water to strike temp
Turn PID down to mash temp
Add grain
Relax for an hour ;)

Thanks, just a quandery I had about how best to do that. That is kind of what I figured. I use beersmith so have no problem figuring out strike temp but was wondering how you did it with the PID.
 
I do exactly like jammin. Especially the relax for an hour :D

And yes, the probe would annoy the crap out of me just tossed into the pot. It would be in my way while trying to stir etc. I wouldn't blink an eye to spending the extra dough to mount it, but hey that's just me and the way I roll.
 
inhousebrew said:
Also, now that I think about it JRB (and anyone else who does something like this), how do you set the PID for the mash? Do you set it to your desired mash temp, say 152*, hit that temp than dough in? The grain addition would cool it down and it would need to rise back up to your mash temp.

Or set it higher , say 165* for a 154* mash so that when you add grain it cools it down to the mash temp and then you need to reset the PID to hold mash temp?

The guy on theelectricbrewery.com doesn't even bother with a strike temp, as it doesn't take that long for the system to come back up to mashing temp. To each their own I guess. I think I might follow the advice on heating to strike, lowering the PID and then doughing in.
 
The guy on theelectricbrewery.com doesn't even bother with a strike temp, as it doesn't take that long for the system to come back up to mashing temp. To each their own I guess. I think I might follow the advice on heating to strike, lowering the PID and then doughing in.

I guess that depends on how fast you can heat then. As with most brewing systems, it seems there is more that one right answer.
 
Got my Auberins order today! Almost done getting it all mounted, still waiting for my fuse holders in the mail...
EAD24D5D-92A5-4277-A1E2-80D6826527C5-11438-000009E48AE8DD38.jpg
 
BoxBrewer said:
Got my Auberins order today! Almost done getting it all mounted, still waiting for my fuse holders in the mail...

Looks great! I need to get some labels, you pushed me over the lazy edge.
 
Looks great! I need to get some labels, you pushed me over the lazy edge.

Thank you sir! I used to run a business that made stickers and shirts, so I was able to cut these out before I sold it, haha. The vinyl doesn't stick too well to the case, though...
 
Brewing today. Did a slight mod. All the talk about splashing wort made me think about adding a piece of hose to the outlet. Simple piece of silicone hose pushed over the camlock fitting in the lid. Seems to be working fine, no splashing and there is good swirling going on in there.

b830ff568a5995384dc8c76ef9fadd65.jpg
 
Brewing today. Did a slight mod. All the talk about splashing wort made me think about adding a piece of hose to the outlet. Simple piece of silicone hose pushed over the camlock fitting in the lid. Seems to be working fine, no splashing and there is good swirling going on in there.

http://i8.photobucket.com/albums/a7/jrb03/misc/beer/b830ff568a5995384dc8c76ef9fadd65.jpg[IMG][/quote]


crazy - I am brewing on the mini today as well! I also made a couple mods as well. I switched over to camlocks, hooked the pump directly to the kettle (eliminating a hose), re-did the numbers on my site glass.

[ATTACH=full]86212[/ATTACH]

[ATTACH=full]86213[/ATTACH]

[ATTACH=full]86214[/ATTACH]

[ATTACH=full]86215[/ATTACH]
 

Attachments

  • Photo1 (4).jpg
    Photo1 (4).jpg
    43.1 KB · Views: 1,428
  • Photo1 (2).jpg
    Photo1 (2).jpg
    65.3 KB · Views: 1,393
  • Photo1 (3).jpg
    Photo1 (3).jpg
    65.3 KB · Views: 1,392
  • Photo1 (5).jpg
    Photo1 (5).jpg
    68.5 KB · Views: 1,620
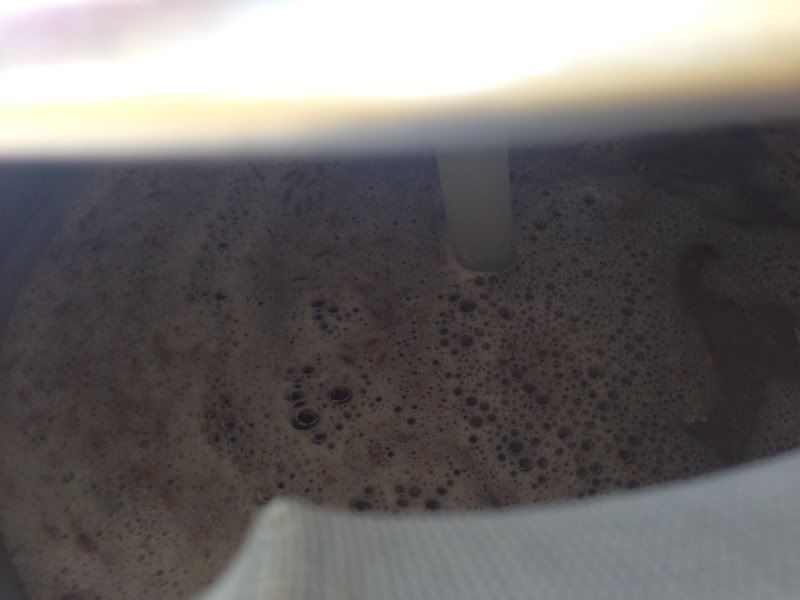
Starting up the boil. Getting a nice hotbreak. I use the stove to bring it up to boil temp faster. Seems to help yield a better hotbreak as well. This is my first time with the new hop filter. Brewing a Citra/Nelson Sauvin IPA so I'll try and put it through it's paces.

photo.jpg
 
Lookin good jammin! Let us know how you like that hop filter. I'm brewing Wayne1's blue moon clone for the second time, hit the exact same preboil sg as last time. Don't know if its coincidence or not, but I got by far my best hot break on this setup. It foamed up a lot, had me scarred for a bit!
 
Lookin good jammin! Let us know how you like that hop filter. I'm brewing Wayne1's blue moon clone for the second time, hit the exact same preboil sg as last time. Don't know if its coincidence or not, but I got by far my best hot break on this setup. It foamed up a lot, had me scarred for a bit!

Thanks, JRB!

Great to hear about your consistency - that's a really big deal in my book. I will update you on the hop filter for sure.

Cheers!

PS: relax'n on the couch while I brew, love it.
 
here is a shot of the cooling run after today's brew session. one of these days i'm gonna put my hop rocket in line with and see how damn hoppy I can make a beer haha. would be one hell of a 3 gallon batch with 3oz in the hop back!

Photo1 (8).jpg
 
Back
Top