One Barrel Brewery

Homebrew Talk - Beer, Wine, Mead, & Cider Brewing Discussion Forum

Help Support Homebrew Talk - Beer, Wine, Mead, & Cider Brewing Discussion Forum:

This site may earn a commission from merchant affiliate links, including eBay, Amazon, and others.
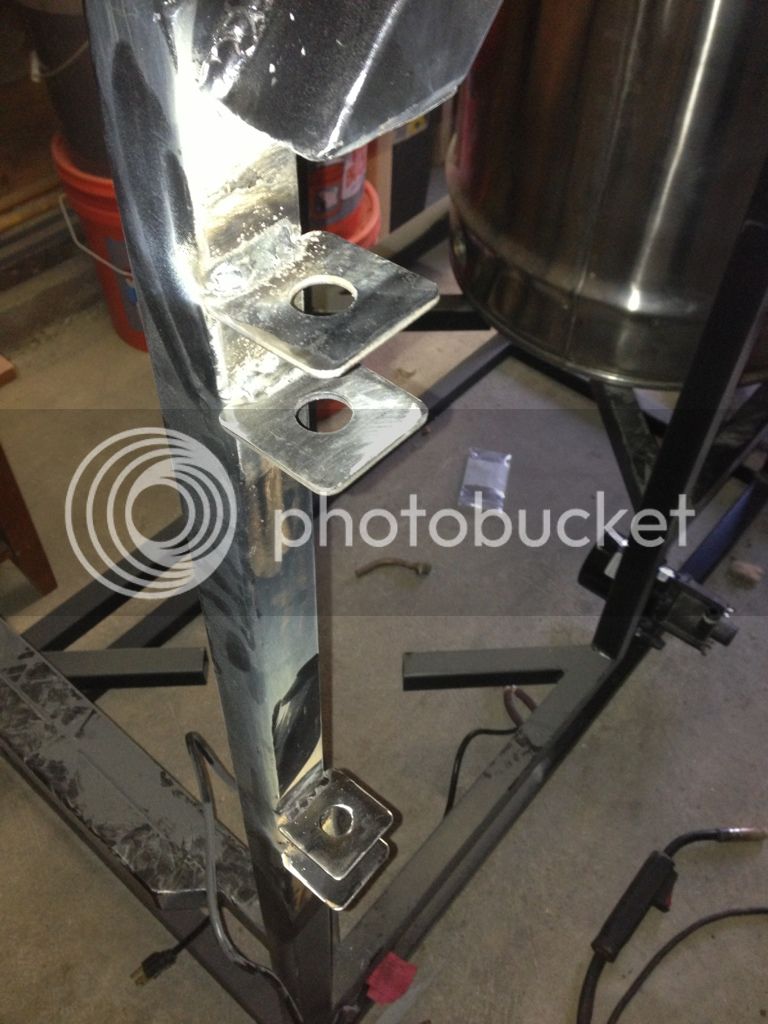
I do like that mount. Seems plenty sturdy. Once I get the stand in it's final resting place, I'll have to entertain that idea.

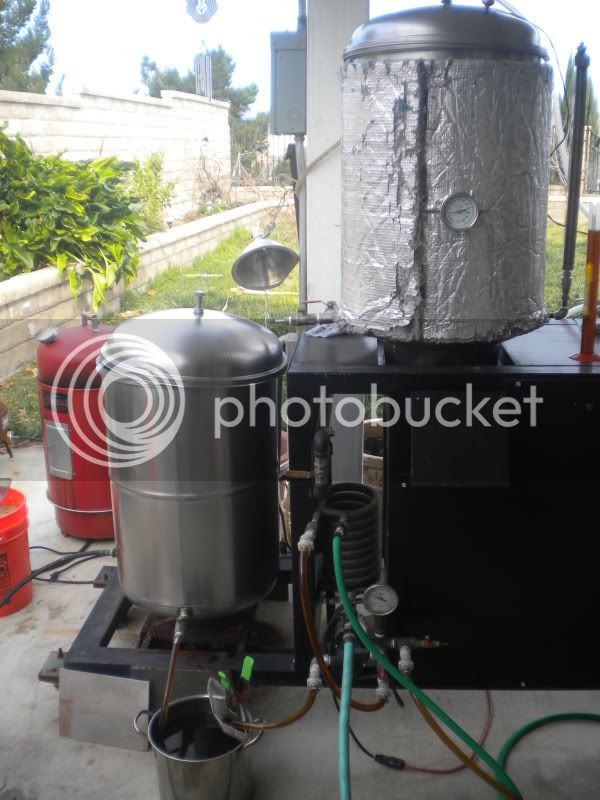
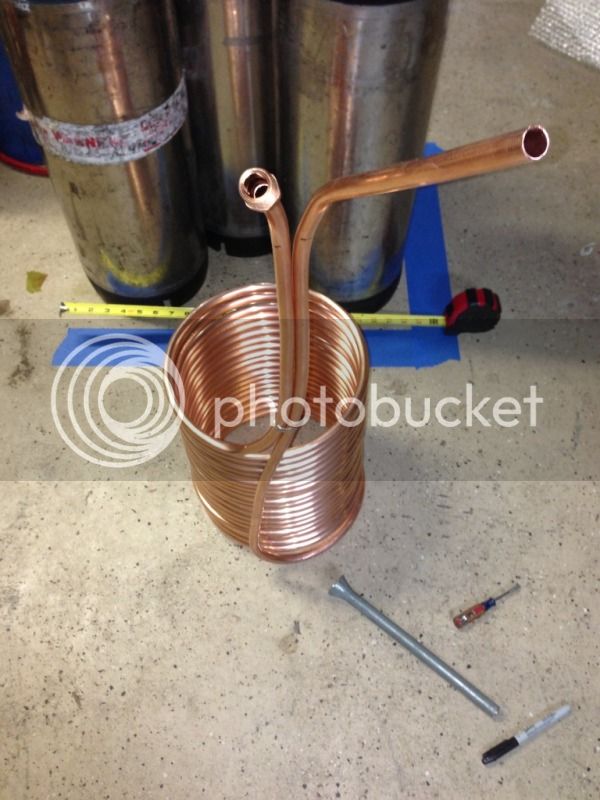
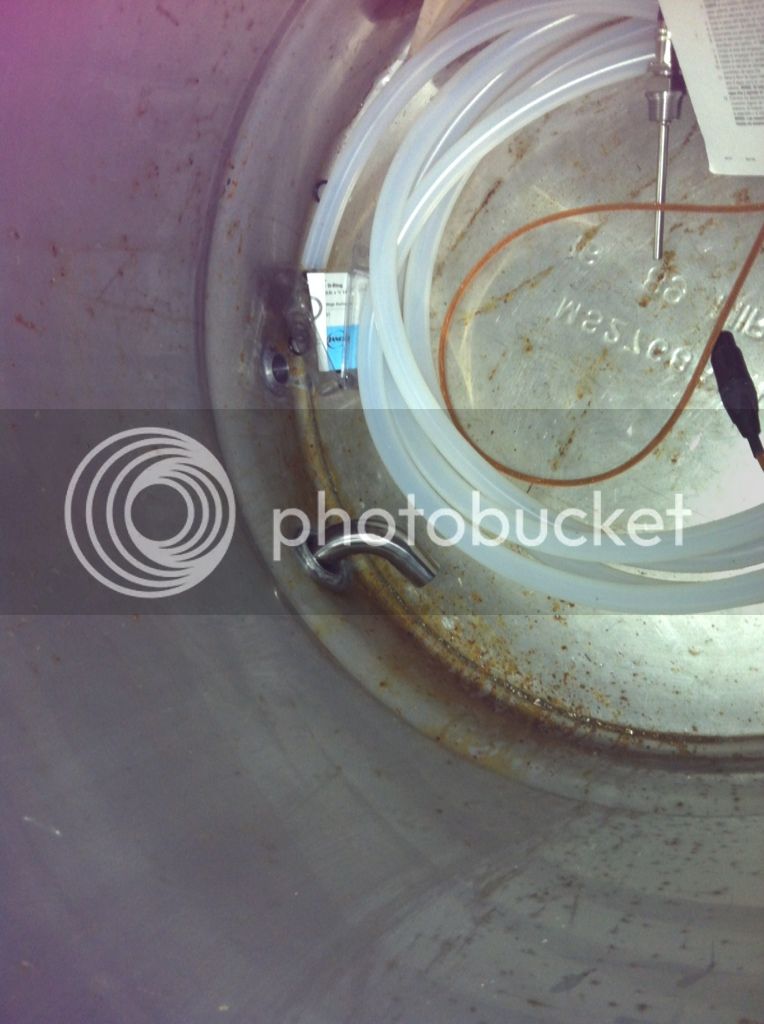
Anyone have any other ideas as far as chilling goes? Still kinda stuck. I'll be getting the 1/2" x 50ft chiller kit from coppertubingsales.com for the HEX. I can always throw some ice in the HLT and use the HEX as a prechiller if I need to in the summer. I know a plate chiller would work best but after cleaning them on my last system and seeing what comes out even after it's "clean" i'm really having a hard time settling on buying one.

Just thought about something else. I can use the HEX coil as an immersion chiller first, bring the temp down to say 100, then take it out and place it in the HLT with some ice to chill the water and run it through the counterflow to bring it the rest of the way.
 
I'm building a closed loop chiller. It'll consist of a 70 qt cooler set up like a jockey box with a 50' stainless steel coil. I'll pump glycol from my glycol chiller through the coil to bring the water temp in the cooler down to about 32 degrees. Then have a pump to recirculate the chilled water through the plate chiller and back into the cooler. This was there's no waste water and less swapping out of hoses.

I've got all the parts on order to look for a DIY thread in the near future.

I do think you'd need more than 50' for a 1bbl batch.
 
I don't know if the CFC will have enough gusto to chill that much wort. I'd probably have to build a 50 footer to make it work. That's a lot of space and would probably cost about as much as a plate chiller by the end.

so i don't think you fully understand how a CFC works. it has no limit based on size of batch like an IC does. you just push hot wort from top to bottom, and cold water from bottom to top. you adjust the flow of the beer or water to get the desired output temp. ;)
 
A CFC will be the most efficient way of cooling and will save you a lot of time on your brew day.

I have a 1BBL system and I use a 12' Convoluted Chiller that gets me down to 70 degrees.

DSCN1293.jpg
 
I understand how it works. However, the more contact time you have with the cool water, the lower the temp will get. This isn't a decision between an Immersion chiller and CFC. This is CFC vs. Plate which is also a type of CFC. A plate has more surface area to it which is why they usually work better than a typical CFC. It all comes down to surface area. In order to match the performance of a plate chiller you would probably need a fairly large CFC.
 
it is for sure all about surface area, but i think you're talking a difference of a couple of minutes for a plate vs an IC, even when dealing with 20 gallons. just set your flow rates to get the temp you want, possibly using your 50' ic as a prechiller to let you flow faster. and CFCs are way less prone to clogging and gunk buildup.
 
Yea, I hated my plate chiller. That's why I was thinking CFC only during the winter months and then during summer use the HEX in ice to pre chill the water before going into the CFC.
 
If a 25' CFC will chill 5 gallons @ .5 gallons per minute it will chill 30 gallons at the same rate. My 12' convoluted chiller gets down to 70 and it takes a little over an hour to transfer 30 gallons.

During the summer I use a post chiller due to warm ground water, it uses 10lbs of ice in an ice chest, it gets it down to 60 and I still have ice left over at the end.
 
Ok sounds good. That's what I'll do then! Thanks for the input. I may wrap some copper wire around it every 6 inches to a foot to add some turbidity into the water that way there is no "skinning". Then solder each wrap to keep it in place.
 
CoalCracker said:
Ok sounds good. That's what I'll do then! Thanks for the input. I may wrap some copper wire around it every 6 inches to a foot to add some turbidity into the water that way there is no "skinning". Then solder each wrap to keep it in place.

This is what a convoluted chiller is. Basically the inner tube is wrapped in copper wire so the water "spirals" through creating more distribution of the heat!
 
great, now i need to find copper wire for the other 25' chiller i have to make and benchmark them against each other. jerks. :p
 
This is what a convoluted chiller is. Basically the inner tube is wrapped in copper wire so the water "spirals" through creating more distribution of the heat!

Actually it is convoluted copper tubing, it is twisted so both the water and the wort get turbulated going through.

When you wrap it with wire only the water gets turbulated but it will still increase the cooling rate.
 
Monster Mash said:
Actually it is convoluted copper tubing, it is twisted so both the water and the wort get turbulated going through.

When you wrap it with wire only the water gets turbulated but it will still increase the cooling rate.

Thanks for that, I didn't know you could get copper tubing convoluted on the inside, I though it was just a thing HBTers discovered and wrapped the outside!
 
I think the benifit you get for that twisty tubing is very low relative to the cost. Making your chiller 5 feet longer would have the same effect and cost next to nothing. A regular old cfc could chill 1000 gallons it would just take a long time, as far as a half gallon per minute, I think most people get a lot better results than that with a 25 foot cfc.
 
Is there any reason a guy couldn't just dimple the inner tubing every 1/4" or so? Think pinch it 25% or so between a couple 1/4" bolts every 1/4" rotating as you go. Might help.
 
I own the Chillus Convolutus which uses 12' of that tubing and does the same job as a 25' chiller. I bought it before plate chillers came out and it was the most compact chiller out there.

I have one, too, and love it. Recirculate through it during the whirlpool and pump ice water through it when I pump through it on the way to the fermenter. Works like a charm and is easy to clean.
 
I was looking at those chillers. But with all the money I spent everywhere else, I'm trying to save a bit in other places. I figure I can build a CFC for about 60 bucks, wrap it with the copper wire to try and increase efficiency and make do with that if I can. If not, I'll sell that and go the original route when money permits.

I ordered a 50ft x 1/2" chiller kit and 25ft of 3/8" tubing from copper tubing sales yesterday. Just have to buy the rubber hose and fittings and I can start fabbing this thing up. Hoping to have this setup fully functional by the new year. Would like to do an Apocalypse ale on the 21st of December. Damn wedding savings is cramping my style!!!
 
Some updates!! I received the copper for both chillers. Will probably start working on that next week. I also found a member here to weld a ferrule to my HLT for a heating element. I will be getting that done on Saturday. I also got my control panel back from my BIL. It looks great. I just have some signal wiring for the SSR to do and wire the RTD receptacles. I will be stealing some silver satin from work today to do that. Here are some more pictures.

EEC636FE-211C-46C2-AE4C-A2D5A2F4F2CC-11622-0000064DC1941999.jpg

AF7E3D2E-F81B-44AE-AE54-18B51443D697-11622-0000064E191CF8BB.jpg
 
7A1AA1BE-A9B3-47D6-AAE9-6157C48F3D2D-12984-00000711D2B8216A.jpg


ITS ALIVE!!

Going to do some work on the HEX coil tonight. Try and get that built. On saturday I'm heading to a local member's house and he is going to weld a ferrule on the HLT for an element. I ordered the element adapter from stilldragon.com. Looks well made and half the cost of the brewers hardware version.
 
7E975B5C-AABA-44BB-89B9-497B2D81042A-13948-0000079F5B10EB6D.jpg


Here is the heat exchanger for the HLT. Made it just like an immersion chiller so it's removable. It's 50' x 1/2". Have to trim the tubing and solder the connections on. Will probably get that done Monday evening as I'm out of town for the weekend.
 
Progress has been a bit slow lately regarding the brewery. With xmas coming up, money has been put towards that. However, I did get a ferrule welded in to my HLT for an element and received my element mount from StillDragon. Slowly saving up some more mula for the rest of the items needed. Should see more progress soon.
 
A few updates. I got the two temperature probes wired up last night. I also ordered the Spa panel and 30 amp breaker for the panel. I'm planning a brew the second week of January or so.
 
  1. HLT Cost Website
    30g Kettle $446.00 www.brewershardware.com
    HERMS Coil $66.99 https://coppertubingsales.com/store...ucts_id=946&osCsid=86jm87f15s99udksq0u0nb9463
    DIY Sight Glass $45.95 Misc Providers
    Thermocouple $32.55 http://www.auberins.com/index.php?main_page=product_info&cPath=20_15&products_id=107
    Dip Tube $25.00 http://www.brewershardware.com/1-Tri-Clover-Tri-Clamp-Style-Pickup-Tube.html
    3pc Valve $29.00 http://www.brewershardware.com/TC10VBALL.html
    5500w Heating Element $22.00 http://www.amazon.com/dp/B000BPG4LI/?tag=skimlinks_replacement-20
    Heating Element Kit $69.00 http://www.brewershardware.com/TC15F10NPSCOV.html


    MT
    30g Kettle $539.00 www.brewershardware.com
    Dip Tube $25.00 http://www.brewershardware.com/1-Tri-Clover-Tri-Clamp-Style-Pickup-Tube.html
    3pc Valve $29.00 http://www.brewershardware.com/TC10VBALL.html
    Thermometer $29.99 http://www.northernbrewer.com/shop/brewmometer-1-2-npt.html

    BK
    42g Kettle $274.66 www.bubbasbarrels.com
    DIY Site Glass $45.95 Misc. providers
    Dip Tube $25.00 http://www.brewershardware.com/1-Tri-Clover-Tri-Clamp-Style-Pickup-Tube.html
    Thermometer $29.99 http://www.northernbrewer.com/shop/brewmometer-1-2-npt.html
    3pc Valve $29.00 http://www.brewershardware.com/TC10VBALL.html
    5500w Heating Element $22.00 http://www.amazon.com/dp/B000BPG4LI/?tag=skimlinks_replacement-20
    Thermocouple $32.55 http://www.auberins.com/index.php?main_page=product_info&cPath=20_15&products_id=107

    Other
    Little Giant Pump $120.00 www.ebay.com
    Steel 60 ft $56.00 www.ebay.com
    Electrical cords w/ 30a plug $33.00 www.ebay.com

    Control Panel
    30a kit $180.00 http://www.ebrewsupply.com/index.php/ebrew-kits/30a-1pid-kit.html
    2 PID $100.00 http://www.auberins.com/index.php?main_page=product_info&cPath=1&products_id=3
    14x12x8 Enlosure $100.00 Ebay
    Labor $100.00
    Heatsink $25.00 www.heatsinkusa.com

    Total= $2,518.63

    MISC. 10% buffer $251.86 Fittings, plumbing, ETC.

    TOTAL(+Buffer): $2,770.49
 
Last edited by a moderator:
Forgot to take a pic for you. I'll have to see if my Fiance can take one tonight.

I did some more work for a mount for the control panel. Ended up makeing an arm that will swing the panel out of the way. It will be mounted right in front of the HLT.

5D044BEF-2CDC-40F6-8BED-316975CB477E-4390-0000024E5C6D9A51.jpg


F7FF0FF7-BDC1-4213-AD2F-A7E2A2A631BD-4390-0000024E547B4927.jpg


Found the square washers at a local metal place and the idea hit me. Still have to drill the bracket and 'permanently' mount it. Then I can get the control panel set up on it and I should be all set...for now.
 
96026033-BD68-4BFD-A275-CFEB81621BD3-4390-00000294D23B2DDE.jpg


You can see here how the mount for the panel will look. Then it will swing out of the way when needed.

Picture of the brew area so far. Still have some things to do.
EB680C06-5760-4D6D-AC2F-C234D0ACF425-4390-0000029503CD4F0F.jpg


@DrPhilGood: Here is an inside shot of the dip tube. The kettle still needs some cleaning up so disregard the flux.
2EA1933A-870E-4003-AFFE-50786DE8850D-4390-0000029508E1AAD2.jpg


It comes in through the outside and connects with a clamp, then the ball valve connects to the dip tube. There are two mounts on the dip tube. One for the ferrule on the kettle and one for the ball valve.
 
I figured that's how it works. so you have a 1.5 inch ferrule on the barrel and the dip tube is 1 inch so it fits through the front? Nice
 
Nice build. Just so you know, a 42 gal kettle is going to be wicked tight for a full barrel boil. I've got 40 gal kettles and there's no way I can do a full volume boil. Two extra gallons might make a difference, but I'd hate to have a boil over of those proportions. What I usually do is split my batches between the BK and HLT so I can make two different beers. Either that or I drop back to 25 gallons. Anyway, after your first brew you'll get it dialed in. I'm interested to see how your CFC works out. I have a 100ft 1/2" immersion w/ whirlpool. In the winter when the tap water is below 60F I can chill 25 gallons in ~45 minutes. Originally, I was going to get a plate chiller but I didn't want to deal with possible clogging issues. Have you thought about what you're going to use for a BK filter? If you plan on using pellets, you'll probably need a hop spider or something. I use whole hops only and get away with using a chore boy SS scrubie pad over the dip tube which makes it simple. I used pellets once without a bag and ended up having to rack the wort.

You're doing pretty good money wise. I wish I'd gone electric when I put my rig together. Good luck finishing the build.
 
Nice build. Just so you know, a 42 gal kettle is going to be wicked tight for a full barrel boil.

Totally agreed. My pre boil volume is close to 41 gallons to net 1 BBL out of the fermenter (based on the buckets I used to use. A conical will have less loss). My BK is 60 gallon with allot of surface area and I boil off 3 gallons an hour. A 90 Min boil and I lose 4.5 - 5 gallons. You are going to be dangerously close to the top and will have to throttle back for hop additions. Not to mention the space your hops will take up in the kettle can be substantial in some brews (as much as several gallons of space for moderate hop brews) I use pellet hops and they swell up into a large balloon in the hop spider. I recirculate during the boil to get better hop utilization through the lid into the hop spider. You do not want 40 gallons of wort to boil over...trust me been there with a 60 gallon kettle..:D I would plan to do a split boil as suggested to net 1BBL to be on the safe side.
 
Yea after I started the build, I figured this would probably be perfect for 25 gallon batches. Going to be doing the first brew in a few weeks. I can't wait. Seems like it's been soo long since I brewed. Hope I remember how!

I use a hop spider for all of my hops. Infact, I have to make a new one for this build. Thanks for the reminder.

As for chilling. I think what I'm going to do is run my HEX coil as an immersion for 15 minutes or so, then run it through the Counterflow chiller. This should get me to where I need to be. After having a plate chiller previously and seeing what came out even after a thorough cleaning, and having a rash of infected batches, I could only trace it back to that. Hopefully this method will work ok.

For the first brew I'll be doing a 25 gallon batch of Jamil's Evil Twin. Then splitting it with friends. I'm taking 10 gallon, Someone else will take ten and the other will take 5. Hoping to take some good pictures during the process.
 
As for chilling. I think what I'm going to do is run my HEX coil as an immersion for 15 minutes or so, then run it through the Counterflow chiller. This should get me to where I need to be. After having a plate chiller previously and seeing what came out even after a thorough cleaning, and having a rash of infected batches, I could only trace it back to that. Hopefully this method will work ok.

I just started using a plate chiller and run wort through it for that last 15 min of the boil. I too am scared that the plate chiller still may harbor some bacteria. As you mention even after a good cleaning I still get a little crap here and there.....I sure hope I'm not heading down that road. Seems like a counter flow would have similar potential for harboring bacteria as well? May want to do the 15 min sterilization with the boil using the counter flow just to be safe. Great system by the way enjoy watching it progress. Keep up the good work!
 
What I do for my plate chiller is after the mash tun is cleaned, I run Oxyclean through my pump and plate chiller until it hits at least 180 degrees for 15 minutes. I flush both ways starting with the out first. Then Flush with fresh water. When I have 15 minutes left in the boil, I start to recirc the wort. After chilling is complete I run oxyclean both ways through the chiller.

So Basically my chiller is cleaned twice and sanitized twice before each use. I usually get hop particles when I flush after each time. I agree it is hard to clean, but I haven't had a problem doing mine this way.
 
I used to clean it after every brew by back flushing with boiling water. Then before running wort through it I would recirc the boiling wort through it for 15 minutes.
 
I clean mine while cleaning the rest of the system by back flushing with boiling water with PBW and then rinse. I use water left in the HLT from sparge and heat, run through all lines, pumps and chiller for 30 min. I maintain a min of 190 for 15 min then rinse and blow dry with compressed air.
 
official first brew day will be the 20th of January! Going to have my brother in law wire the 220 line next weekend.
 

Latest posts

Back
Top