The adventures of a complete noob and a brew rig

Homebrew Talk - Beer, Wine, Mead, & Cider Brewing Discussion Forum

Help Support Homebrew Talk - Beer, Wine, Mead, & Cider Brewing Discussion Forum:

This site may earn a commission from merchant affiliate links, including eBay, Amazon, and others.

Tomtanner

Well-Known Member
Joined
Feb 26, 2011
Messages
364
Reaction score
6
Location
Tampa
Hey guys,

I've been brewing for about a year and a half. Not long after starting to brew I found hbt and have been a avid reader of this forum ever since. At one point I stumbled upon the DIY pages and was amazed to see all the gadgets and toys that could be incorporated into brewing. I now pretty much only go to the DIY pages and am inspired by all the great things us brewers can do. I've been so inspired that I decided to build my own brew rig and get in on all the fun.

I will be documenting my experiences as an unhandy inexperienced never attempted anything like this before noob. My intention is to show anyone like me who doesn't have a clue that it's not too difficult to do if you have the time and are willing to ask a ton of annoying questions to the more experienced brewers on these pages.
 
First things first.

Why did I chose to build instead of buying one already made? Well after a SMALL amount of research of cost of parts verses cost of buying prebuilt and shipping costs, I thought I could do it cheaper than say buying one of those fancy blichmann rigs or even one of those awesome brew steel rigs. In theory it is cheaper if you are handy and have all necessary tools. I didn't calculate that and I will guarantee it would have been cheaper and easier to buy one from the pros.

There is my first lesson learned in this process.
 
First things first. Seed money.

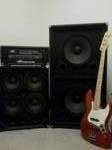
I'm a musician, however now that im married and have a career it's been harder and harder to find like minded musicians to play with. Since I've spent more time brewing lately I chose to sell my professional level badass bass rig. This was a tough choice but I knew I would need the dough and stopping mid project due to lack of funds was not an option for me

image-1704281834.jpg
 
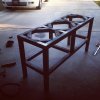
After getting my money I needed to decide what route to take. Weldless or teach myself to weld. Single tier gravity fed?


image-3868722572.jpg

I decided to teach myself to weld. Mostly reading these threads and looking ok YouTube.


image-3532140913.jpg

I did set a few things on fire. Don't wear frayed jeans and don't keep towels and paper lying around.


image-451271809.jpg

Most of my welds look pretty ugly.

image-872041908.jpg

Angle grinder makes up for most ugliness.
 
Whilst honing my welding skills I decided to go ahead and get to work on my brewing vessels

First I had to purchase three kegs. There is a lot to discuss about legally obtaining kegs. .... Not here please. After an extensive search I managed to buy three kegs at $50 a piece. A little pricey but I had been searching for months so I took what I could get!

image-1359223185.jpg


image-1376990765.jpg

I built a keggle jig after getting myself an angle grinder. Yes the Barbour freight one was cheap, but I had to replace it within 2 months.


image-3333967595.jpg

Another view


image-583419916.jpg

It made a pretty clean cut


image-220641801.jpg

Next came the drilling. This was quite labor intensive for me. I bought a step bit $45 and it took hours of work!


image-436848068.jpg

I inserted typical weldless ball valves on all three vessels


image-2670549002.jpg

Here is my typical weldless false bottom on my mash tun.
 

Attachments

  • image-71914204.jpg
    image-71914204.jpg
    57.2 KB · Views: 4,358
  • image-479440431.jpg
    image-479440431.jpg
    49.2 KB · Views: 4,318
image-3095564651.jpg

On my mash tun I added two blichmann thermometers in addition to the false bottom


image-333477173.jpg

On my brew kettle I used bobby m's weldless sight glasses and thermometers


image-1733587954.jpg

Same thing on my hot liquor tank


image-402247679.jpg

At first I wanted to use the cutoff discs from my keggles as lids, but it ended up being a failure and a hassle so I just went to Ike's for this. They look better anyway. I plan to use a fly sparge on the mash tun that I will incorporate into the lid. For the hlt and bk ill only use the lids to heat things up more quickly and that's about it.


image-1668370523.jpg

I probably took 50 mock up pics of all stages of this project. It's just fun!
 
At this point I decided that I wanted to do a single tier stand. Mostly because they look super cool.


image-616364228.jpg

I started by purchasing the three burners. I soent about $50 a piece fir a total of $150 I intend to make this a direct fired rims system because in my mind It seemed the easiest. I'm sure that is actually false but I'm going with it anyway.


image-1145620183.jpg

Next I realized I needed a miter saw so I picked one up from home depot for about $90.


image-1581011346.jpg

Next I purchased the steel. At my local steel outlet it only cost about $90 for all the 2x2 steel you see here and some extra angle iron for another project later that will involve sanke kegs to be used as fermenters.
 
image-4245623832.jpg

I felt like I was as practiced up as I was going to be. My goal here was to just start learning. This will not be the coolest brew stand you have seen, instead it's going to be relatively simply and low tech. No automation no beautiful stainless steel construction. Just a noob.


image-366915281.jpg

Next I went ahead and put in my center braces. Here Is something I wish I has thought of. Making it longer, you will see why later.


image-3381002955.jpg

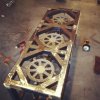
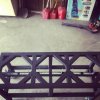
After realizing I miscalculated space for my kegs to sit on a had to embark on a lengthy process of cutting pieces for the diamond openings made famous by brew steel. They look cool but are quite time consuming to measure cut grind weld and grins again.


image-2981975795.jpg

Here they are tacked up


image-1438823307.jpg

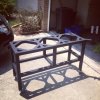
A month later I had this. It weighs a ton!


image-2439202039.jpg

And isn't pretty yet
 

Attachments

  • image-1936625022.jpg
    image-1936625022.jpg
    42.1 KB · Views: 4,248
image-949626548.jpg

Legs attached


image-2876571053.jpg

Side braces


image-2357514467.jpg

All support braces tacked up
 

Attachments

  • image-1338885174.jpg
    image-1338885174.jpg
    28.9 KB · Views: 2,460
image-197030779.jpg

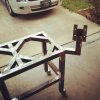
This is how I went about mounting my burners. I welded these directly to the stand and used the wing nuts to adjust the height.


image-3944401791.jpg

One more piece of tube steel for the burners


image-3262550046.jpg

It's fairly simple and low tech but it gives me the opportunity to adjust the burner height very easily
 

Attachments

  • image-548453741.jpg
    image-548453741.jpg
    32.3 KB · Views: 2,479
verbhertz said:
You are an inspiration for someone like me! How much did you sink into this, equipment and all?

Thank you sir! Well I'm trying to do a running tally of expenses. To the point documented in this thread I've spent the following

Kegs. $50 x 3. $150 total
Sight glasses. $37 x 2. $74
Ball valves. $30 x 2. $60. Total
False bottom $80 and ball valve
Ikea lids. $9. X3. $27

Barbour freight welder. $100
Flux core reels Can't remember but I bought three
Angle grinder $45
Miter saw. $80
Grinding wheels and blades. $70ish
Step bit for drilling. $45

Banjo burners. $50 x 3. $150 total
2x2tube steel. $90
Miscilanious nuts bolts fittings. $50

So roughly speaking to this point in the build I had spent about $1021. This includes brewing vessels and tools keep in mind
 
This is how I mounted the burners. Very low tech but works for me because it's simple and adjustable. Also if I find a better way in the future nothing is permanent


image-3684019023.jpg

Brackets from home depot


image-2962582556.jpg

Simple bolt and wing nut. I used stainless when I could


image-2522140950.jpg

Drilling these holes was annoying and time consuming. 2x2 steel for this beam was not necessary.


image-3012448480.jpg

But it did work pretty well


image-2479119526.jpg

All three mounted


image-2063565861.jpg

Another view
 
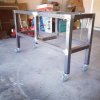
Once I got the burners situated I purchased done casters. These ended up costing my $98 dollars with shipping. I didn't expect to pay this much but I wanted something that looked good and relatively seamless.

image-2750296642.jpg

These are also adjustable in case I am dealing with any uneven surfaces.


image-145447443.jpg

Another view


image-2817243939.jpg

Believe me this thing weighs a ton so getting these casters was one of the best things I could have done.
 
image-4033961178.jpg

Next I tried to build a control arm. In retrospect I probably should have made it bigger, but I wanted to keep things as compact as possible. The nice thing about this was that I made the entire thing out of leftover scrap metal.


image-2439922016.jpg


image-1814951127.jpg

This will be a very low tech control panel I only intend put the pump switches and a timer. I might try to put some igniters on here as well but that's about it.


image-1828270888.jpg

The cash box was only $12 at ace hardware.
 

Attachments

  • image-1299400277.jpg
    image-1299400277.jpg
    46.7 KB · Views: 2,227
View attachment 63704

I went ahead and stripped it all down so that I could get it painted. I used rustoleum from ace hardware and put 2 coats on everything. They were $7 per can and bought 5 cans for a total of $35


View attachment 63705

I've been told after the fact that the high temp BBQ paint might not last very long so if I need to repairs it I will go with header paint next time. But for now it looks ok.


image-1733866082.jpg

More finished paint pics
 

Attachments

  • image-1020094733.jpg
    image-1020094733.jpg
    39.5 KB · Views: 2,266
More paint pics


image-3581033788.jpg

Everything stripped down.

image-3581033788.jpg


image-4195701944.jpg

Slowly reconstructing


image-927605983.jpg

Burners back in place.


image-3925690434.jpg

Everything reattached.
 

Attachments

  • image-1104626176.jpg
    image-1104626176.jpg
    56.4 KB · Views: 2,201
image-2079479099.jpg

Then I picked up two march 809 pumps at $150 a piece.


image-2314773874.jpg

And a 30 plate counterflow chiller for $80


image-2176498336.jpg

After looking at some more expensive and complicated mounting options I just took the $5 method and used some wing nuts bolts and metal plates.


image-3207421408.jpg

Same for the plate chiller.
 
damn.. you have had a busy couple of days! Love all the pics! It looks great! Thanks for posting!
 
Looka nice!!!!! Hurry up and get the finished and running pics posted. I plan on doing the same thing.
 
flips said:
damn.. you have had a busy couple of days! Love all the pics! It looks great! Thanks for posting!

Ha! No this is six months worth of work condensed into a few days of posting! I whisk I were that fast.
 
How much time did you spend practicing welding? I have zero knowledge and no mentors, but learn quickly and have the desire to learn.
 
slatkin said:
Looka nice!!!!! Hurry up and get the finished and running pics posted. I plan on doing the same thing.

Have you ever welded? I never had before this but it's actually a lot of fun and easy to pick up.
 
The propane manifold and all that it entails scared me a little bit so i just reached out to a pro for help. The guys at brew steel are awesome and seem to put out the most innovative projects so I asked Kurt to help me out and he put this together for me.

image-4116516005.jpg


image-420357348.jpg

The whole manifold was $128.

image-1758785806.jpg

It's a bit cramped but this is mostly due to my overly compact not well thought out design!
 
Yes. I have been welding forever. Own all the tools and equipment to do this, Just need the kegs and gumption to jump to AG. I am lazy and like only having two hour brewday
 
xeno said:
Fantastic documentation. Been considering the weld-less stands but you have inspired me.

It's really not too difficult, just give yourself plenty of time to learn. My welds aren't pretty by any means but they get the job done.
 
slatkin said:
Yes. I have been welding forever. Own all the tools and equipment to do this, Just need the kegs and gumption to jump to AG. I am lazy and like only having two hour brewday

It's definitely a lit cheaper if you already have the tools. Truth be told I haven't done a.g. Yet either, my first one will be when I use this thing for the first time.
 
For one complete noob welder to another - can you sum up your experience with the HF welder? I've been hesitant to pull the trigger on one of these but it really fits my budget nicely.
 
Smashing said:
For one complete noob welder to another - can you sum up your experience with the HF welder? I've been hesitant to pull the trigger on one of these but it really fits my budget nicely.

Lots of slag not pretty but that could be just as much because of my low skill level. Honestly mine has been great and I would recommend it. I would not recommend their angle grinder however. You will certainly need one of those but the hf angle grinder lasted about a month and then I had to replace it.

The flux core welder has been a good purchase for me due to price and ease of use. Hope that helps!
 
Hey Tom - We used expensive angel grinders and found they didn't last much longer. We have gone to using HF grinders due to cost and replacement warranty. We have 6 in the shop for all the various processes. The HF grinders usually last about 6 months and occasionally we get one that lasts about a month. At $15 and a $5 2/yr warranty. it's worth it for us. Another really nice to have tool they sell is there bandfile belt sander. It is great for getting into tight places and cleaning the inside edges of the tube.

I would NEVER buy a HF welder. Lincoln or Miller only! And NEVER NEVER buy a welding hood from them. The flux core wire they sell is complete crap. We bought a small spool to try it out. We threw out the whole spool after 5 minutes testing.
 
Lots of slag not pretty but that could be just as much because of my low skill level. Honestly mine has been great and I would recommend it. I would not recommend their angle grinder however. You will certainly need one of those but the hf angle grinder lasted about a month and then I had to replace it.

The flux core welder has been a good purchase for me due to price and ease of use. Hope that helps!

HF welder will produce more splatter. some stuff you buy there other things buy name brand.
 
OneHoppyGuy said:
Hey Tom - We used expensive angel grinders and found they didn't last much longer. We have gone to using HF grinders due to cost and replacement warranty. We have 6 in the shop for all the various processes. The HF grinders usually last about 6 months and occasionally we get one that lasts about a month. At $15 and a $5 2/yr warranty. it's worth it for us. Another really nice to have tool they sell is there bandfile belt sander. It is great for getting into tight places and cleaning the inside edges of the tube.

I would NEVER buy a HF welder. Lincoln or Miller only! And NEVER NEVER buy a welding hood from them. The flux core wire they sell is complete crap. We bought a small spool to try it out. We threw out the whole spool after 5 minutes testing.

Well there you have it. It's hard to dismiss the experienced people on this forum. It worked for me but I didn't use the hf wire. I bought my wire from another source and it seemed to be adequate but I as a noob I have nothing to compare it to. Thanks for the input Kurt!
 
I have a harbor freight welder. It runs perfectly fine for the price. Ive seen videos of the hf welder compared against the 4-500 brand models and there isnt much difference. I agree that the wire sucks though! Its twice as expensive as the lincolin brand. And sucks ass
 

Latest posts

Back
Top