ideas for sparge "arm"/return/sprinkler, etc.

Homebrew Talk - Beer, Wine, Mead, & Cider Brewing Discussion Forum

Help Support Homebrew Talk - Beer, Wine, Mead, & Cider Brewing Discussion Forum:

This site may earn a commission from merchant affiliate links, including eBay, Amazon, and others.

nathan

Well-Known Member
Joined
Apr 8, 2008
Messages
945
Reaction score
10
Location
NC
What's everyone using for sparge return to the top of the bed in their system?

I'm finishing up a single tier, 2 pump HERMS. My MLT is a blichmann 20g. I'd like to rig up something simple to use, maybe something even that I can mount through the blichmann's lid.

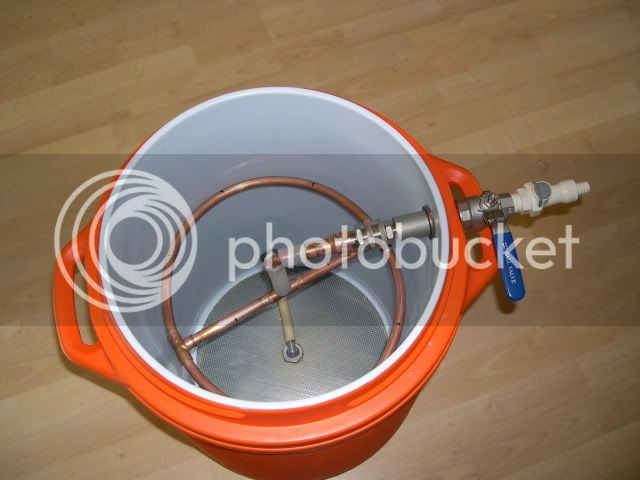
Maybe if I make a copper tube octogon with a cross piece, T up from the middle of the crosspiece to a compression fitting mounted through the lid to a coupler (compression fitting has threaded opposite end), and put the male QD just on the outside of the lid for easy attachment.

The compression fitting would let me take it off occasionally to scrub out the inside, but if it's in a HERMS, then has all the sparge water run through... maybe that will work.

Drawbacks are that I would have to lift it to check water level, but I guess once I set the level, I could watch the site-glass tube on the blichmann.

Positives are that it would be very simple to build, and I could just drill holes with the tiniest bit possible until it flowed properly.

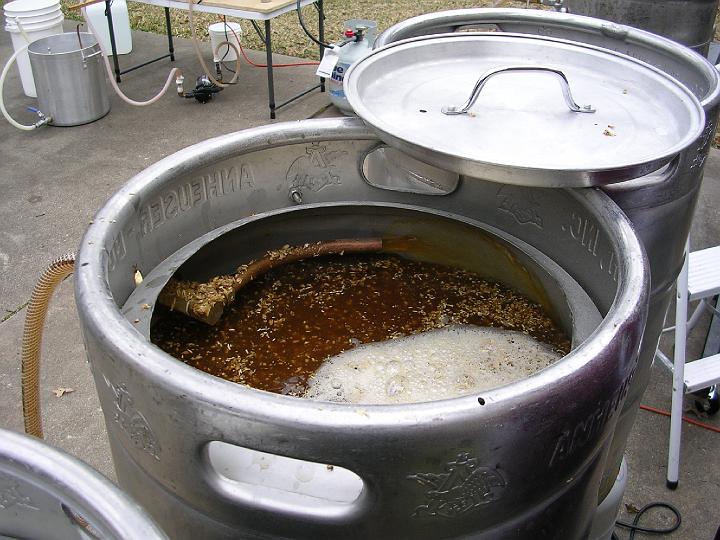
I may do the same to the HLT lid (it's a converted keg) so I can keep the fluid in that moving to stabilize it's temp. I may just use my hang-on-the-side copper whirlpool tubing though.

Anyway... I'm looking for suggestions. I'll hope to build it on friday and give my rig a water-only test run.
 
On my old rig I started using the Brew-Magic method as derived from Conrad-Fix and just lay a hose over top of the grain bed and let the return swirl around in a 1 " layer over top. It works for me and my mash efficiency went up 2 percent (to 85%) consistent over 4 batches.

Sometimes the simplest approach is the best approach.
 
I think this is one of the better ways to go:

DSC00633.jpg


Here is the thread: https://www.homebrewtalk.com/f11/hey-everybody-look-my-new-sparge-arm-79824/

Here is the cheapest place to get it:

ModularHose.com - Loc-Line Modular Hose System

Item numbers:
50813
32094
51837
Total $40.65

32094 is a nozzle that I plan to put on the end so I can open it for full flow during vorlauf or while circulating the mash.
 
is that a half inch thread on there?
do the sections snap apart for cleaning?

Is anyone actually using this yet?
 
It is 1/2" NPT on the end, the flow path is 1/2" and they do snap apart, but I would do that every time. These are designed for supplying industrial fluids, such as lubricants, for tooling. They are food grade plastic and rated to a really high temp (I can't remember). I think the idea is originally the Pol's and he has been using it for a while (I could be wrong about that though).
 
Now that's pretty cool. I've been trying to figure out a good sparge/vorlauf return that would level itself. The one I had before was a simple copper ring. It worked fine, but my brewing area is not flat, so neither are my kettles, so it would tend to drain more from one side than the other. Seems like I was always bending and tweaking on it to get it to flow consistent.
 
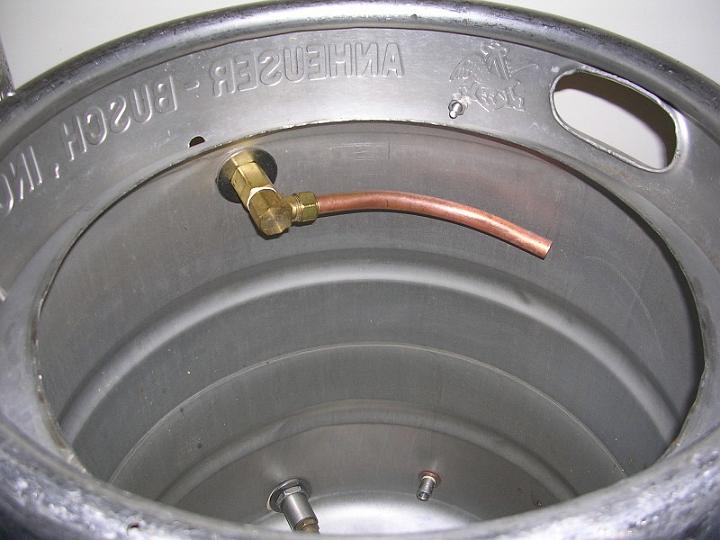
I havn't built it yet but I'm planning on rebuilding my copper ring. In the top of my keggle I'm going to drill a hole to allow a 1/2" pipe through with a 90* elbow at the end. I have my MT top cut to 12" so there is plenty of room on the top to do this even with a lid on it. Connected to this 90* compression fit elbow I'm going to make a new ring out of copper. Not sure what size holes i'm going to drill in it but they will point up. At the end of the copper ring I'm going to keep a feature my ring already has, a stainless steel bolt that can be removed for cleaning of the ring. The first sparge arm I made was "H" shaped and sweated together. I diddn't leave anything unsoldered so once some grain got in I couldn't clean it out. For heighth of the ring to the grainbed I plan on using some kind of clamp attached to the 1/2" pipe above where it goes through the edge of the top of the keggle so it can be adjusted to any height I want. I have looked at Boerderij_Kabouter's post and I like that idea too as long as it can come apart for cleaning.:mug:
 
I did this same basic thing - I have 10Gal Gott MLT. I made a polygon out of 8 x 45* CPVC and 3" sections. A Couple of Tees and a piece down the center. Fits through a 1/2" hole in the lid. Oh yeah, don't forget to drill the holes :)

And if you use this, remember that I just saved you about $4 and a trip to the store to get a bunch more fittings because you used 4" instead of three.
 
It is 1/2" NPT on the end, the flow path is 1/2" and they do snap apart, but I would do that every time. These are designed for supplying industrial fluids, such as lubricants, for tooling. They are food grade plastic and rated to a really high temp (I can't remember). I think the idea is originally the Pol's and he has been using it for a while (I could be wrong about that though).

Yup, that is what my HERMS runs with. I love it... highly recommend it! You will not be disappointed
 
I dont use that weird little manifold. I have the single nozzle tip. You can see it in my gallery somewhere... it is in there.
 
I'm thinking of making a copper ring ( or hex depending on what I have) and using this as a supply line. Save a dollar or so and I'll drill what ever size holes I need. I have this stuff in my aquarium and it's tight enough to hold whatever shape you want. I should be able to position the copper ring anyway I want.

That's my plan.
 
I dug into my stuff and with a few fittings I can use the H design, but I got the parts to put threaded ends on it and caps, so I can unscrew and clean it out with a brush. The thread for the through-the-lid portion is female, to recieve a threaded end of a male QD with a washer through the lid and stabilize it.

I was thinking if I really want height adjustment later, I can solder together some sections with a male thread on one end and a female on the other of various lengths to be able to adjust it easily before the brew session.

I like that plastic blue and orange thingy, but I figured I should give a shot to the stuff I have (+ a few bucks in fittings), since I could still mount that through lid if thsi doesn't work.

I'm doing a similar through-the-lid for my hlt return, but just using a single T, some arms, then elbows turned opposite ways and sort of downward to help generate a bit of rotation in the HLT. I plan on using pump #2 to keep the water temp more equalized.

I like the motorized paddles folks have, and might consider that down the road, but I only needed one fitting to do this. Perhaps when I electrify HLT I'll do the motor. Pol will have to talk me through all the electrics, though. ;)
 
You want ME to talk you through the electronics... ha... never thought I would hear anyone say that.

When you get to that point, let me know, I will help with what I can. Electricity has nver really been my "bag baby". But I am picking up some things here and there.

The stirrer is a nice addition... on my control panel I will have one switch that powers my A419 AND the stirrer through a single outlet on the box. They always run simultaneously.
 
Well, you are light years beyond me there. When I've got a brew or two under my belt and I'm sick of trying to maintain HLT temp for herms with the propane, I'll be back looking for help.

My garage has plenty of power and breaker box space, but from there it'll all be fairly new to me. I soldered 3 electronic items in my life, and all were low voltage. :)
 
mbarley is using some of your ideas in his project. He's in my state, maybe I can convine(bribe) him to let me peek over his shoulder and learn some of this.

Now that I am so close to being done with my cooler w/ copper manifold, I feel almost sad... I'll have to find a new home for it when I'm up and running on the sculpture.
 
I'm west of Chapel hill by about 11-12 miles.

I have LOTS of space in the house, spare beds, etc., if we want to set up a get together. My brewery is half of my 900 square foot garage (30'x30', 12' high). Plenty of room for everyone. I'd also travel in the area to set up a control panel with the electrics or something, too. I will need help with the power socket in the garage, though.
 
I've got four batches to brew this weekend on the cooler, for the last time. :) I'm doing an alt and a cream ale one day, and a bo pils and a schwarzbier the other. They are all recipes that I decoct, so it will be long days.
 
I've just got a copper return at the top of my sanke MLT (and BK). It's similar to the Brutus 10 method of a return in the lid. I batch sparge, so I don't really care about anything "trickling/showering". I do recirculate the mash, and this setup whirlpools the wort on top of the grain bed pretty good. I should take a pic during recirculation to show.

 
I would love to see a Photo with this in action or even a video as I am still trying to decide how the return will be for my MLT


I've just got a copper return at the top of my sanke MLT (and BK). It's similar to the Brutus 10 method of a return in the lid. I batch sparge, so I don't really care about anything "trickling/showering". I do recirculate the mash, and this setup whirlpools the wort on top of the grain bed pretty good. I should take a pic during recirculation to show.

 
Here's mine. Made out of Pex-al-pex tubing (which all of my piping is made out of.) Seems to work great for fly sparging! For batch sparging I go through the pipe on the left side of the pic, which has a return similar to Sparky's.

SpargeRing.jpg
 
I'll try to get pics of mine as well when it's ready. I'm off tomorrow, so I'll be working on it all day.
 
Lil' Sparky,
Or anyone that uses this set up. Are you still happy with this sparge arm? I plan on batch sparging only and I will use this design if there are no complaints from the current users. Thanks - Dwain
 
Ya dont need to sprinkle with a fly sparge... as stated above.:D
 
I know this isn't a converted keg, or 20g pot, but the concept is still the same. I just went with a weld less fitting through the side of my MT. A few QD's and some silicone tubing to adjust for grain bead height and it works like a charm. Right now its just used in the sparge, waiting on more copper for the heat exchanger, but its been a great addition. Once I get the flows matched, which only take a few seconds, I can put the lid on to keep the heat in.
DSCN2647.jpg
 
Man, you over-engineered the HECK outta that thing.

Looks cool.
 
I've just got a copper return at the top of my sanke MLT (and BK). It's similar to the Brutus 10 method of a return in the lid. I batch sparge, so I don't really care about anything "trickling/showering". I do recirculate the mash, and this setup whirlpools the wort on top of the grain bed pretty good. I should take a pic during recirculation to show.


The only thing that I am worried about in that design is the loss of heat from hitting the side oif the mashtun.

The return manifold that I have been using is made of 1/2 copper pipe and has 4 ports that I can stick in the mash to return wort
 
The only thing that I am worried about in that design is the loss of heat from hitting the side oif the mashtun.
With a 10 gal batch, recirculating constantly throughout a 40 min mash, I only have to turn on my burner (I direct-fire my MLT) once or twice. I don't think I'm losing too much heat. ;)
 

Latest posts

Back
Top