rico567
Well-Known Member
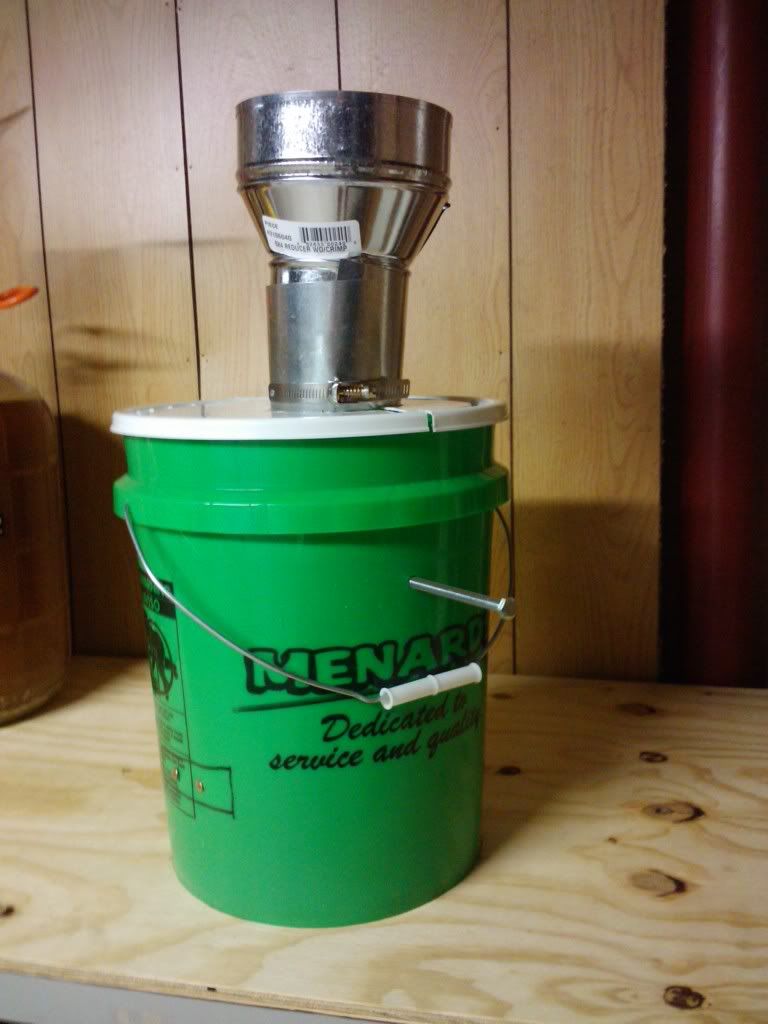
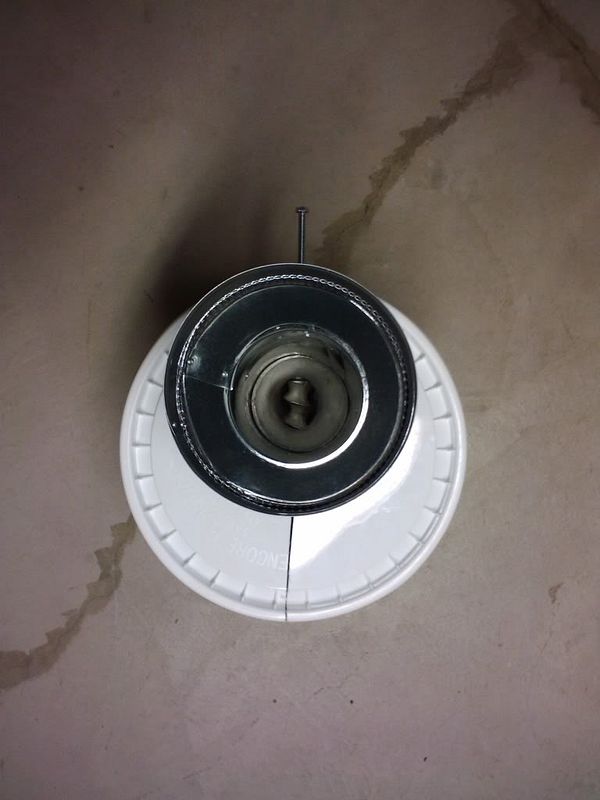
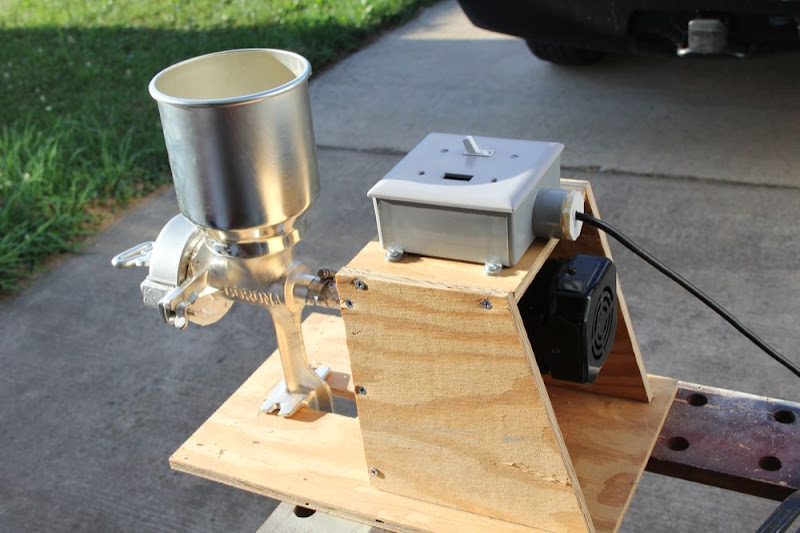
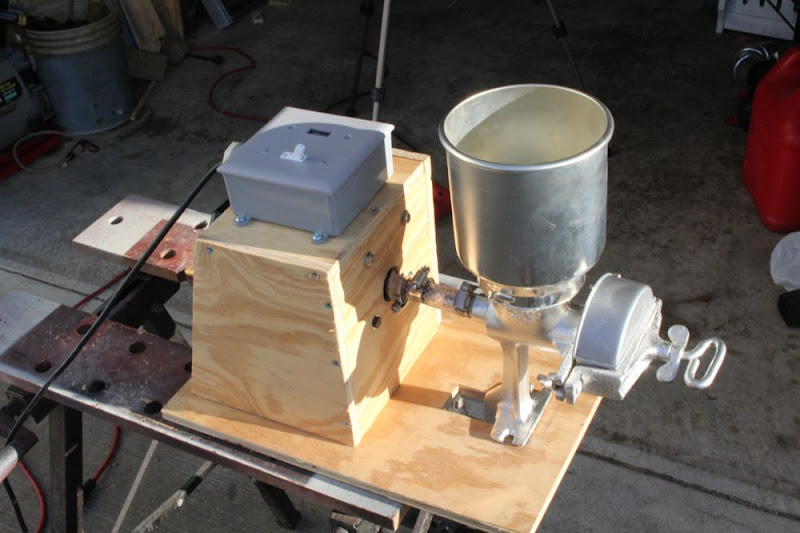
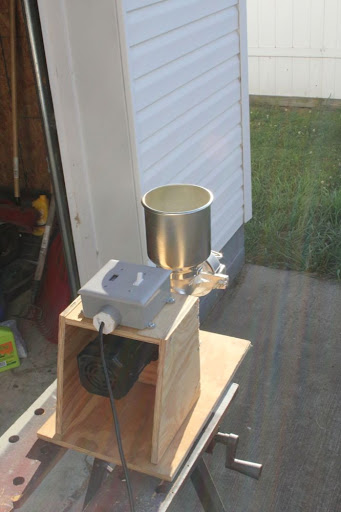
how to motorize your corona!
GFs daughter, she didn't want to stop! but i had to pull her aside 'cuz we still had like 5lbs of grain and i was at strike temp already!

My drill's efficient, but not nearly that cute!

how to motorize your corona!
GFs daughter, she didn't want to stop! but i had to pull her aside 'cuz we still had like 5lbs of grain and i was at strike temp already!

My drill's efficient, but not nearly that cute!
Whew. 20 lbs. of base grain has been milled. Holy **** that was a lot of work.
Next project is definitely attaching a drill to the mill. I'm sweating balls right now and am about to take my 3rd shower of the day.
")
Some folks from here need to go over to this thread. There's some of that anti corona ignorance going on in there, and I can't be the only one defending our beloved corona, and setting people straight.


Just used my Corona for the first time and got 88% efficiency.
Unfortunately, I took it apart and washed it afterwards. In the morning, after air drying I see that there is some rust present that I will have to scrape off. Guess I need to coat it with a little vegetable oil to keep it clean and rust free, and then just use compressed air to clean it in the future.

Yeah, water on a Cast Iron mill is bad juju. FWIW, I've never cleaned mine.

P.S. Welcome to the club!

So I've modified my mill quite a bit (drill powered, removed the pin and replaced with a screw and nut, JB welded everything) but now my problem seems to be that as I grind my mill gets looser and looser(yes I use that wingnut to hold it). I find myself constantly having to readjust the tightness. Its very frustrating the lack of consistency. I think I'm just gonna break down and buy a barley crusher once I save up enough.


A fellow homebrewer and I built this mill with the help of this thread. So, in respect, we decided to add our motorized grain mill to this ever growing thread. It took about 4 weeks to build but with about 4 hours of labor.
Comments?

wyzazz said:Fixed those for ya! It looks good Bro, care to provide any details on how you motorized it?
I just got my new mill. Is there a summary on which mods need to be done? This thread is huge!
Excellent thread. It will certainly save me $100+ from buying one of them "fancy" grain mills. This will definitely be my next piece I pick up in an effort to have a fully functional single tier brewing setup. Well that and finally being able to take full advantage of the group grain buys.
I saw many people posting about picking one of these up for around $25 or so, however; in my search for the el cheapo grain mill I found the one I plan to order tonight when I get home from work. I found one online for only $19.95 with free shipping!
http://grantfords.com/product_info.php?&i=B000U5NZ4I


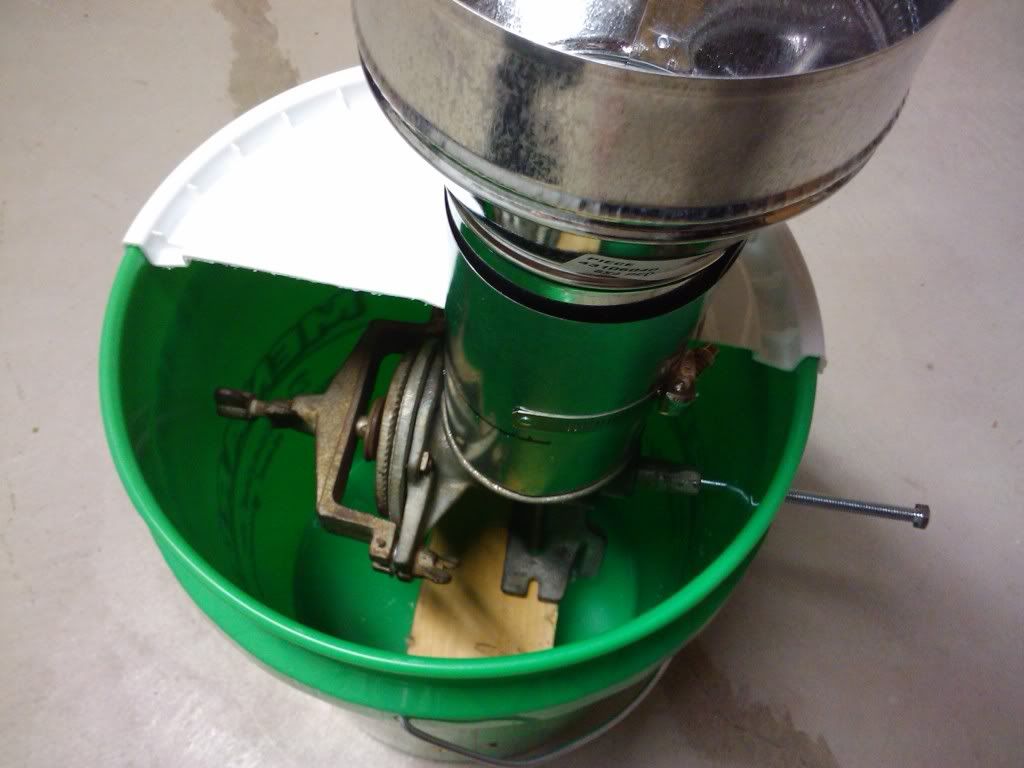
I replaced the cotter pin with machine screw, JB welded the grind plate, and added 3 washers to the tensioner frame. I must not have done a good job aligning the grind plate because it is not parallel to the opposing grind plate.
Enter your email address to join:
