Wort Chiller Question

Homebrew Talk - Beer, Wine, Mead, & Cider Brewing Discussion Forum

Help Support Homebrew Talk - Beer, Wine, Mead, & Cider Brewing Discussion Forum:

This site may earn a commission from merchant affiliate links, including eBay, Amazon, and others.

plumber8302

Well-Known Member
Joined
Feb 20, 2013
Messages
75
Reaction score
2
Hey everyone! First, thanks for all the responses to all my questions up to this point! I am brewing my first batch tomorrow and have one more question. (At least for now!)

I am working right now on making my immersion wort chiller. I have a 50' piece of 3/8" copper and I formed it to make sure it fits inside my 5 gallon brew pot. My question is, How long does it really need to be? I coiled the entire 50' and it seems to hang out of the pot quite a bit. Can I cut it down and it still be effective? I dont want to risk having my wort touch the copper that is not being sanitized in the boiling brew pot.
 
Are we talkin about just a coil or two sticking up out of the wort or a whole bunch?

For just a couple coils, I would think that, if you have the rest of it in the wort for the last 15 minutes of the boil, the copper will conduct heat well enough to kill any creepy crawlies living on it.
 
With a 5 gal brew pot you really only need about 25' of copper tubing. I would cut down the tubing to where you need it and you should be fine.
 
Thanks for the replies. It is actually quite a bit of coils sticking out. So, if I take 20' or so off, it will still cool the wort efficiently?
 
Thanks for the reply! How do you sanitize yours? Will just spraying it with Star San be enough or do I need to immerse it in the Star San?
 
I keep a 5 gallon bucket of sanitizer around. Anything that needs sanitizing, into the bucket it goes. I would immerse it and not spray it.
 
The more copper you can get below the wort level the better. Look into recirculating the wort while chilling. This can be through a pump or just by stirring. That will drop the temp much faster.
 
Hey everyone! First, thanks for all the responses to all my questions up to this point! I am brewing my first batch tomorrow and have one more question. (At least for now!)

I am working right now on making my immersion wort chiller. I have a 50' piece of 3/8" copper and I formed it to make sure it fits inside my 5 gallon brew pot. My question is, How long does it really need to be? I coiled the entire 50' and it seems to hang out of the pot quite a bit. Can I cut it down and it still be effective? I dont want to risk having my wort touch the copper that is not being sanitized in the boiling brew pot.

Wow, you must be excited! I can barely wait to even order equipment, lol.

Honestly, I think that if you put the chiller in early enough, the copper that is well above the wort level will be sanitized from how hot it will be. But I guess you can sanitize the whole darn thing, that would do it.

If you already have way too much copper, I think by removing excess you actually would increase your efficiency, if barely. Well the real reason I'm posting is that if you do have a lot of extra, then make a second chiller with it! Run that inline into a tub of ice water before it runs through more hose into your brew kettle. This may be overkill right now, but on a hot summer day, this might knock down your water usage and wait time in a very big way. The water getting to the final chiller will be so much colder.
 
If you already have way too much copper, I think by removing excess you actually would increase your efficiency, if barely. Well the real reason I'm posting is that if you do have a lot of extra, then make a second chiller with it! Run that inline into a tub of ice water before it runs through more hose into your brew kettle. This may be overkill right now, but on a hot summer day, this might knock down your water usage and wait time in a very big way. The water getting to the final chiller will be so much colder.

That's a fine idea. Use that excess 20' of copper to make a pre-chiller.

As far as sanitizing the chiller, I dare say that immersed 15 minutes in a pot of boiling wort will do the job quite nicely.

Swirling while cooling makes a big difference. I swirl opposite the flow of the chiller with a sanitized (in Star-San) plastic spoon every minute or two. I have a Brewmometer on the kettle, so I can see the temp drops that occur with each swirl.

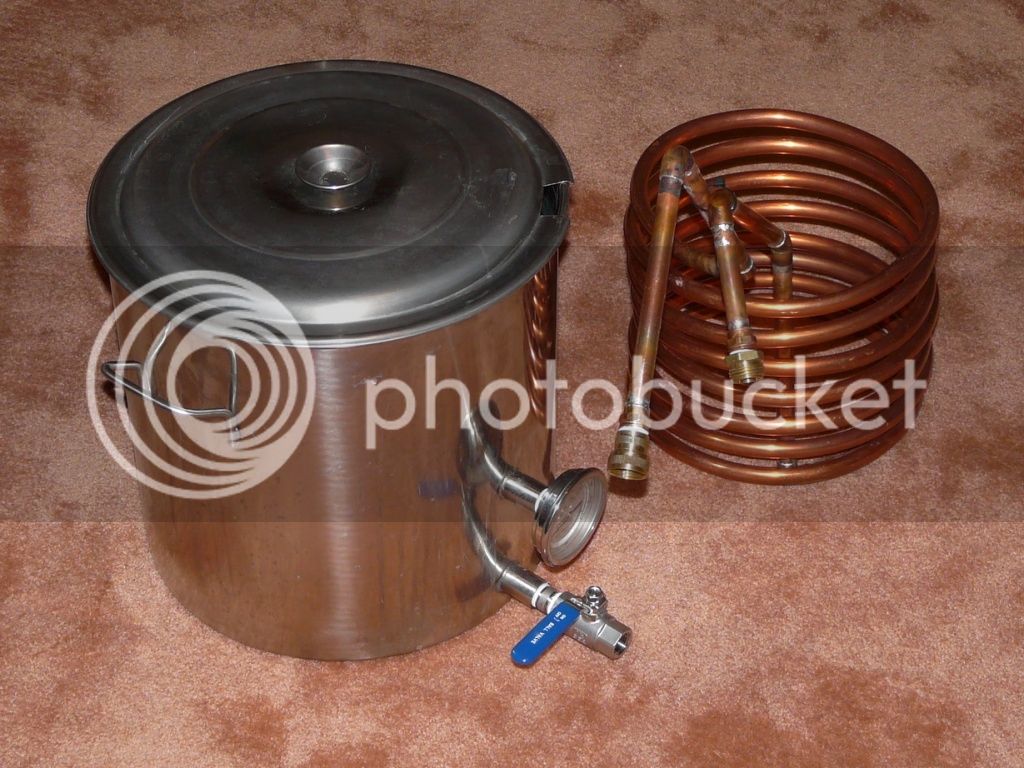
I took a different approach on the chiller tubing and used 22' of 1/2" ID copper tubing with 90* and 45* slip joints attached to copper hard pipe for the straight bits and garden hose connections. That size tubing is a little harder to shape. Instead of trying to wrap it around a keg, I shaped by working it down alongside the walls of a 5-gallon plastic bucket. That worked well.

kettleandchiller_zpsa390aece.jpg


My mechanical engineer son advised me that, in an open thermal transfer system, flow rate is an important factor. Well, this one flows quite a lot more hose water than the 3/8" chillers that use vinyl tubing.
 
BigFloyd said:
That's a fine idea. Use that excess 20' of copper to make a pre-chiller.

As far as sanitizing the chiller, I dare say that immersed 15 minutes in a pot of boiling wort will do the job quite nicely.

Swirling while cooling makes a big difference. I swirl opposite the flow of the chiller with a sanitized (in Star-San) plastic spoon every minute or two. I have a Brewmometer on the kettle, so I can see the temp drops that occur with each swirl.

I took a different approach on the chiller tubing and used 22' of 1/2" ID copper tubing with 90* and 45* slip joints attached to copper hard pipe for the straight bits and garden hose connections. That size tubing is a little harder to shape. Instead of trying to wrap it around a keg, I shaped by working it down alongside the walls of a 5-gallon plastic bucket. That worked well.

My mechanical engineer son advised me that, in an open thermal transfer system, flow rate is an important factor. Well, this one flows quite a lot more hose water than the 3/8" chillers that use vinyl tubing.

BigFloyd
Did you shape it on the inside or outside of the bucket? Also, did you have to do anything special to the solder joints to make them able to go in the wort? My 3/8" chiller I made worked well, but I think I want to make one like yours.
 
BigFloyd
Did you shape it on the inside or outside of the bucket? Also, did you have to do anything special to the solder joints to make them able to go in the wort?

I slowly worked the tubing down around the inside of the 5-gallon plastic bucket.

You must use lead-free solder and flux just as you would for the water you drink out of your household plumbing.


My 3/8" chiller I made worked well, but I think I want to make one like yours.

I appreciate the compliment. I've been quite happy with mine. I found out through using a friend's chiller before I made mine that the type which use vinyl tubing can develop a kink in the vinyl where the tubing joins the outlet tube, resulting in reduced flow. That's why I decided on garden hose connections.
 
looking good. I made mine from 25 ft 3/8 copper to vinyl hose. I have an old pond pump I use to move water from a bucket. I learned on this site I think, to run domestic water from the tap first then when a temperature drop occurs, switch to ice water and a closed circulation.

so in the beginning I run a garden hose into a 5 gal bucket with pond pup to coils. from coils I run the water into a bucket for watering plants. once cooling water discharge temp drops to around 100f, fill the bucket with water and ice, put the other end of the tubing in the bucket, and the pond pump moves the ice water in a circle.

spreading the coils lets water through and you should stir the water or it will only cool where it touches the copper coils.

plan enough copper coming up from the coils so the fitting area is not submerged in wort, esp when sterilizing while boiling.

I like the solid construction of your setup.

you might think about using a short but double coil arrangement to get more contact with hot wort. keep us updated.
 
BigFloyd said:
I slowly worked the tubing down around the inside of the 5-gallon plastic bucket.

You must use lead-free solder and flux just as you would for the water you drink out of your household plumbing.

I appreciate the compliment. I've been quite happy with mine. I found out through using a friend's chiller before I made mine that the type which use vinyl tubing can develop a kink in the vinyl where the tubing joins the outlet tube, resulting in reduced flow. That's why I decided on garden hose connections.

BigFloyd
That makes sense! Thanks for the picture and response! I was hoping you meant inside the bucket, because I tried to form my 3/8" chiller on the outside of a 5 gallon bucket and it didn't fit in my brew pot and I formed it by hand. It is probably the ugliest chiller known to man, but it did the job on my first brew.
 
looking good. I made mine from 25 ft 3/8 copper to vinyl hose.

If you have any problem with the vinyl tubing getting weak near the copper because of the high temps (vinyl tubing is only rated to about 140*F), try switching to silicone tubing. It's an inexpensive fix and will handle the heat just fine.

BigFloyd
That makes sense! Thanks for the picture and response! I was hoping you meant inside the bucket, because I tried to form my 3/8" chiller on the outside of a 5 gallon bucket and it didn't fit in my brew pot and I formed it by hand. It is probably the ugliest chiller known to man, but it did the job on my first brew.

I'm not sure that I could've formed that 1/2" ID tubing around the outside of anything without kinking it. It's quite a bit stiffer than the 3/8" coolant tubing. That's why I decided to try the inside of the bucket.
 
BigFloyd said:
I slowly worked the tubing down around the inside of the 5-gallon plastic bucket.

You must use lead-free solder and flux just as you would for the water you drink out of your household plumbing.

I appreciate the compliment. I've been quite happy with mine. I found out through using a friend's chiller before I made mine that the type which use vinyl tubing can develop a kink in the vinyl where the tubing joins the outlet tube, resulting in reduced flow. That's why I decided on garden hose connections.


image-26580865.jpg

Just wanted to thank BigFloyd for the advice on the wort chiller. Sorry I completely copied yours, but I am much happier with this 1/2" one over my 3/8" monstrosity! Thanks again BigFloyd!
 
Back
Top