Wiring Diagram- PID Controller and RIMS

Homebrew Talk - Beer, Wine, Mead, & Cider Brewing Discussion Forum

Help Support Homebrew Talk - Beer, Wine, Mead, & Cider Brewing Discussion Forum:

This site may earn a commission from merchant affiliate links, including eBay, Amazon, and others.

dutch101st

Well-Known Member
Joined
Mar 3, 2009
Messages
216
Reaction score
1
Location
Roseville, CA
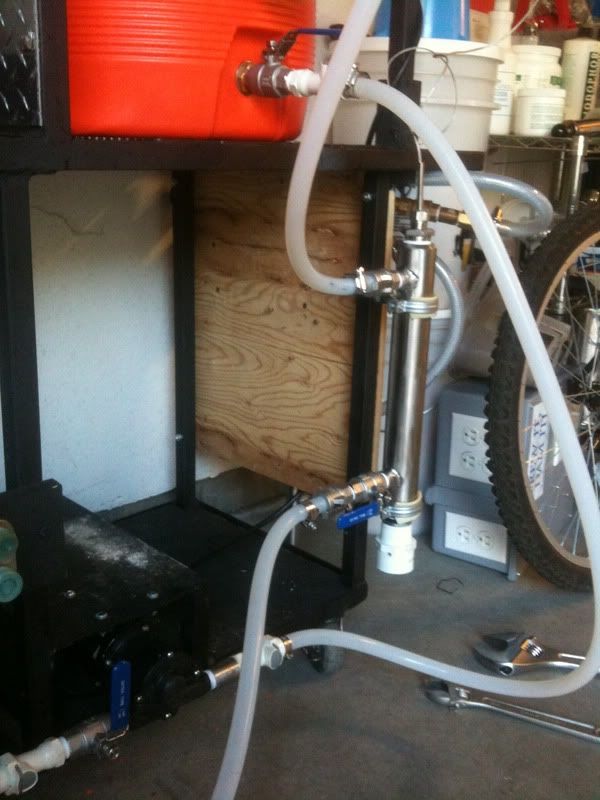
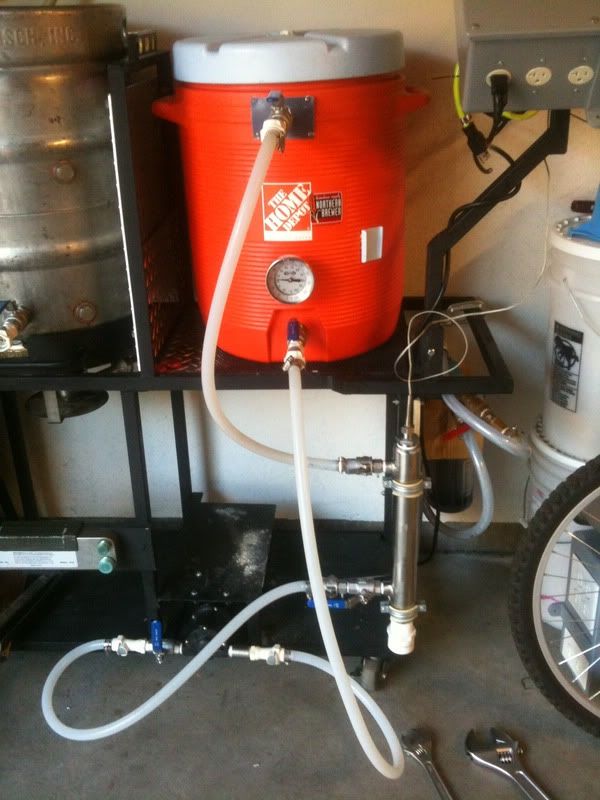
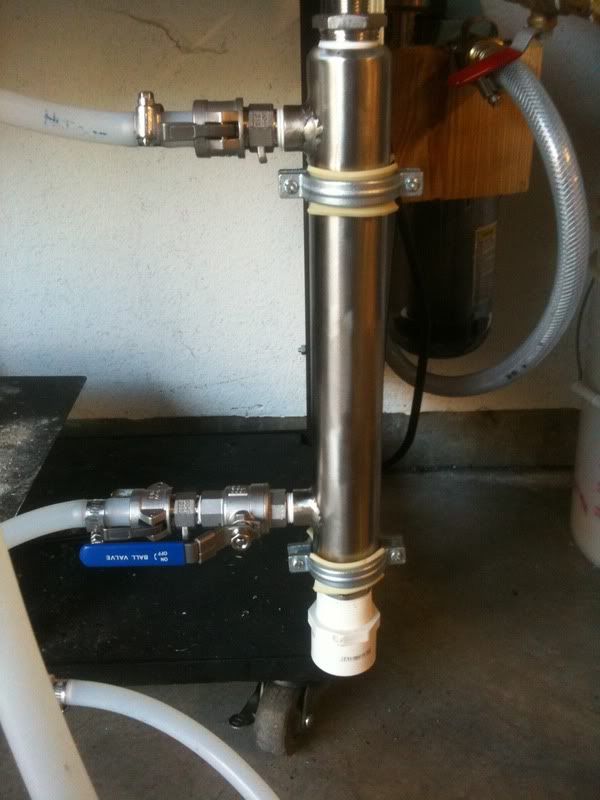
Wiring up my RIMS based on A LOT of great stuff on here...

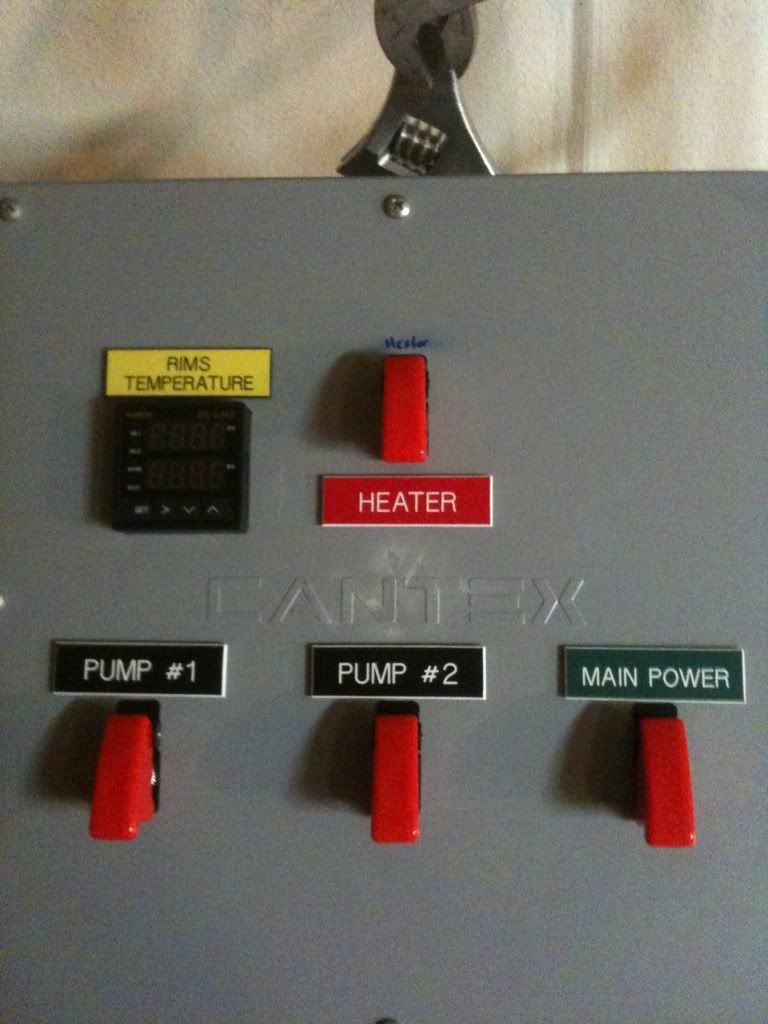
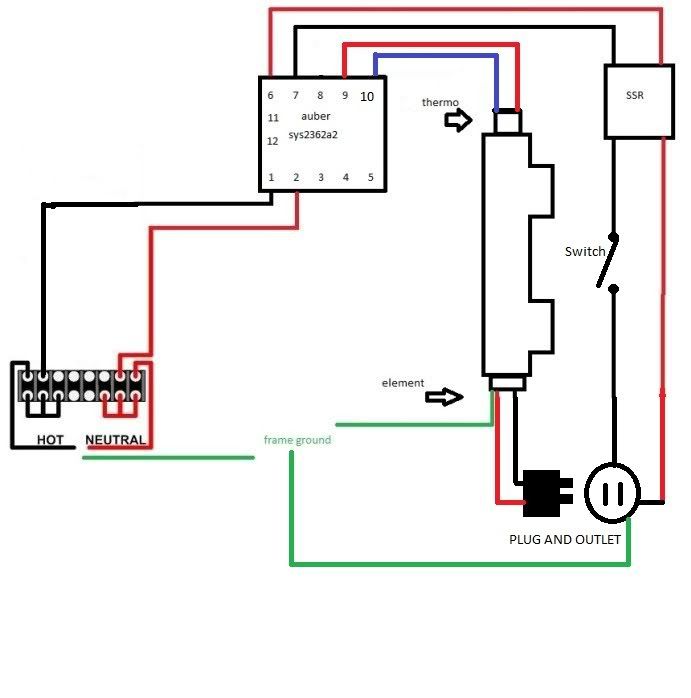
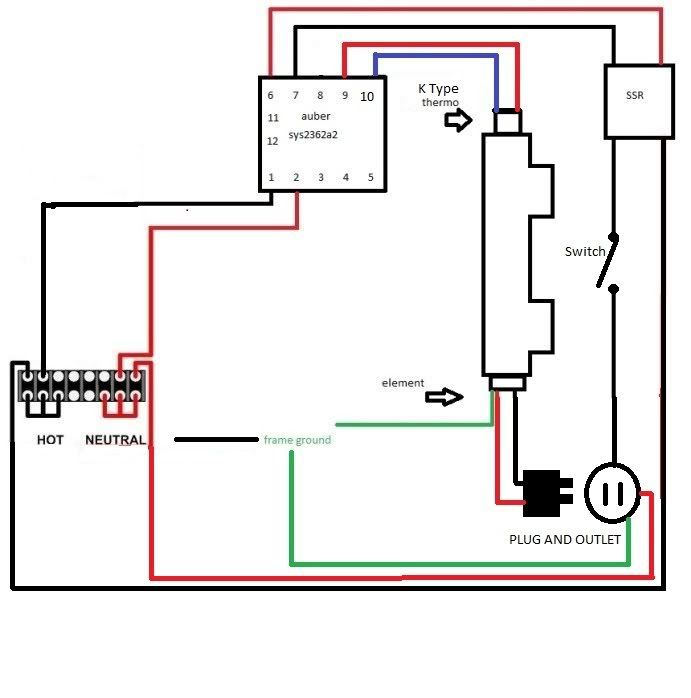
First off, I am pretty saavy with wiring although I do not do it enough to really be good at it...having said that I am saavy but not confident. So, here is my PID wiring diagram...I would like to know, is this right/will this work? It seems like I am throwing a lot of current through the PID to the heating element in the RIMS (and yes, everything will be grounded)

Here is my diagram...

betterwiringREV2.jpg
 
I believe you almost have it right. I am also assuming you are using a 120V circuit. The SSR will switch the power off and on for the element via pins 6 & 7 from the PID. That is to say that pins 6 & 7 control the SSR. This is a low voltage circuit. It's ok to have a red and black set of wires here.

Now as far as the other side of the SSR is concerned, you are switching only the hot side of the circuit. Then have the neutral go directly to the neutral side of the outlet you are plugging the element into. I like your switch after the SSR, I did the same thing.

Here's a really crappy picture of my schematic. It was inspired by P-J and the work he's done for TiberBrew and others on this board. I have the switch for the element on the wrong side of the SSR. It should be down before the light.

MyControllerSchematic12-16-10.jpg
 
I see says the blind man...yea, the way I had it wasn't making sense...this does. Duh.

Yea, I don't do enough electrical to really retain and remember and therefore have confidence in what I am doing.

Do you have a larger picture of this? I am documenting everything in my brew book...

Thank you very much for he help!
 
I don't see how this will work. The SSR should get power directly from the main on one of the switched terminals and the other output terminal should go to the element through the switch. The neutral from the element should go directly to the neutral of the supply.

The way you have it down no power will get to the element. Remember, the SSR does not supply current from the PID to the element. The SSR is only a switch between the supply and the element.
 
the switch after the PID is a manual switch for you to shut off the element?

Yup.

Always good to have a kill switch.

I also have a "Main Power" switch that powers the box...both the hot and the neutral are wired through it.

Stlbeer's wireing diagram really has made the light go on, no pun intended... Here is my updated schematic:

betterwiringREV3.jpg
 
Got your pm...however the forum is saying you have too many save messages for me to send you my email addy...which is on my profile (I think)
 
Ok, so I got everything wired up...and TESTED. Well,I do not have my RIMS going quite yet, but tested the wiring, switching, and connectivity. The test was my box fan to keep my SSR cooled down and to provide some airflow within the control box.

I want to say a BIG thank you for everyone who helped...if you are in the area, homebrew on me!!

Here are pix of the completed control box..inside and all buttoned up with power:

CtlPanel1.jpg


CTLpanel2.jpg


The switches are:

Top: Heater power (kill switch)

Bottom: Pump #1, Pump #2, Main Power


I have control box engraved tags coming to round it out so it doesn't look so plain.
 
Well, got my parts from Bargain Fittings (ALWAYS a good experience with them!!) and I think I am hooked/sold/enamoured with CamLocks...but I digress...

I have got the RIMS tube even closer to being ready for a full on water test...just awaiting the low density heater element. Got the old HEX coil from my old RIMS removed and the holes plugged. I got everything teflon taped up and ready (except the temp probe)...the element should be here tomorrow and will get it mounted and then will do a water test- and if that goes well, then off we go with brewing with the RIMS tube in full production!!

ALL HAIL THE RETRO ATOMIC ROBOT BREWERY.

Pics of today's work...


Brewery251.jpg


Brewery252.jpg


Brewery253.jpg
 
More today...new heating element came...its the schiznit:


All in all, looking pretty damn good. Now if the weather clears for the weekend here in NoCal, looks I will be brewing with the new system this next weekend!

Sahwheet!!
 
Last edited by a moderator:
Control panel is now done!

1da5ea45.jpg


Did a brew this weekend and my pump placement need to change...so will have that in place by my next brew. Pics forthcoming
 
Rather than having the flow horizontal, I am changing the flow to go downward' this should help with priming the air out of the pump(s).

Had problems with the pump not being primed this weekend. Just more tweeks to the system, thats all.
 
Ok, thats what i was wondering. there have been a few posts lately about this item called an autovent. it perges air rom plumbing systems. install it downstream of your pump and it virtually primes the pump everytime. check it out. I am looking at on when i work on my sculpture this spring.

Rather than having the flow horizontal, I am changing the flow to go downward' this should help with priming the air out of the pump(s).

Had problems with the pump not being primed this weekend. Just more tweeks to the system, thats all.
 
Thanks for posting all this. Looks good. Just what I want to do. A little off topic, could you post a pic of two on the 'return' to mash tun? Like from the top looking in? Like to see how you got it rigged going thru your mash tun. I've got a 10 gal Gott, and deciding to go thru lid, side or not cutting a hole all together. Thanks!
 
I use a Blichmann sparge arm...so have to go through the side. One thing I do like about having a side mount sparge system is that I can remove the lid of the cooler without having to worry about spilling wort or water everywhere.
 
I would have to say that I am the proud new owner of this control panel. If I was any more excited when I won the auction I would have peed myself. You were not kidding when you said that you upgraded your control panel. Thanks for everything Shane and I cannot wait to use it.

Chromados
 
Yup the panel got here yesterday, everything looks perfect. It was exactly what I was looking for. Thanks for everything and it will get a lot of use starting this weekend.

Chromados
 
It went well, I am sure after another brew or 2 I should have it completely dialed in. The only problem I ran into was after brewing with the clean up. My RIMS tube is from brewers equipment and I was like how am I supposed to clean the element after a brew. It seems far too painful to take the element out each time so after a little thinking I am going with some tri-clovers from brewers hardware so I can easily remove the element each time. This should make me much happier as I can clean and inspect my element after each brew.

How is your new system/control panel running so far. I would love to have one like your one day.

Thanks again for anything

Chromados
 
So far so good...2 brews with it so far and it seems to be working as designed. I did my flagship IPA for the first brew, then decided to change it up and go with a black IPA last weekend.

Here is video of the first brew with it...

 
Last edited by a moderator:
Can you put up a parts list and final wiring diagram? I would like to replicate this setup (adding RIMS) but have two pumps already.
 

Latest posts

Back
Top