The full Monti

Homebrew Talk - Beer, Wine, Mead, & Cider Brewing Discussion Forum

Help Support Homebrew Talk - Beer, Wine, Mead, & Cider Brewing Discussion Forum:

This site may earn a commission from merchant affiliate links, including eBay, Amazon, and others.

GreenMonti

Well-Known Member
Joined
Nov 29, 2009
Messages
1,268
Reaction score
67
Ok,

I am posting this as my offical build thread. I will post pics and try to document it the best I can along the way. I get in a hurry a lot of the time and I don't document as well as I should. This might take me a while to complete too. I am gonna have to depend on others to do a few things for me. That and cash flow.

Since I just discovered I can boil in my kettle using a steam jacketed bottom only. I have found my method. It is also pretty scary how the pieces are falling together too. I have a good bit of the parts required to get me started.

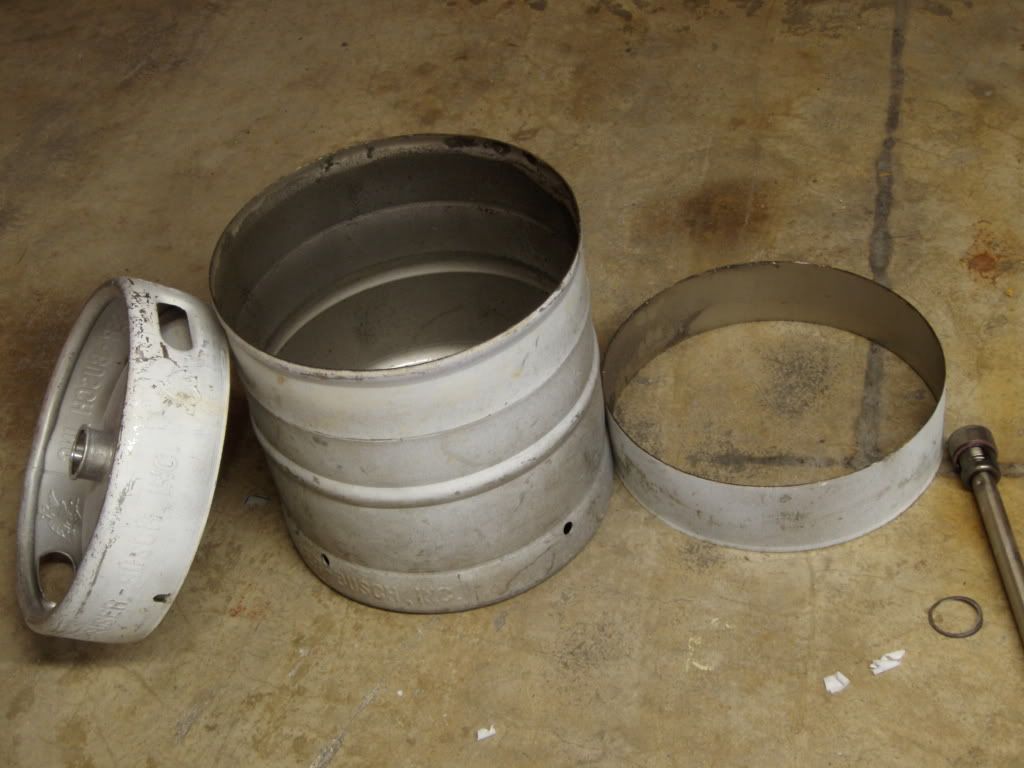
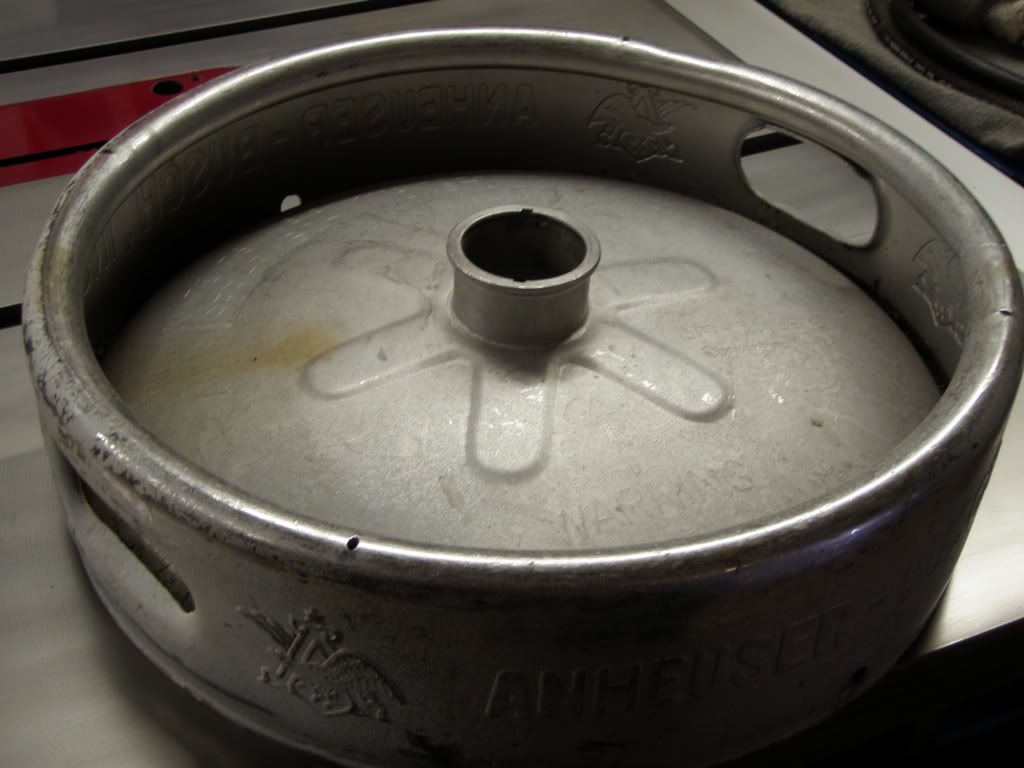
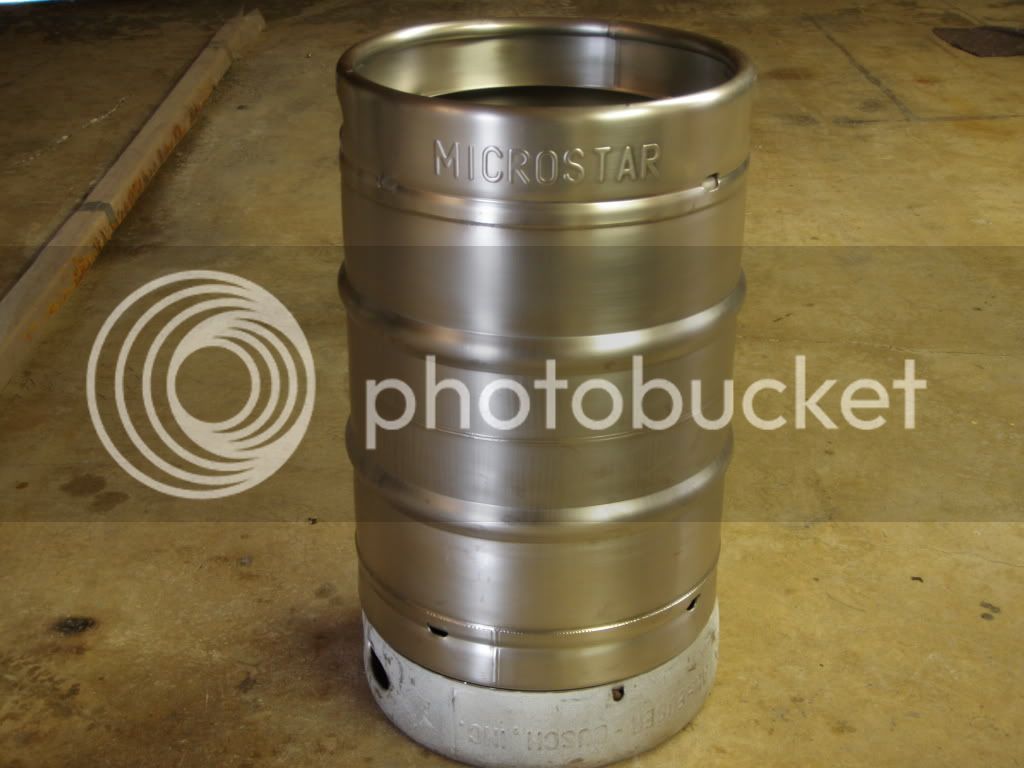
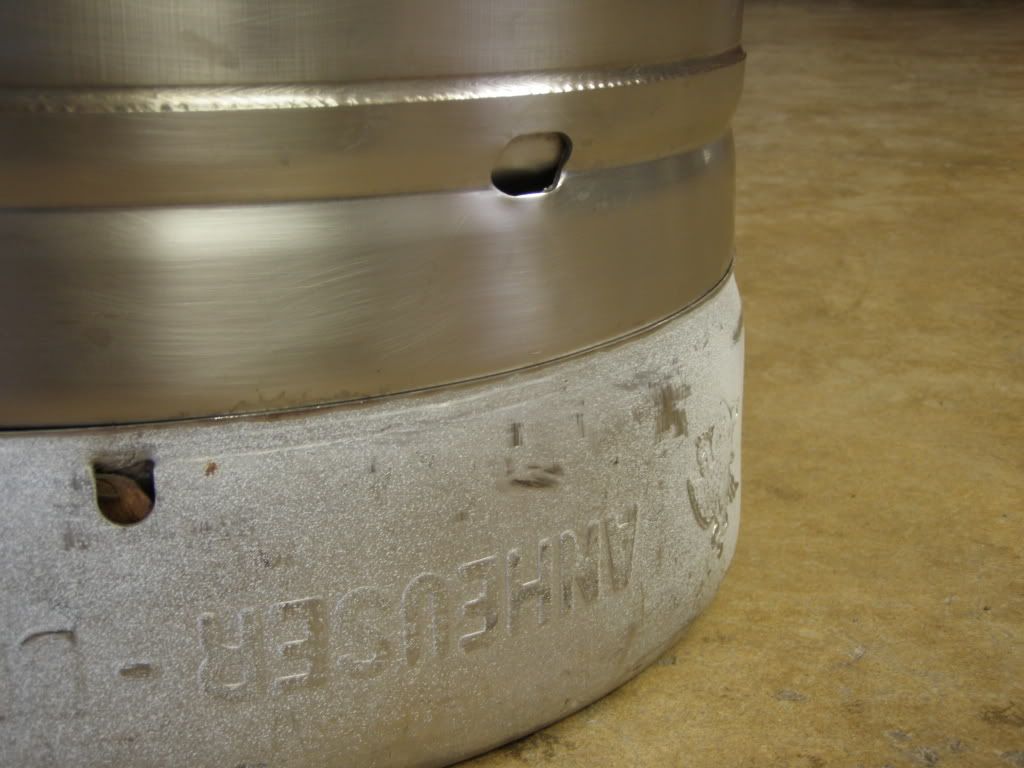
I am going to start with my kettle. I want to get it built and completed so I know how to place other items around it. I have really toyed with a wood stand but I think I am ultimately going to build out of steel. I am going to use standard mild steel tubing. I believe I want to use 1" x 3" or 1 1/4" x 3" tubing. I will paint it with black single stage automotive paint.

The system will be a single heat source and it will all be steam fired. I will make my water and steam on demand. The mash will be a steam infused via the recirculation. No steam manifold in the tun. I am going to have 1 pump and it will be a single tier setup. I am going to use a cooler for the MLT because I just can't pass up on the fact that it is an all inclusive vessel. It will however not be a permanent part of my rig. The kettle and my burner exhaust stack will be the setup. I am going to have a shelf that either slides out, or tips up to hold the tun. This way I can empty it, wash it, dry it, and put it away while my boil is going on.

Short of that, this is gonna be the same way I build all my stuff. A fly by the seat of my pants deal. But please don't hold any comments, I will discuss options and ideas. This build is on a budget due to the fact that I have built part of it already,(my boiler) and spent so much time and money in the research side trying to learn about steam.

So here we go.
Cheers everyone.:mug:
 
So, like I mentioned. My kettle is first. I have an idea and the great thing is it doesn't cost me any money. Not yet anyway.:)

So I need to close off the bottom skirt area and provide a way to get the steam in and out. I started a MLT project a few months back and I never went any further with it. So, it just so happens that the way I cut the keg to use as a MLT I can use the top for my kettle bottom. It will also provide me with the low spot for drainage that a standard sheet of sheet metal wouldn't without some work. My testing kettle's sheet had a X break in it. So it gave me the low point.

Here is a shot of the MLT I cut up a few months ago.
P1010058.jpg


I am using the top from that project. Its nice and straight. The only dent or worble it has is in the handle area.
P1010002-4.jpg


If I turn it upside down and set my kettle on top of it........I have a nice fitting bottom, a drain, and still have a nice solid bottom to build a place for it to sit on and have all the access to the drain.
P1010003-4.jpg
 
This is a closer shot of the fit and what I will have to weld up.
P1010004-2.jpg


This shows a better idea of what I have in mind. Sometimes I don't explane my self very well. It easier to see the void here.
P1010005-2.jpg


This kinda shows my idea for the drain. I could just use a tri-clover but I don't want to for some reason. Thanks to a friend here on HBT, I have this fancy reducer and it fits perfectly. I plan on removing the neck on the lid and just using the reducer. It will then go to the 1/2" coupling that is going to be cut in half cause I don't need the whole thing. It will all be shortened and it will look much better when it is done. This is going to be the first project to tackle. I will get it all done and then weld it to the kettle bottom.
P1010001-4.jpg


Thanks for checking this out.
 
Any reason you cut the MLT so short? I like the idea of the tri clover drain but hell if you have the parts and time you may as well fully fabricate it. I look fwd to your build.
 
Any reason you cut the MLT so short? I like the idea of the tri clover drain but hell if you have the parts and time you may as well fully fabricate it. I look fwd to your build.


When, I was going to use that as my MLT. I figured it was plenty big for 10 gallon batches that way. It will still hold 10 gallons cut down like that. That lid was left that way so a motor could easily be mounted with a tri-clover. Also, aside from just being a little shorter, it would still match the kettle sitting next to it, and not have the large air space to rob more heat along with it being SS.
 
I'll be watching this, I have a 40 gallon jacketed steam kettle that I have been contemplating how to heat.
 
I'll be watching this, I have a 40 gallon jacketed steam kettle that I have been contemplating how to heat.


About all I can tell you is your gonna need a lot bigger boiler then I have.:D
 
Hmm I'm not sure I quite understand how its going to work. Does steam go in through the bottom and out through the holes in the skirt?

That shiny brand new keg is a thing of beauty. It'll almost be a shame to see it get cut/welded/etc. Almost. :)
 
Steam is fed under controlled pressure to the cavity in the keg bottom that he is going to create, and water will be allowed to drain from the bottom.
I'm sure that keg will be just as pretty if not nicer once he gets through with it.
 
Hell yea man! This is looking great. I hope everything turns out great. I am gonna keep checking this out.

By the way, the couplers you welded for me are working great, I checked the inside of one and they are still looking good. Thanks again and good luck on this new project.
 
I am going to use a cooler for the MLT because I just can't pass up on the fact that it is an all inclusive vessel

Monti.... I formally request that you fabricate a beautiful sculpture out of stainless and inconel for your MLT. :tank:

People like me use a cooler mlt ;)
 
Steam is fed under controlled pressure to the cavity in the keg bottom that he is going to create, and water will be allowed to drain from the bottom.
I'm sure that keg will be just as pretty if not nicer once he gets through with it.

Where's the feed input going to be? The side of the skirt? Still having trouble visualizing things here...
 
Hell yea man! This is looking great. I hope everything turns out great. I am gonna keep checking this out.

By the way, the couplers you welded for me are working great, I checked the inside of one and they are still looking good. Thanks again and good luck on this new project.

That's good to hear. Not sure why but I just never paid real close attention to the coloration on SS. It would appear that it was indeed just a byproduct of the heat input.

Keep making great beer and enjoy the hobby. Prost.:mug:

Monti.... I formally request that you fabricate a beautiful sculpture out of stainless and inconel for your MLT. :tank:

People like me use a cooler mlt ;)

You mean people like "US", use a cooler as a MLT. I used a cooler as a MLT in the beginning. I then made a nice SS one out of a keg. Complete with a false bottom, the whole nine. I am now regressing back to a cooler. I think, I will enjoy the simplicity of a cooler. I have so far. I will run steam into it for the first few minuets to heat things up. Then I will increase the flow and fill it to the level I need it for the mash. Then "IF", I need too I can directly infuse steam into the recirculation. I say "IF" because the mash is generally done after the first 20 ish minutes or so. I don't loose but a degree or two in the top layers of the mash in that amount of time. I just don't see the need to have a fancy, heavy, bling type of vessel anymore for this application.

Having said that..........believe me. I want to build another MLT all fancy and full of bells and whistles. Purely to have something to build. I love too weld.
Cheers.:tank:
 
Where's the feed input going to be? The side of the skirt? Still having trouble visualizing things here...


Yes. The feed will be in trough the side of the skirt of the addition to the kettle. I have had a slight rethink of things but nothing too skue what has already been said. What I changed is that I am going to use a keg bottom instead of the top. I cut the bottom out of the same keg I posted eairler in the thread. The same one I got the top from. Anyway, The steam will go through the skirt of the addition to the keg.

Here is a pic of the test keggle I built. In this application I just added a sheet to the bottom to create the same effect as adding the entire keg bottom or top. The reason for adding a keg bottom or top is too give me a solid base to set the kettle on, that and I have a donor keg so the steam jacket/chamber is free to me this way.
P1010002-3.jpg

P1010001-3.jpg


Edit; Here is a shot of the bottom of the keggle. This is the bottom of the sheet that is welded to the bottom of the keggle. This is the drain.
P1010003-3.jpg
 
Steam is fed under controlled pressure to the cavity in the keg bottom that he is going to create, and water will be allowed to drain from the bottom.
I'm sure that keg will be just as pretty if not nicer once he gets through with it.

Thank you for the kind words. It means a lot to me.:mug:

awesome.

subscribed!

I hope it turns out, and meets your expectations. I am trying to build it as fast as I can. I want it done!! I am not sure what steam fired beer is going to taste like? All the local micros are direct fired. I can't wait to taste the result of this build.
 
Looks like the steam/wort mixer is your next frontier, you seem to have conqured the steam heating approach with a test of all the methods used. You have taken this a lot farther than I ever have and I salute you for your craftsmanship and determination to bring steam heating into the homebrew scale size systems. I am looking forward to watching you integrate the various brewing components with the flash boiler heat source and build a system that outperforms all others.
 
looks good monti. Like the simplicity of this design, most likely its worth the resuction and cost.

And an inconel mlt or whatever else would kick ass, but maybe not on a price basis
 
I will be watching this build. Sure wish I had welding and fabricating skills such as yours. Good luck and keep the pictures coming! :)
 
Wow!!! Getting excited thinking about my kettle now. If I did this to mine I could then make it look like the HLT and MLT with insulation and truck bed liner. How much better would you estimate your gas savings boiling with say... a large container (think SS trash can) wrapped around the kettle and welded shut at the top as a all-encompassing "skirt"? Just like a steam jacketed kettle is now! That is what I am contemplating for mine based off of your build. I'm just thinking about squeezing as much efficiency as possible out of the steam production to minimize propane input/water used. I would also extend my kettle height to accommodate a 15 gallon end-batch for my brewery. I was just curious of your thoughts Monti.

Oh, by the way, you had me at, "OK, I am posting...." :)
 
looks good monti. Like the simplicity of this design, most likely its worth the resuction and cost.

And an inconel mlt or whatever else would kick ass, but maybe not on a price basis

I may build one in the future. It will be a while tho. Maybe if the cooler takes a poop on me it will kick me in the back side. I have never used a cooler utilizing steam before. I have seen the steam melt some things that were supposed to take the heat. We'll see.......

I will be watching this build. Sure wish I had welding and fabricating skills such as yours. Good luck and keep the pictures coming! :)

I will do so as much as I can. Thank you for the kind words.:mug:

Wow!!! Getting excited thinking about my kettle now. If I did this to mine I could then make it look like the HLT and MLT with insulation and truck bed liner. How much better would you estimate your gas savings boiling with say... a large container (think SS trash can) wrapped around the kettle and welded shut at the top as a all-encompassing "skirt"? Just like a steam jacketed kettle is now! That is what I am contemplating for mine based off of your build. I'm just thinking about squeezing as much efficiency as possible out of the steam production to minimize propane input/water used. I would also extend my kettle height to accommodate a 15 gallon end-batch for my brewery. I was just curious of your thoughts Monti.

Oh, by the way, you had me at, "OK, I am posting...." :)

I am not sure how to go about the facts on the design of a jacketed kettle. I am with you on the efficency part though. I plan on utilizing a pre-heater for my boiler feed. It will use the condensate to heat up the incoming water to the boiler using a 10' CFC. I am also going to place a valve in front of the pre-heater. The kettle will see 6 PSI steam and the pre-heater will not be pressurized. So that as the condensate enters the pre-heater it will flash back into steam and then re-condense because it will be going into a 0 PSIG environment. I will be condensing steam twice in one pass.
 
Looks like the steam/wort mixer is your next frontier, you seem to have conqured the steam heating approach with a test of all the methods used. You have taken this a lot farther than I ever have and I salute you for your craftsmanship and determination to bring steam heating into the homebrew scale size systems. I am looking forward to watching you integrate the various brewing components with the flash boiler heat source and build a system that outperforms all others.

Hey Kladue. Glad you found my thread.

Kinda funny you mention that. I have started a new mixer. One that I hope will emulate one that is in use in food processing. I am hoping to get close to the Pick Heater idea. Not completely but kinda close.

I wish I could outperform all the others. It seems that on this small scale the electric group still beats anything. My gas usage is low, but not low enough to beat the cost of electric in most areas of the US.

I am already using your boiler to brew with while I build this setup. The ability to blow steam into the MLT to heat it up and then just fill it with water that is ready to go........Sweet. Also, using the FB to sparge with is smooth. At least that's what I think.

I have done three test runs, two full batches of beer, and I still have a fair amount left in my propane tank. I can't wait too see just how much a full session will use when I am done building.
 
I spent the day today working on my steam input pipe/manifold. I bet if I have the proper tools I could have got more done today. Oh well. I could have probably taken a couple more pics but I didn't want to get to carried away.

I used 1" OD SS tubing that is electro-polished on the inside. I cut apart a 1/4" coupling so I could get the threads I needed for my temp gauge and my pressure gauge.

My temp gauges say to use a thermo-well for any pressure applications. So I started by building a thermo-well. So I cut apart a 1/4" coupling and moded the one side to my needs. The tapered end gets welded to a piece of 1/2" OD SS tubing.
P1010001.jpg

P1010003.jpg


Here is the pieces welded and polished off and the gauge placed to check my length.
P1010005.jpg

P1010004.jpg


Next I had to cap the end cause an open ended thermo-well is pointless. I hooked it up to my compressed air and pressure checked it with 90 PSIG air. No leaks. Move on.
P1010006-2.jpg
 
I then needed to figure out how I was going to place this into my steam line. I came up with a good idea (so I think anyway) and used a piece of the 1" tubing for the job. I had to cap the end first off. I used a SS washer that I ground down to fit the OD of the tubing.
P1010007-2.jpg


Now I need to make the hole bigger to accommodate the new thermo-well. This pic shows the small hole but you get the idea of what I'm after here.
P1010008-2.jpg


I got busy building and skipped a few steps. Sorry. The hole was made larger and the thermo-well was welded in last. I first cut the 1" tube to length and copped the end to fit its mating 1" tube. Things were then welded up and I had too give a love tap to straighten it back out cause I was too lazy to weld it with a strong back in place, pre-stressing the part blah, blah, blah....

Here is how the coping came out.
P1010014.jpg


Here is how the thermo-well came out.
P1010015-1.jpg


The whole piece.
P1010013.jpg


This is the thermo-well sticking down on the inside. By placing it into the 1" tubing the steam will travel up into the T section giving me my temp reading and I am not giving up any real flow due to an obstruction. See how shiny the inside is? That's the electro-polish.
P1010009-2.jpg
 
This one shows that I got it straight. I plan on welding in another fitting on the T section just below the threads of the thermo-well for my pressure gauge.
P1010012.jpg


As I mentioned eariler, I decided to use a keg bottom instead of the top. Here is kinda a preview of the steam line going into the jacket.
P1010016.jpg


I think that's about it for now.


Prost everyone.:mug:
 
Beautiful welding, wish I could come close to that quality. What are the plans for the seal weld where the tube meets the inside of the bottom.


Thank you for the kind words Kladue. I will purge the welds of course but, I plan to weld the inlet to the bottom before it gets welded to the kettle. This way I can weld the inside 100% without any question. I do plan on welding the outside as much as I can. On the very bottom it gets real tight up near the skirt weld. I am going to hang the tungsten out real far to get up as close as I can. We'll see how I do.......
 
A little more progress today. I got a couple more pieces ready to be welded up.

First I got the hole cut into the T section for my pressure gauge mount.
P1010017.jpg

P1010018.jpg


My weapon of choice for this job.
P1010019.jpg


I also prepped the end for the half coupling to be welded on. At first I was going to weld on a Swage Lock fitting but then......I wondered what I would do if I should ever need to replace something. SS is famous for seizing up, and since it will be in direct contact with my steam, I opted for something more removal friendly.
The coupling I cut in half and reduced the OD to match my tubing.
P1010023.jpg

P1010022.jpg


And just for kicks I thought I would show you my welder. I have mentioned in other threads that I have an old dinosaur for a machine. Well here it is in all its 1979 glory. No real options here. Just HF. Even on the inside it is just a bunch or resistors and contact blocks. Not one single circuit board.:mug: So just remember all you DIY weldors out there.....its not the machine that makes the weldor. Prost everyone.
P1010020.jpg

P1010021.jpg
 
GM... You've got MAD skills. Most the time I have no idea what you are building, but it all looks like art to me.
 
GM... You've got MAD skills. Most the time I have no idea what you are building, but it all looks like art to me.


Ha,Ha.
Well my friend, stay tuned cause this is my build thread. By the end of this I will have my new system. It may not work, but I'm excited to be building it. LOL.:D


Just joking. I gotta tell you, I followed your electric thread for the first few pages and I was totally lost. Its funny how different folks work in different mediums. Some work in oil....I work in pencil. I can fix what I screw up by welding it back together and cutting it again.

Did you do a build thread?? or just question threads?? I would like to see your setup. You've brewed on it, yes?

I have been brewing on it since February. But it is still very temporary. Most of the components are pretty much finished, I'm just fine tuning as I kind of "package" it. The vessels are still sitting on scaffolding and the electrics/control panel are on a piece of plywood.

I can hardly wait to watch your build progress. Do you have a completion target date in mind?

Sounds a bit like my current setup. My MLT sits on my table saw, while my flash boiler is on the ground with about 5-6 feet of steam line into the MLT. My keggle is on a slightly moded turkey burner, my LG pump is clamped to my step ladder........Argh. It makes beer though. I can't wait for this to be done. I want a system again real bad. I miss my 3 tier, so simple.

Ha,Ha.....Heck no. That would mean I would have to plan, and budget this thing. I unfortunately have never done that in my life and I'm not gonna start now.LOL.
 
GM, how far will your flash boiler be located from the mlt and boil kettle? You are working with 5-6' now. I assume you lose some heat as the steam travels that distance but one could tune the system to take that into account. Could it be further, 10'? Just have me thinking about a remotely located flash boiler outside the brewery.....
 
Ha,Ha.....Heck no. That would mean I would have to plan, and budget this thing. I unfortunately have never done that in my life and I'm not gonna start now.LOL.

I hear ya... IMO, nothing will ruin a hobby faster than a budget and a schedule.
 
Monti, I'm welding with a Miller Dialarc 250 (stick welder) from the early '80s (I think, I don't even remember), so I'm right there with ya. I actually had to fabricate a few parts for it, since they don't make them anymore.
My skills aren't anywhere close to yours, though. Keep up the good work, I'll be watching this as I'm quite intrigued by the idea of steam setups. :mug:
 
Back
Top