
- Joined
- Dec 21, 2011
- Messages
- 277
- Reaction score
- 38
After many requests, I finally have enough time to do a write-up on this.
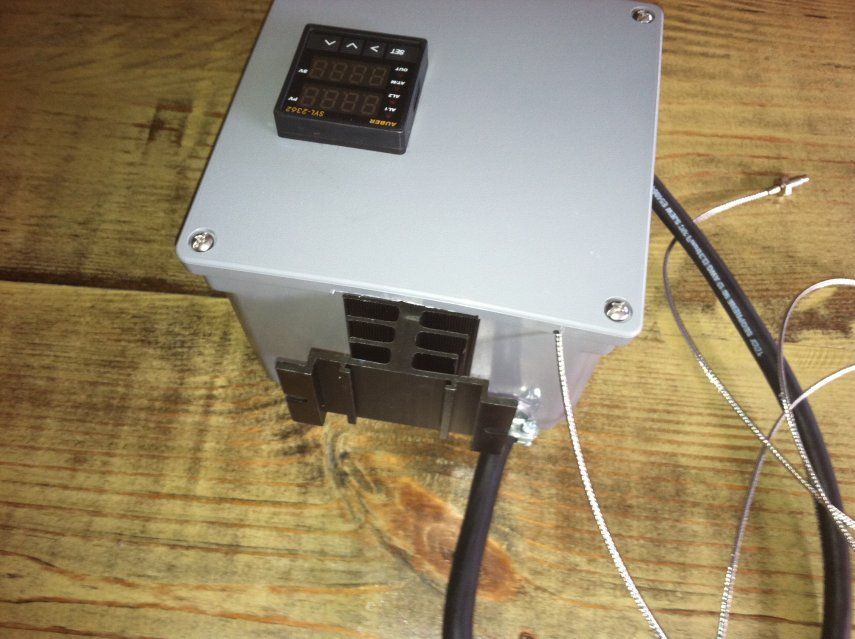
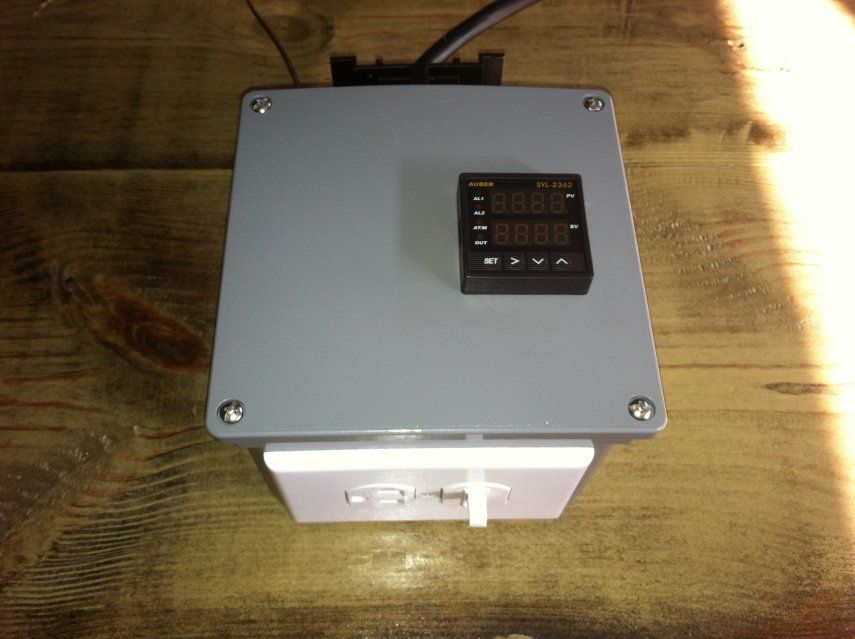
It is my single element, 110v PID controller that I use on my eBIAB setup.
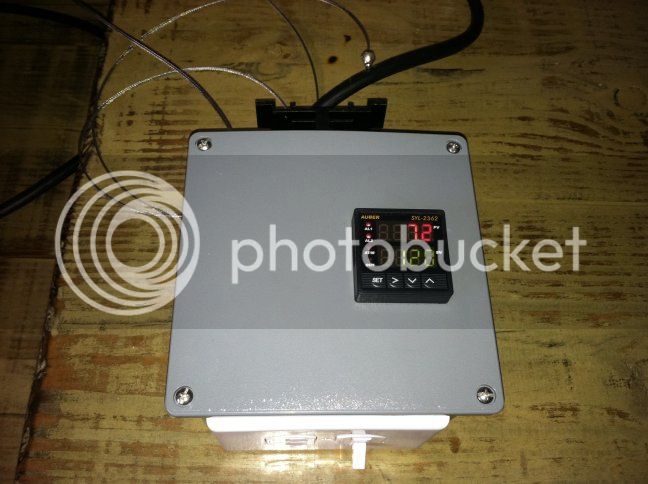
Credit goes to jkarp because I made mine from his original Countertop Brutus 20 Thread.
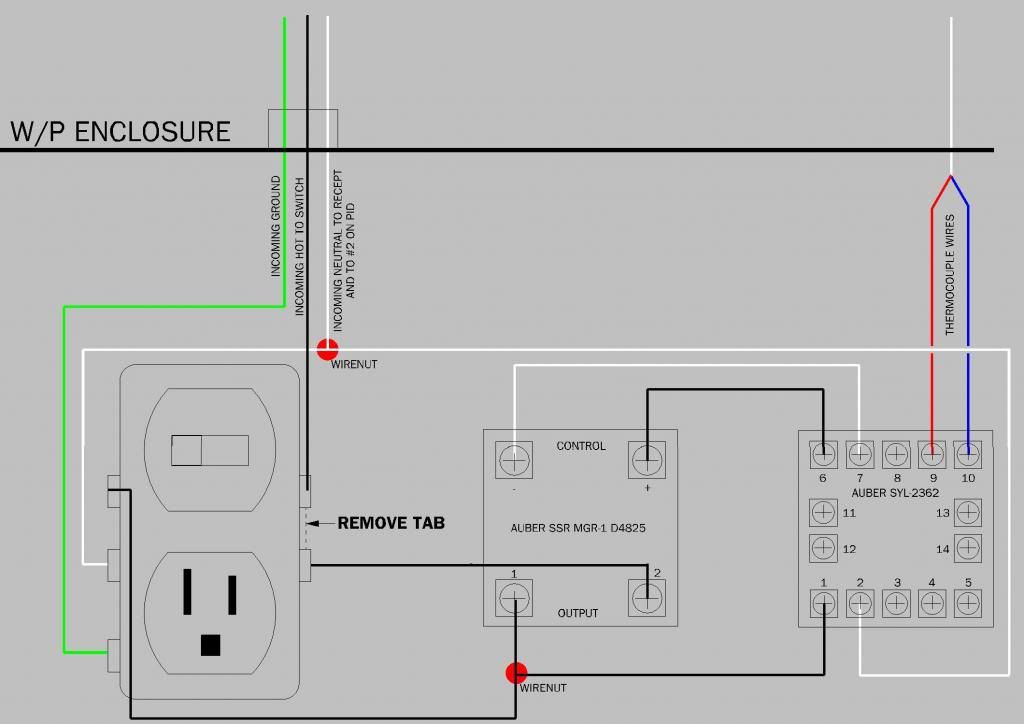
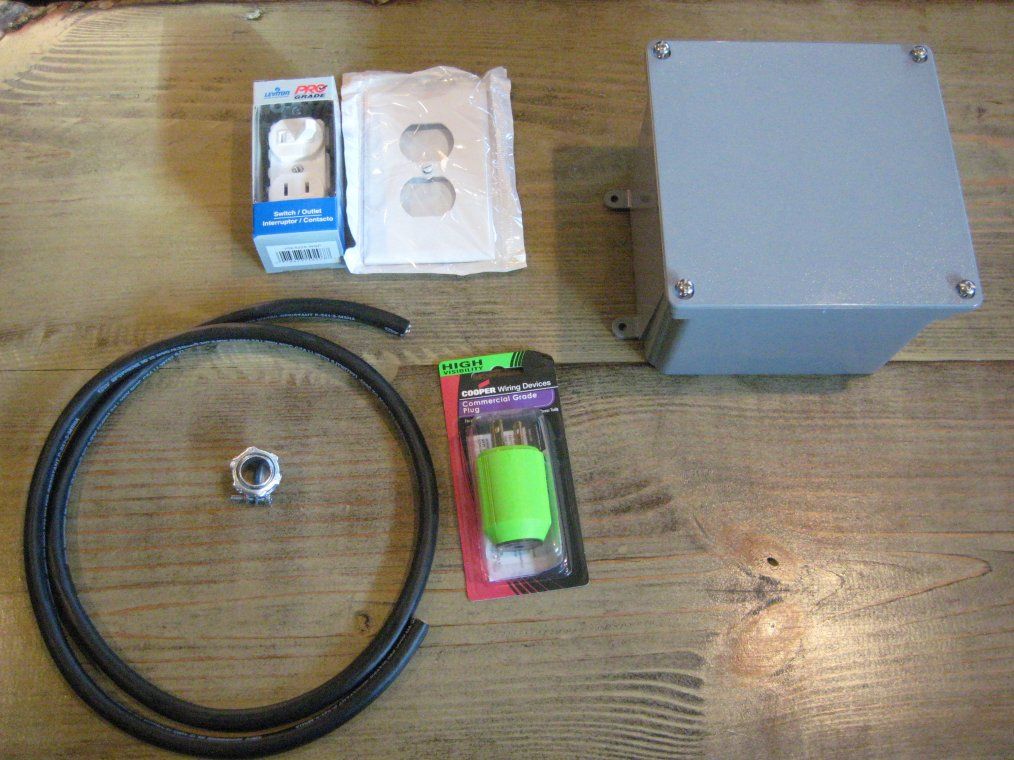
Parts needed:
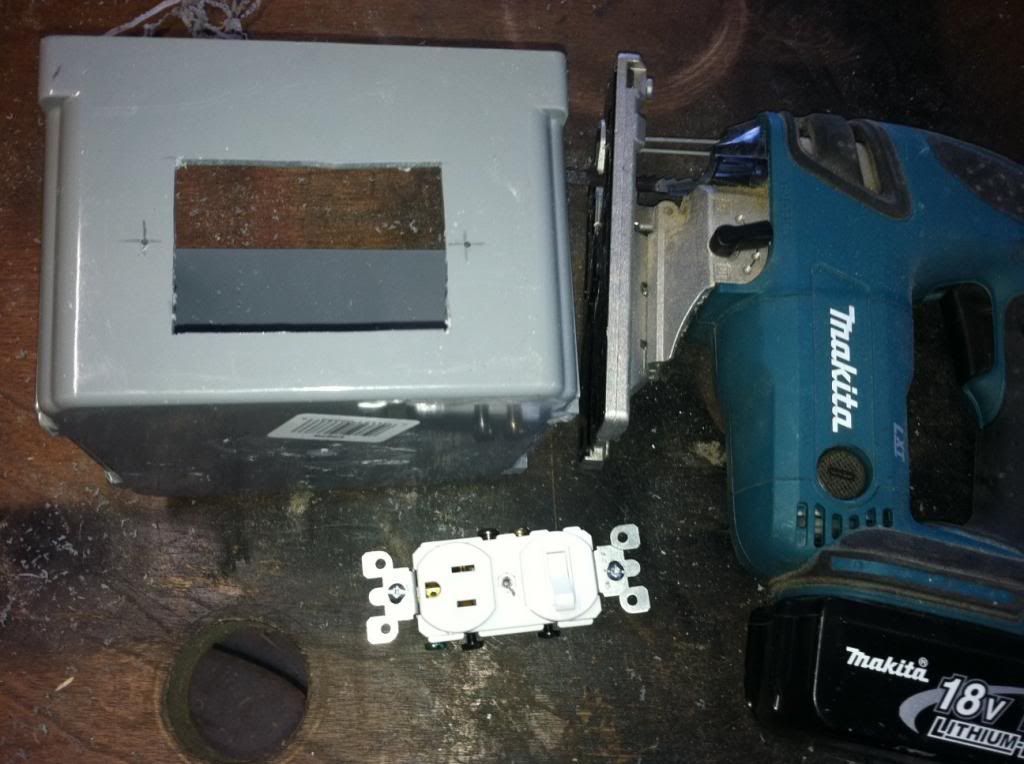
Enclosure:
(1) 6x6x4 WP Box. (I am linking to Amazon for reference, I think they are cheaper at HD, Lowes, etc)
http://www.amazon.com/Carlon-E989N-CAR-Junction-Box/dp/B0037MZW1A/ref=sr_1_2?ie=UTF8&qid=1357739799&sr=8-2&keywords=6x6x4+weatherproof+box
Combo Switch/Receptacle and Cover:
http://www.amazon.com/Leviton-109-05225-WSP-Combo-Switch-Receptacle/dp/B00004YUMX/ref=sr_1_1?s=hi&ie=UTF8&qid=1357739869&sr=1-1&keywords=switch+receptacle
2 to 3 feet bulk 12awg wire (hot, neutral, and ground)
http://www.amazon.com/dp/B002G9TNFG/?tag=skimlinks_replacement-20
Replacement extension cord end
http://www.amazon.com/Coleman-Cable-05984-Replacement-Yellow/dp/B000FPANE8/ref=sr_1_1?s=hi&ie=UTF8&qid=1357740128&sr=1-1&keywords=replacement+extension+cord+end
Note. You can also simply buy a 12awg cord, and cut it to length. I was able to buy an end and 3' or wire cheaper than a complete cord, that is why I told you of either option.
1/2" Romex connector
http://www.amazon.com/Romex%C2%AE-Connector-1-2-in/dp/B0003S2MEQ/ref=sr_1_1?s=hi&ie=UTF8&qid=1357740244&sr=1-1&keywords=romex+connector
And you will need 2 wire nuts.
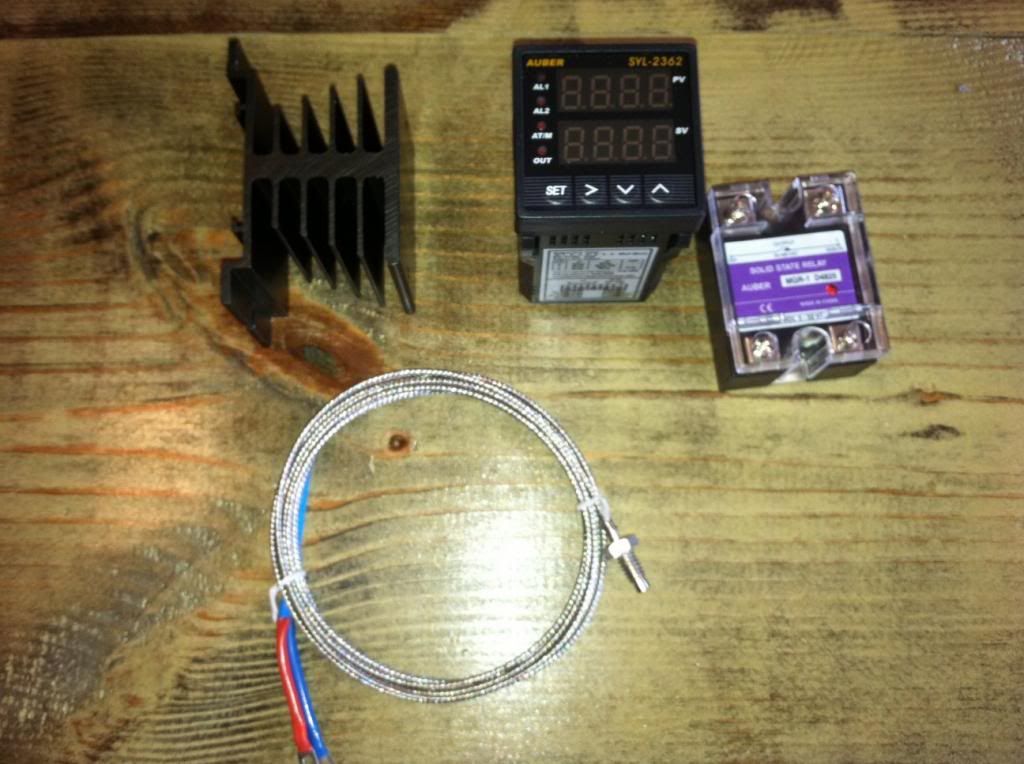
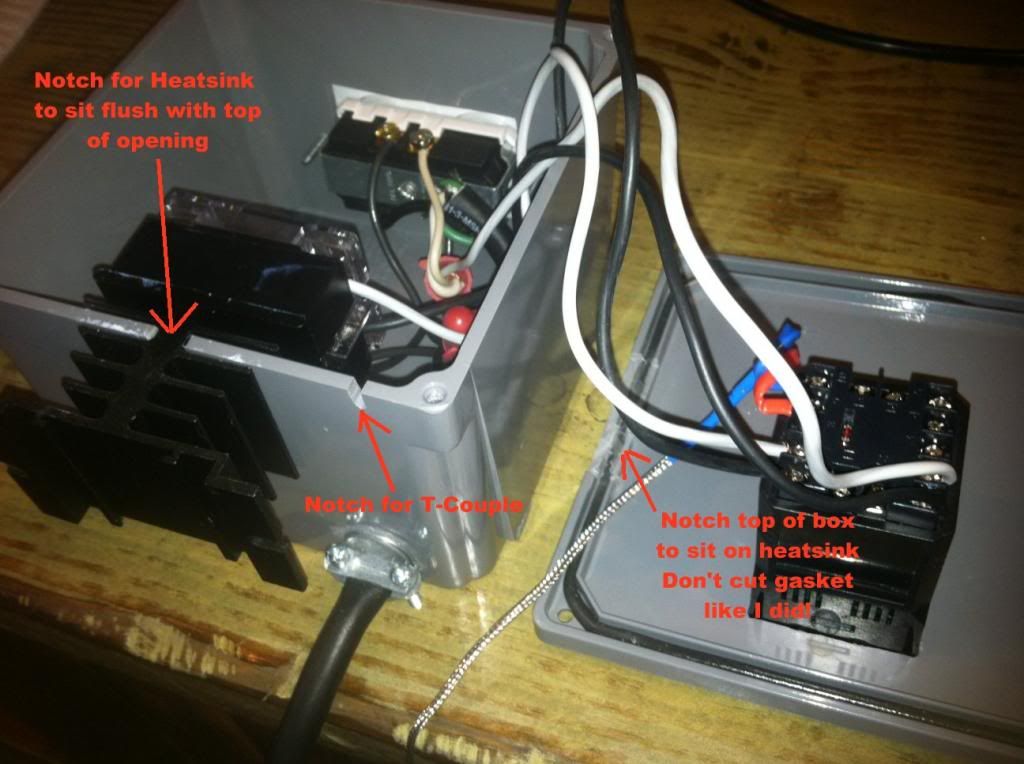
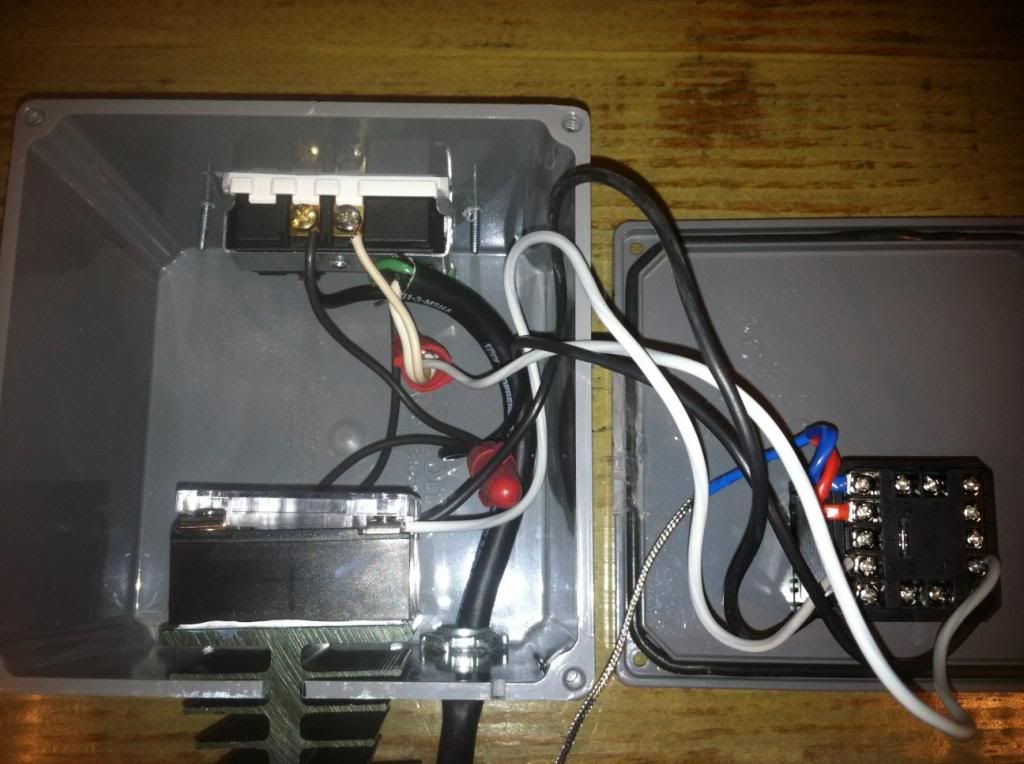
From www.auberins.com:
PID Controller SYL-2362
http://www.auberins.com/index.php?main_page=product_info&cPath=1&products_id=106
Solid State Relay MGR-1 D4825
http://www.auberins.com/index.php?main_page=product_info&cPath=2_30&products_id=9
Heat Sink HS25
http://www.auberins.com/index.php?main_page=product_info&cPath=2_30&products_id=45
K Type Thermocouple
http://www.auberins.com/index.php?main_page=product_info&cPath=20_3&products_id=2
That's it. Build pictures continued in next post.
It is my single element, 110v PID controller that I use on my eBIAB setup.
Credit goes to jkarp because I made mine from his original Countertop Brutus 20 Thread.
Parts needed:
Enclosure:
(1) 6x6x4 WP Box. (I am linking to Amazon for reference, I think they are cheaper at HD, Lowes, etc)
http://www.amazon.com/Carlon-E989N-CAR-Junction-Box/dp/B0037MZW1A/ref=sr_1_2?ie=UTF8&qid=1357739799&sr=8-2&keywords=6x6x4+weatherproof+box
Combo Switch/Receptacle and Cover:
http://www.amazon.com/Leviton-109-05225-WSP-Combo-Switch-Receptacle/dp/B00004YUMX/ref=sr_1_1?s=hi&ie=UTF8&qid=1357739869&sr=1-1&keywords=switch+receptacle
2 to 3 feet bulk 12awg wire (hot, neutral, and ground)
http://www.amazon.com/dp/B002G9TNFG/?tag=skimlinks_replacement-20
Replacement extension cord end
http://www.amazon.com/Coleman-Cable-05984-Replacement-Yellow/dp/B000FPANE8/ref=sr_1_1?s=hi&ie=UTF8&qid=1357740128&sr=1-1&keywords=replacement+extension+cord+end
Note. You can also simply buy a 12awg cord, and cut it to length. I was able to buy an end and 3' or wire cheaper than a complete cord, that is why I told you of either option.
1/2" Romex connector
http://www.amazon.com/Romex%C2%AE-Connector-1-2-in/dp/B0003S2MEQ/ref=sr_1_1?s=hi&ie=UTF8&qid=1357740244&sr=1-1&keywords=romex+connector
And you will need 2 wire nuts.
From www.auberins.com:
PID Controller SYL-2362
http://www.auberins.com/index.php?main_page=product_info&cPath=1&products_id=106
Solid State Relay MGR-1 D4825
http://www.auberins.com/index.php?main_page=product_info&cPath=2_30&products_id=9
Heat Sink HS25
http://www.auberins.com/index.php?main_page=product_info&cPath=2_30&products_id=45
K Type Thermocouple
http://www.auberins.com/index.php?main_page=product_info&cPath=20_3&products_id=2
That's it. Build pictures continued in next post.
Last edited by a moderator:

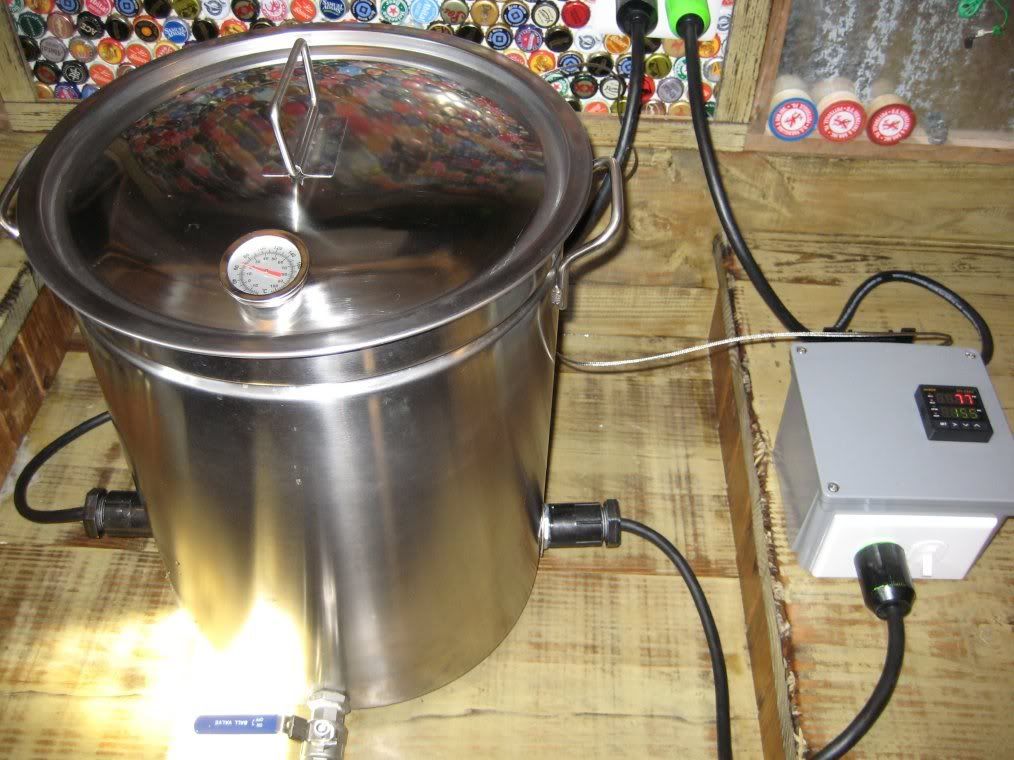
") I wanted an E-stop on mine but it was probably overkill.
I wanted an E-stop on mine but it was probably overkill.