Brutus 10 BYO Plans Changes?

Homebrew Talk - Beer, Wine, Mead, & Cider Brewing Discussion Forum

Help Support Homebrew Talk - Beer, Wine, Mead, & Cider Brewing Discussion Forum:

This site may earn a commission from merchant affiliate links, including eBay, Amazon, and others.
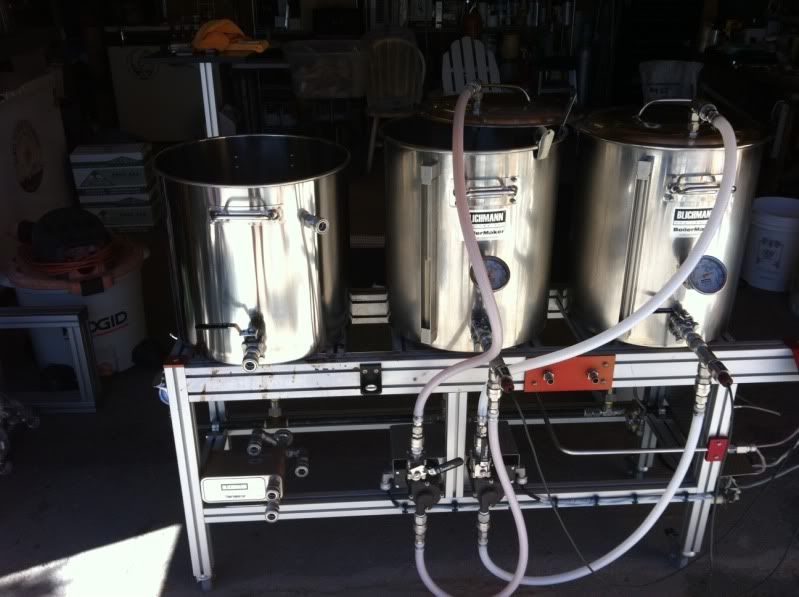
I have a question about reversing the head on my march pump, now that they're bolted up, one has outlet pointing to floor and I need to change it . I assume you simply remove the screws, but I don't want to make and error and ruin it.
TD

Just take the four screws out and rotate, retighten. The March is well built, you'll see it has brass inserts for the screws so it can be taken apart over and over without fatiguing plastic threads.
 
You talking to me? If so, yes the aluminum frame gets hot, but no not so hot as to being a problem. Any metal will get hot. I've gotten a few small burns from touching it but you learn pretty quick not to touch it when the burners are going. I've brewed probably 50 batches on it so far and have had no issues.
 
Finally got mine built.

Made 4 batches so far. 1 still untested (Belgian strong golden)
First batch was great
Second batch I ran out of propane and didn't achieve my post boil volume, ended up slightly thin/lower OG FG than intended, but ended up otherwise fine.
Third batch I goofed up. Turned off recirc pump on mash to clear a clog(must've been running too fast flow), but forgot to turn off the burner switch and overshot mash temps cause burner kept on and basically mashed out in the first 15 minutes.... Oops! Well that one mistake I won't make again!
Think I might try to recycle this as mash in water for another batch of brew... Anyone ever try this?

Finally posted a couple of pics in my gallery.

Wanted to say that the folks who claim that the spark modules cause EMI with the temp controllers, well at least for me, it just isn't so. I did take some lead flashing to shield the controllers and the spark modules, all housed in a NEMA 4X enclosure.

One design flaw, was that I should've used a longer arm for mounting the enclosure. It can get pretty darn hot when heating the mash in water. I'm thinking of taking a cheap garbage can lid and shearing it bit to make a heat shield....

I still need to install my manual ingnition setup on the boil kettle burner.

Thanks to all for all the help on this forum!!

TD

My PIDs sometimes have weird temp readings flash when the solenoids fire.

On your overheated mash, you can actually just cool the mash back down and continue. Throw a few handfuls of ice and keep recirculating. My MLT solenoid stuck once and that worked fine for me.

I feel your pain when shaking down the new rig. I keep thinking I've made pretty much all the mistakes. However, new ones surprise me, but they are getting fewer and farther between. I've had a few brews that just went smooth as silk. Makes you smile at the end of the day.
 
Yeah, I tried the cooling the mash down, but I still ended up with crazy FG, that I'm blaming on the mash overheating.

The very first brew was flawless and the brew session without any stress or worries. I guess I was more attentive during the first brew-session with the new rig.

Well I am planning my summer brewing season, and have also recently sold off all the OLD brew gear to make room for a possible chest freezer to use as a fermentation chamber. I figure I can easily fit 3-4 brews in there at once!

TD
 
Need to make some revisions to my rig.

The 10 jet mininburner I am using for all three vessels is the culprit. I've replaced one so far, and they no longer carry it where I purchased. Plus I think it is an inferior product based on multiple leaks that develop over time.

Now the boil kettle cast iron ring seems to be leaking directly, not from a threaded port hole!
I have purchased a banjo style burner and plan to adapt.

I am not surrender what fittings I will need.
My manifold is a 1/2" SS pipe with regulator on one end, with main shut off off ball valve on the low pressure outlet side I believe. Then it feeds in a chain the first honeywell valve and then the second honeywell valve and then an elbow with another ball valve that feeds the boil kettle burner, pipes are 1/2". With flex pipes going to the burners. The burners themselves have a small reducing 90 degree elbow 1/2" to 3/8" for the inlet on the burner rings.

The new banjo burner has a 1/4 MPT inlet with an air mixer plate on the front. So question is, can I use a regular pipe fitting 1/2" to 1/4" reducing elbow to connect the flex pipe to the banjo burner or do I need a different style of fitting?

TD

You can use a reducing elbow but I would say from my experience to buy a stainless one. I have steel ones now and they rust from washing the frame after dirty brew days. A minor deal but worth dealing with now.
 
Thanks.

They don't make 1/2 to 1/4 reducing elbows so I am planning on the following:

Galvanized 1/2" to 3/8" reducing elbow
Zinc plated 3/8 to 1/4 bushing

Then I'm getting the brass orifice/valve sold where I bought the burner to connect to the burner inlet.

Question I have is, with all these dissimilar metals and treatments, am I going to have problems?
Planning to seal with blue RTV, though I might use the high temp red RTV since the blue tube is getting difficult to work with as it's starting to get really plugged up from curing over time in an opened tube...

A.so curious about a check valve for propane systems. Is there such a thing?

TD
 
Yeah that makes sense that they won't make an elbow that drops two sizes, only one.

You may see some galling from the dissimilar metals but since you are doing NPT, you need pipe tape but use the yellow tape which is rated for flammable gases. The tape should prevent any galling.

There are check valves for everything. They may not be cheap but I guarantee Swagelok has one that will work, depending on your layout.
 
Thanks!

Think I'm still going to use the permatex blue or red RTV instead of tape. Kladue once persuaded me not to use tape.

Will definitely incorporate a check valve. That's one expense not to be skimped on.

Not sure if I should just put one between the propane tank and regulator or if another location or multiple check valves would be needed.

The honeywell valves I believe have built in safety mechanism like this. Marshall 300 series 2 stage regulator might also have safety setup built in.

Can anyone confirm? Ideally I'll be plugging into a buried propane tank instead of the portable cylinders. Want to make sure the sucker is safe! After seeing the cast iron ring leak I started worrying about what would happen if the gas inside were to combust. BOOM! Is what I imagined!

TD
 
Some pics for that ferret guy on page 2 or so. No joining plates are needed with 8020. The hardware they sell cinches up real nice. They sell joining plates but are overkill, even under thermal and mechanical loads for this application.

Gas beam terminus with pressure gauge
photo-9.jpg


HLT/Control panel
photo-8-1.jpg


MT
photo-7-1.jpg


Schitty iphone pic of Therminator but you can see the QD's
photo-6-1.jpg


ASCO wiring conduit
photo-5-1.jpg


Hop sack holder (don't use PVC fellas, it's ghetto and toxic)
photo-4-1.jpg


updated ball valves
photo-3-2.jpg


Phil and Bobby on Friday night for those who know
photo-10.jpg
I was waiting to see if anyone commentes on the sticker on your control panel (which I dig) and now this pic....I'm jealous! Hung out with Phil and Bod at a motel while they were in town for a couple shows a few years back! What a memory...
 
I used a bunch of the butt fasteners on the corners. They are robust and have never loosened or failed, even after close to 100 brew sessions on my rig. This thing is definitely robust. I had to rebuild the Asco valves which was fairly expensive but they are now back to like new and I've been brewing up a storm. 6 brews in the last 3 weeks.
 
Having issues with my rig.

Had to replace burners. The 10 jet rings kept leaking thru cast portions. I got some from brewers supply hardware. Banjo type for low pressure lpg.

Initially they burned Fine but then as other burners cycled on and also during the boil, could not keep consistent blue flame. Plus also, would sputter out and reignite on my spark setup. Intermittent and very frustrating.

Any advice appreciated.

RH
 
Hi TrickyDick. I hope your rig has been working well other than the leaky chinese potmetal burners. I had my shopperschoice minijets fail over the years I've been using my 8020 rig and each time one failed, I went with the 100 dollar ones from Tejas Burners. They are clearly a better product and seem much more robust. I've had excellent luck with these versions but they are expensive. You will need a better regulator if using 3 bango burners simultaneously. You are most likely not pushing enough gas when multiple burners are on. It's difficult to push the volume of gas needed to run multiple banjos with a sub 300 dollar regulator. You have two choices it seems. Upgrade to the Tejas minijets or buy a higher volume regulator. Hope that helps. This is assuming you are on propane...

I'm in the process of changing over my burners and pumps to a 304 SS welded frame I recently completed. I went with an integrated gas beam like Lonnie's original design utilized as I always thought this was the cleanest and most robust way to do it. It was a spur of the moment kind of deal where I came across a bunch of 2" box sections for a price I couldn't pass up so I went with it. I messed up on the main front beam cut so it was a tad bit short for my control panel but it should be OK. I faced all the cuts on my mill at work and had it welded up for a screaming price. I'm really excited to finish this up but I have a little ways to go still. I'm waiting on a few new parts and then I'll shake it down and post up some new pics. My latest pic was this one:

photo-20.jpg


I'm selling the aluminum frame here in a few days once I finish transferring over to the new frame with a few extras if anyone is interested in building off my old frame. I'm in the Albuquerque area. I'm going to throw in the ASCO valves which were recently rebuilt and work well, the conduit for the ASCO valve wiring, some high end needle valves for the HLT and MT stations (these are almost 200 a piece), the fuel gas manifold/mounting hardware and the casters. You would need burners, pumps and to configure your wiring but it's a good place to start for someone willing to start with a used frame. The aluminum frame is holding up OK but stains when hot wort is splashed on it. This is impossible to remove. I'm letting it go for 250 which is way less than I have in it. PM me if interested. I'll put it up in the classifieds in a few days once I finish the transfer.

Edit: my 8020 frame was sold without pain to someone in my local homebrew club. My new frame is complete but I am still in the process of re-wiring it up and I hope to be brewing by next weekend (1/21 or so). I should be able to make this date with the amount of work I have left.
 
Thanks for the update

I have still been having issues with my burners. I switched to the low pressure LP burners that I purchased through brewers hardware.com. They are a banjo style burner with a restriction plate on the inlet manifold and an orifice jet with valve that connects to the LP hose in the center of that plate.

At any rate, three burners are connected to my LP manifold, with the two stage regulator at one end of the pipe. two are "Tee'd" off the main pipe, and the last elbowed off the manifold pipe. The last is the boil kettle with has a ball valve at the elbow and no electronic controls otherwise. The other two burners are connected to a honeywell furnace valve that is controlled by a temp controller/PID and has non-standing, intermittent pilot with spark ignition. Valves were changed to the LP orifice and springs, but the screw knob adjustments don't seem to make any differences (for the burners running off the furnace valves).

The issue I have currently is inconsistency in the flame color & intensity with lots of soot, but it is not consistently bad or good, no matter how I try to adjust (even on the manual burner). I am beyond wits end to the point that I've essentially stopped brewing until I can figure it out.

I am at the point where I need to hire a professional to fix the issue for me, as I cannot figure it out.
I can't seem to find anyone knowledgeable in central Florida to help. If anyone has any ideas, I'd love to hear from you.

TD
 
Doesn't sound good. I'm sorry to hear. Are you running any kind of heat shields around the burners? If so, have you tried running without them? It sounds like you aren't getting a good air/fuel ratio. I remember fussing with heat shields at one point and having similar issues and then no more issues once I removed them.
 
Irrenarzt, Are those the Blichmann 20's? I am looking to build a stand that will hold 3 of them (I only have one for now, but I'm trying to plan for the future) what is the spacing between the two beams that support the blichmann's, and also, what is the space between the two blichmanns.

Thanks in advance.
 
No I only have one 20 and I use that as my BK for 10 gallon batches. My MT and HLT are 15's. My beam spacing is 12 x 12 on the BK and 12 x 10 on the 15's. 12 x 12 all round will work with three 20's...

Use the original Lonnie Mac dimensions and you'll be fine for three 20's.
 
I'm subscribed to this thread, since long ago I too was looking for updates. If I were to do it again, I'd definitely make it large enough for 25-30s. I'm wanting to upgrade to half barrels, since my beer seems to evaporate so fast from the taps. I ended up going with Stout Tanks and Kettles, since they had a tall 21.5 gallon that would fit on the stand. Even they bump handles. BTW, Stout Tanks and Kettles are beautifully done. I highly recommend them. They, like Blichmans are made in China so sometimes you have to wait.
 
Finally have "fixed" the problems was having with my rig. The ring burners sucked. I have replaced with burners from brewers hardware dot com. There must have been an issue with the pigtail hose I connected to the portable cylinder OR the cylinder itself was bad or poorly functional. I got invisible flame now in Florida daylight on all three burners!!

Propane guy has me plumbed to the buried tanks and a padlock ball valve for connection and a QD for the brew rig with 15 feet of hose!!

Now I just need to get some time to brew again!

TD
 
Congrats TrickyDick!

I think saying the ring burners suck is a bit strong. They may not have worked with your particulars but I think they are a damn fine burner when they are working. There are a lot of schitty chinese castings out there so you need to sort through a lot of chaff to get some good ones but the Tejas ones kickass albeit at a high cost. The guy from my local club who bought my old frame has found a source for 40 each with a guarantee from a country store in Texas but I can't recall the name. Maybe he'll chime in.

Regardless, congrats on your successful upgrade.
 
Irrenarzt said:
Congrats TrickyDick!

I think saying the ring burners suck is a bit strong. They may not have worked with your particulars but I think they are a damn fine burner when they are working. There are a lot of schitty chinese castings out there so you need to sort through a lot of chaff to get some good ones but the Tejas ones kickass albeit at a high cost. The guy from my local club who bought my old frame has found a source for 40 each with a guarantee from a country store in Texas but I can't recall the name. Maybe he'll chime in.

Regardless, congrats on your successful upgrade.

I guess you're probably right in that. When I had the ring burners they worked fine. Mine must've been the cheapie ones. Wish I had known a reliable source enforce changing everything, would have been a much easier "fix" than the path I took,and less expensive too!

One of these days I'll post some darn pics of the thing!

TD
 
Looks very clean. Any details? Hard to see what you've done on big photo. Integral has manifold?
What's those connections by the plate chiller?

I gotta post some pics of my rig. Reassembled everything last night. Need to test for leaks and give a good cleaning then its back in business!!

TD
 
Yeah I went with the integral gas manifold. So far that has been working well. The plate chiller has the back facing connections u-turning to the front so you don't have to reach around the back. There is also an inline thermometer on the water side to tell you your water temperature. I did that mainly because I ran out of elbows and had a T so I just used the thermometer. But it has served me well. There's a closer pic of that earlier in this thread.

Otherwise, pretty standard Brutus build.
 
I was tuning up and testing my rig on Sunday, in preparation for march madness (99 gal in 10 days) planned.
As I've said before I had issues with some burners and went with the low pressure lp banjo style burners from brewers hardware.
Managed getting through one brew session poorly. Then hooked up to buried propane tanks, and got much better burn.
Once the vessels are setting on top though, the burn was not as good, with yellow flame.
I removed the flame shroud and raised the burner height to be in closer contact with the boilermakers on the boil kettle
I did the same on the mash tun, but that was trickier to get the flame good and blue. I turned the propane orifice valve partially closed which should also heat the mash more gently. Since I don't do many step mashes except mash out, this should hopefully be a problem. The tuning nut on the automatic propane valve seems pretty useless to me.
Also posting some pics from my phone after this if I can figure it out...

TD
 
This is my new brewing space! And also first officially posted pics of my brew rig. SS frame.

Had to add a heat deflector cause made the Arm too short where the control panel (NEMA 4X) is mounted.
Have two PID capable temp controllers, and thermocouples. The company I got the thermocouples from custom made them when I told him how they were to be used. Forgot the specs.

Intermittent pilot with automated spark ignition on two burners,,manual control on boil kettle. Stainless manifold pipe and Marshall two stage regulator is bolted to frame with u bracket. Looks ghetto but it works.

Therminator, two march 809 pumps with splash guard, & electronic boil kettle ignition are mounted to the frame. SS QDs and fittings all around. Use a hop blocker in the boil kettle. Waiting for a buddy to weld the mounting bracket for the trub filter.

On the inside photos show where I can roll my brew rig between sessions, and store fermenting beer, etc. the whole room has its own AC zone so I can cool to fermenting temps in hot FL summers. I may decide to put some insulation on the metal doors when I do this.
Got a nice industrial sink for cleaning, and I can actually fit a 15 gal boilermaker into and sideboards for draining.
Storage for my equipment and grains. Freezers, one is temp controlled for my conical.
The patio just outside this room has SS hose Bibb and GCFI electrical and propane hookup. You can see the cool QD and locking ball valve on the propane.

Have a little rack on the side of the brewrig that i have dubbed, "brewzilla" for stowing hose, and tubing and power cord.

Seem shots trying to show the flame action on the new burners. This was before height adjustments.

Is the tip of the blue flame supposed to be just barely contacting the undersurface of the vessel it is heating? Its difficult to adjust a HOT burner by the way until it cools!

Thanks

TD
 
The last pic showed the boil kettle burner after I got it burning well. I didn't snap the pic of it raised higher toward the boil kettle.

Gonna fiddle some more with the burners this weekend. I think it's going to work well for me now. If, not I can always go back to the ring/jet burners.....but those Tejas ones that someone said were good quality.

TD
 
Can you post a pic of one of the burners? What size is the inlet? My old ones I had a 3/8 to 1/2 street elbow fitting to connect to ring via 1/2" flex hose to manifold/valves.

I have 1/2" manifold and valve outlets, which required reducing bushings and small ID flex pipe to connect to my banjo burners, which have flare female inlet, I think it's like 1/4" ID on my flex hose. This adaption I think is partly why I am having issues. Hopefully a little adjustment will bring it all into place.

TD
 
I can post a pic but not right away as I'm at work and I'm getting home late tonight as I have a show to attend after work. The inlet on all those minijet burners is 3/8 FNPT. I use all 1/2 including the elbow then a reducing bushing to a 3/8 nipple and that works great. I bought some 1/2 FNPT to 3/8 FNPT reducing elbows from ebay but they sucked as the 3/8 threading was cut wrong so I tossed those and went with some higher end 1/2 elbows.

I'll post a pic and you'll see how it lays out. My setup works perfectly. No issues at all.
 
Cool. If I continue to have issues, I may go back to the ring burners, but I'm thinking it's going to work fine once I tweak the burner height, and valves for good flame.

TD
 
Back
Top