- Joined
- Nov 26, 2006
- Messages
- 3,996
- Reaction score
- 94
So all of my awesome brew history has been lost in the years I have been gone. Life got tough (still is) and the days of turkey fryers, 20gal MLT's, 15 gallon batches, etc shall remain gone for awhile longer. But I can't stand not having access to tasty frothy homebrew, so I am getting back in, in a rather small way. I am doing stovetop boils on a really weak gas stove. I can't boil even 3 gallons as it is. So I am working on insulating strategies. Outside boils are not feasible in my apartment complex. Electric heating elements are out . I have to make it work with a weak gas burner.
The plan is to run a pair of 3 gallon kettles. As they sit, they don't get much above 185F on my stove. The first thing I did just now is take foam adhesive-backed foam and foil insulation and stick it on the lids. I know it would be hazardous to wrap the whole BK in this stuff, but I think it will be fine for the lids.
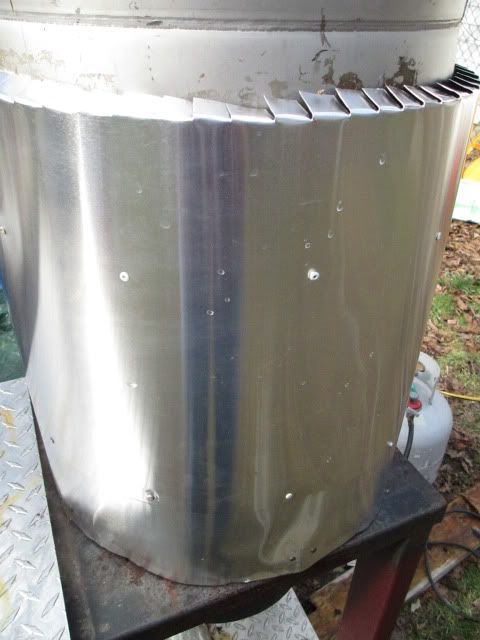
Next, I want to use some galvanized flashing to make a circular shroud that wraps around the BK and retains heat. I will use a mallet to bend the top of the shroud inward so that it rests atop the kettle (at the expense of a tightly fitting lid, but that's ok, I don't want to trap the DMS anyway). Some machine screws or a couple tiny bolts will be used to hold the contraption together. It will be open at the bottom, solid sheet wrapping around, and bent inwards at the top to rest on the kettle.
If I use galvanized, I think it should be fine since it shouldn't be coming into contact with the wort at all, except for very minor incidental splash contact perhaps.
Would others agree this is a reasonable approach? Galvanized flashing is very cheap. Or is the risk too great and I should seek out an alternative material?
The plan is to run a pair of 3 gallon kettles. As they sit, they don't get much above 185F on my stove. The first thing I did just now is take foam adhesive-backed foam and foil insulation and stick it on the lids. I know it would be hazardous to wrap the whole BK in this stuff, but I think it will be fine for the lids.
Next, I want to use some galvanized flashing to make a circular shroud that wraps around the BK and retains heat. I will use a mallet to bend the top of the shroud inward so that it rests atop the kettle (at the expense of a tightly fitting lid, but that's ok, I don't want to trap the DMS anyway). Some machine screws or a couple tiny bolts will be used to hold the contraption together. It will be open at the bottom, solid sheet wrapping around, and bent inwards at the top to rest on the kettle.
If I use galvanized, I think it should be fine since it shouldn't be coming into contact with the wort at all, except for very minor incidental splash contact perhaps.
Would others agree this is a reasonable approach? Galvanized flashing is very cheap. Or is the risk too great and I should seek out an alternative material?
")