Bottling Tips for the Homebrewer

Homebrew Talk - Beer, Wine, Mead, & Cider Brewing Discussion Forum

Help Support Homebrew Talk - Beer, Wine, Mead, & Cider Brewing Discussion Forum:

This site may earn a commission from merchant affiliate links, including eBay, Amazon, and others.
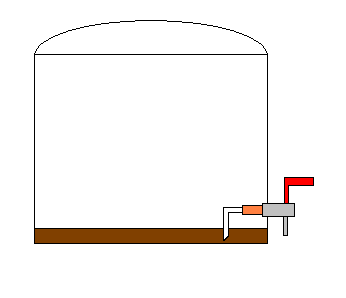
I'm not clear on the proper elbow. Shouldn't we be using CPVC? I use my bottle bucket for my mash tun running, so could have temps above 140. Stopped by an Ace store yesterday and they didn't have it in CPVC, only PVC. Clerk said they don't even carry a CPVC elbow with one end threaded, only ones that would require gluing.

Thanks for any help,
Robert


Just bought the elbow; I'll try it tonight! Thanks again!:mug:
 
The elbow is for the bottling bucket. So your temps shouldn't be any higher than room temp.

Uh, as mentioned, we use our bottling bucket to catch our mash tun running's so the temps are around 148 or higher. May not be normal use for most but I'm sure we aren't the only ones that have/will put hot liquids in theirs.
Being hot might not be a big deal (PVC vs CPVC) anyway it's just for a few minutes but thought I would ask for clarification.

Thanks,
Robert
 
I believe 3/8" copper tubing would work in place of a broken racking cane. The racking cane is the cheap and easy solution. Your setup is preventing you from the cheap and easy solution. You have two choices: Modify your current system or purchase another bucket dedicated to bottling. The latter is probably the less expensive of the two.
 
To the newbies who happen to read this thread, your patience will be well rewarded!

I now have 2 cases of cider, 1 case of English ale (already aged 2 months in the bottle), and 4 cases of Centennial Blonde ready to drink, plus at least another case of odds & ends sixers of all of the above. I am brewing another 5 gallons of Centennial Blonde right now. I now have a pipeline established where I can drink as much as I please, share as much as I please, and I can replenish it pretty easily.

I recommend brewing a lot of simple but good recipes, repeatedly. Practice, practice, practice! I have brewed the extract Centennial Blonde recipe three times in a row now. It is a good beer, but more importantly it gave me lots of forgiving opportunities to get my brewing rig and procedure ironed out. Brew day and bottling day are now almost second nature. I am comfortable with what I have to work with and with my capabilities so now I can really start playing, exploring different recipes and brewing for the seasons.

Brew on!
 
I do not want to read 70 pages by the time i Reach 10 i will probably need medical assistance because ill be on the floor having seizures.

I’ve don’t both bottling and Kegging. I of course started with bottling but was limited to how many different style of beers I can make and with handing out samples keeping up with bottles was getting making me drink more staying up late and cleaning off labels, I had enough. I started kegging to end the nightmare and late nights.

I have a question about bottling from Kegs and get some advice.

My process:

When my beer is ready to be kegged I use 2.0 ounces of priming sugar, fill the keg, purge with co2 several times and let it sit for about 3 weeks at 70 degrees.

I want to start bottling from my keg for hand outs and competitions. I recently put together a poor mans beer gun to fill up bottles as needed.

Question 1) If I fill the lets say 12 bottles right after I kegged it would I need to add more priming sugar to the bottle since the ratio for using priming sugar to bottle/keg are different?

Question 2) If the keg is on tap and its at 44 degrees and i want to bottle some would I use priming sugar and store at room temp to make sure its carbonated? Or do I bottle and place at same temp I drew it from with no priming sugar.

Question 3) After 3 weeks of beer in keg at 70 degrees I want to bottle some would I just bottle and let sit at room temp?


Anything will help!
 
Do you need to put bottle caps in warm water to make rubber soft or just sanitize and put on
 
Awesome writeup, I wished I would have found this earlier. I have been struggling with getting the last couple of bottles worth from my bottling bucket. along with the spillage because I didn't really have a process, I was wasting way too much brew.

I went to my LHBS and found the right drilled stopper and then went to the depot to see what would fit in it. The hole was a little bigger then the person said but I found the perfect fitting. I'll see how it works next bottling event.

I guess I was lucky, the bottom of the fitting is between 1/8 and 1/4 of an inch above the bottling bucket bottom.

BottlePlug.jpg
 
Big thanks to this thread. Bottled for my second time this weekend and it went much smoother thanks to the information in this thread.

Made my own bottling bucket dip tube and it worked like a charm

long story short, Now I am making them for all my homebrewing friends. Great suggestion, as well as direct connecting the bottling wand and placing bucket over dishwasher. so streamlined.

bottlingbucketdiptube.JPG
 
Don't have a dip tube in yet, but this worked fine! I just had to tip the bucket a bit towards the end and drink the bit that was left over :mug:
Bottled 15.5 liters of meed in less than half an hour. Nice and easy.
 
This thread really helped me start and perfect my bottling process. Last night, a friend and I bottled 10.5 gallons of beer in under 2 hours (including clean up). It is ALL about making the process work for you. We all have different set ups and some of us can't afford kegging right now. To be honest, with as simple a process as it is, I don't see myself getting into kegging anytime soon. There's just something about cracking open or sharing one of your bottle of home brew. Harder to share in a keg.
 
Big thanks to this thread. Bottled for my second time this weekend and it went much smoother thanks to the information in this thread.

Made my own bottling bucket dip tube and it worked like a charm

long story short, Now I am making them for all my homebrewing friends. Great suggestion, as well as direct connecting the bottling wand and placing bucket over dishwasher. so streamlined.

What did you make the dip tube out of. I had nearly an entire beer left over last night, but I ran out of bottles, so I just drank it :mug:
 
What did you make the dip tube out of. I had nearly an entire beer left over last night, but I ran out of bottles, so I just drank it :mug:


There is probably a more efficient way to do it, but I had a broken clear plastic PVC racking cane that I just broke off like 6-8 inches of. boiled some water and submerged the cane so that it would be pliable and bent it to roughly where I thought I would need it. then I just screwed the sharp end through a cork and used sand paper to file off the other end so that it was reasonably close to the bottom of the bucket.
 
Thanks for the tips Revvy. I moved the wand closer to the spigot. Much easier.

I've been using the dishwasher to sanitize my bottles the night before bottling. One full hot cycle with no detergent, and the heat cycle to dry. I can load all the bottles for a 5 gallon batch.

Brief warning: The bottles need to be cleaned prior sanitizing, and should be cool prior to bottling.

Then it's a short distance for the bottles to travel from the dishwasher to the counter prior to bottling over the dishwasher door.

Splitting up bottle sanitizing from the bottling helps with time management.
When you sanitize in your dishwasher, do you have any concerns, or have you noted any problem with anti-spot stuff? I've heard it suggested that since its a surfactant that it could reduce the head on the beer when poured.

I REALLY like the notion of being able to split the sanitizing from the bottling. Some days, that's just a lot to tackle at once. This sounds like a good option.
 
Just run the dishwasher without any soap or agent. Straight water on the hottest cycle you can get. You might want to run the washer first without any dishes to rinse out any remaining residue and soap.

Having said that, on bottling day I tend to just fill a big trashcan full of Starsan solution and I drown all my bottles in that. I just reach in, grab a bottle, dump out the Starsan, and fill immediately. Both ways are fine, but I "don't fear the foam" and just feel that having all surfaces wetted with sanitizer right up through filling and capping keeps me well out of trouble. Probably personal paranoia. The dishwasher method probably is more than adequate as well if you start with clean bottles and don't fart around too long before filling them.
 
Has anyone got a link for the clamp Revvy posted in the OP? I've yet to find one.
 
Tried to get some decent shots but it's hard to take a picture with a phone in a bucket..lol. This piece was from Home Depot, 3/4 elbow, threaded one side, not threaded other side, schedule 40. Not sure if the UPC code will help. It also has a part number molded on it that reads "D-2466".

Take your spigot off and take it to the store with you to test it.

As been said many times, this thread rocks. I went and picked up this part at the Depot and it fits the spigot perfectly. And at less than a buck, the price is right.

Only problem is that the bucket isn't deep enough for the elbow to fit. Has anyone tried cutting one of these to make it fit?
 
Only problem is that the bucket isn't deep enough for the elbow to fit. Has anyone tried cutting one of these to make it fit?

Yes, I had to chop off about 1/4" or so off the elbow to make it clear the bottom of the bucket. I used a band saw to cut it, but a hack saw would also work. The cutting process created burrs in the plastic that I didn't want to just scrape or sand off (and make scratches to harbor nasties), so I used a heat gun to round over the burrs. The inlet is now about 1/8" above the bottom of the bucket and I only leave about an ounce or two of beer when I tip the bucket.
 
Yes, I had to chop off about 1/4" or so off the elbow to make it clear the bottom of the bucket. I used a band saw to cut it, but a hack saw would also work. The cutting process created burrs in the plastic that I didn't want to just scrape or sand off (and make scratches to harbor nasties), so I used a heat gun to round over the burrs. The inlet is now about 1/8" above the bottom of the bucket and I only leave about an ounce or two of beer when I tip the bucket.

I used a hacksaw and cut about 3/8" off and now it fits perfectly - it's just barely off the bottom of the bucket. Did a test run with water last night and it worked great.

I'm not sure what to do about the burrs at the bottom as I don't have a heat gun. You mentioned that sanding wouldn't really suffice - what other options are there? I guess I could use a lighter but I have a feeling it would just make a mess of things.
 
So why wouldn't you clean it up with sandpaper to smooth things up before hitting it with heat? Set a piece of sandpaper flat on a hard surface and just rub the cut edge on it while holding it flat on the paper. Cleans up the cut, but doesn't add any scratches to the inside or outside of the 90.
 
So why wouldn't you clean it up with sandpaper to smooth things up before hitting it with heat? Set a piece of sandpaper flat on a hard surface and just rub the cut edge on it while holding it flat on the paper. Cleans up the cut, but doesn't add any scratches to the inside or outside of the 90.

Sure, that would work. Just seems the sanding would be an extra step, as the heat will take care of the burrs on its own. But if you really enjoy sanding, go for it! :)
 
Use a butane lighter. Move the flame around so it doesn't scorch the plastic. All you want to do is round over the burrs and leave a smooth surface.

Well I used a lighter and smoothed out the bottom of the piece. Some sections got a little black. I was able to rub off some of the darkness but other parts still look pretty charred. I soaked it in oxy overnight - hopefully that'll help clean it up more.
 
Well I used a lighter and smoothed out the bottom of the piece. Some sections got a little black. I was able to rub off some of the darkness but other parts still look pretty charred. I soaked it in oxy overnight - hopefully that'll help clean it up more.

Well the Oxy didn't do much. The bottom still looks pretty charred and sooty. I'm not really keen on using the dirty thing to bottle so I picked up another one to try again (they're cheap enough.) I'm gonna practice on the piece that was cut off first to see if I can smooth it out without scorching the thing.
 
Well the Oxy didn't do much. The bottom still looks pretty charred and sooty. I'm not really keen on using the dirty thing to bottle so I picked up another one to try again (they're cheap enough.) I'm gonna practice on the piece that was cut off first to see if I can smooth it out without scorching the thing.

Go over the edges very quickly with the lighter--don't let the flame linger. All you want to do is round over the burrs, not melt the ends. Butane lighters give off some soot. If you have access to a propane torch, use that at the lowest flame you can set it at, as that will give you less soot.
 
Also, for those who find this thread as they are saying... "I am bottling NOW and need to make a dip tube!"

A standard wine cork will fit perfectly into the spigot on the inside of the bucket.

bottling_bucket.bmp


I took a wine cork and drilled a 3/8 hole through the longitudinal center. Then I took an old racking cane and cut the curved portion off. I filed a slight angle in one end of the racking can to a length that would reach the very bottom of my bottling bucket from the center of the spigot hole. Then I jammed the cane into the cork and the cork into the spigot bulkhead. Viola! A free dip tube, NO MORE TIPPING!!!

I'm always looking for better ways to bottle. The dip tube is an excellent idea.... Something that I will definately implement. Thanks for the idea.

One thing that I've done to my bottling bucket that has really sped things up for me is that I've drilled another hole in the bucket and have added a 2nd spiggot. To the two spiggots, added tubing and bottling canes. When I bottle, I bottle 2 at a time instead of just one. Twice as fast.

Now... If I'd only been born with 4 arms and hands... That would really speed things up.
 
To speed things up I upgraded to the 1/2" diameter bottling filler (available at many online sellers).
I do mostly 22 oz or 750 ml bottles (the sparkling cider bottles are great...like Martinelli's) and both really fill a lot more quickly this way. You do end up with a little more air in the neck of the bottle (especially 12 oz bottles)...but I haven't noticed any issues from that. To "adapt" the standard spigot to this filler I cut about a 2" piece of 3/8" (thin wall) silicon tubing...it's a very tight fit on the filler and I slide it all the way up on the spigot. Be sure not to leave much tubing between the 2 pieces of hard plastic because if you do the filler tube swings around a little wildly and splashes beer...plus you end up "chasing" it around with the bottle. Put the silicon tube on the filler first about 1/2" maybe 3/4" but no more (after an hour or 2 of bottling it's really firmly stuck on the filler tube, I even ripped it once trying to just yank it off), then hold it up to the spigot and cut to length plus about 1/8-1/4". Perfect. smccarter....if you had 2 of these you'd be a real fillin' machine!!!
 
Go over the edges very quickly with the lighter--don't let the flame linger. All you want to do is round over the burrs, not melt the ends. Butane lighters give off some soot. If you have access to a propane torch, use that at the lowest flame you can set it at, as that will give you less soot.

I haven't done this yet 'cause I was paranoid about screwing it up again. I used it to bottle on Friday night and it worked like a charm. Barely any beer left in the bucket. So simple and so great.

I've got a month before I'll need to bottle again so I'll try to smooth out the edges before then.
 
Great writeup Revvy, but it is missing one thing. Since you didn't mention it in the original post I'll just throw this out there.

Make sure the spigot on the bottling bucket is closed before racking into it.... I seem to forget this about 1 out of every 3 bottling days. :(

Ha, I just bottled for the first time yesterday and have about 3 cups of beer on my floor because of this.... But it turned out so clear and pretty, if I may say so myself :):mug::ban:
 
I need to get a video or at least some pictures together. I bought a bottling bucket with spiggot. Bought a second spiggot and drilled a 2nd hole in the bottling bucket so that I have 2 spiggots. I come out of the spiggots with two tubes and two bottling canes. I bottle 2 at a time. Works very well.... I bottled 168 beers last night in about 3 hours... including boiling the priming liquid, racking, cleaning, capping, etc....

I totally stole the dip tube idea. I bought 2 rubber bungs that fit into the inner part of the spiggot. I bought vinyl tubing that comes out of the bung. Cut a V in the tubing and the arc of the tubing lays pretty well flat on the bottom of the bucket. What a great idea. I'm left with a thimble full of beer at the end of bottling... sometimes it pays to read these messages.

I hate bottling... but this method makes it much easier to get motivated to do. Just wish I had 4 arms and hands so I could cut the time in half again.
 
Just finished reading the entire thread over the past week (76 pages as of today). I'm studying up for my first brew, and now feel like the world's foremost expert on bottling. Knock on wood. In an effort to try and give back a little, I'll paste in the notes I took while reading the thread in order to provide a cliff's notes version. Thanks again!

Bottling Bucket Mods
• Attach wand directly to spigot with 1-2" of tubing
• Purchase 3/4" 90 degree elbow from Lowe's/HD, threaded on one end and smooth on the other, to attach to spigot and use as dip tube (see thread for multiple graphic images)

Prior to Bottling Day
• Soak bottles in Oxyclean to remove labels
• Brush quickly to remove any sediment
• Rinse in clean bucket

Night Before Bottling Day
• Set fermenter on counter above dishwasher to let settle
• Put clean bottles in dishwasher and run with no soap

Bottling Day
• Sanitize bottling bucket, auto siphon, bottling wand, piece of hose, bottle caps
• Make sure spigot on bottling bucket is closed
• Boil priming sugar (let cool before adding)
• Add to bottling bucket
• Rack beer to bottling bucket
• Stir extremely gently to mix priming sugar without aerating

Next 4 steps to be done in batches
• Sanitize bottles in clean bucket, set back in dishwasher rack (don't let dry before filling)
• Fill bottle - try and only partially open valve at first when bucket is full to avoid aerating beer when pouring
• Set bottle cap on top for 5-10 minutes
• Cap

• Store at 70 degrees for minimum 21 days (can taste periodically thru the process to learn how the conditioning process affects beer)


Note: the one recurring tip I have not included is use of vinator. I'm sure I'll end up with one at some point.

And one last question of my own: are swing top bottles just as effective as capped crowns? (assuming gasket is in excellent condition)
 
You don't need to stir. The racking will mix the sugar in with the beer. I haven't seen anyone that has had an issue from this.

I actually have had problems with getting an even mix from the racking alone. Regardless, I changed my bottling routine to include a verrrry gentle stir at 1/3 full, 2/3 full, and when finished. This did improve the consistency of my carbonation without any side effects. Just be sure to maintain good sanitization processes and do not get too aggressive with the stirring.
 
Back
Top