
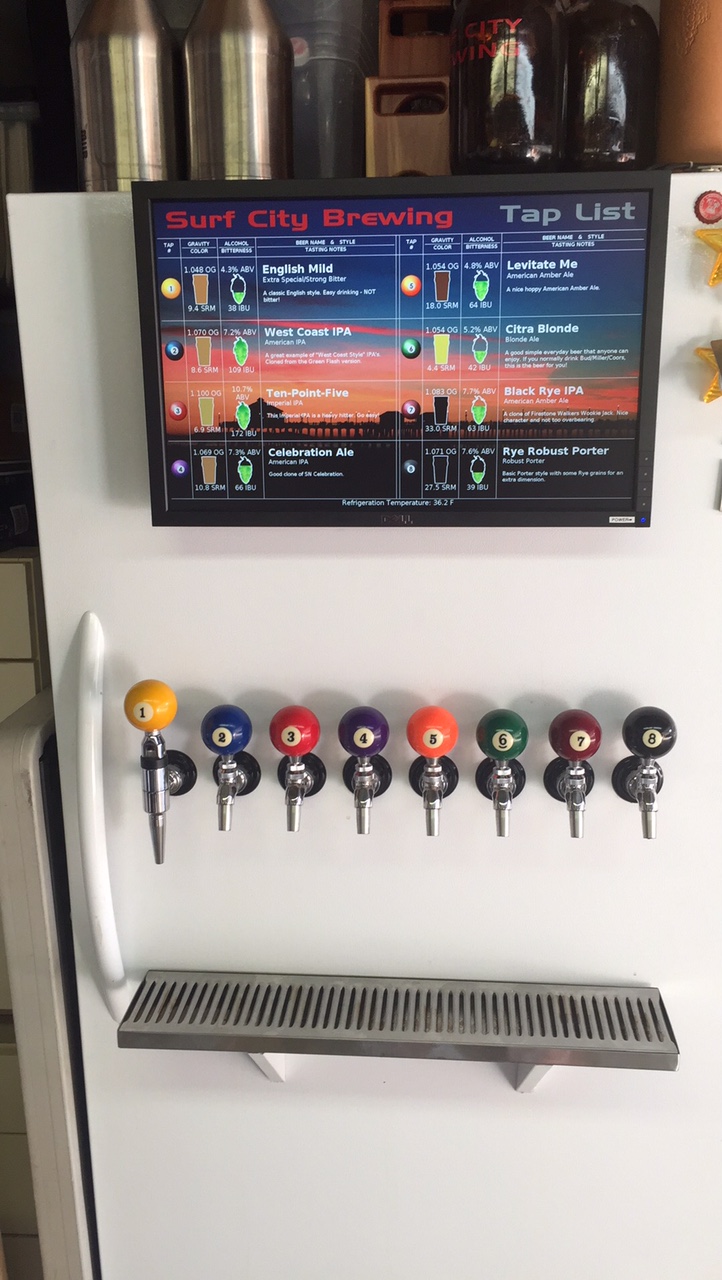
I recently built a new keezer that I keep in my garage. I was previously running 6 taps and I wanted to expand just a little more, but I also wanted to add storage for a few kegs to cold condition them.
I decided to go with an upright (frost-free) freezer for the smaller footprint.
Here's what I built:
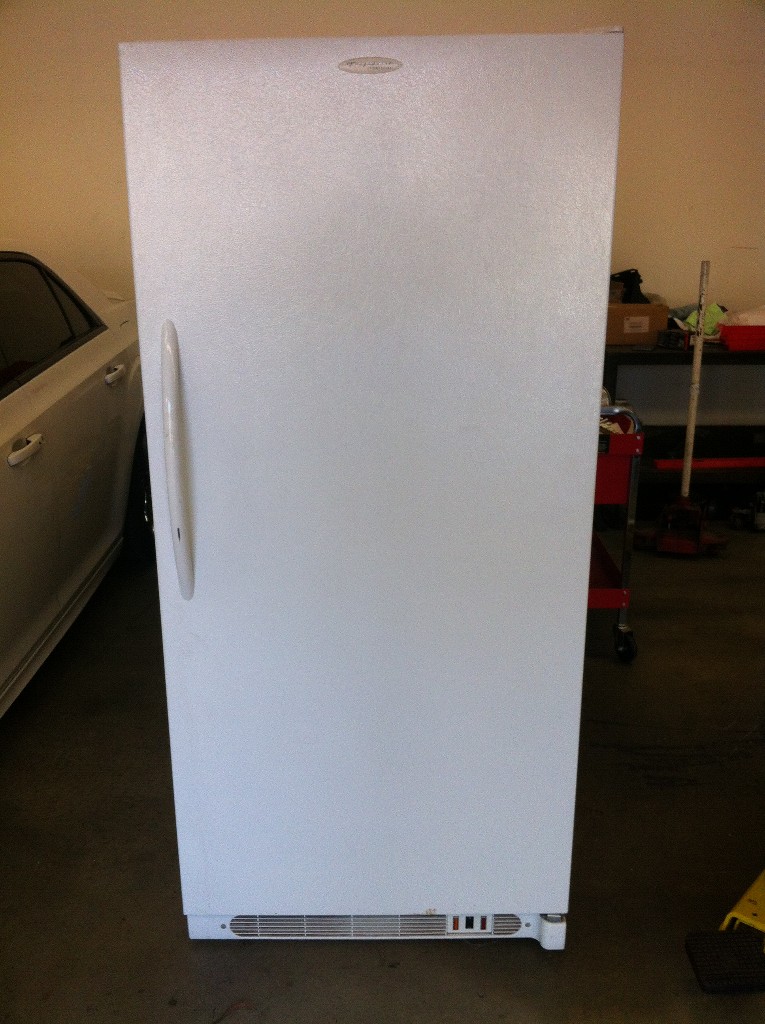
The basic freezer is a Frigidaire 20 CF upright.
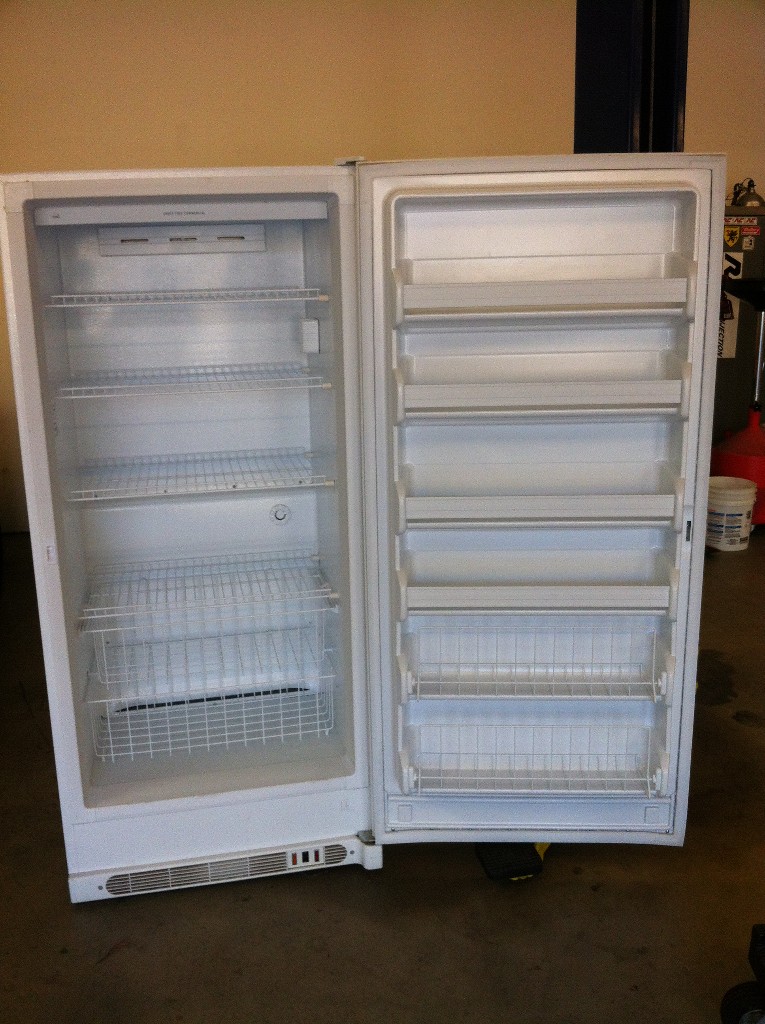
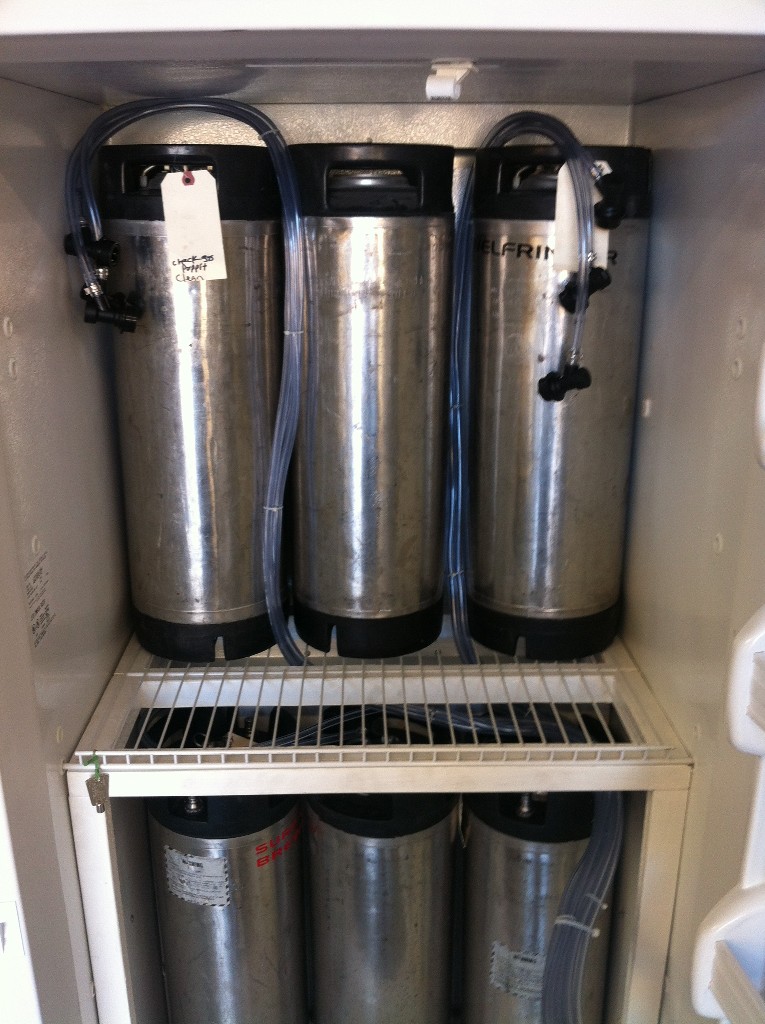
You can fit 6 kegs on the top shelf and 5 on the bottom. By only doing 5 on the bottom, you can maintain all the door shelves. If you want to do 6 on the bottom, you'll need to remove some of the door shelves. There is a hump on the back wall that forces the kegs forward a bit on the lower section. I also added a 2x2 wood frame to support the freezer shelf.
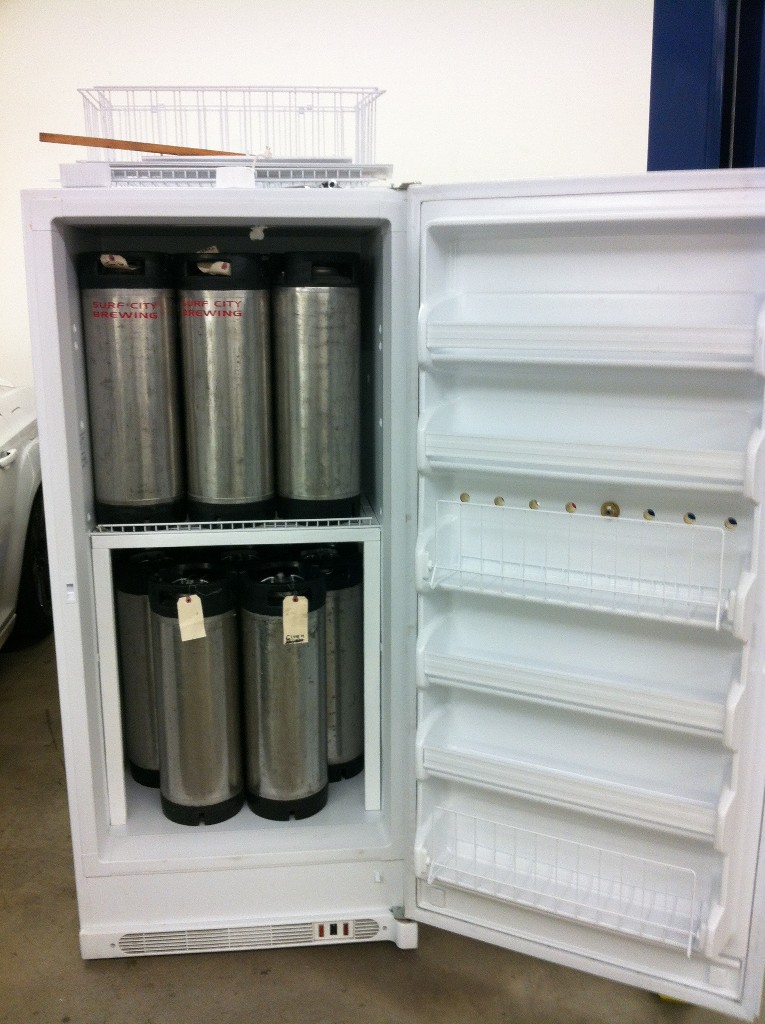
I removed two wires from the shelf to open an area between the kegs to route the lines up from under the shelf. When 6 kegs are on the top shelf, there is a natural gap/hole in the middle of the kegs that was perfect for routing the lines.
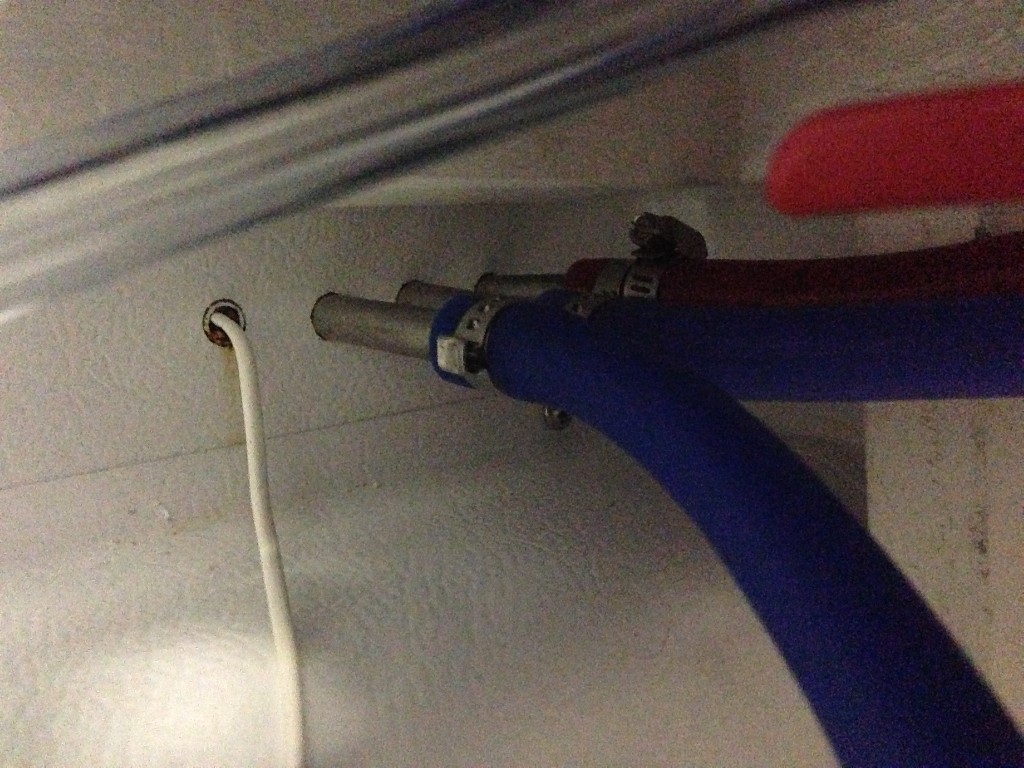
I drilled 4 holes through the back wall. One hole is for my temp probe and the other 3 are for gas lines. I used 3/8" SS tubing bent in a 90 degree radius to poke through the back wall. I then crimp on the 5/16" gas lines to the SS tubing on both the inside and outside. This makes it clean on the inside and also gives the bend on the outside to minimize the space behind the keezer so you can push it all the way against the wall.
I mounted the 8 port manifold for CO2 and a 2 port manifold for nitrogen/co2 under the shelf frame.
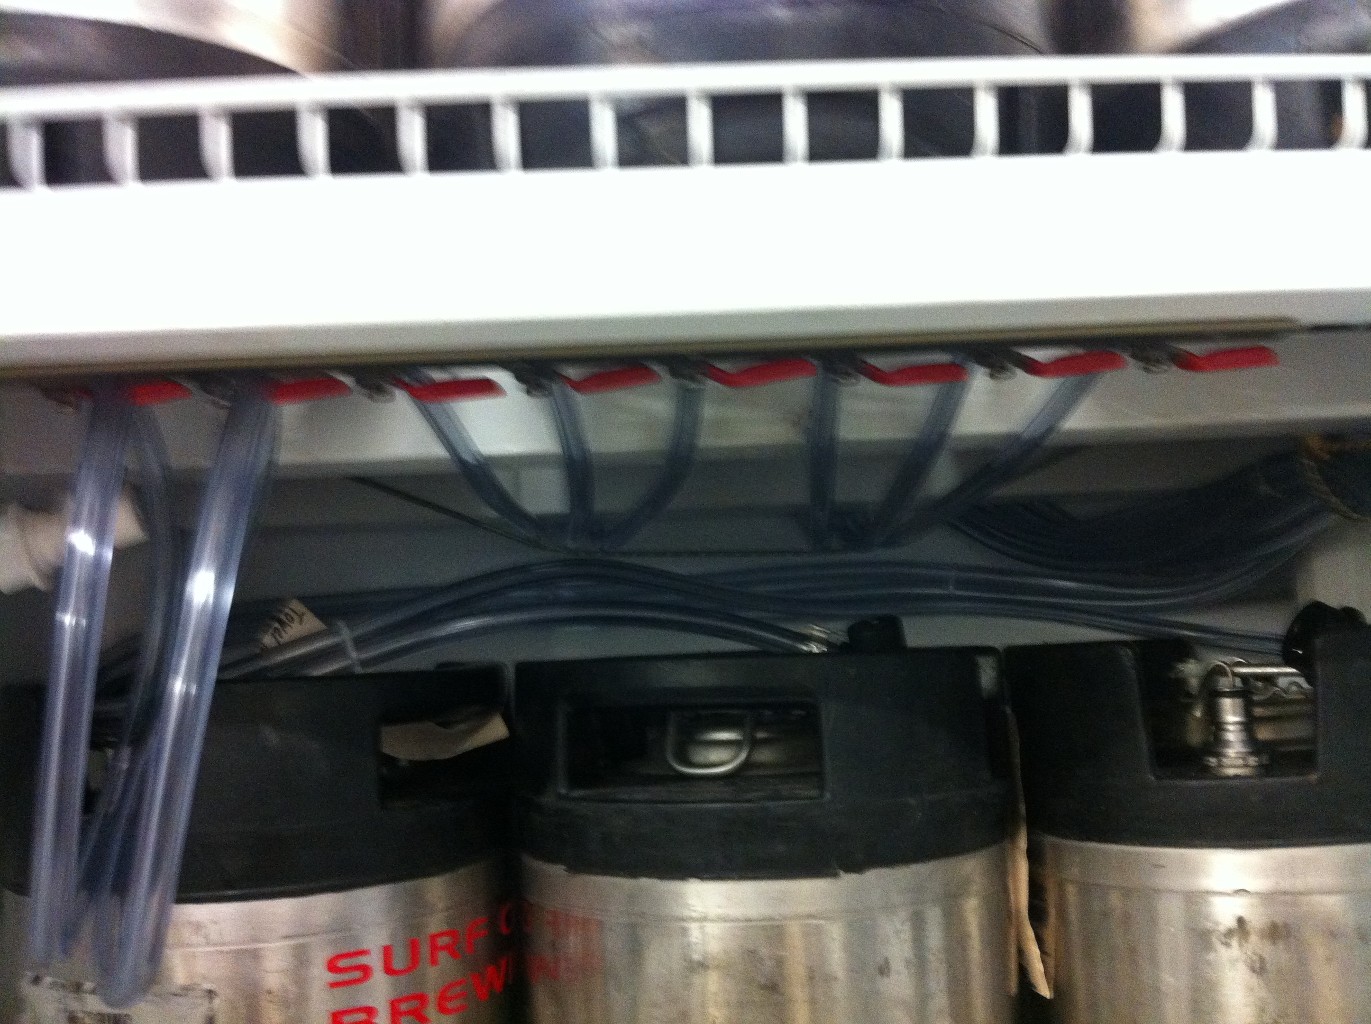
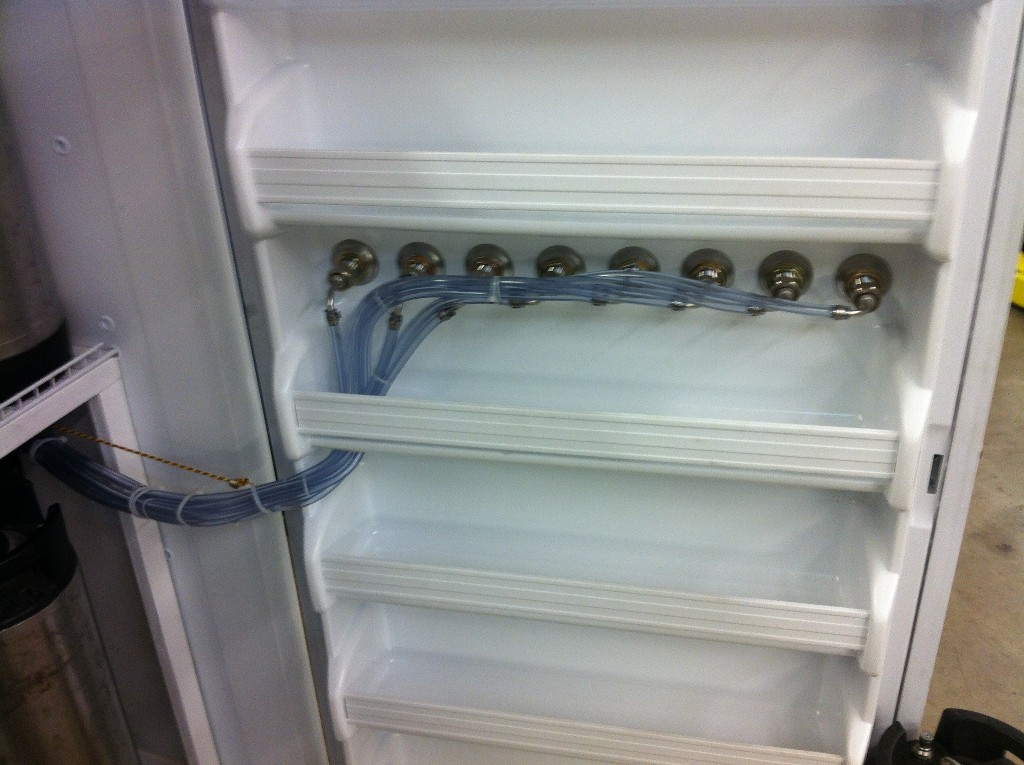
I used 90 degree tail pieces for the inside of the shanks to minimize the space needed for the lines. I also bought extra shank collars to use on the inside of the door so that the shank nut had a larger surface area to compress against the inside wall. I drilled a 2" hole in one of the shelves and routed the lines through that hole. This was to keep the lines organized and to position them right below the keg shelf. Having 5 kegs on the bottom also provided slack space on the end for the lines to collapse into when the door closes.
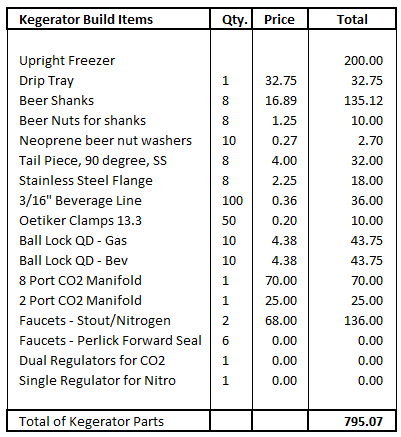
Here's a summary of my build costs. I re-used some items I already had, so I didn't include costs for those (425SS faucets, CO2/Nitro tanks & regulators).
I decided to go with an upright (frost-free) freezer for the smaller footprint.
Here's what I built:
The basic freezer is a Frigidaire 20 CF upright.
You can fit 6 kegs on the top shelf and 5 on the bottom. By only doing 5 on the bottom, you can maintain all the door shelves. If you want to do 6 on the bottom, you'll need to remove some of the door shelves. There is a hump on the back wall that forces the kegs forward a bit on the lower section. I also added a 2x2 wood frame to support the freezer shelf.
I removed two wires from the shelf to open an area between the kegs to route the lines up from under the shelf. When 6 kegs are on the top shelf, there is a natural gap/hole in the middle of the kegs that was perfect for routing the lines.
I drilled 4 holes through the back wall. One hole is for my temp probe and the other 3 are for gas lines. I used 3/8" SS tubing bent in a 90 degree radius to poke through the back wall. I then crimp on the 5/16" gas lines to the SS tubing on both the inside and outside. This makes it clean on the inside and also gives the bend on the outside to minimize the space behind the keezer so you can push it all the way against the wall.
I mounted the 8 port manifold for CO2 and a 2 port manifold for nitrogen/co2 under the shelf frame.
I used 90 degree tail pieces for the inside of the shanks to minimize the space needed for the lines. I also bought extra shank collars to use on the inside of the door so that the shank nut had a larger surface area to compress against the inside wall. I drilled a 2" hole in one of the shelves and routed the lines through that hole. This was to keep the lines organized and to position them right below the keg shelf. Having 5 kegs on the bottom also provided slack space on the end for the lines to collapse into when the door closes.
Here's a summary of my build costs. I re-used some items I already had, so I didn't include costs for those (425SS faucets, CO2/Nitro tanks & regulators).


