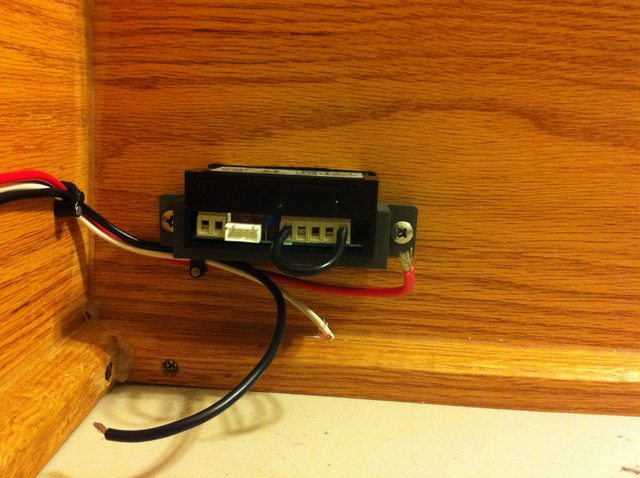
I've searched all around but haven't found any info on how people are securing their Love controllers to the collar. The little plastic clips that mine came with only allow for a very thin panel thickness, and I've got 3/4" wood. How has everyone secured them that mounts them directly to the collar?
You are using an out of date browser. It may not display this or other websites correctly.
You should upgrade or use an alternative browser.
You should upgrade or use an alternative browser.
Love TS2 Mounting in collar??
- Thread starter kerklein2
- Start date

Help Support Homebrew Talk - Beer, Wine, Mead, & Cider Brewing Discussion Forum:
This site may earn a commission from merchant affiliate
links, including eBay, Amazon, and others.
Hang Glider
Beer Drinker

mine slide back far enough - not a problem for getting the clips to clamp to the face.
Hang Glider
Beer Drinker
at the Dwyer Instruments website, all the Love boxes look adjustable to me - post a pic of the side view of yours...
it should slide on from the back until pressing against the back of your cutout, panel thickness be damned...(within reason)
it should slide on from the back until pressing against the back of your cutout, panel thickness be damned...(within reason)
kerklein2
Well-Known Member
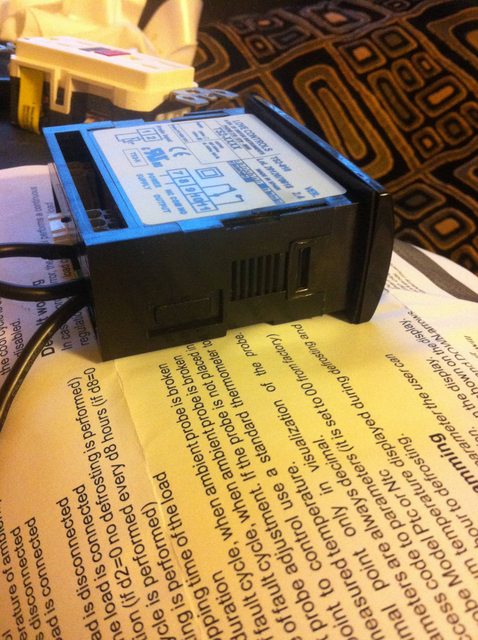
Unfortunately, the new design had two discrete clips that actually slide on from the side, not from the back. Here are a couple pictures.
And here's the Dwyer drawing:
http://www.dwyer-inst.com/images/TS2_DD.pdf
My only idea at this point is to enlarge the cutout and then use a piece of SS sheet metal I glue to the wood.
And here's the Dwyer drawing:
http://www.dwyer-inst.com/images/TS2_DD.pdf
My only idea at this point is to enlarge the cutout and then use a piece of SS sheet metal I glue to the wood.
Hang Glider
Beer Drinker
ahhh - that whole back section that "protects" the wires can be unclipped and discarded... that will make your rails show up and you can slide the clips further back.
kerklein2
Well-Known Member
ahhh - that whole back section that "protects" the wires can be unclipped and discarded... that will make your rails show up and you can slide the clips further back.
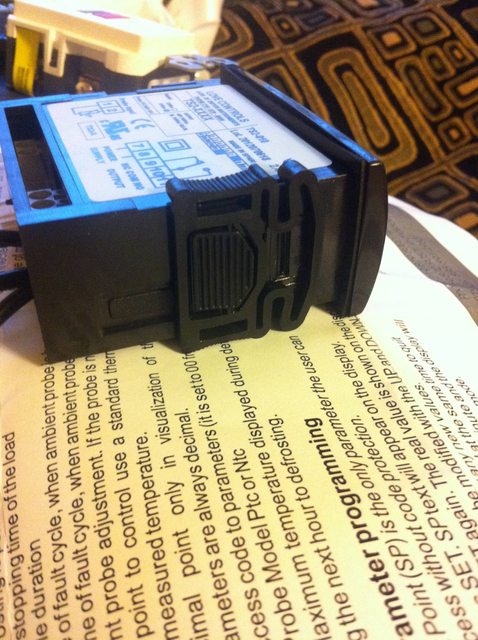
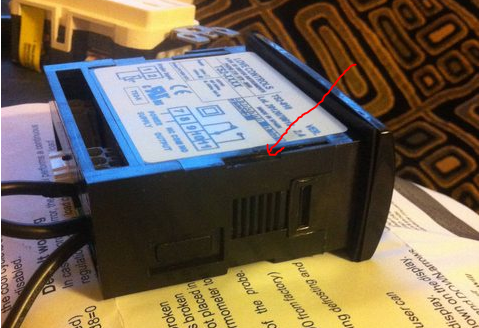
I don't believe so. Those ridges are only at the front so it wouldn't be able to ratchet to anything further back. Additionally, those clips slide in on these slots:
Hang Glider
Beer Drinker
That black plastic around the back wire section - doesn't remove? I don't have this model, but I have three different Love models, and on all three, the wire protector (a plastic "U") un-snaps off the back, revealing more ridges.
kerklein2
Well-Known Member
Well I wasn't thinking there'd be more ridges if I removed that piece, but even if there are, it's clear the slot ends there, so I don't know how the clip would attach and slide. I'll take a look at it when I get home tonight though.
kerklein2
Well-Known Member
Took a look at it tonight and it's a no-go on removing the back piece. The ridges and slot are all part of that back piece and there'd be no plastic other than the very front if I removed it.
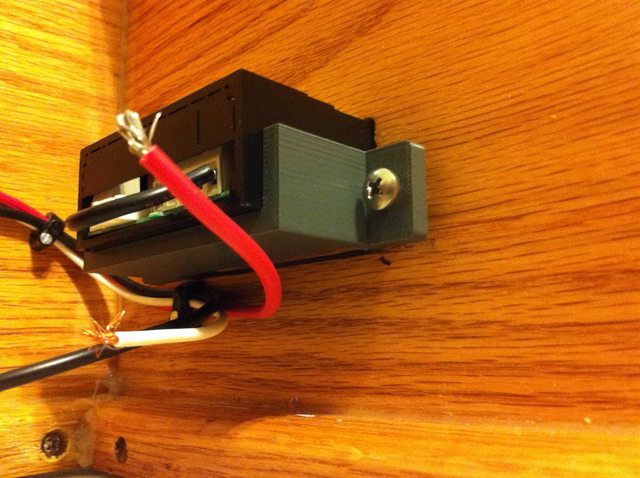
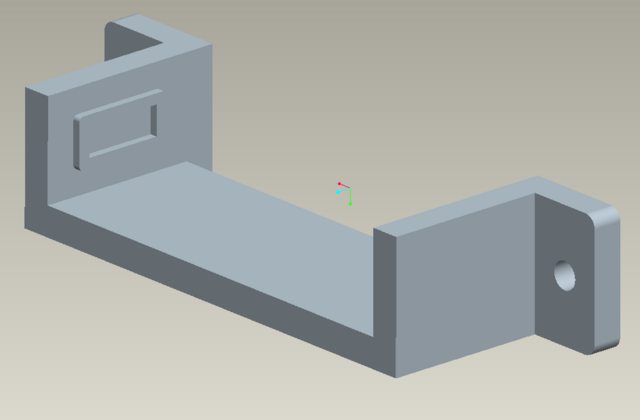
My current revised plan is to throw together a design for a different bracket and abuse the 3D printer at work to crank it out. I'll post it here when it I get it done. Inevitably others will run into this issue going forward.
My current revised plan is to throw together a design for a different bracket and abuse the 3D printer at work to crank it out. I'll post it here when it I get it done. Inevitably others will run into this issue going forward.

You could use a router to open a larger area in the back side of the collar so you could add a thinner insert that would be big enough to cut an opening through to accommodate the controller.
A bit of a chore, but if there aren't any alternatives...
Cheers!
A bit of a chore, but if there aren't any alternatives...
Cheers!
Had the same problem. I used a razor blade to cut the "plastic spring" piece off the front of the clip. If you look at the spring as the letter "D", I cut the entire letter off, leaving just enough resistance to provide a secure connection. Razor blade or needle nose pliers work equally as well.
trailbrewery
Member
- Joined
- Aug 22, 2012
- Messages
- 21
- Reaction score
- 0
Hang Glider said:mine slide back far enough - not a problem for getting the clips to clamp to the face.
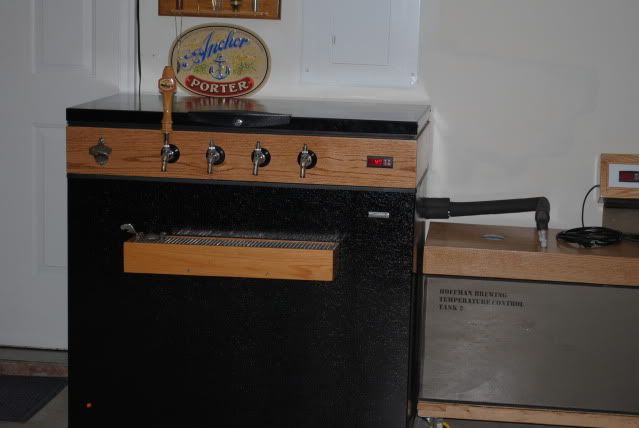
What is the set up next to your keezer ?
Hang Glider
Beer Drinker
That would be my fermentation control. It's a tank-within-a-tank of plexiglass - insulation between the layers. The "insulated pipe" connects to my cold glycol -
Basically - I have 5 gallons of cold glycol sitting on the shelf of the keezer - (might as well add thermal mass, and get some use out of the "cold" ) - so when the thermal sensor demands "cold," a pump submerged in the glycol comes on, pumping the ice cold glycol thru a clean, new automotive oil cooler submerged in the fermentation tank - cooling off the tank water bath. (An aquarium heater provides the heat on demand). my carboys sit in the tank during fermentation and stay a very nice 63F.
Basically - I have 5 gallons of cold glycol sitting on the shelf of the keezer - (might as well add thermal mass, and get some use out of the "cold" ) - so when the thermal sensor demands "cold," a pump submerged in the glycol comes on, pumping the ice cold glycol thru a clean, new automotive oil cooler submerged in the fermentation tank - cooling off the tank water bath. (An aquarium heater provides the heat on demand). my carboys sit in the tank during fermentation and stay a very nice 63F.
kerklein2
Well-Known Member
Had the same problem. I used a razor blade to cut the "plastic spring" piece off the front of the clip. If you look at the spring as the letter "D", I cut the entire letter off, leaving just enough resistance to provide a secure connection. Razor blade or needle nose pliers work equally as well.
Didn't think of this.
I did 3D print out a bracket that is working fine though.
SpeedYellow
Well-Known Member
This thread is totally overcomplicating this issue. Just finished my keezer with a new TS2 and I simply junked those two little black clips, and cut a hole so that the TS2 fits in pretty snug in the 3/4" collar. Nothing else needed -- it's not going anywhere. I cut it a little undersized and reamed it with a Dremel & routing bit, but you could certainly just cut it oversized and stick in a dab of silicone to secure it.
The point is that this is totally a non-issue. But I read this beforehand and was totally worried I wouldn't be able to get it to fit!
The point is that this is totally a non-issue. But I read this beforehand and was totally worried I wouldn't be able to get it to fit!
kerklein2
Well-Known Member
This thread is totally overcomplicating this issue. Just finished my keezer with a new TS2 and I simply junked those two little black clips, and cut a hole so that the TS2 fits in pretty snug in the 3/4" collar. Nothing else needed -- it's not going anywhere. I cut it a little undersized and reamed it with a Dremel & routing bit, but you could certainly just cut it oversized and stick in a dab of silicone to secure it.
The point is that this is totally a non-issue. But I read this beforehand and was totally worried I wouldn't be able to get it to fit!
Non-issue? The included mounting bracket doesn't work. I wouldn't call that a non-issue.
Cutting it undersized is certainly an option, but there are a couple caveats. One, you had to realize this was an issue before cutting your hole, which I did not. And two, you have to be happy enough with that mounting scheme, which I'm sure a lot of people won't be.
Gluing it in is also an option if your hole is over-sized, but I also did not want to do that. I wanted to be able to replace the thing if it ever dies or I break it.
Similar threads
- Replies
- 7
- Views
- 813
- Replies
- 4
- Views
- 688
- Replies
- 0
- Views
- 1K
