thorongil
Well-Known Member
First off, credit to where credit is due: the inspiration for this rig came from jkarp and Boerderij Kabouter. Without you guys leading the way, I would never have been able to build this. Also worth mentioning is the quality electrical info from CodeRage; his advise kept me from building an unsafe system.
Now on to the good stuff... I originally started out thinking that I wanted to build a single tier system to replace my current 10 gallon rig. But then, after reading the threads from the folks mentioned above, and dwelling on what a pain it is to brew outside during the summer in Phoenix, I changed course and decided to build a rig that could run inside, be 120V electric, and be all (or mostly) stainless...
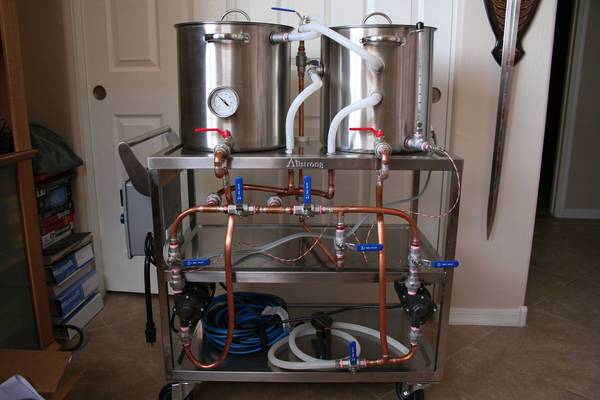
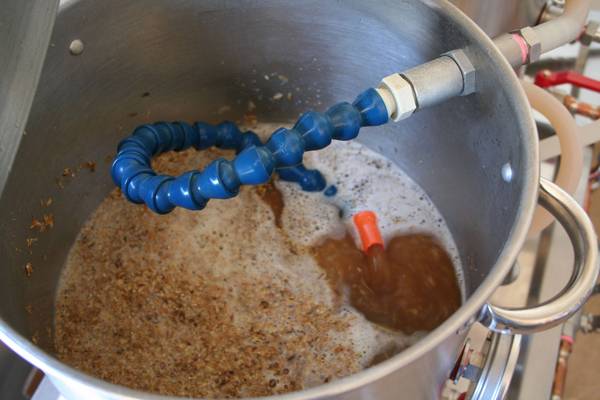
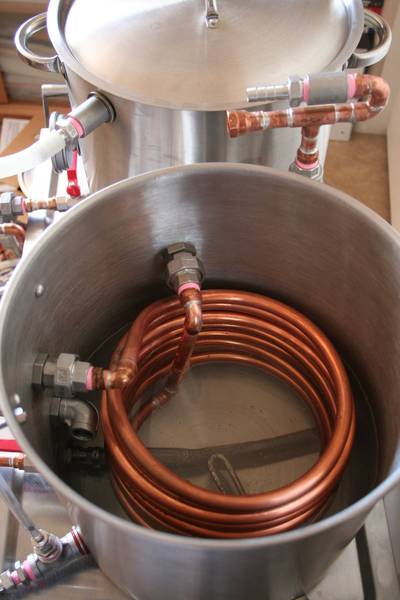
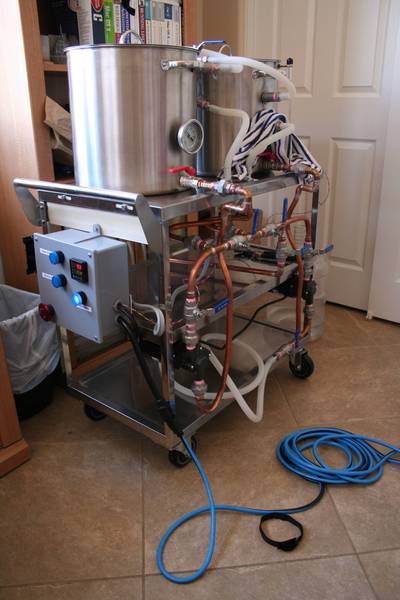
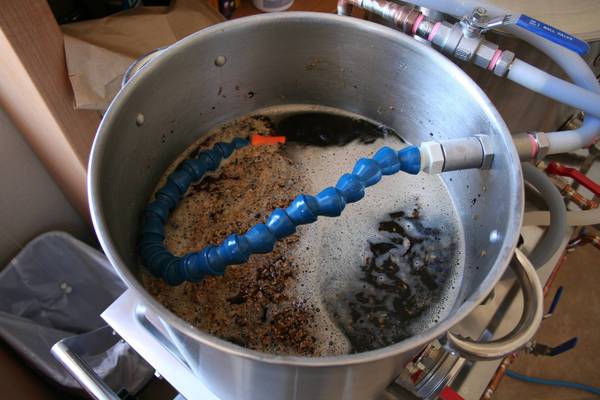
Thus was born the BrewKart... I ended up going with copper piping due to cost and ease of handling, and went with a 2 vessel Brutus 20 like system that incorporated a dual function coil for HERMS control and chilling. I dont claim to have anything too original here, but threw together a number of well established concepts to build a rig that would work for me. I went with the largest heating element that I could run on 120V (2000W HD) and sized the setup accordingly. I start with about 5 gallons preboil since that really the most the element can boil and end up with just a bit under 4 gallons into the fermenter. After about six weeks of planning and about 4 weeks of building during my spare time, I ran the first pilot batch through this weekend. Overall it was a big success, though I need to work on a couple things. Even with a semi-sparge, I still obtained 66% efficiency, and I think I can tweak my process a bit to get to my planned 70%. I also need to return to my stainless scrubby method of filtering the drain on the boil kettle - the modified kettle screen clogged too quickly with whole leaf hops.
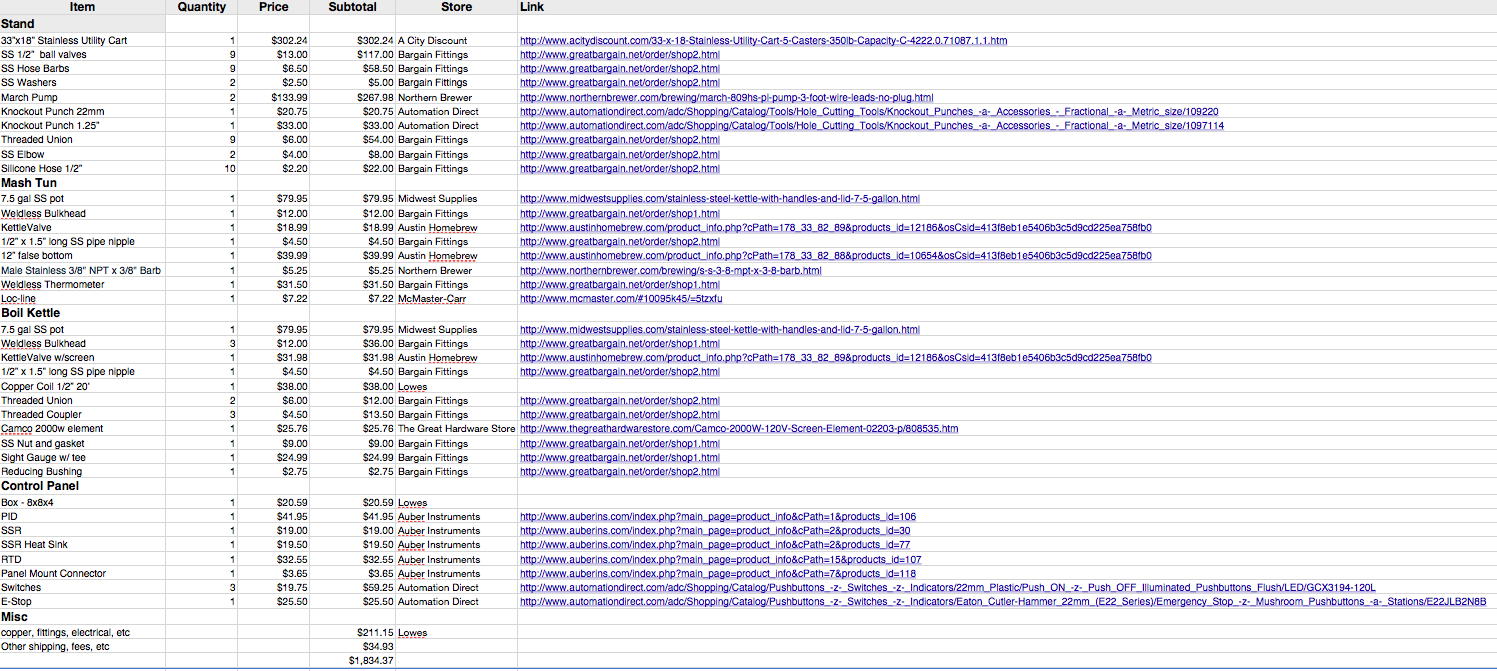
Heres the price and parts list; Ive accounted for everything here except tools (let me know if you need live links - not sure how to past an actual spreadsheet here...):
Now on to a few pics.
Stainless...

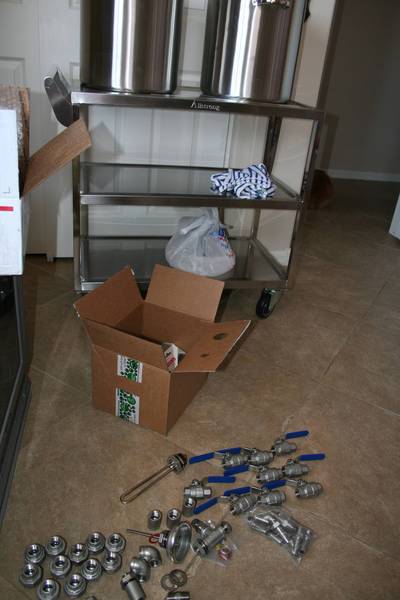
More Parts:
Ready to start the build:

Progress:

Now on to the good stuff... I originally started out thinking that I wanted to build a single tier system to replace my current 10 gallon rig. But then, after reading the threads from the folks mentioned above, and dwelling on what a pain it is to brew outside during the summer in Phoenix, I changed course and decided to build a rig that could run inside, be 120V electric, and be all (or mostly) stainless...
Thus was born the BrewKart... I ended up going with copper piping due to cost and ease of handling, and went with a 2 vessel Brutus 20 like system that incorporated a dual function coil for HERMS control and chilling. I dont claim to have anything too original here, but threw together a number of well established concepts to build a rig that would work for me. I went with the largest heating element that I could run on 120V (2000W HD) and sized the setup accordingly. I start with about 5 gallons preboil since that really the most the element can boil and end up with just a bit under 4 gallons into the fermenter. After about six weeks of planning and about 4 weeks of building during my spare time, I ran the first pilot batch through this weekend. Overall it was a big success, though I need to work on a couple things. Even with a semi-sparge, I still obtained 66% efficiency, and I think I can tweak my process a bit to get to my planned 70%. I also need to return to my stainless scrubby method of filtering the drain on the boil kettle - the modified kettle screen clogged too quickly with whole leaf hops.
Heres the price and parts list; Ive accounted for everything here except tools (let me know if you need live links - not sure how to past an actual spreadsheet here...):
Now on to a few pics.
Stainless...
More Parts:
Ready to start the build:
Progress: