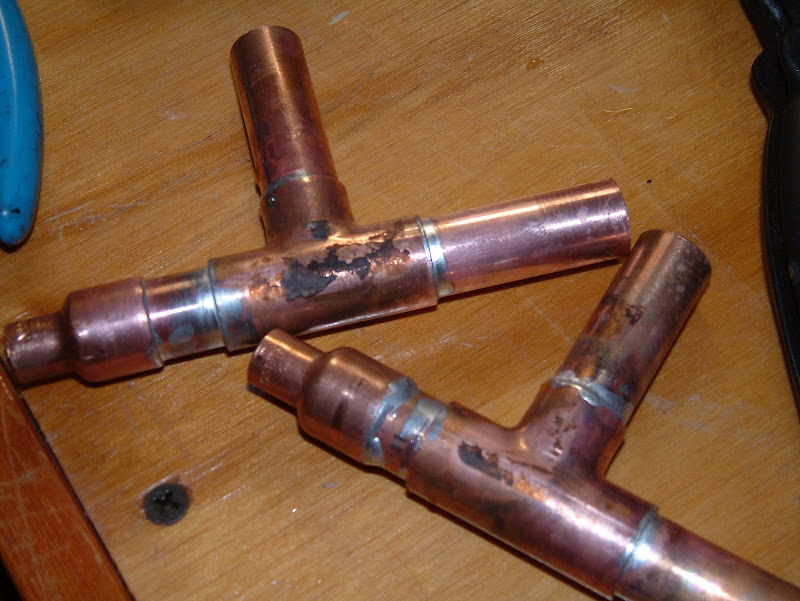
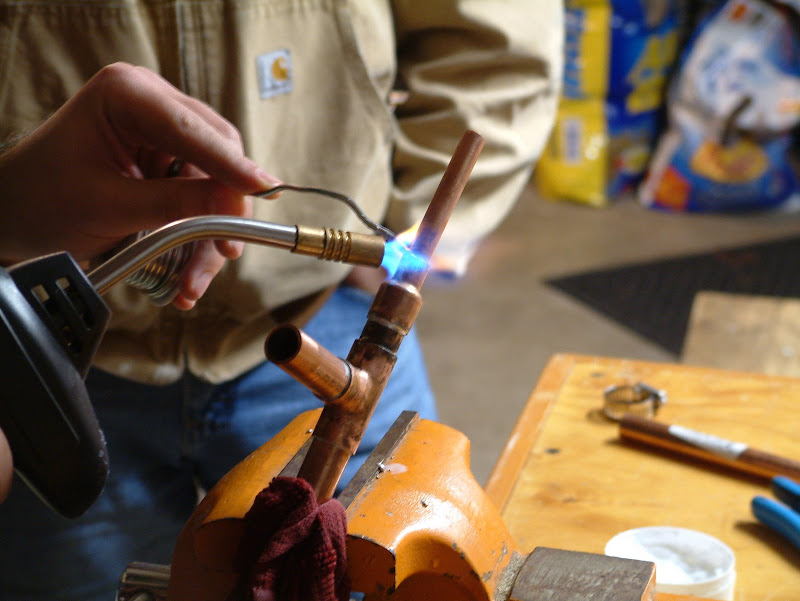
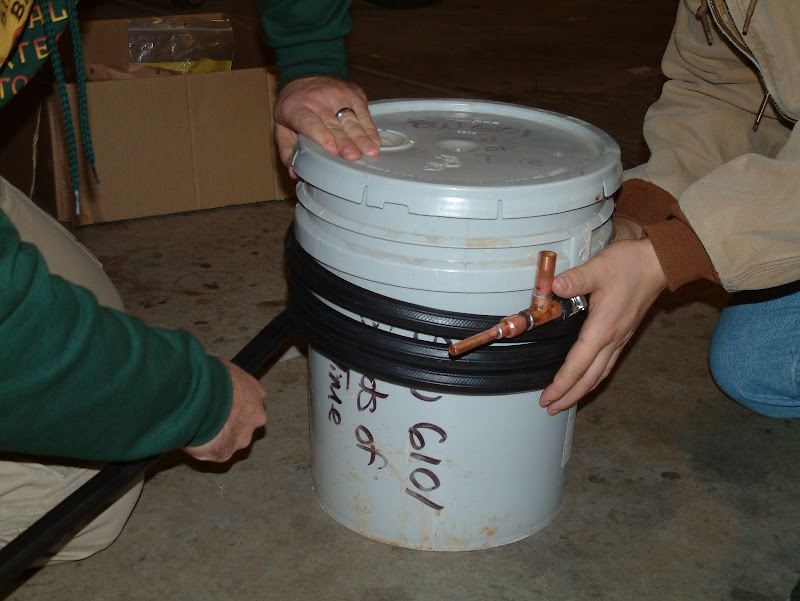
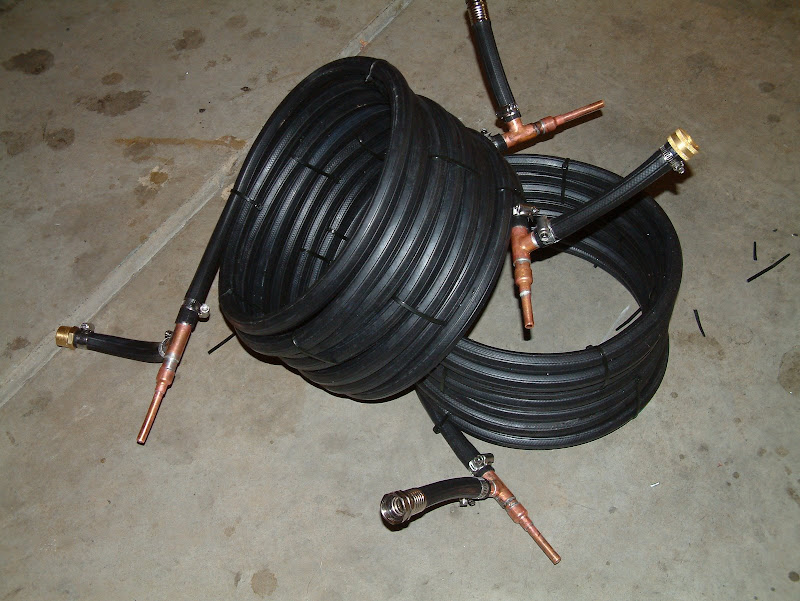
OP
OP
Yeah sure why not, but I'd probably plumb some quick disconnects in just so I didn't have to grab a wrench to connect/disconnect.
Lookin good by the way.
Lookin good by the way.


 I'll be done in a little while and post some pics.
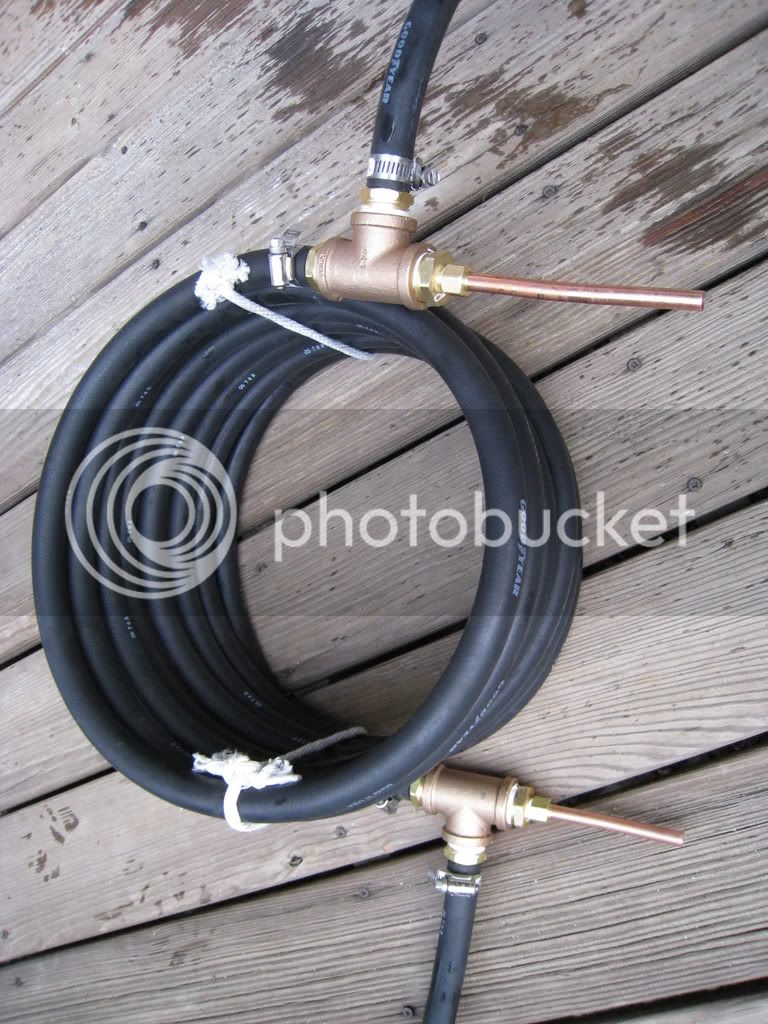
There's a catch to plate chiller though. They can potentially get fouled if hops and trub aren't filtered out. You can add a hopstopper but that's $70 right there. CFC's are much more tolerant of that kind of thing.
Also, while it's debatable how much surface area is enough, the $50 10 plate has a total hot/cold surface area of 200 square inches. The 3/8" OD x 25' copper tube offers 353sqin. In other words, you'd need the $64 15-plate version to come close and you'd still need garden hose and hose barb fittings. Of course, with the plate chiller, you have no DIY work to do.
I encountered a strange shift in chilling efficiency with this CFC design about 6 months ago and it frustrated the heck out of me. For a while, I was able to chill wort to one degree F higher than the coolant water temp. All of a sudden, that number went to 8-10F so for the most part, the chiller was FAILING. I finally figured it out.
Before I built my brewstand, I was putting the chiller on the floor and pumping the wort though. At the output, a tube had to go up and over the fermenter. This caused the entire coil to fill solid with wort.
The failure started after I built the brewstand where I'd put the CFC up on top of the HLT. I was still pumping but the wort outlet now saw a 3' drop into the fermenter. When I slowed the wort flow down to get more chilling, the outflow siphon would cause the coil to partially empty so I was losing contact area.
The moral of the story is to make sure both your coolant outflow and wort outflow has to go higher than the chiller itself, even if only a couple inches so that the tubes stay full. I was able to get the output wort just about the same temp as the coolant.
...or get a plate chiller.
Maybe put a ball valve on the output of the Chiller so you don't need to fool around with the tubing.
Maybe put a ball valve on the output of the Chiller so you don't need to fool around with the tubing.
I like the idea but I also don't want to pressurize the coolant chamber with city pressure because it's clamped on to smooth copper pipe. I'll blow them off. What I think would work though is restricting the output somehow to provide a limited backpressure. I'm thinking maybe a 4" piece of silicone tubing, plugged on the end with a few slits cut in it. Water won't gush out under water weight and it will open the slits more under city pressure.
I think the ball valve on the wort output is a good idea though.
Nice grab on the copper! Ebay?
OK- one small problem I came up with - counter flow chillers are great, but they will only get the wort to within 20 degrees or maybe a little more of the water used to chill.
OK- one small problem I came up with - counter flow chillers are great, but they will only get the wort to within 20 degrees or maybe a little more of the water used to chill. In other words, if using 65 degree water, you're going to get the wort down to about 80 to 85 degrees (not good enough for pitching). In Georgia, the water's going to be in the 70's, and that's going to get you close to 90! Has anyone thoughts on this? I have built a post-chiller, which sends the outflow from my CFWC right into a 15' coil of tubing immersed in ice water. 1st time out I barely had to turn the water flow in my CF chiller, and could get wort to exact temp, right into the carboy for aeration and pitching!:rockin::rockin::rockin:
OK- one small problem I came up with - counter flow chillers are great, but they will only get the wort to within 20 degrees or maybe a little more of the water used to chill. In other words, if using 65 degree water, you're going to get the wort down to about 80 to 85 degrees (not good enough for pitching).

Enter your email address to join:
