Speidel Braumeister (brewmaster)

Homebrew Talk - Beer, Wine, Mead, & Cider Brewing Discussion Forum

Help Support Homebrew Talk - Beer, Wine, Mead, & Cider Brewing Discussion Forum:

This site may earn a commission from merchant affiliate links, including eBay, Amazon, and others.
DeGarre said:
The link I posted works fine for me. It is Marks Home Brew in Australia. Google brings it up too.

Works today for me but don't see a part other than the original gasket for the malt pipe on his site.
 
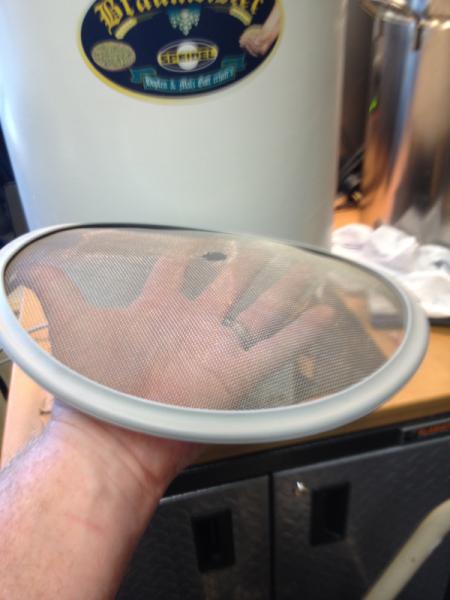
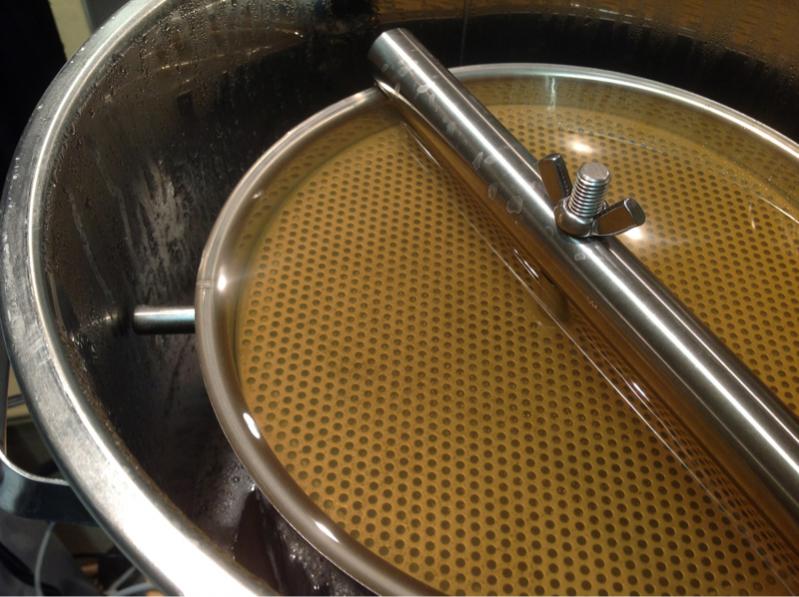
Okay I think I may have found a solution. I'm in the middle of mashing in and trying this out at the moment with a few pics posted below. I'll post some final thoughts after I finish the brew day. I'm using two 10 inch pressure cooker seals around the screen that I bought on Amazon.

image-3758445105.jpg


image-4015962909.jpg


image-581358887.jpg
 
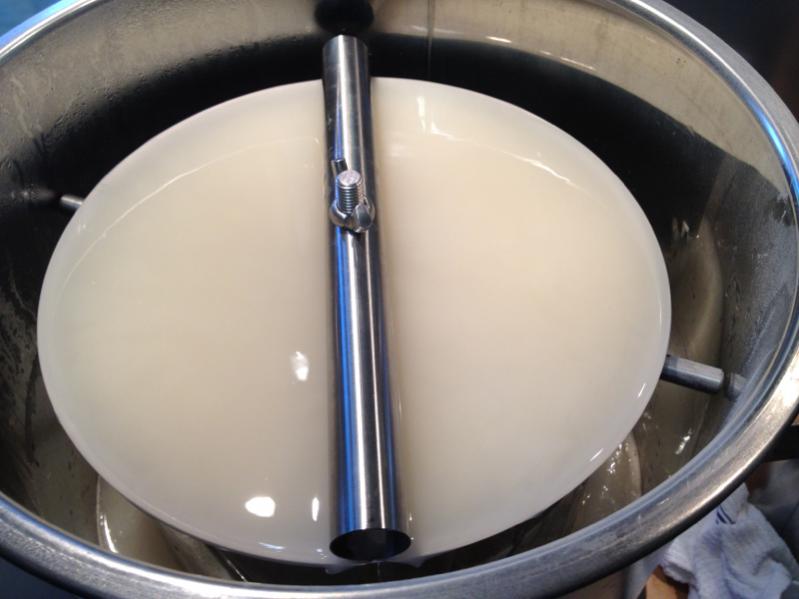
As you can see from this picture I had only a couple rice hulls and some very small particles make their way between the plate and center post when I initially turned on the machine. This is the least I've ever had flow from the beginning of a mash. Too early to call it a success just yet, but I'm very hopeful. The great thing about the pressure cooker seals is that you know they are food safe.

image-2117791751.jpg
 
Can you give us the amazon link? Is there any reason why we couldn't use this for the bottom screen/plate??
 
bcryan said:
Can you give us the amazon link? Is there any reason why we couldn't use this for the bottom screen/plate??

Below is the link, and did use it on the bottom screen as well. It won't fit on the plate and into the malt pipe. The screens flex enough you can fit it on and still slide it in. I put the bottom plate in outside the Unit, then put the bottom screen with the seal in and slide it in nice and tight. Then after adding water, you just slide the pipe with plate and screen down the rod. Very easy and tighter than a drum. This allowed for a nice stir of the grain prior to closing off with the top screen then plate with no worries about disrupting the bottom screen.


http://www.amazon.com/gp/product/B00008UA67/?tag=skimlinks_replacement-20

I'd say it is working - clearest wort ever at this point. We'll see how sparge goes!

image-2871675911.jpg
 
Last edited by a moderator:
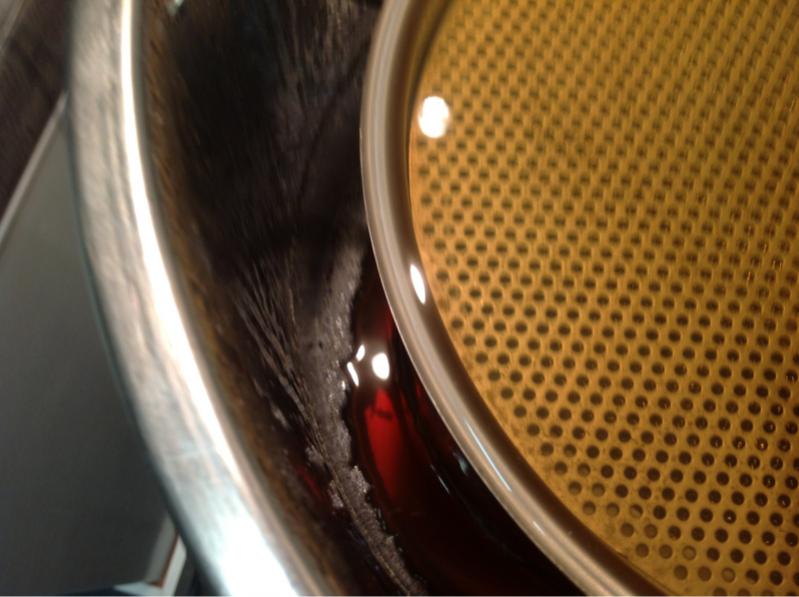
I've never been able to see the bottom of the kettle down the side of the malt pipe before. It's obviously this grain bill being very light but also you can see there are no floaty's down the side of the pipe and the pump is running.

image-1133262898.jpg
 
Wow man. My wort above your screen/plate is very similar. But your wort outside the maltpipe is amazingly clear. You're setting the bar buddy!!! Greatly appreciated.
 
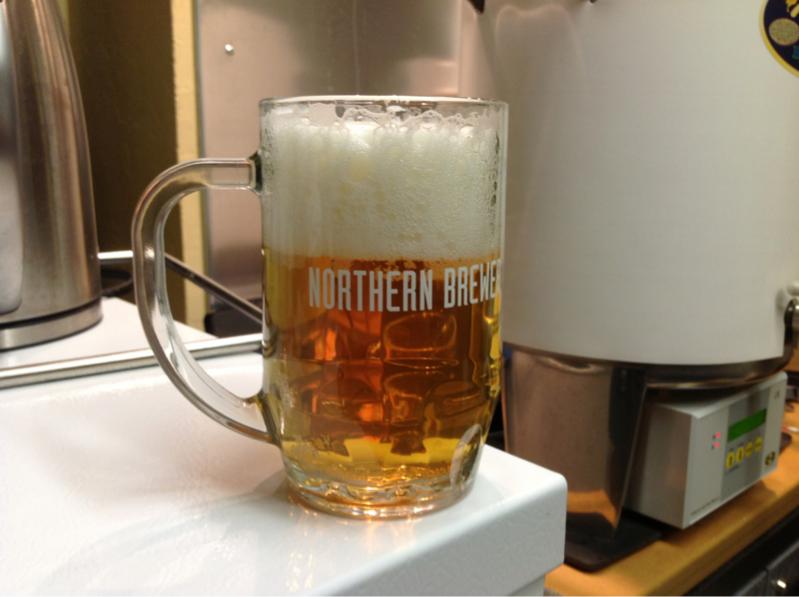
After much skimming with the fine strainer post sparge this is what I came up with out of the boil kettle. This bill has flaked maize and instant rice which is some of what you're seeing here. This is the least amount of 'escapees' I have ever pulled out and it's all small in size. My guess is what did make it into the kettle slipped between the plate and the center post. My crystal clear wort is now milky from the fine particulates but this is the clearest that I've had in the year that I've been brewing with the machine. I'd call it a success. Now to kick off my boil with a mug of my last brew "Notty as Helles"! Prost!

image-20728474.jpg


image-154873706.jpg
 
Here's a picture of the bottom seal after I dumped out the malt after the mash. You can see even after dumping the grains out, the screen and the bottom plate are firmly held in place. These pressure cooker seals aren't cheap but they really help keep the grains out of the kettle. I won't claim complete victory until I get a few more brews with this setup but I'm very pleased thus far.

image-4157023097.jpg
 
Very late night brewing yesterday and my Oklahoma groundwater is 80F - so had to chill overnight in the chest freezer before pitching. Didn't mess with my separate pre-chiller and ice which I probably should have done with a 64F pitch.

A few quick comments about the closing of the brewday. My efficiency usually runs around 77 to 78%. Yesterday's efficiency – 90%! I don't know how much of that is attributed to the longer mash at 90 minutes given the adjuncts or the impact of not having the grain tightly mash together in a bag between the two plates. There was headspace between the screen at the top and the grain below which allowed for a better free flow through the grain bed which may have improved efficiency as well. I will let everyone know if this trend continues when I do my next beer Simarillo Pale Ale.

image-3325210107.jpg


image-2886339793.jpg
 
the pumps make it a more complicated system than the urn. that said i'm sure someone with the right equip and time and skill could put one together, not sure how much cheaper it would be, especially in terms of man hours buit would be a great project. fair to say it is a fair bit more complex than an urn though.
 
I finally found the time to brew the DFH 90 minute

5. I let the whole mash sit overnight as suggested in an earlier post. Also not a good idea if you want to keep the temperature steady. The temperature was 5 degrees warmer the next morning. I had turned off the pump so as not to have it running all night.

This was suggested by me, so I feel I compelled to balance your opinion with my own. First, I'm sorry your temperature didn't hold steady like you expected. This is very surprising considering one of the central functions (it's supposed to do well) is holding the mash temperature steady. It shouldn't matter much if you don't run the pump once you have reached the target temperature—the volume of the water and the sensor/heating element should keep it within +/- 1 degree. I'll verify this the next time I brew (overnight mash is the only way I do it now). I should add that I do have the thermal jacket for the braumeister—this should help keep the temperature steady as well.

Secondly, some of you might be interested to know that I successfully brewed a 1.097 Scotch Ale last weekend on my Braumeister 50L without doing a double mash. My grain bill had about 22.5 lbs of grain, and I figured out (through estimating, and previous posts) the ABSOLUTE MINIMUM water needed to complete the pump circuit in the Braumeister. The reasoning was that I wanted to wind up with as little water as possible post-mash so that it wouldn't take me forever to boil down the wort to ~5.5-6 gallons. For me, that magical number was 11.5 gallons (for 22.5 lbs of grain). You could complete the pump circuit with slightly less water, but it won't cover the heating elements. After the mash, my volume was just under 10 gallons. It took me just under 3 hours to boil that down to 6 gallons. This should give folks some rough numbers for brewing some stronger winter beers now (give them some time to age) :mug:
 
Hi Soviet, I am glad you have chimed in. I used the thermal jacket, as well as the lid. It will be interesting to hear what happens with your next overnight mash. If you experience the same rise in temperature, I will turn off the heat as well as the pumps for my next attempt. The recipe states a lower mash temperature is desirable. I am surprised as you to find that the temperature did not stay steady. Could heat soak be the culprit?
 
Hi Soviet, I am glad you have chimed in. I used the thermal jacket, as well as the lid. It will be interesting to hear what happens with your next overnight mash. If you experience the same rise in temperature, I will turn off the heat as well as the pumps for my next attempt. The recipe states a lower mash temperature is desirable. I am surprised as you to find that the temperature did not stay steady. Could heat soak be the culprit?

I guess I should ask how you're measuring the temps. The electronic sensor was reading 158 (My mash temp for the strong scotch ale) when I woke up in the morning. Be advised that if you measure the temperature from the top of the malt-tube's cascading wort, the temperature may vary a bit.

This confounded me to no end when I first started brewing with the Braumeister. I did notice, however once you've run the pumps for a while, especially with the lid closed, the temperatures will re-align with the electronic temperature reading. My theory is that this is because the top of the malt pipe that sticks out into the air is cooler than the submerged part, and therefore acts as a heatsink, cooling the wort that touches the top of the malt tube as it foundains out.. This doesn't however explain why your temperature was HIGHER. Hmmm.. I'll let you know my findings when I brew next weekend.
 
ok so i started this thread a while ago and unfortunately im selling my setup. four kids and going from a employee to the owner of our family business with my dad stepping down has left me with no time for this hobby.

https://www.homebrewtalk.com/f16/speidel-braumeister-20l-home-brewery-supplies-343263/#post4273888


please see the link to the sale of my equipment. i have lots and will post a complete list soon but for now this is what i got off the top of my head . thanks for the guidance and inspiration during my time in this awesome hobby.
 
mandrakemuffly,
Which brand of plate chiller do you have? I bought one and it doesn't work anywhere as well as you describe. Your drop in temperature is impressive.
Are you reticulating ice water through it or is that just using tap water?
Tap water temps are warm here in Oklahoma especially in the summer when outside temps are well over a 100F/38C day after day. Thanks a bunch I appreciate the ideas and feedback.

just to follow up, the plate chiller is a 'Shirron'. does an admirable job, with the right prep.

on another matter, i have a couple brews in the fermenters and i have just racked them off from their primary fermenters into a couple secondary carboys. they are from the same brew, different yeasts, but after about 10 days in the primaries, since racking one has kicked off again and i have a mild krausen forming, but with a patchy foam, not an even spread. the grav readings had stabilised for 3 days in the primaries. just wondering if i may have an infection or have others experienced a similar occurance?
i guess a couple photos would be useful in terms of the foam forming.
 
A couple of new goodies that I'll be using to modify my brew process on the braumeister - a new valve and a 30 plate chiller from Duda Diesel. Pictures to follow upon my next brew day and I'll let everybody know how it works.

image-3103537260.jpg
 
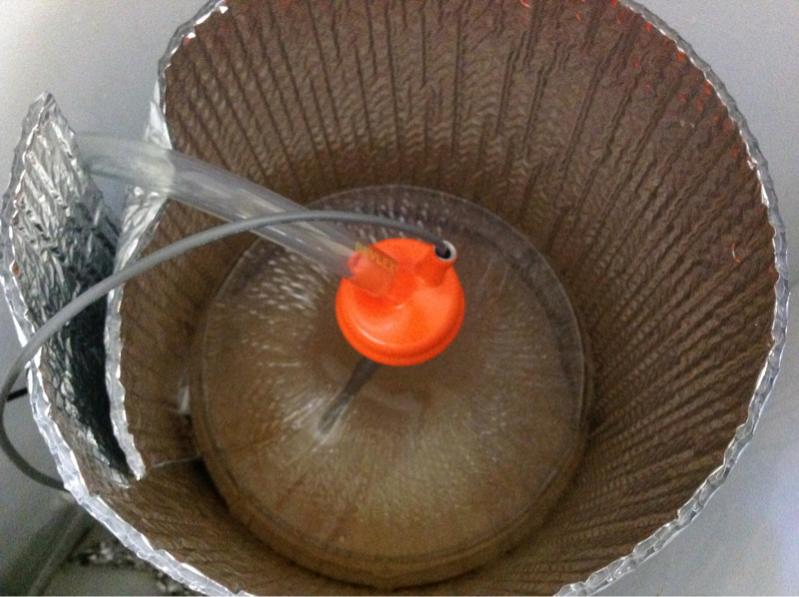
Made up 6.25 gallons of starter today in the BM and tried out my new pressure canner. Should be set for a long time on starters! Very strange mashing but not boiling (in the BM) or cooling. First time but trying to make it easier for impromptu beer brewing sessions. Also going to be building up my yeast library through some yeast washing. New valve worked great - no leaks and twice the flow from the standard valve.

image-3170725731.jpg
 
more info on that valve?? the stock one is a bit rubbish now that you mention it. is anyone whirpooling with an external pump?
 
dinnerstick said:
more info on that valve?? the stock one is a bit rubbish now that you mention it. is anyone whirpooling with an external pump?

It's just a 3 piece valve with a 1/2 inch NPT nipple, and hose barb - you can buy them on most online retailers - got mine from bargainfittings for another project that never came together. The key is a 3/4 to 1/2 NPT adapter, which I bought on Amazon.

http://www.amazon.com/gp/product/B003GSL38Q/?tag=skimlinks_replacement-20

I got hung up on the threading as the BM's threading is 3/4 BSPP (British parallel). After a ton of research and refusing to pay for the BSPP to NPT adapter (>$80), I found out through online research that the thread counts for 3/4 in both is the same and they are interchangeable with pipe tape. You'll need a few more wraps than normal but it sealed up tight with zero leaks. I did insure that I didn't over tighten by feeling inside the pot as I screwed itin. Worked brilliantly for 316 stainless less than $6"given I had the valve already.
 
Last edited by a moderator:
dinnerstick said:
more info on that valve?? the stock one is a bit rubbish now that you mention it. is anyone whirpooling with an external pump?

No pump here, but it's on the wish list. If you use a plate chiller you can get a nice whirlpool with a big spoon. I get a nice pile in the center without my old immersion chiller in the pot. With it in, it doesnt work very well. One of two reasons I bought the plate chiller. The other reason is cooling time - takes forever with the immersion chiller with high groundwater temps - going to use the immersion as a prechiller for the plate chiller and looking forward to pitching temps in less than 10 minutes!
 
It's just a 3 piece valve with a 1/2 inch NPT nipple, and hose barb - you can buy them on most online retailers - got mine from bargainfittings for another project that never came together. The key is a 3/4 to 1/2 NPT adapter, which I bought on Amazon.

http://www.amazon.com/gp/product/B003GSL38Q/?tag=skimlinks_replacement-20

I got hung up on the threading as the BM's threading is 3/4 BSPP (British parallel). After a ton of research and refusing to pay for the BSPP to NPT adapter (>$80), I found out through online research that the thread counts for 3/4 in both is the same and they are interchangeable with pipe tape. You'll need a few more wraps than normal but it sealed up tight with zero leaks. I did insure that I didn't over tighten by feeling inside the pot as I screwed itin. Worked brilliantly for 316 stainless less than $6"given I had the valve already.

awesome info, thanks!
 
Last edited by a moderator:
I've tried whirlpooling in the 50L braumeister by putting copper elbows on the inlets at the bottom of the kettle, and that doesn't work. I've tried strengthening that whirlpool by using an external pump that runs wort back into the kettle and out the whirlpool-chiller from morebeer and that didn't do much for me either. You get a whirlpool, but because of the heating elements at the bottom of the unit you can't get a real good one going. And even when you think you do, you still find the trub doesn't collect in a nice little cone at the bottom like you might have hoped. I believe whirlpooling is a lost cause on this unit, but the good news is, if you tip the unit and let it sit (prop it up as I previously suggested) the trub will collect in the corner at the bottom and the drain is elevated enough to where it won't get much trub into your fermenters when you pump it out.
 
hmmm... anyone ever have success getting a trub cone to form in the bm with an immersion chiller in? i normally don't mind how clear the wort is but i'm moving over to fermenting in a temp-controlled corny keg and need to make best use of the small space so i was hoping to get me a whirlpool chiller built. also, i can get wort cool pretty quickly if i run the bm pump, i have cold tap water year round, but i have clogged it before and am a bit nervous running it with a lot of hop gunk in there
still mulling it over...
 
It's just a 3 piece valve with a 1/2 inch NPT nipple, and hose barb - you can buy them on most online retailers - got mine from bargainfittings for another project that never came together. The key is a 3/4 to 1/2 NPT adapter, which I bought on Amazon.

http://www.amazon.com/gp/product/B003GSL38Q/?tag=skimlinks_replacement-20

I got hung up on the threading as the BM's threading is 3/4 BSPP (British parallel). After a ton of research and refusing to pay for the BSPP to NPT adapter (>$80), I found out through online research that the thread counts for 3/4 in both is the same and they are interchangeable with pipe tape. You'll need a few more wraps than normal but it sealed up tight with zero leaks. I did insure that I didn't over tighten by feeling inside the pot as I screwed itin. Worked brilliantly for 316 stainless less than $6"given I had the valve already.

Hilarious, I was planning on buying exactly the same part you did but then got hung up on the threading after a master steamfitter relative of mine gave me the "you're going to do what!?" look when I told him about it.

Ended up with the 60 dollar Adaptall part! :p
 
Last edited by a moderator:
SFBrewer said:
Hilarious, I was planning on buying exactly the same part you did but then got hung up on the threading after a master steamfitter relative of mine gave me the "you're going to do what!?" look when I told him about it.

Ended up with the 60 dollar Adaptall part! :p

I think the key is that this isn't pressure tight - but for holding fluids at the 6 gallon level, that's not a requirement. I can imagine a master steamfitter Is a bit more cautious given his profession and pressures involved with steam!
 
I normally wouldn't mention a classified here- but I have a Speidel related item for sale in the classifieds- a stainless steel 3/4 male to 1/2 female reducer if you want to convert your output. Cheap, just don't need it. Price covers postage and a couple bucks more.
 
I think the key is that this isn't pressure tight - but for holding fluids at the 6 gallon level, that's not a requirement. I can imagine a master steamfitter Is a bit more cautious given his profession and pressures involved with steam!

agreed. tho I have to admit the "proper" part isn't as leakproof as I'd have anticipated or expected. Tho I have run the BM50L at capacity many times once I sorted the issue out and have had no problems since.


on an off note, has anyone tried brewing with adjuncts in the BM?

I ran a batch yesterday that was about 25% rice which was ground down to grits and gelatinized in a rice cooker...I did a long protein rest and had no problems at all with the flow thru the mash.

Post boil I had some funky hot break material...dark, filmy and gelatinous, not unlike seaweed and mucous. That was the only "exceptional" event I had with the brew session, other than a leaky seal (not related to the 3/4" to 1/2" bushing) that cost me about a liter of post-boil wort. :p
 
SFBrewer said:
agreed. tho I have to admit the "proper" part isn't as leakproof as I'd have anticipated or expected. Tho I have run the BM50L at capacity many times once I sorted the issue out and have had no problems since.

on an off note, has anyone tried brewing with adjuncts in the BM?

I ran a batch yesterday that was about 25% rice which was ground down to grits and gelatinized in a rice cooker...I did a long protein rest and had no problems at all with the flow thru the mash.

Post boil I had some funky hot break material...dark, filmy and gelatinous, not unlike seaweed and mucous. That was the only "exceptional" event I had with the brew session, other than a leaky seal (not related to the 3/4" to 1/2" bushing) that cost me about a liter of post-boil wort. :p

Just did Cream of 3 Crops which has rice and corn it. Riice definitely gives some weird gelatinous floaters in my one time experience with it.

I always use rice hulls in every batch. A small amount 1/4 pound for all grains - 1/2 to 3/4 pound when using wheat, rye, corn, or rice. It only takes one session with the fountain to teach that lesson!
 
I just have to ask. Are you folks sing the rice hulls on top/bottom or both? It would appear to me that the top of the pipe is where they would be needed the most.
 
OntarioBeerKegs said:
I just have to ask. Are you folks sing the rice hulls on top/bottom or both? It would appear to me that the top of the pipe is where they would be needed the most.

Crush your grain, add the rice hulls, and mix in before dumping in the pipe. Even distribution.
 
Crush your grain, add the rice hulls, and mix in before dumping in the pipe. Even distribution.

agreed...in my case I also mixed about a 1/4 lb into the cereal mash right out of the rice cooker when it was still easy to mess with. The minute it cools it turns into a big sticky blob, which fortunately is water soluble.

I also scattered a layer on the very top of the mash mostly because it made me feel better about putting 5ish lbs of soggy glue like gunk in the malt pipe. :)
 
I am thinking about making an insulation jacket out of an insulated camping sleeping pad which looks to be about similar thickness as the Speidel stock one. Obviously I need to make some nice slits and holes for handles and tap. How is the standard issue fastened around BM, is it velcro? Thanks.
 
Anyone got the copper lid for 50L they want to sell?
I've got one for the 20L, and other than inverting it for a funnel for filling the malt pipe, I find it's useless:
- during the boil condensation forms on it, and because it overhangs the vessel, the condensation drips around the vessel.
- as the boil begins, the copper hood greatly increases the chance of a boil over, and it's difficult to see until it's too late.

Don't waste your money, even though it is pretty when it's shined up.

I have the copper hood for my 20L BM which came with a rubber seal around the edge which makes a water tight seal on the top edge of the BM.

I place mine on the big U shaped bar so that I can keep an eye on the boil until the hot break has passed.

The primary reason for me to purchase the hood was to connect it via a 4" hose to an extractor fan to keep SWMBO happy, this unfortunately means you cannot smell the hops but we have to make some sacrifices if we are to brew in the cellar AND maintain marital harmony ;)
 
Thought the hole in the hood was big enough to prevent boil over. Dern, any 50L hood owners care to comment? Thinking would allow for less energy waste and more rolling boil. My 50L doesn't boil that hard even with jacket.
 
I have a cooper hood with the silicon gasket for my 20L. I posted a video several pages back showing a comparison of the boil with and without it. It definitely helps produce a vigorous boil but dealing with boil overs lead me to give it up. I tried a couple of the anti-foam solutions but it still caused me grief. It's solid as heck and makes a fine funnel. Ultimately mine is sitting in the garage gathering dust. If there's a 20L owner out there interested in one state-side shoot me a PM.

-Chris
 
Back
Top