NattyBrew's Electric Brewery Build

Homebrew Talk - Beer, Wine, Mead, & Cider Brewing Discussion Forum

Help Support Homebrew Talk - Beer, Wine, Mead, & Cider Brewing Discussion Forum:

This site may earn a commission from merchant affiliate links, including eBay, Amazon, and others.
I can just imagine this conversation at work...

"Hold on a second on kicking off this meeting Steve, my Saison is fermenting a bit high and I need to kick my fermentation fridge on. Okay, done. Now where were we in these expense reports?"

Gadgets like that are EXACTLY what I love about brewing your own beer. You can go as crazy in your own little world as you like! Awesome.
 
Sometimes...you just want what you WANT. Blichmann's are pretty slick....but there's pro's and con's to all. If it were me, I'd go with instawares pots (unmodified megapots) or the penrose kettles (when they come back in stock) and solder in fittings exactly where I wanted them. I did it on my build, and I've got a completely custom setup that does what I want it to. Weldless is cool, but soldering really is easy and the results are excellent.

have any of you thought about Stout Tanks and Kettles http://conical-fermenter.com/products/ welded and tri-clamp...
 
I can just imagine this conversation at work...

"Hold on a second on kicking off this meeting Steve, my Saison is fermenting a bit high and I need to kick my fermentation fridge on. Okay, done. Now where were we in these expense reports?"

Gadgets like that are EXACTLY what I love about brewing your own beer. You can go as crazy in your own little world as you like! Awesome.

Ummmmm....yeaaaaahhhh.....I've been meaning to talk to you about those expense reports.....:D
 
Matt, at first I though I had replied in this thread because of your -=Matt=-

however I soon realized it had been coined from me ;)

nice electric build you have going on. :mug:

-=Jason=-
 
Looks swell! Subscribed!


One question though, don't you mean "Flux Incapacitator"?

This actually came up when I was deciding the name in the first place, and after a few beers with some of my buddies we decided that it made a little more sense to alter "capacitor" as it's used in Back to the Future instead of using incapacitator. Plus I think that just doesn't quite roll of the tounge as nicely as incapacitor!

And Jason, didnt mean to steal your sign off man... I've borrowed it and now I am putting it back!

- Matt
 
Great job on the build!! Yea, this inspired me to redo my entire control box as well. I am going to be working on a new brew rig this spring...the control box will be moved over but it will also give me reason to re-vamp it as well.

Looking forward to seeing more on this! SUBSCRIBED!
 
Sounds awesome man, it's always exciting to have a new "project". I've found however that no matter what it is I've just finished there's always just that "one more thing" I could use to make my brewing process just a bit easier.

I am afraid after finishing this rig that could involve the training of live apes or maybe seals; not sure how my significant other would respond to that one...
 
...another Cincinatti Kal-clone brewer subscribed :mug:

Actually a hybrid because of the following changes:
  1. Purchasing Stout kettles w/HERMS option
  2. SERIOUSLY thinking of building 230V heatsticks - I've been using through-the-wall eKeggles for about a year now and however you slice it the bulky box and/or pigtail is a royal PIA if you need to carry/clean your pots.
  3. Using LabView/LabJack w/color touchscreen for control/monitoring

I just cleared my eBrewery room in the basement this past weekend and I'm starting the venting for the hoods ... next is running electrical and plumbing

Glen
 
Glen, welcome to the club! Be sure to keep up updated on your build as it progresses. Pics are a must.

Well in light of the fact that I am in the midst of purchasing my first home, I only could allow myself a small spend on a little progress on my build. I tackled putting the temperature probes together this week. It was a simple project, but I thought I'd share my progress. Here are a couple quick photos.

181652_10100655504645324_9314355_79095585_1794934_n.jpg


168000_10100655504999614_9314355_79095590_7235672_n.jpg


I also started looking at my list of parts from More Beer for all the plumbing projects and noticed that a lot of people were having trouble getting their hands on the stainless steel QD pieces, especially considering that More Beer is out of stock of the male pieces until March 21st! I was just aimlessly browsing Midwest Supplies a few nights ago and was surprised to see that they recently began stocking stainless steel QD's. Not wanting to get caught without them when I started to plumb up a few pieces in the next month or two I scooped up all the necessary male and female connections while they were available.

Just a little Stainless Steel beer pron for the peeps.

167496_10100655505313984_9314355_79095594_6873383_n.jpg


179020_10100655505583444_9314355_79095597_5641265_n.jpg


180512_10100655505857894_9314355_79095600_3244076_n.jpg
 
I got one of those light buzzer alarms from the guy on EBay...I noticed it was marked for 240 volts...can I use it running 110?

Any idea?


Congrats on the SSQDs!!
 
Not knowing exactly how the internals of that buzzer works I would say it would be fine, under the same premise that running a lower voltage through higher than needed gauge wiring has no real ill effects. The only thing I can think might happen is maybe a softer buzz from the alarm because its designed to be run on 220v instead of 110v?
 
Nice build on the probe cables. Progress is steady it looks like. Hopefully you're house purchase will finish up soon enough to give you time to concentrate on the build!

I finished mine all up recently and now I plan to do a little test run this weekend and see how everything works out. Keep us posted on your progress!
 
Yeah seriously, where are my priorities at? Electric build first, mortgage later!

I am looking at a closing date on my house of March 25th, and I seriously plan to drag 50' of 10/3 wire and some conduit as the first things through the door. I actually have a pretty nice spot for my brewery in the basement, its about an 8' by 8' room tucked away in the corner of the lower level. All it needs is power and little but of plumbing for the sink and it will be set to go.

Once I get a chance to swing by the house again soon I will snap some pics because I definitely will need some input from you all as to the best layout for the space.
 
Yeah, you'll have plenty of time for mortgage payments! Without beer, though, you'll realize just how much you're paying!

Looking forward to seeing the space you'll have there. That's about the size of my room but I'm only using about half of it to brew in and the other half to store beer and a keezer. You should have plenty of space. The guys that ran my electric for me were great. The whole thing, wire, breaker, and labor was only about $175 I think so a lot cheaper than I had planned on. I'm really happy with how things look and the last thing I have to do is redo the volt and amp panels since I blew the first ones. PITA!
 
Thanks vball, the expandable braiding is a little bit of a pain to work with but in the end they turned out pretty nice. The stuff reminds me of those Chinese finger traps I use to play with as a kid....they always drove me nuts!

And yeah, gotta keep saving those pennies a little bit at a time. I think my next chunk of saving will be getting the cash together to run the electric to my brew room as well as build the brew stand. I can't wait to get my hands on the new brew room and start putting it together.
 
@Natty: have you given thought to how your going to wire/install the elements. I'm interested in you reaction to my comments about in-tank v. heat sticks. Some of the peeps have done nice stick work -- and you don't have to put large holes in your new kettles. Inevitably you will need to clean/carry/move your BK and the electrical connection is always a pain to deal with. My current setup has a 2" PVC cap over the element connections (so it's comparitively small) with an 18" pigtail to a Hubbell weatherproof twistlok.

I'd like to devise a secure standoff to hold the heatstick securely so that its not obtrusive but can be easily removed for cleaning.
 
Yeah I've been contemplating that a lot actually because I definitely understand your point about a pigtail being a little bit of a PITA when trying to clean your kettles. I am definitely going to look into a couple of options to make my kettle connections on both ends of the cord if it is still feasible to make the one on the kettle end water tight.

For me right now I think its a catch 22 because if I could disconnect the cord completely at the kettle it would encourage me to rinse and wash my kettles like I do now by putting them completely into the sink and not caring about where the water goes inside or outside the kettle. Obviously if I were to do that I would want 150% confidence that ZERO water could penetrate my connection box which I am not entirely convinced is doable. In my mind right now at least with the pig tail I won't be an idiot and get my kettle completely soaked when cleaning it and therefore preserve the electrical connection better.

In therms of the sink that is exactly what I was thinking, though I don't think I will have enough room for a sink with a drainboard. I am going to wait until I move into to the new house and build my stand so I really can get a better idea what kind of space I am dealing with. It will work just fine for what I need, but it will need to be well planned and laid out to make my brew days go smoothly. After all that is why I am building a system like this, to make my beer better and my brewing more enjoyable!
 
Alright guys so I was able to get into the house and snap a few pictures of what will be my brewery room so I could get started on the layout. The problem I am having right now is coming up with a layout that will fit a sink at the end of the of the brew stand that will make the space easy to use. I also should note that installing a sink would require digging up the floor and adding a drain line since this corner room has no current drainage at all which is also currently a large deterrent from including a sink. I do have a laundry sink just around the corner from this brew room which wouldn't make it too hard to pick up and move the BK and MLT for cleaning. Anyway, if anyone out there wants to suggest or take a shot at helping with the layout it would be very much appreciated. I am sticking with something close to Kal's brew stand which is 68" long, 26" wide, and 36" tall. The box itself is 16" wide and would be mounted obviously on one of the walls. Anyway below is a drawing of the room itself, as well as one of my ideas for a simple layout. Let me know what you think!

Here is the room as it stands without anything:

182911_10100671865303434_9314355_79374339_8052699_n.jpg


And here is my favorite layout so far:

183108_10100671865393254_9314355_79374342_5640018_n.jpg


And below are photos as the room stands now. I will be removing the framed closet in the corner and have only bare concrete walls in the corner you see in the photos. Here is the entrance to the room:

183540_10100671905243394_9314355_79375148_4154421_n.jpg


And another shot of the entrance door:

181728_10100671904190504_9314355_79375130_5901086_n.jpg


Wall directly straight in from door with glass block window:

183132_10100671903137614_9314355_79375106_7129567_n.jpg


Just a shot of the glass block window I will be using for ventilation. I will be installing two dryer vent squares on each end of the middle row, one for the exit air and the other for make up air.

183188_10100671904499884_9314355_79375136_3696398_n.jpg


Shot of wall to the left of the door where I plan to place the brew stand and panel to the left.

181568_10100671903631624_9314355_79375116_1417869_n.jpg


The small bump out in the corner of the wall that throws a little wrench in the works in terms of making things fit nicely:

181760_10100671903941004_9314355_79375122_586109_n.jpg


Temporary wall where doorway is framed. Separates the room from the area where the furnace, water heater, and other stuff is located.

181732_10100671904849184_9314355_79375143_394296_n.jpg


And lastly a shot back out of the room towards the door which you enter from the basement. The furnace, water heater and other stuff is on the other sides of the wall and to the right.

184856_10100671903337214_9314355_79375110_3812378_n.jpg
 
I just purchased Kal's e-book today and have been going through it. Im still just completely torn between dropping t he 5-6K on a B3 Brew sculpture or putting one of these together. My only issue is that I am not mechanically inclined at all so putting all of this together seems a daunting task when I could just get a ready to go system. Any thoughts? I also already own 3 Blichmann 10 gallons kettles so that cost is being subtracted.
 
I just purchased Kal's e-book today and have been going through it. Im still just completely torn between dropping t he 5-6K on a B3 Brew sculpture or putting one of these together. My only issue is that I am not mechanically inclined at all so putting all of this together seems a daunting task when I could just get a ready to go system. Any thoughts? I also already own 3 Blichmann 10 gallons kettles so that cost is being subtracted.

To be honest it really isn't all that hard. There are a few parts of the process which take some general project knowledge but Kal does such an excellent job of describing/laying out the steps its painless to follow. If you already have downloaded his e-book and aren't completely overwhelmed by reading through it I think you should go for it.

That being said, I still think you should understand what your are doing especially in terms of the wiring and the control panel. Kal's directions are great, but blindly following the directions without really understanding what you are doing isn't a dynamite idea. He is planning to sell whole systems and components via a US manufacturer soon so maybe if you aren't feeling confident you should just keep your eye out for that. Either way you go, show us your progress and/or new toys! Pics are a must!
 
And so it begins!

First up my newest delivery which showed up on Friday:

199375_10100730190159954_9314355_80288551_3103443_n.jpg


206264_10100730190589094_9314355_80288558_3302883_n.jpg


I am going with the same fan used by Kal in his build not only for the nice 10 year warranty, but I also have a similar length run in my brew room and the 450 cfm should be plenty adequate for my ventilation needs.

I closed on my first home on Friday which gave me official access to my future brew room. Of course, this meant the first wall in the brew room had to come down the same day! Here's a quick before shot:

183540_10100671905243394_9314355_79375148_4154421_n.jpg


And after:

198037_10100730192001264_9314355_80288570_5778763_n.jpg


206583_10100730193039184_9314355_80288579_2418927_n.jpg


208888_10100730192515234_9314355_80288574_1681187_n.jpg


I am sticking with the layout I discussed in previous posts, with the brew stand on the wall to the left in the first picture and control panel mounted in the back corner of the room. I am in the process of rebuilding the wall which divides the water heater and furnace from the rest of the room, though the new wall will form less of a door and serve as more of a divider between the two spaces.

I am having the glass block window on the back wall being modified to include a 4" dryer vent square for exhaust, as well as a two block wide vent for fresh return air. While I will not have a sink in the brew room due to the time and money required to run the plumbing, I am having a cold water line run in the new dividing wall being built which will have a hose spigot on the end. This will allow me to fill my HLT via a much shorter hose without having to run one from a sink on the other side of the basement. I do have a floor drain to use which is currently used to route condensate from the A/C unit that should serve my purposes well.

I hope to have some pretty serious progress on the build here in the coming weeks, including the next step of running the 240v electric, building the stand and vent hood, running the exhaust, etc. Stay tuned for more frequent updates as the build progresses!
 
Congrats on closing on that house! Now the fun really starts.

I've done three batches on my stand now and am very happy with the ease of the system and the product in the end. It is so much freakin easier than what I was doing each time with propane on my brutus stand.

Good luck with the start of the construction phase and hopefully you'll be up and brewing in no time! If you need an electrician for the 240 line let me know and I can set you up with the group that did mine. The line, labor and 30a breaker was about $175 total. The guy is a commercial electrician that's laid off now and doing all kinds of residential work but this was right up his alley and what he did for a living. Nice guys that ended up doing several different projects for me in the end. Anyways, hope it all goes well and looking forward to progress pictures!

Doug
 
Thanks! I was super pumped when my realtor showed me all the extra rooms that came with my brew room. Apparently it was part of some "housing package" special that they were running. I guess the deal was if you bought a brew room it came with three bedrooms, a bathroom, and even a kitchen! Pretty nice arrangement if you ask me :)

On a side note, anyone had experience learning how to solder copper plumbing on their own? I got a quote for what amounts to a 5 foot or so run of pipe so I can have a hose spigot for water in my brew room and it came out to $250-$300. I know the price of copper is super high, but for that much I think I might try and tackle it myself. Any advice from you DIYers out there??
 
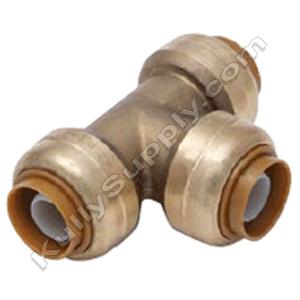
If it's code in your area you can cut the copper, install a push-on SharkBite to CPVC (or PEX) transition and do the rest w/o soldering. SharkBite is expensive, but so worth it in terms of convenience.
 
I actually have seen the PEX product in several homes and it came to mind when I thought about doing it myself. I would have to buy a torch, solder, and flux to install a copper "T" to tap into the water line nearby still though right? I will need to look into local code to see if that's allowed but running the flexible PEX would mean almost no fittings on my short run and probably WAY easier for me to accomplish.
 
No you shouldn't need a torch. Cut about 1-1/2" (you'll have to check) out of the copper line and press the ends into a SharkBite T. Then you are good to go PVC/PEX out the tee.
I'm in Warren County (OH), and I'm know we can use copper, CPVC or PEX. And the SharkBites are code too. You can get them at HD. And, I might suggest CPVC for that run -- if you go PEX, you'll need a special $30 tool (or $12 at Harbor) to crimp the PEX clamps. But you can re-use the tool -- I use 1/2" PEX clamps on my silicon hose -- much easier on the hands than stepless clamps.
 
Vball thanks for all the info, I think I will most definitely go the route you have described. Can CPVC be used with the Shark Bite "T" fitting I would be using? If so that would pry be supper easy to run having to only solvent the CPVC fittings together. Thanks again for the help.

Matt
 
Haha, thanks Kal. I am doing my best to keep my build as clean as yours. As I've said many times before, without your site this electric build would still be floating around somewhere in the nether regions of my mind.

I hope to really get rolling on the brew stand and vent hood build here soon so hopefully I will have plenty of updated pics coming for everyone here on HBT. Stay tuned!
 
Just a shot of the glass block window I will be using for ventilation. I will be installing two dryer vent squares on each end of the middle row, one for the exit air and the other for make up air.

183188_10100671904499884_9314355_79375136_3696398_n.jpg
Careful with recirculation: The in and out will be fairly close so you'll likely get some of the outgoing humid air just coming right back in. Especially true if the window's recessed down low (which it appears to be (?)). I would extend the input vent out and down and/or to the side away from the output vent.

I talk about this a bit here: http://www.theelectricbrewery.com/ventilation?page=6
(see last bullet in the list)

Kal
 
Back
Top