Stupidly effective keezer dessicant hack

Homebrew Talk - Beer, Wine, Mead, & Cider Brewing Discussion Forum

Help Support Homebrew Talk - Beer, Wine, Mead, & Cider Brewing Discussion Forum:

This site may earn a commission from merchant affiliate links, including eBay, Amazon, and others.

day_trippr

The Central Scruuuutinizer
HBT Supporter
Joined
May 31, 2011
Messages
44,285
Reaction score
31,977
Location
Stow, MA
Even with a tight lid gasket and silicone sealant closing up the holes for the CO2 and the 12 volt feed to my tower cooler, when the humid season arrives my 10cf keezer is afflicted with puddled condensation that's a pita to mop up every few weeks. So I had picked up one of the popular Eva-Dry E-500 "dehumidifiers" in the hope that it would suck up the humidity.

I had emptied the keezer of all six kegs, dried it out to the proverbial bone, then reloaded it and set the E-500 in the middle of the keezer floor. But after just two weeks of use it was clear that it simply didn't work much if at all. The indicator showed the same blue color as it had when I took it out of the sealed package, and there were puddles beginning to form again.

After thinking a bit about this a bit, and realizing there was virtually no air movement within the keezer, I decided it would be worth a simple hack to see if I could improve the performance of the little beast by forcing air through it with a small 12v fan I had in my parts bin.

As there's an electric coil within the Eva-Dry that is used to heat up and dry out the desiccant, I didn't want to risk damaging that by driving screws into its case, so I used a piece of Velcro to stick an 80mm fan to one side of the case.

ab_june_16_2012_02.jpg


ab_june_16_2012_01.jpg


I daisy-chained the fan to the 12V feed to my tower cooler fan, set it back in the middle of the keezer floor, and waited to see what happened.

The result has been amazingly transformative: that 80mm fan really stirs the air inside the keezer and drives it right into the drier, and the keezer has remained puddle-free for three weeks now. As I was drawing a bed-time pint of my favorite Imperial Stout tonight I checked the indicator on the Eva-Dry and it was definitely turning pink, indicating it was doing its job.

So I figured I'd run the overnight drying cycle on it and take a couple of pics to post up here, in case anyone else has had a less than impressive experience with these little guys. A simple fan turned what was essentially a brick into something very useful indeed...

Cheers!
 
Awesome, i'm going to try that out.

Edit: a couple thick rubber-bands work well to attach the fan (the adhesive velcro i had wasn't sticky enough).
 
Here to report back. After a day there are no signs of condensation in my keezer and the little crystals are now a faint pink. Normally it would would take weeks to for the unit to absorb that much water. Great thread!!
 
fwiw, I've found that this size Eva-Dry is good for ~5 ounces of moisture before its effectiveness falls off sharply. By the time the indicator is obviously "pink" it has absorbed at least four ounces of moisture (a half cup - not insubstantial) and pushing too much further in my case means seeing frozen beads to start appearing on the keezer walls.

But driven with the close-coupled fan it does work well, I have to say. Worth the investment for sure...

Cheers!
 
I know this is a couple of months old, but I'd like to report that this solved my issue as well. Nothing was working, I bought the Eva-Dry 500 (for $6 after using my saved up ebay bucks) and velcroed an 80mm fan to it as described in this post. After 8 hours, the humidity in my keezer went from 100% to 25%.
 
Will be giving this a try as soon as my eva-dry arrives. Plus it will help move air around, keeping the temp in my keezer more evenly distributed since I don't have a fan in there yet.
 
Had cause to revisit this thread.

I should have noted that I had/have a 120mm 12vdc fan running half-speed to generally keep the air inside the keezer stirred up, but that had zero benefit wrt the Eva Dry (I didn't want to have the drier blocking the stirrer). Hence the dedicated fan..

Cheers!
 
I wired it to the 120mm fan supply, yes.
They both run at ~9VDC instead of the full 12VDC as there's no need for tornado force, just movement.

My tower cooler runs at the full 12VDC because it's just a wee 40mm thing and needs all the gas it can get ;)
So I have two voltage rails running into the keezer...

Cheers!
 
I noticed the image links are broken for who knows why, and I wanted to reference this thread in another, so here are the original pictures...

ab_june_16_2012_02.jpg

ab_june_16_2012_01.jpg

Cheers!
 
Have you determined how the moisture is getting into the keezer in the first place? Is your door seal making full contact with the collar, or are you opening door on a daily basis? I only open my keezer when its time to replace a kicked keg, and I have never had problems with humidity (of course it takes me a couple months to drink a keg of beer!!!)
 
Sure. It's a combination of simple physics combined with ambient conditions.

With the metered tap list I always know how much beer is behind each faucet, so I never have to open the keezer except to change kegs. And that's not THAT often, maybe once a week tops.

I don't think anyone claims they're selling an air-tight chest freezer, and this chest freezer is no exception (as was it's predecessor). Considering there's 13 cubic feet of air inside less what's displaced by the kegs, when the interior air goes from say 45°F down to 25°F during a cool-down cycle it's going to be pulling exterior air through any teeny little gaps there are to keep the interior pressure at 1 atmosphere.

From roughly November through May there's no big problem because the air is dry, but once the humidity rolls in, there will be condensation. It's unavoidable - though having the keezer in the basement probably doesn't help ;)

The fan-driven Eva-Dry can keep up with that; without the fan it was totally useless...

Cheers!
 
This is as relevant a thread as any to post this.

Last night I pulled the two Eva-Dry units out of my keezer (both are a couple of years old now) and they were ready for the drying cycle, both holding ~ 4 ounces of moisture after around 2 weeks in the keezer (it's been humid here). So I plugged them into a bus strip in my shop before I went to bed.

Around 10 hours later this morning I gave them a shake - while still plugged in - and one of the two units had a momentary internal short circuit that totally tripped a 20A breaker in my workshop :eek:

Later I checked the internal resistance of both units and they're comparable - between 500 and 600 ohms - so somehow I didn't manage to burn through the internal wiring (likely a loop of Nichrome). I also set the meter for a continuity alarm and shook the hell out of "Sparky" but couldn't inspire another short circuit. Maybe the wire needs to be hot/flexible enough.

Anyway, I marked the suspect unit and will give it extra attention on the next dry cycle.

So, I guess the message here is "Don't Shake The Eva-Dry!" :D

Cheers!
 
day_trippr,

Do you have a build thread on your tower cooler? I am installing a 4 tap tower on my new freezer unit and would like to run a similar setup as you. My old keezer had mold issues from condensation and I wanna avoid that with the new unit. (Also didn't help my old unit was previously used as a fermentation chamber and molded after the first two batches). I'm staring from new on everything so I have this tower and I am getting this freezer. Any suggestions. My unit is in a garage that get super hot (115+) and gets to (mid-high 30s in winter).
 
I've posted some of these somewhere on HBT but never the series.
What the heck, storage is cheap, I'll dump them here :D

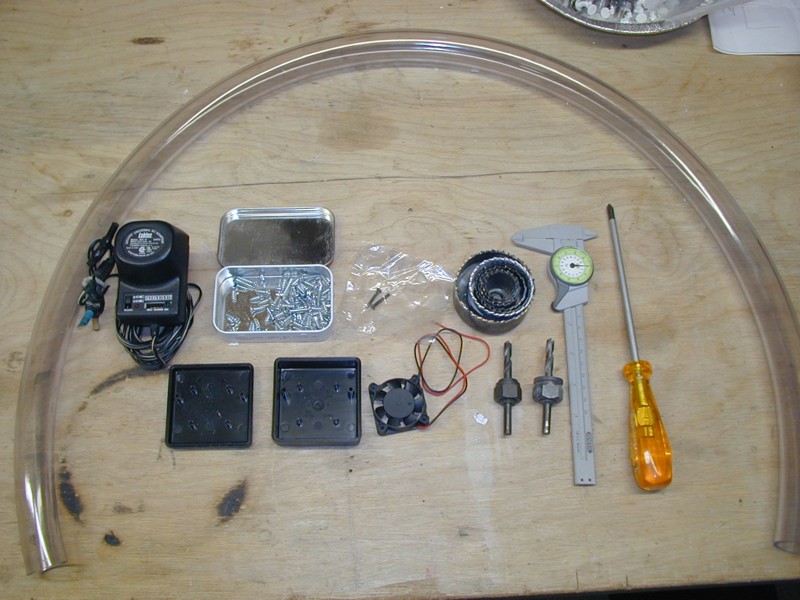
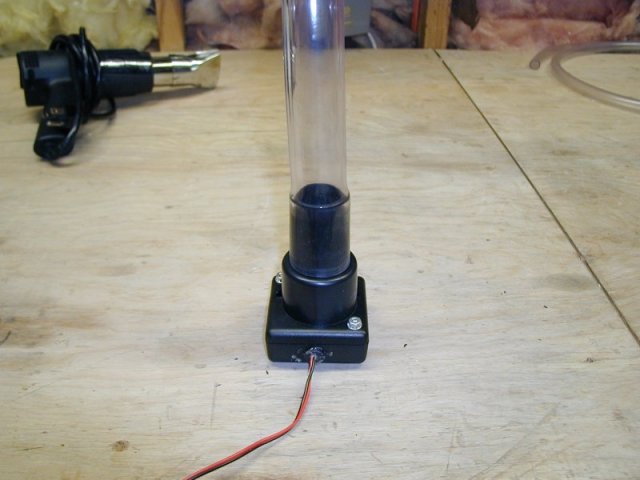
So this was the first iteration. All the bits used are shown. The plastic box was of arbitrary size large enough to fit the 12VDC 40mm ball bearing fan, the tubing is 1" ID/1-14" OD vinyl. The wall wart was scrounged from my junk pile.

tower_cooler_01.jpg


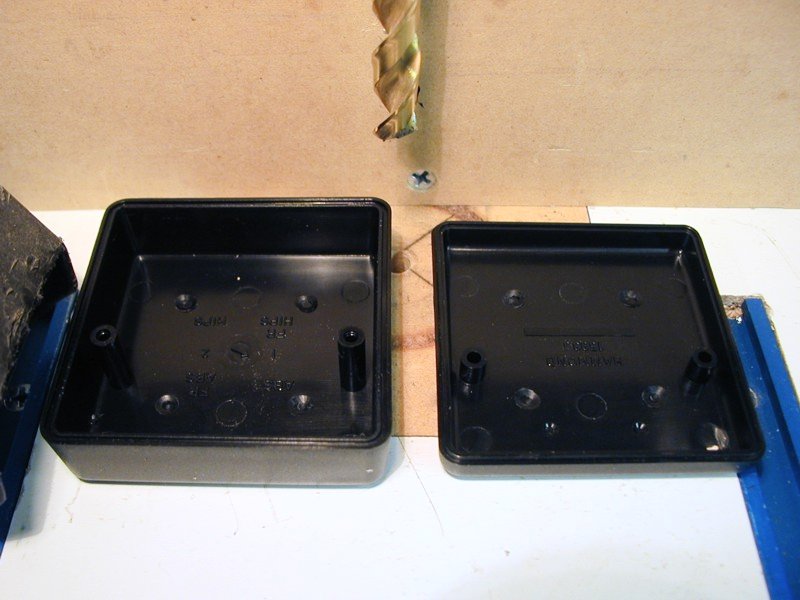
There were some posts sticking out on the inside that I milled down with a drill bit so the fan would lay flat.

tower_cooler_02.jpg


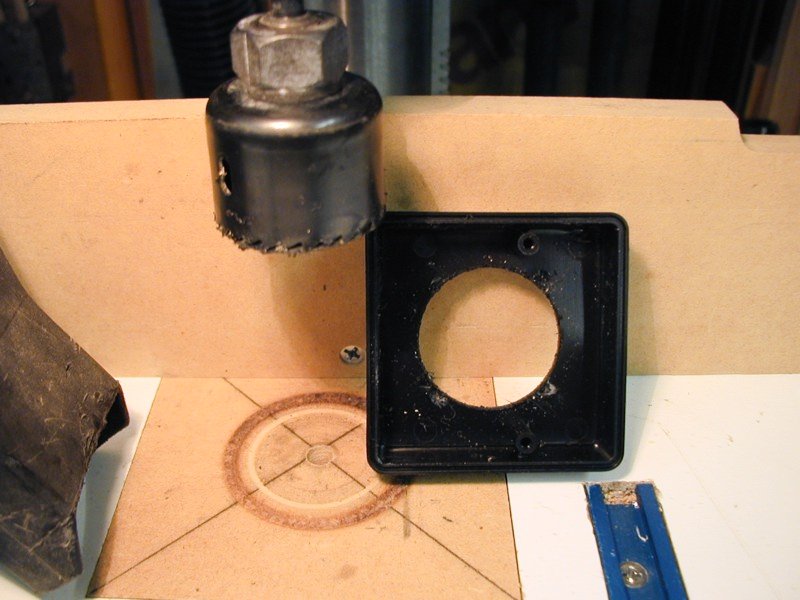
Cut a hole the same size as the fan housing ID.

tower_cooler_03.jpg


Centered the fan, marked the mounting holes and drilled screw clearance holes in the case to suit. The short sheet metal screws were sized to carve into the fan mounting holes directly, so no nuts required. Added a grommet for the wire as well.


tower_cooler_04.jpg


Drilled the other half of the case with a 1-1/4" hole saw so the vinyl tubing was nearly a press-fit.

tower_cooler_05.jpg


Added a schmear of silicone caulk.

tower_cooler_06.jpg


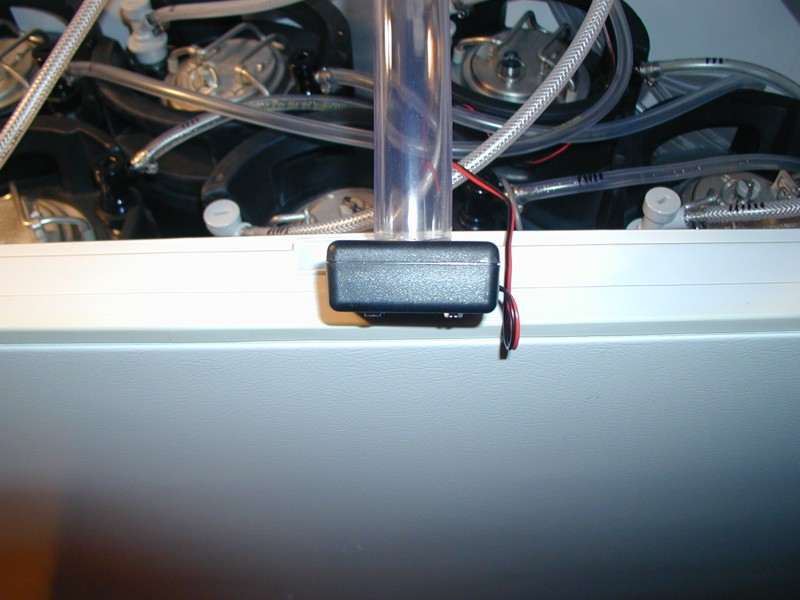
All assembled.

tower_cooler_07.jpg


A couple of years later I found this 1-1/2" to 1-1/4" small shop vac adapter in Lowes.

tower_cooler_11.jpg


I thought the wider interface to the fan box might be a bit less restrictive, so I widened the hole on the non-fan side of the case a tad then stuffed the new fitting through. A bit of heat gun treatment to the tubing and it stretched over the 1-1/4" fitting end nice and tight.


tower_cooler_12.jpg


I had no way of quantifying any change in the flow but I think it looks cooler at least :D

So there you have it. Hope you find it useful...

Cheers!
 
Last edited:
I've posted some of these somewhere on HBT but never the series.
What the heck, storage is cheap, I'll dump them here :D

So this was the first iteration. All the bits used are shown. The plastic box was of arbitrary size large enough to fit the 12VDC 40mm ball bearing fan, the tubing is 1" ID/1-14" OD vinyl. The wall wart was scrounged from my junk pile.

View attachment 587365

There were some posts sticking out on the inside that I milled down with a drill bit so the fan would lay flat.

View attachment 587366

Cut a hole the same size as the fan housing ID.

View attachment 587367

Centered the fan, marked the mounting holes and drilled screw clearance holes in the case to suit. The short sheet metal screws were sized to carve into the fan mounting holes directly, so no nuts required. Added a grommet for the wire as well.


View attachment 587369


Drilled the other half of the case with a 1-1/4" hole saw so the vinyl tubing was nearly a press-fit.

View attachment 587370

Added a schmear of silicone caulk.

View attachment 587371

All assembled.

View attachment 587372


A couple of years later I found this 1-1/2" to 1-1/4" small shop vac adapter in Lowes.

View attachment 587373

I thought the wider interface to the fan box might be a bit less restrictive, so I widened the hole on the non-fan side of the case a tad then stuffed the new fitting through. A bit of heat gun treatment to the tubing and it stretched over the 1-1/4" fitting end nice and tight.


View attachment 587376

I had no way of quantifying any change in the flow but I think it looks cooler at least :D

So there you have it. Hope you find it useful...

Cheers!

Awesome. What did you hook the power up to? Seems silly but how do you run the pvc tubing in the tower to maximize cooling? I’m a newb of this kind of stuff. Never had a tap or tower other than picnic taps.
 
I ran the wire from the wall wart into the keezer through the back edge of the lid then through the lid liner to the cooler fan, but the wire is so thin you could get away with pinching it between the lid gasket and the cabinet.
The tubing is stuffed up the T-tower column with the six beer lines tie-wrapped around it.

brewpints_46.jpg


I position the tip of the cooler tube half way into the faucet box, and there's enough gap area between the lines to serve as the air return. The fan is about mid-point when the lid is closed, and I have a 120mm fan keeping the cabinet air stirred up...

Cheers!
 
Back
Top