mplutodh1
Well-Known Member
Preface:
This project began, as many home brewing projects do, as a discussion over a few beers, debating the possibilities, costs and rewards of building a small scale brewery as a family. A father, the engineer, and two sons, the oldest of which is project driven OCD, the other the fun loving jokester who would rather brew and drink then design and build. Well, combine the three of us, a passion to brew more, consistent and higher quality brews and we're bound to spend some money and time and build something.
The Brewery at a Glance
With inspiration coming from the designs and ideas of several brewers throughout the world, we've taken our favorite aspects of what we've seen, tweaked and added a few of our own touches.
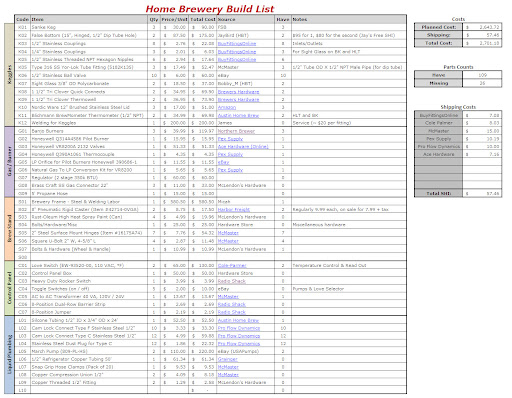
DRAFT List - I'll continue to update as we move through our build and will post our final build list with prices, links, and part numbers were applicable at the completion of the build.
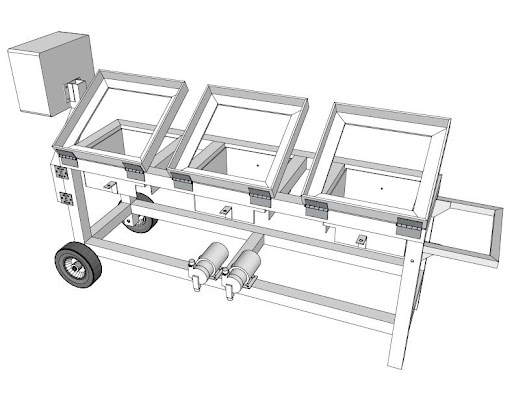
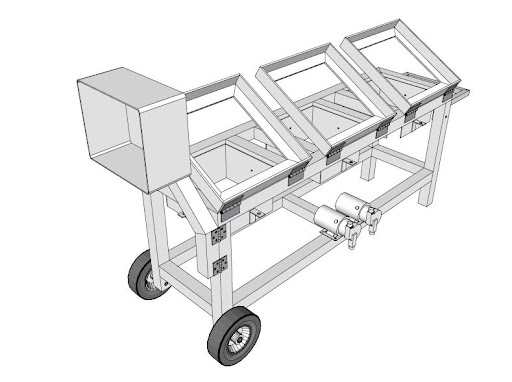
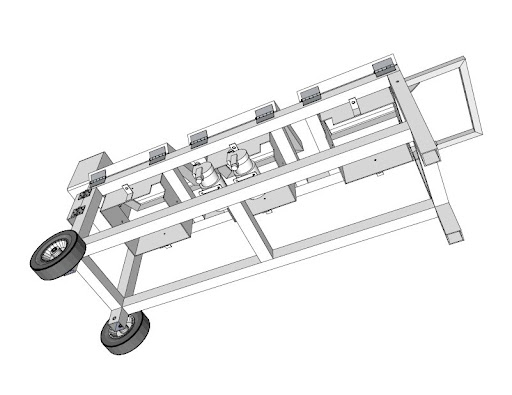
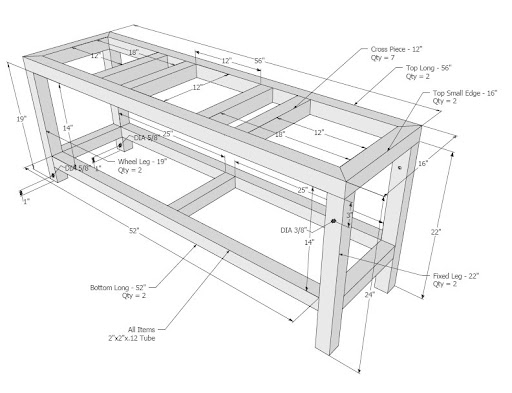
Brewery Design Mock-Up
See Post #2 in this thread.
Brewery Process Diagrams
Coming Soon...
Photos

Updates:
[November 23, 2009] - I plan to update this thread as we move through our design, build and brew process with our brewery.
[November 27, 2009] - Added 3D model sketch (will add Sketch-Up files at a later date for anyone interested)
[December 15, 2009] - Added updated 3D model (I'll clean up all the models at the end and update this thread with all the "FINAL" images)
[December 18, 2009] - Updated build list to reflect some recent decisions around our quick disconnects, gas control, and welded fittings.
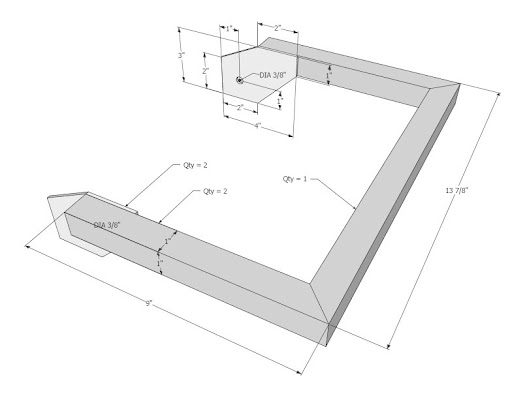
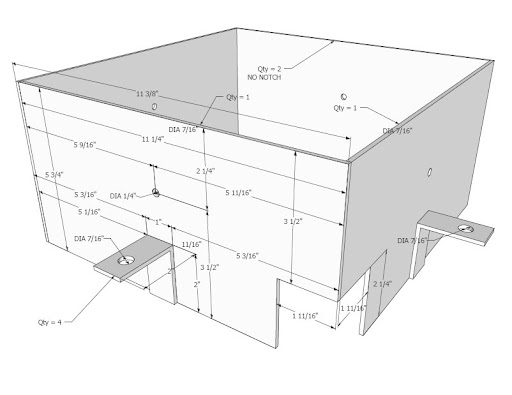
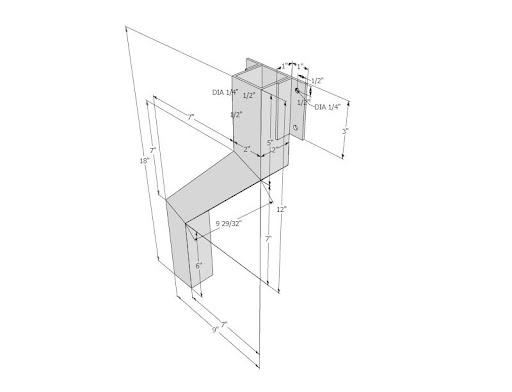
[December 21, 2009] - Added Final Drawings, measurements & multiple angles.
[January 4, 2010] - Gave the green light to our welder to order the frame materials from the metal supplier and begin welding.
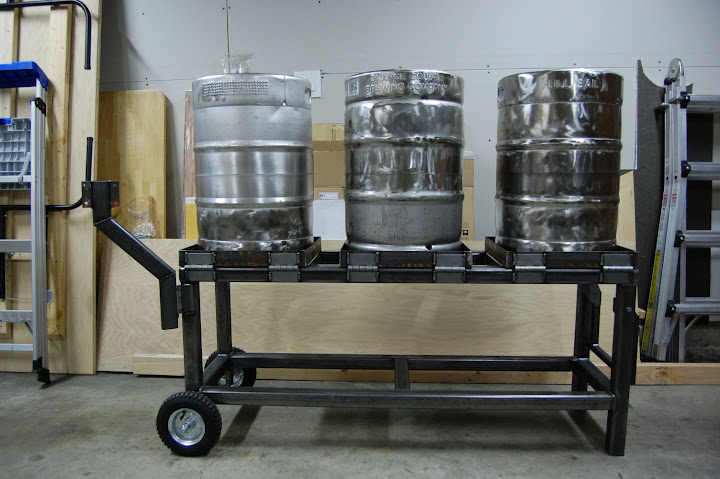
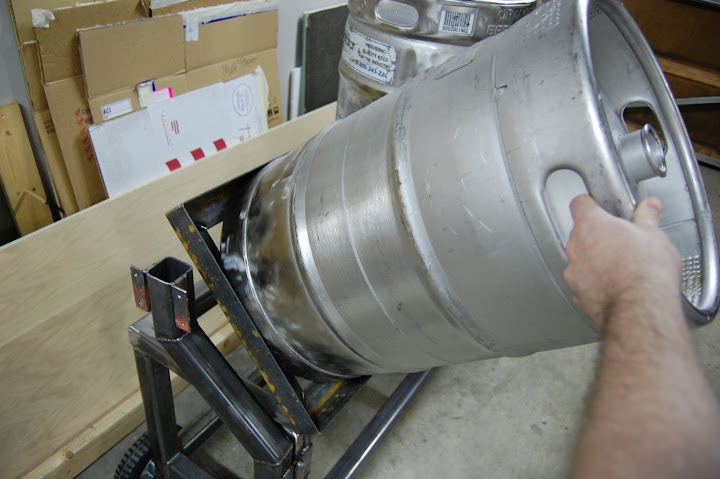
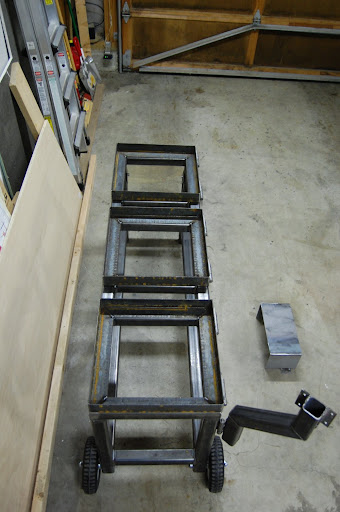
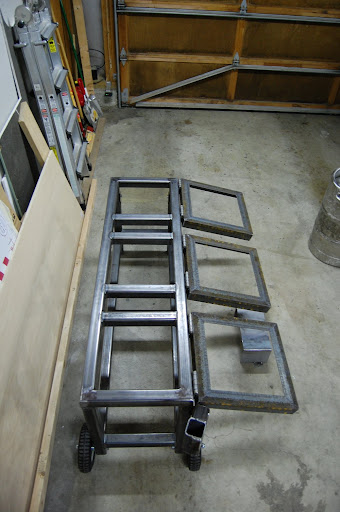
[January 20, 2010] - Updated build list with most recent parts, prices, etc. Posted the first photos of our build progress. Picked up the stand from our welder tonight and bolted on the wheels and handle.
[February 6, 2010] - Keg tops cut off and lids fitted.
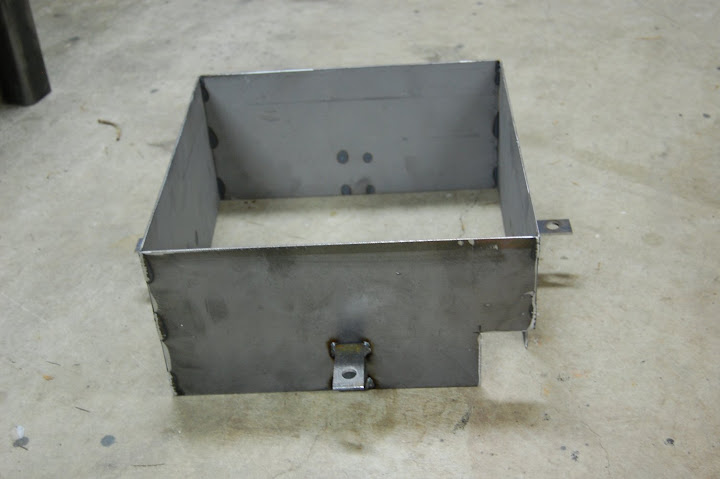
[February 22, 2010] - Control panel box mounted, kegs drilled and bolted to tippy trays, burners mounted to the burner boxes, HERMs coil wound.
[March 1, 2010] - Burner boxes mounted, more gas plumbing fitted.
[March 14, 2010] - Drilled kegs and prepped for welding.
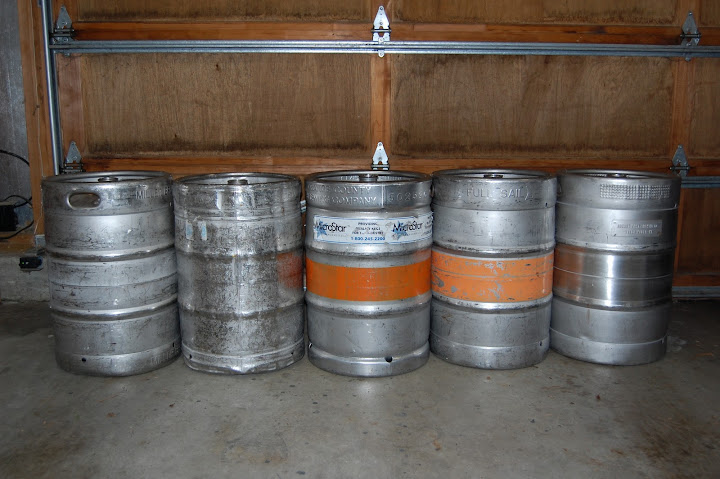
[April 4, 2010] - Received the kegs back from GreenMonti and dry mounted the fittings.
[April 10, 2010] - Completed gas assembly, installed fittings to tuns, built pump brackets and mounted pumps, assembled HERMS coil and dip tubes, cut and assembled fluid hoses.
[April 17, 2010] - Electrical build day; mounted switches, Love controllers and timer to control panel; fired up the power for the first time and everything seems to be working.
-------------------------------------------------
Thank You
Thank you for the inspiration, design ideas, education & assistance:
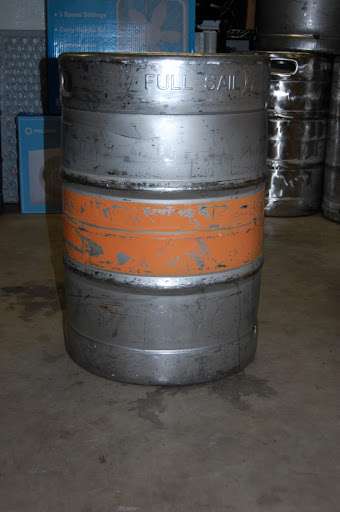
HomeBrewTalk.com, Kladue, Sawdustguy, Jaybird, Bobby_M, Nicksteck, Snake10, Doug Cameron & Full Sail Brewing Co., GreenMonti
Also, special thank you to our welder, Micah.
.
This project began, as many home brewing projects do, as a discussion over a few beers, debating the possibilities, costs and rewards of building a small scale brewery as a family. A father, the engineer, and two sons, the oldest of which is project driven OCD, the other the fun loving jokester who would rather brew and drink then design and build. Well, combine the three of us, a passion to brew more, consistent and higher quality brews and we're bound to spend some money and time and build something.
The Brewery at a Glance
With inspiration coming from the designs and ideas of several brewers throughout the world, we've taken our favorite aspects of what we've seen, tweaked and added a few of our own touches.
- Single tier, wheelbarrow style for mobility
- Low profile design
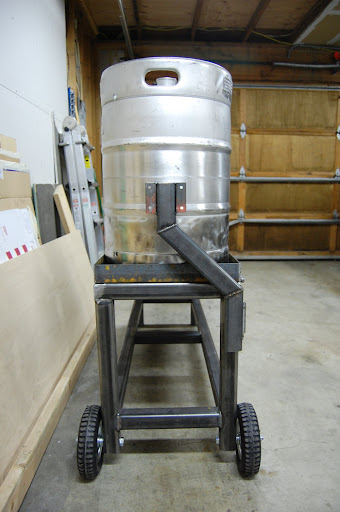
- Tilting mounts for kettles for easy cleaning
- HERMS design w/ability for direct fire on all kettles
- 3 Keggle brew kettle system
- 2 March pumps for wort / liquid transfer
- Propane fuel for mobility
DRAFT List - I'll continue to update as we move through our build and will post our final build list with prices, links, and part numbers were applicable at the completion of the build.
Brewery Design Mock-Up
See Post #2 in this thread.
Brewery Process Diagrams
Coming Soon...
Photos
Updates:
[November 23, 2009] - I plan to update this thread as we move through our design, build and brew process with our brewery.
[November 27, 2009] - Added 3D model sketch (will add Sketch-Up files at a later date for anyone interested)
[December 15, 2009] - Added updated 3D model (I'll clean up all the models at the end and update this thread with all the "FINAL" images)
[December 18, 2009] - Updated build list to reflect some recent decisions around our quick disconnects, gas control, and welded fittings.
[December 21, 2009] - Added Final Drawings, measurements & multiple angles.
[January 4, 2010] - Gave the green light to our welder to order the frame materials from the metal supplier and begin welding.
[January 20, 2010] - Updated build list with most recent parts, prices, etc. Posted the first photos of our build progress. Picked up the stand from our welder tonight and bolted on the wheels and handle.
[February 6, 2010] - Keg tops cut off and lids fitted.
[February 22, 2010] - Control panel box mounted, kegs drilled and bolted to tippy trays, burners mounted to the burner boxes, HERMs coil wound.
[March 1, 2010] - Burner boxes mounted, more gas plumbing fitted.
[March 14, 2010] - Drilled kegs and prepped for welding.
[April 4, 2010] - Received the kegs back from GreenMonti and dry mounted the fittings.
[April 10, 2010] - Completed gas assembly, installed fittings to tuns, built pump brackets and mounted pumps, assembled HERMS coil and dip tubes, cut and assembled fluid hoses.
[April 17, 2010] - Electrical build day; mounted switches, Love controllers and timer to control panel; fired up the power for the first time and everything seems to be working.
-------------------------------------------------
Thank You
Thank you for the inspiration, design ideas, education & assistance:
HomeBrewTalk.com, Kladue, Sawdustguy, Jaybird, Bobby_M, Nicksteck, Snake10, Doug Cameron & Full Sail Brewing Co., GreenMonti
Also, special thank you to our welder, Micah.
.