Let the build begin... e-keggle starts NOW

Homebrew Talk - Beer, Wine, Mead, & Cider Brewing Discussion Forum

Help Support Homebrew Talk - Beer, Wine, Mead, & Cider Brewing Discussion Forum:

This site may earn a commission from merchant affiliate links, including eBay, Amazon, and others.

BigFloppy

Well-Known Member
Joined
Aug 28, 2013
Messages
885
Reaction score
117
Location
Marietta
hardware:
18x13x6" aluminum case http://www.harborfreight.com/18-x-13-x-6-aluminum-case-69315.html
various switches / indicators

1x Rims Tube
1x Chugger
25ft x 1/2" silicon hose mcmaster 3038K26
1x HD mash tun
2x Auber 2532 PID controllers
1x Auber JSL-73A multi-timer
1x cheapie ebay pid for mash monitoring (ala Kal's system)
10g Bayou Classic boiler

5G Moose Drool to keep us going :mug:
 
If you haven't already bought the ebay PID I think you'd be better off with a phase angle SSR to control your boil with a manual knob. Use the two Auberin units for your MLT and HLT.

That's my plan except I'm going to use a BCS-460 instead of multiple PIDs
 
I couldn't source the crimp forks for installing into the Auber PID cheaply BUT I did have some other forks available that were just a little too big to fit as a real fork.

SO...

modified_forks-61537.jpg


and here's what they look like once installed
installed_forks-61538.jpg
 
Personally, I'd try to find the right connector, but if you put them on the other side, they'll pull in instead of pushing out.
They don't pull or push, they are sandwiched between the moving plate and static bottom connector
 
Didn't have the nice U channel cable conduit BUT did have some Cable Tubing Conduit so I put it to use. It will be tied down using tie-wrap mounts and tie wraps.

Can you spot my major "oops" from this picture (the space is there for an additional needed PID, that's not the oops)?

yellow_cable_tidy-61539.jpg
 
At least I have my choice of styles of DIN connectors from previous DIY builds, I way over-bought on these but got them at the right price a couple of years ago, now they will get the proper usage they demand. WAGO ROCKS

Just push a screwdriver into the Square hole and the round hole is where the cable goes, pull the screwdriver out and the cable is locked in place

din_connectors-61540.jpg
 
Because the DIN terminals I have are majority "push-fit" - Ferrules are definitely the way to go...
Strip the wire, put the copper strands through the hole in the ferrule and crimp away, much easier than trying to solder the wire to get an effective solid strand

ferrules_rock-61541.jpg
 
What color goes where on 110V wiring?

USA Wiring:
Black = Live = Gold Colored connector
White = Neutral = silver connector
Green = Ground = Green Connector


AH, but my cable colors are Brown, Blue and Green/Yellow... now what?
Brown = Live
Blue = Neutral
Green = Ground
 
You've been busy! Are the PID's installed in the box, I bet it looks cool with the lid shut. Floppy and I have worked together on his build a little, its going to be a nice brewery when finished. As for the wire color, it really doesn't matter what color you use for what as long as you keep it uniform all the way through so you don't get confused and straight wire a neutral or ground to a hot terminal (think of the fourth of July!!). In my setup I used only black wire, and used color marking tape to keep them straight. Good luck bro!
 
LUCKILY for my wiring, SWMBO cut through a HUGE long extension cable with electric shears. I pressed it into service by extracting the physical cables to make correct wiring colors throughout the assembly.

I'll be using Cat6 cable for RTD-in and Alarm-out wiring so each PID can effectively be separated by a single "core" of 8 cables with some of them being unused
 
The Multi-tool came in extremely useful for cutting straight holes, Harbor Freight was definitely my best friend for this.
The circular saw bit is rated for cutting through aluminum, it also served as a great guide for the plunger bit

Check, re-check and check again before you cut because it can't be undone... has anyone spotted my big oops moment yet?

multitool-61546.jpg
 
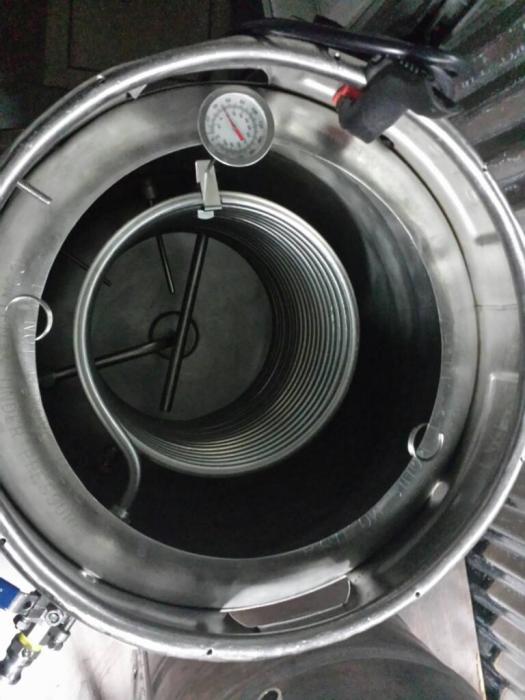
ok, it's not a keggle just yet... this build is for my daughter's boyfriend, he needs help in the biggest way but he's not ready for Full herms system so he's starting with a (Christmas gift) rims courtesy ebay # 111031228636 @ under $100 delivered and a $6 1500w Amazon special 110v heater element

k_mcarthur did his magic making the electrical box for me (dunno how I can thank you on this Kevin) but it tested waterproof first time with ZERO leaks !

Additional info: Junior is getting regular QD's because I picked up some a while ago from here.., my keggle will use camlocks

"HINT on the major oops" the case is open before being sliced and diced

20131123_094022-61547.jpg
 
7/8: hole saw makes light work of holes for 110v female connectors poked through the side of the case for heater and pump

THIS shows my big "oops" - does it make sense yet?

20131201_154141-61549.jpg
 
im all green with envy you are much further than I am with your build, I have not even gotten switches yet.

But im doing gas so I have a lot of parts to source
 
I'm still waiting for my din mount inline fuse (not really needed but always a good idea to fuse things), main inbound power socket and some indicators to arrive before can finish
 
Looks like one of your thermocouples is wired backwards.
good call on wired backwards

Interesting phenomenon when you wire K type thermocouples backwards... when physical probe temperature increases, temperature display decreases

That's not the oops though
 
tiny little pump arrived yesterday, he's going to be using this rather than the chugger

greatbreweh_pump-61561.jpg
 
Received the cheapie rex-c100 pid off eBay today.... bummed out, will only display C not F, put complaint in with eBay to get refund :(
YEAH, would do as a straight monitor and himself can handle the conversion factor from C to F - works for him = good for me
 
you put the hinge at the top of the panel rather than the side?
ding ding ding - we have a winner!

I cut the holes in the case nearside the hinges rather than other side of top of case dammit!

If you're doing a build of your own and want/need some DIN connectors, pm me your address and I'll get some goodies in the mail for ya
 
this build is for my daughter's boyfriend, he needs help in the biggest way but he's not ready for Full herms system

Daughter's boyfriend here. Floppy isn't exaggerating. My current sparging vessel is a 5 gal painter's bucket with a few thousand holes drilled in the bottom. We hang it from a ladder, pour the mash in and let the wort drip into another bucket before boiling. It's easy, but takes a long time, and I can't afford the quantities of beer my friends drink while we wait.

Anyway, thanks for your help, Kevin and floppy, I'm really looking forward to this build.
 
Ah, yes... this is what is actually being controlled

rims_tube-61585.jpg


A cheap eBay special #111031228636 rims tube, a $6 heater element and an rtd thermocouple I picked up from sales section a while ago
 
Looks good! Can't wait to get my tube put together.

Stupid question: When wiring the element from a 14/3 cord, you've got 1 hot, 1 neutral, and 1 ground...yes? The box I'm using has a screw for the ground to be attached and the element has 2 screws for attaching the wires. There doesn't seem to be markings on the screws for specific lines, so does it matter? Also, did you use any terminals for your connections or you wired it like when wiring an outlet?
 
really makes no difference, but that was a scheme someone in the know told me was the "norm"
 
really makes no difference, but that was a scheme someone in the know told me was the "norm"

Yes, in this case there is no polarity on heating elements. But if there is a gold screw the hot line goes to it as a rule of thumb.
 
Yes, in this case there is no polarity on heating elements. But if there is a gold screw the hot line goes to it as a rule of thumb.

I like hearing reasons why things are as they are, so that's very helpful. Thanks!

Edit: As far as how it's connected, is a terminal needed or is screwing down wrapped wire good? I think that's how light switches are secured.
 
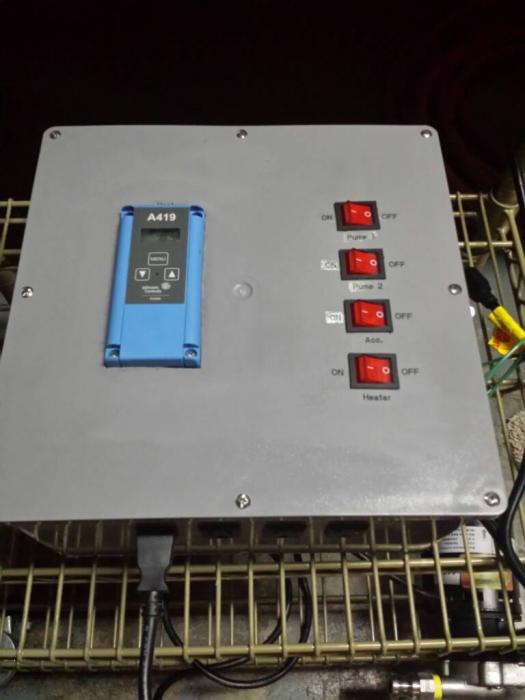
Panel coming together nicely. The crappy bit in the middle of the panel (where wood is showing) is where another piece of conduit is going to go
panel-61623.jpg
 
BigFloppy,

Do you know what size screws are needed for connecting the SSR to the heatsink? My package didn't seem to come with any, and I think I have the 40 amp version of that same one.
 
4mm on my build, I also used some "Arctic silver" thermal grease

Gotcha. I'll be able to pick those up from a box store. Yeah I read people using that stuff. Just ordered some from Amazon. Gotta love free 2-day shipping with Prime!

Looking good btw man!
 
the case is finished, I threw some water though the rims system this afternoon and cannot believe how efficiently it seemed to heat the water

110v @ 1500w element in the rims tube and I was raising 2-3 gallons of water 2 degrees in a minute

There's a couple of weepy points where water got out but overall - I really can't wait to get my system up and running
 
Back
Top