
This has been a work in progress for a while but I finally got the last kettle in recently! Sorry there aren't many mid-construction shots but I was busy constructing.
Thank you to the authors of the many build threads I looked at for inspiration!
Also, thanks to Derrin from Brewer's Hardware, John from Stout tanks, Kurt from Brew Steel, and Zach from Stainless Brewing, and Mike from Chugger for helping me get things all fit in and working well.
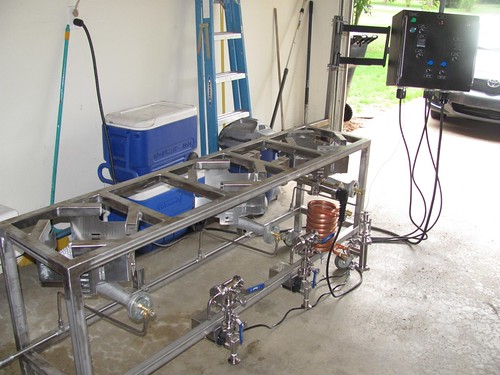
I give you Excalibeer: A 10 gallon all stainless RIMS/propane system with tri-clamp fittings
Brewing Design: I decided to go RIMS over HERMS because I had the hardware from my previous igloo cooler RIMS system. I'm using the BG-14 under the MLT to augment the initial heat up of the mash. HLT: 20g with sight glass, MLT: 20g with sparge arm, BK: 20g with recirculation fitting and sight glass. There are 3-way valves on the pumps to allow for easy purging. I am currently recirculating through the CFC and the in-line O2 for the last 10 minutes of the boil to sterilize. At flameout I turn on the hose and let it cool to pitching temps, then run the O2 at 1-2 LPM depending on gravity for 2 minutes.
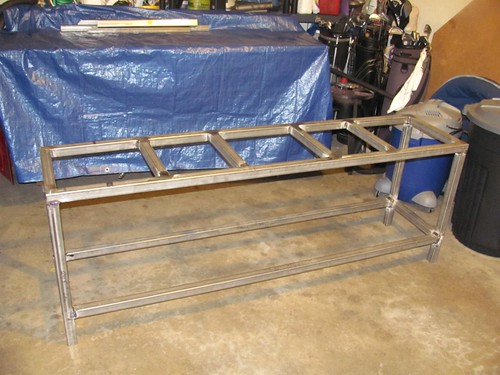
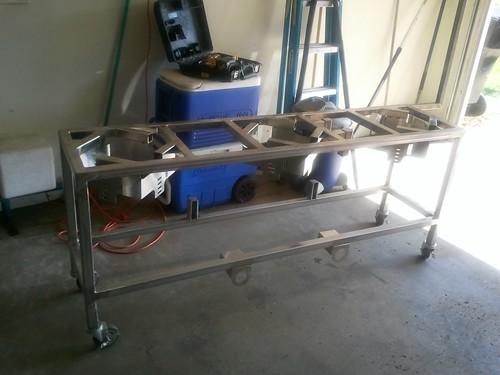
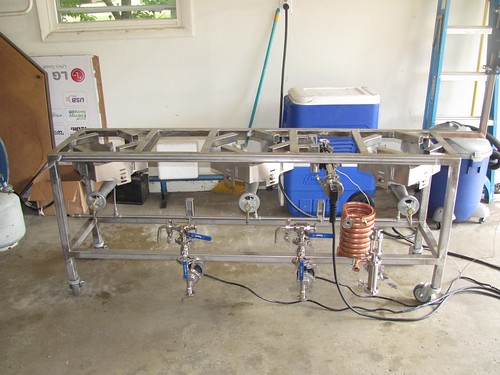
Frame Design: Kludged up in Google sketch (which makes me miss having Pro/E), done in 1.5" square 0.125" thick, 304 SS (which was cheaper than ceramic coating around here), TIG/stick welded depending on what I could get in there easily and what shop we were working in.
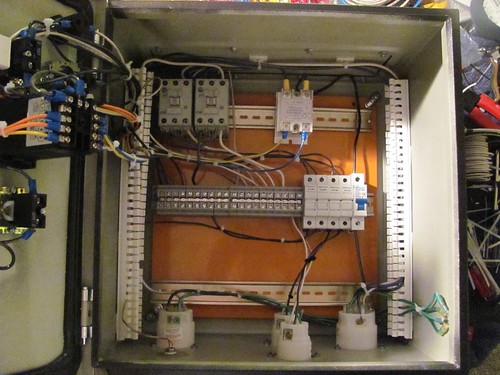
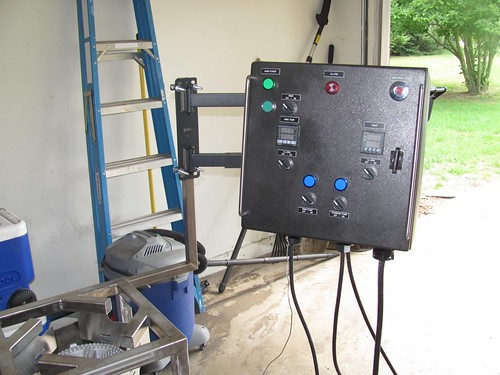
Electrical Control Design: Standard industrial control style on DIN rail, PID controlled, 110v powered (designed for and wired up for 220v if I ever run it to the garage)
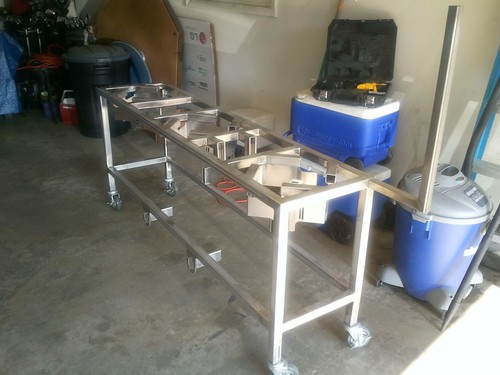
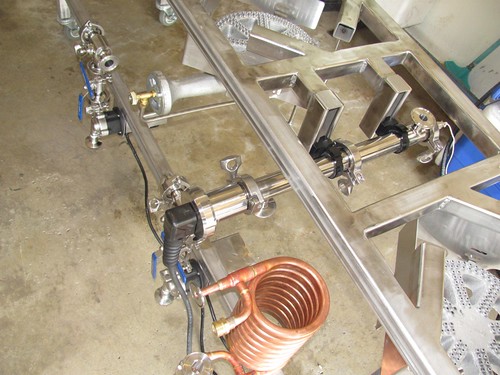
Interesting Features: RIMS Tube mount as shown, Flexible SS and flare fittings used to plumb the burners, slide out removable arm for control box (the back tube was left open on the ends and a 1.25" arm inserted in it for the control box)
Construction: Welded with TIG/Stick depending on if I could get into the corners or not, cuts done on what I refer to as "the 12 ton laser guided band saw"
Vendors (as I remember them, in alphabetical order):
-Agri-Supply (burners)
-Amazon (random bits and pieces)
-Auber Instruments (PID, Timer, TC temperature probe)
-Brewer's Hardware (valves, RIMS tube, TC Fittings)
-Brew Hardware (vinyl sight glass decals)
-BrewSteel (burner shrouds and pump housings)
-Chugger (pumps)
-Computer Engraving (panel tags)
-Ebay (control box housing, NEMA connectors, DIN rail fuse holders)
-eBrewSupply (most control box innards)
-McMaster-Carr (SS compression fittings, electrical hardware)
-Morebeer (TC CFC, butterfly valves, in-line oxygenation, various gasket/clamps, actually bought second hand from an HBT member)
-Stainless Brewing (custom length propane manifold and fittings)
-Stout Tanks (kettles and TC hose barbs)
-Tejas Smokers (burner oriface/valves)
Photos:
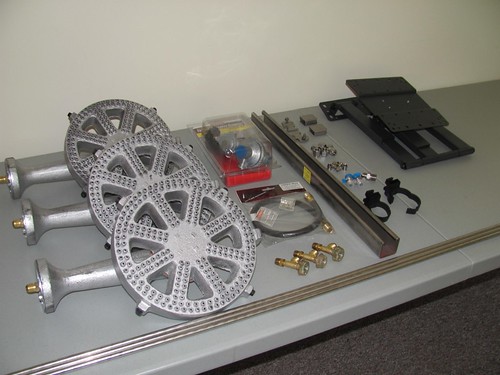
Gas/frame Hardware
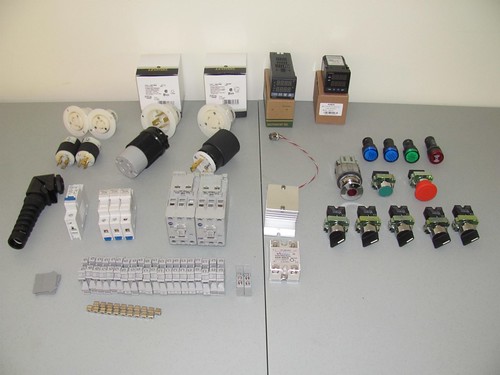
Electrical Components
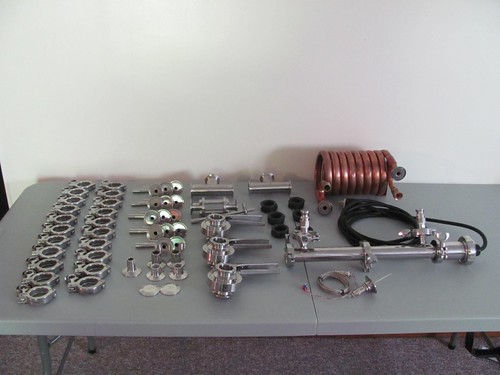
Tri-clamp Beer Porn
Frame Welded Before Cleaning
Frame Cleaned With Everything Welded On
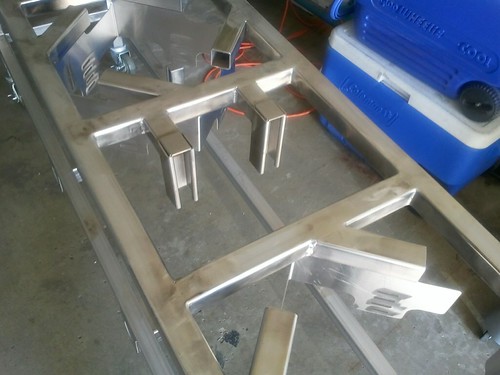
Burner Detail
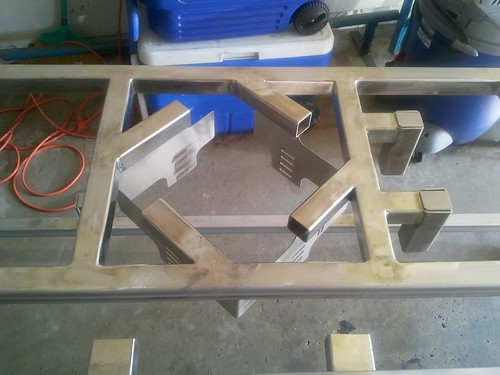
RIMS Mount Detail
Control Box Arm Detail
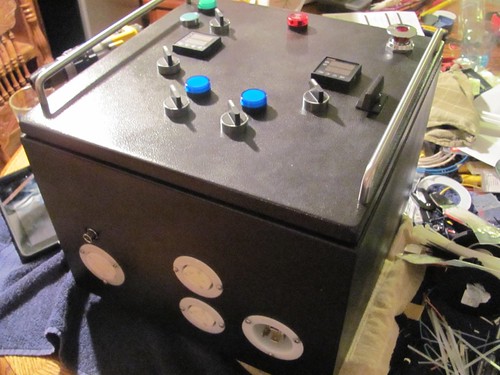
Electrical Box Completed
Electrical Box Inside
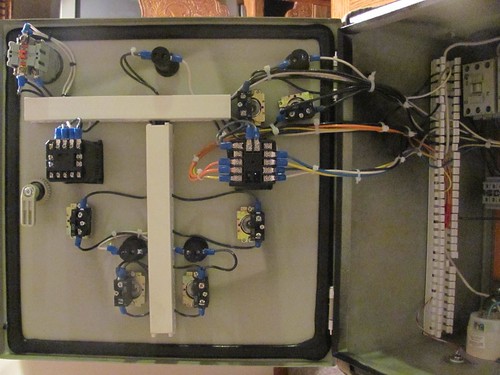
Electrical Box Door
Rig Fitted Up
Easier look at the manifold
RIMS Tube Detail
Control Panel Detail
With Kettles!
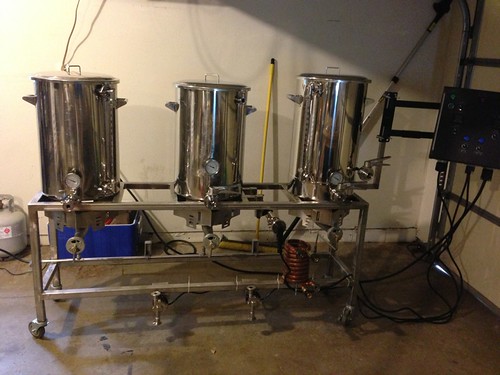
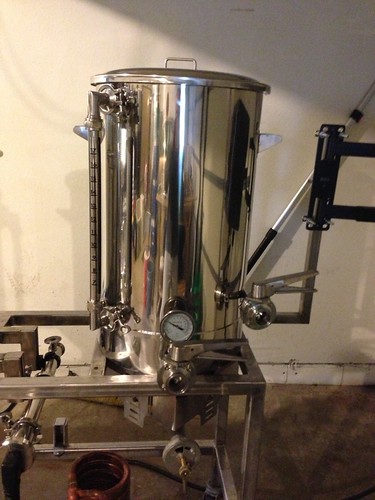
BK Detail
I'm now on batch 6 with her and she runs quite well. Required some propane tweaks but, all in all a very successful build I think.
Thank you to the authors of the many build threads I looked at for inspiration!
Also, thanks to Derrin from Brewer's Hardware, John from Stout tanks, Kurt from Brew Steel, and Zach from Stainless Brewing, and Mike from Chugger for helping me get things all fit in and working well.
I give you Excalibeer: A 10 gallon all stainless RIMS/propane system with tri-clamp fittings
Brewing Design: I decided to go RIMS over HERMS because I had the hardware from my previous igloo cooler RIMS system. I'm using the BG-14 under the MLT to augment the initial heat up of the mash. HLT: 20g with sight glass, MLT: 20g with sparge arm, BK: 20g with recirculation fitting and sight glass. There are 3-way valves on the pumps to allow for easy purging. I am currently recirculating through the CFC and the in-line O2 for the last 10 minutes of the boil to sterilize. At flameout I turn on the hose and let it cool to pitching temps, then run the O2 at 1-2 LPM depending on gravity for 2 minutes.
Frame Design: Kludged up in Google sketch (which makes me miss having Pro/E), done in 1.5" square 0.125" thick, 304 SS (which was cheaper than ceramic coating around here), TIG/stick welded depending on what I could get in there easily and what shop we were working in.
Electrical Control Design: Standard industrial control style on DIN rail, PID controlled, 110v powered (designed for and wired up for 220v if I ever run it to the garage)
Interesting Features: RIMS Tube mount as shown, Flexible SS and flare fittings used to plumb the burners, slide out removable arm for control box (the back tube was left open on the ends and a 1.25" arm inserted in it for the control box)
Construction: Welded with TIG/Stick depending on if I could get into the corners or not, cuts done on what I refer to as "the 12 ton laser guided band saw"
Vendors (as I remember them, in alphabetical order):
-Agri-Supply (burners)
-Amazon (random bits and pieces)
-Auber Instruments (PID, Timer, TC temperature probe)
-Brewer's Hardware (valves, RIMS tube, TC Fittings)
-Brew Hardware (vinyl sight glass decals)
-BrewSteel (burner shrouds and pump housings)
-Chugger (pumps)
-Computer Engraving (panel tags)
-Ebay (control box housing, NEMA connectors, DIN rail fuse holders)
-eBrewSupply (most control box innards)
-McMaster-Carr (SS compression fittings, electrical hardware)
-Morebeer (TC CFC, butterfly valves, in-line oxygenation, various gasket/clamps, actually bought second hand from an HBT member)
-Stainless Brewing (custom length propane manifold and fittings)
-Stout Tanks (kettles and TC hose barbs)
-Tejas Smokers (burner oriface/valves)
Photos:
Gas/frame Hardware
Electrical Components
Tri-clamp Beer Porn
Frame Welded Before Cleaning
Frame Cleaned With Everything Welded On
Burner Detail
RIMS Mount Detail
Control Box Arm Detail
Electrical Box Completed
Electrical Box Inside
Electrical Box Door
Rig Fitted Up
Easier look at the manifold
RIMS Tube Detail
Control Panel Detail
With Kettles!
BK Detail
I'm now on batch 6 with her and she runs quite well. Required some propane tweaks but, all in all a very successful build I think.
