My new brew system, a brutus 10 with some nice modifications

Homebrew Talk - Beer, Wine, Mead, & Cider Brewing Discussion Forum

Help Support Homebrew Talk - Beer, Wine, Mead, & Cider Brewing Discussion Forum:

This site may earn a commission from merchant affiliate links, including eBay, Amazon, and others.
Thanks!

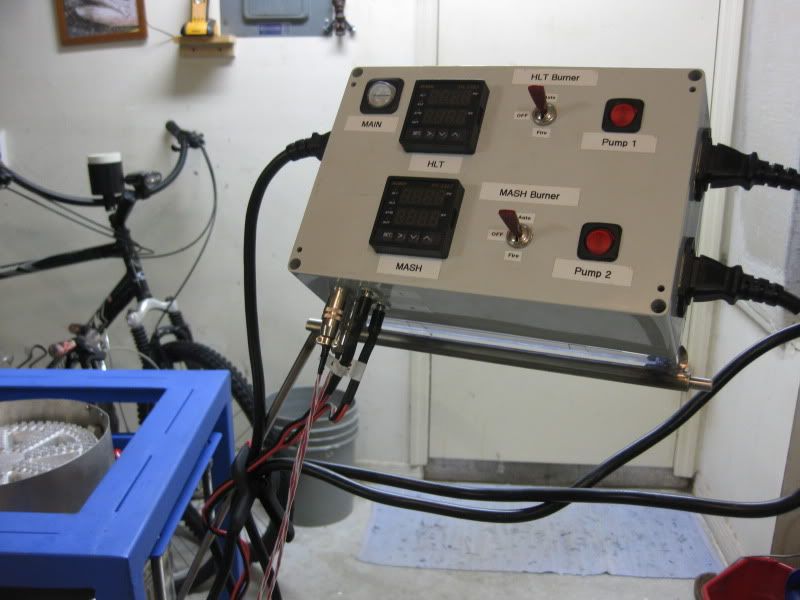
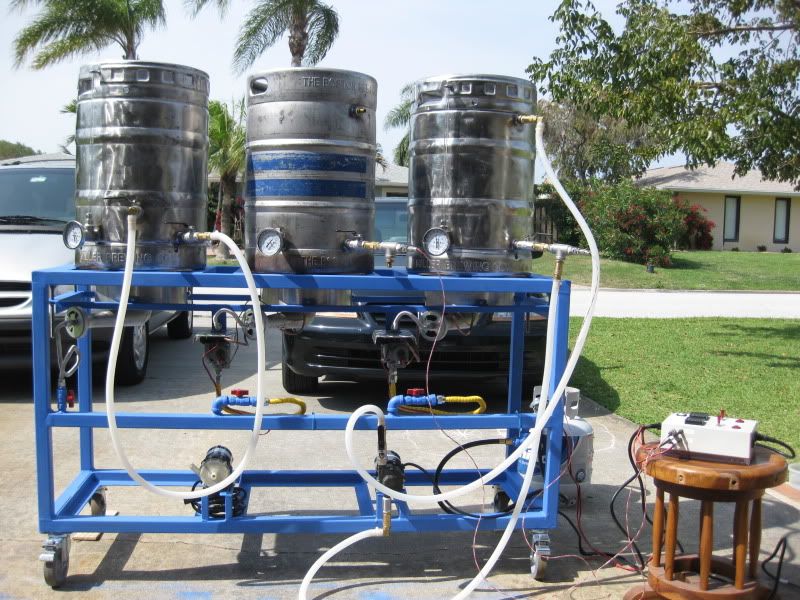
You almost have to build a "practice" brewstand to really figure out how you want things set up. Now that I'm almost done, I want to start over and change a couple dozen things.

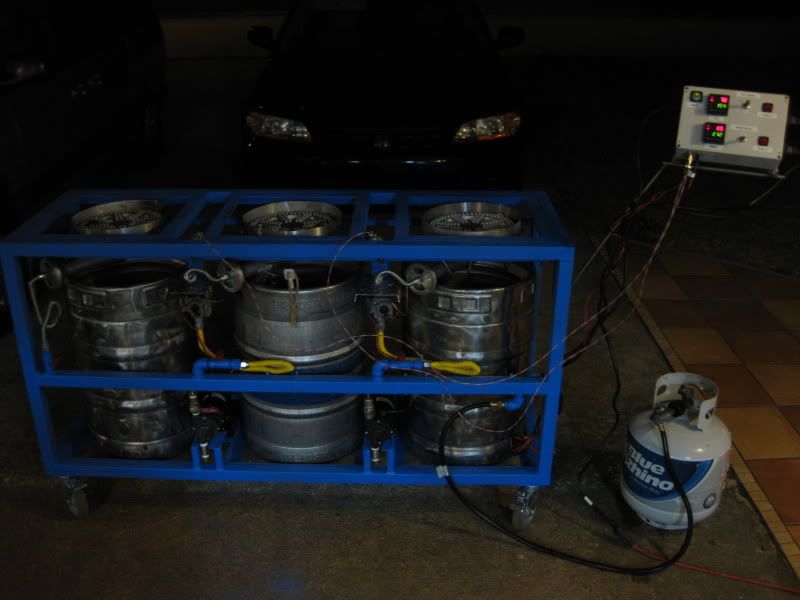
I plan on getting some pics and video up when she's done. Targeting 5/3 as the maiden brew day. I'll bust a bottle of Chimay Blue over it and fire her up!
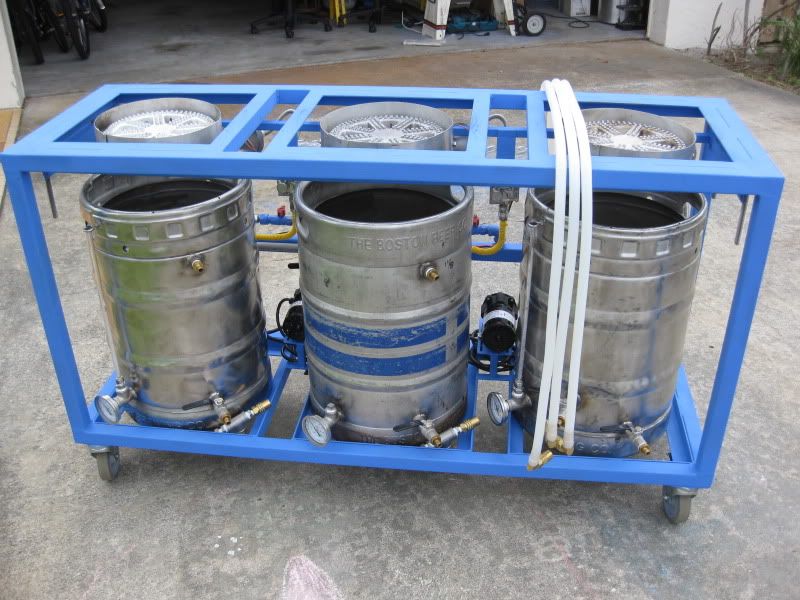
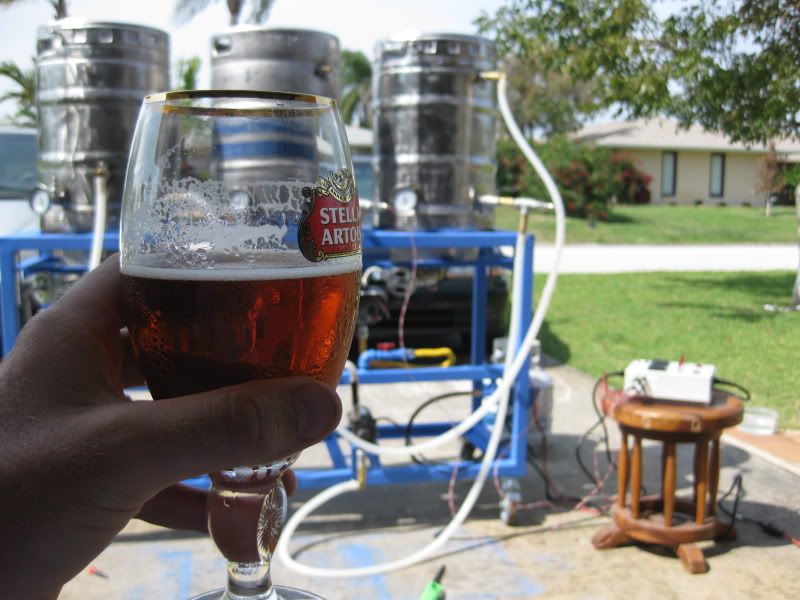
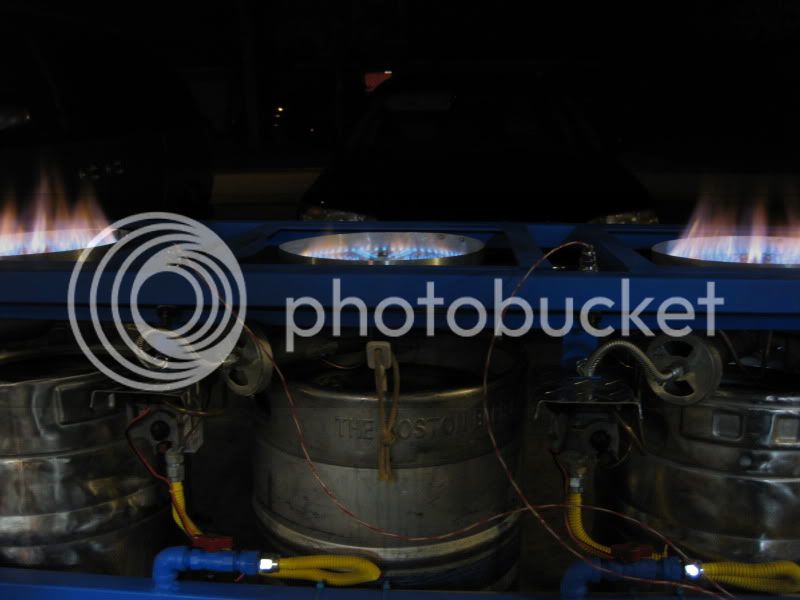
 
Yeah man, this is badass. I finished building my Brutus only 8 months ago and there's already a host of things that I want to change. And now even more! When/if it comes time, I may hit you up for some details on the control panel and its associated power inputs/outputs you have on it.

*subscribed!*
 
When/if it comes time, I may hit you up for some details on the control panel and its associated power inputs/outputs you have on it.

I was actually wanting to put together a wiring diagram of what I did, but I don't have a program suitable for this.

Does anyone know of an easy (and free) program for quick wiring diagrams?

--
Josh
 
Thanks for the links guys. I'll give them a try. Hopefully it'll be as easy as put a switch here, put a power source here, add wires, etc.

--
Josh
 
Ok, post-paint assembly is complete. I brought the system out and cured the paint in-place. I also did some water tests and marked the siteglasses. I still need to build the removable arm that will hold the control panel.

IMG_0123.jpg


I marked the sight glasses by lightly scratching a ring in them with a tubing cutter. Before doing this I tested it on a spare piece of polycarbonate tubing to make sure it didn't weaken it. They look great, though the picture is not great. I'll put vinyl numbers on eventually.

IMG_0124.jpg


I was not that impressed with the boil tests. The burner flames look like they aren't getting enough propane, so I'm going to go through the drilling process again.

--
Josh
 
I was not that impressed with the boil tests. The burner flames look like they aren't getting enough propane, so I'm going to go through the drilling process again.

I really wish someone would design and sell a low pressure propane orifice for the BG14. That is one of the things holding me back from the Honeywell pilot safety valves.

EDIT: Also, looking sweet!
 
Sweet! I'd suggest some kettle lids for storage. When I had my rig in my garage for a while I discovered a small spider in the sight-glass :). Thought I should brew up a batch of Black Widow Kolsch.

You prior Navy by chance? I don't run in to many civilians using the term 'stowed.' :D
 
Make sure to drill a small hole in the frame in contact with the burners. Without anywhere to vent the air inside the frame could expand to extreme pressures resulting in a catastrophic ending.

That is an important safety topic. My #1 concern is safety of course; however, from where did you hear this or how did you come up with it? If you could please provide us with any references or evidence illustrating this scenario. It's not that I don't believe you, it's just that I usually trust but verify. Thanks!
 
Physics 101. Steam occupies 1000x the the volume as water. Additionally all gases expand with temperature. Therefore increased internal frame pressure along with slight weakening of the welds at high temperature could theoretically result in a failure/rupture.
 
Physics 101. Steam occupies 1000x the the volume as water. Additionally all gases expand with temperature. Therefore increased internal frame pressure along with slight weakening of the welds at high temperature could theoretically result in a failure/rupture.

If you could please provide evidence (pictures, testimony, etc.) of such failure/rupture in a brewstand. Thanks!

I know this is OT but that would be Fluid Mechanics 101 or Thermodynamics 101. Physics 101 usually covers elementary classical mechanics.
 
Back to the burner orifice. I tried the .067 that you recommended (I think that was you!) in another post and wasn't happy with the burn. I ended up at .094" with a nice flame. I haven't done a boil test yet, but I think it'll be good.

I also realized I was using 1/4" supply line from the propane tank....3/8" made a huge difference!
 
Back to the burner orifice. I tried the .067 that you recommended (I think that was you!) in another post and wasn't happy with the burn. I ended up at .094" with a nice flame. I haven't done a boil test yet, but I think it'll be good.
I also realized I was using 1/4" supply line from the propane tank....3/8" made a huge difference!

Thanks Brian! Yeah that was me. Funny thing the flames looked totally different initially compared to the water test day. Back to the chart/drilling process I guess...

My supply lines are 1/2" OD after the solenoid valves (something bigger before the valves) so should be fine.

--
Josh

EDIT: This is my 100th post, neato!
 
If you could please provide evidence (pictures, testimony, etc.) of such failure/rupture in a brewstand. Thanks!

I know this is OT but that would be Fluid Mechanics 101 or Thermodynamics 101. Physics 101 usually covers elementary classical mechanics.


Firstly I'm not the one who claimed that a rupture would occur.

Secondly, if your so familiar with advanced physical sciences why did you have to ask?
 
Firstly I'm not the one who claimed that a rupture would occur.

Secondly, if your so familiar with advanced physical sciences why did you have to ask?

Dude... I was just asking if you had evidence to support your theory. I apologize for doing so. I will make sure to ignore you from now on. Good luck with your future endeavors. :)

https://www.homebrewtalk.com/f35/exploding-kegs-29044/

Please see the link above. Although that case is not one of an exploding brew stand it is the same concept. Expanding air in a confined space=BOOM

Thanks, but that is not what I'm looking for. I'm looking for brewstand ruptures, not keg ruptures. I do appreciate your helpful input, though. :)
 
Originally Posted by dudasaj
Physics 101. Steam occupies 1000x the the volume as water. Additionally all gases expand with temperature. Therefore increased internal frame pressure along with slight weakening of the welds at high temperature could theoretically result in a failure/rupture.


If you are going to get technical about water....a droplet of water expands 1700 times its original volume at 212* F and continues to expand exponentially as the temperature increases......Im just a dumb fireman and know that. Relax with your snappy comments man. :confused:
 
That is a good point actually, with gas burner systems, the brewstands to get VERY hot... I would expect them to get close to the same temp as the lip of the keg, which as the exploding kegs thread shows, can be very dangerous! Best to be safe and drill a small hole to release pressure just in case :D
 
"Physics 101. Steam occupies 1000x the the volume as water. Additionally all gases expand with temperature. Therefore increased internal frame pressure along with slight weakening of the welds at high temperature could theoretically result in a failure/rupture."

Please highlight the snappy part of the reply? I admit my volume factor was inaccurate, but I was just trying to offer a little insight for someone who has never worked on saturated steam systems. The point I was trying to make was the potential pressure that could build up in that main cross beam at high temperatures.
 
Cheers!

IMG_0121.jpg


My second March 809 came in and I mounted it in place of that old Teel pump I had on the left. Next up is adding the removable control panel arm!

I'm really hoping to brew a batch on it this weekend.

--
Josh
 
Here's the control arm. I wanted to keep it simple, small, and easily removable to be stored down below with the kettles. The control panel slips on/off the control arm to store in the house when not in use. I used 5/16" SS round rod, some 3/8" ID SS round tubing, and 2 SS washers. I plan to use velcrow straps to hold the wires against the control arm during brew days.

IMG_0171.jpg


IMG_0168.jpg


IMG_0167.jpg


IMG_0166.jpg


IMG_0162.jpg


Fire...

IMG_0161.jpg


--
Josh
 
Ok, the system is done. The final tally is in. You may see that some items like a wort chiller, SS false bottom, etc are not listed. This is because I already had those. Some parts are bundled together (e.g. electronics) because the receipts weren't very descriptive (or I was too lazy to list everything out).

MBS4_MaterialCost.gif


If you have any questions about a specific part, feel free to ask away. Thanks everyone for the kind words, and for following my brutus build. It's been really fun, and I can't wait to make beer on it this Saturday.

Cheers! :mug:

--
Josh
 
Back
Top