Long Draw Salt Water Chilled Beer Tower

Homebrew Talk - Beer, Wine, Mead, & Cider Brewing Discussion Forum

Help Support Homebrew Talk - Beer, Wine, Mead, & Cider Brewing Discussion Forum:

This site may earn a commission from merchant affiliate links, including eBay, Amazon, and others.

runningweird

Well-Known Member
Joined
Dec 18, 2009
Messages
2,060
Reaction score
99
Location
State Line, PA
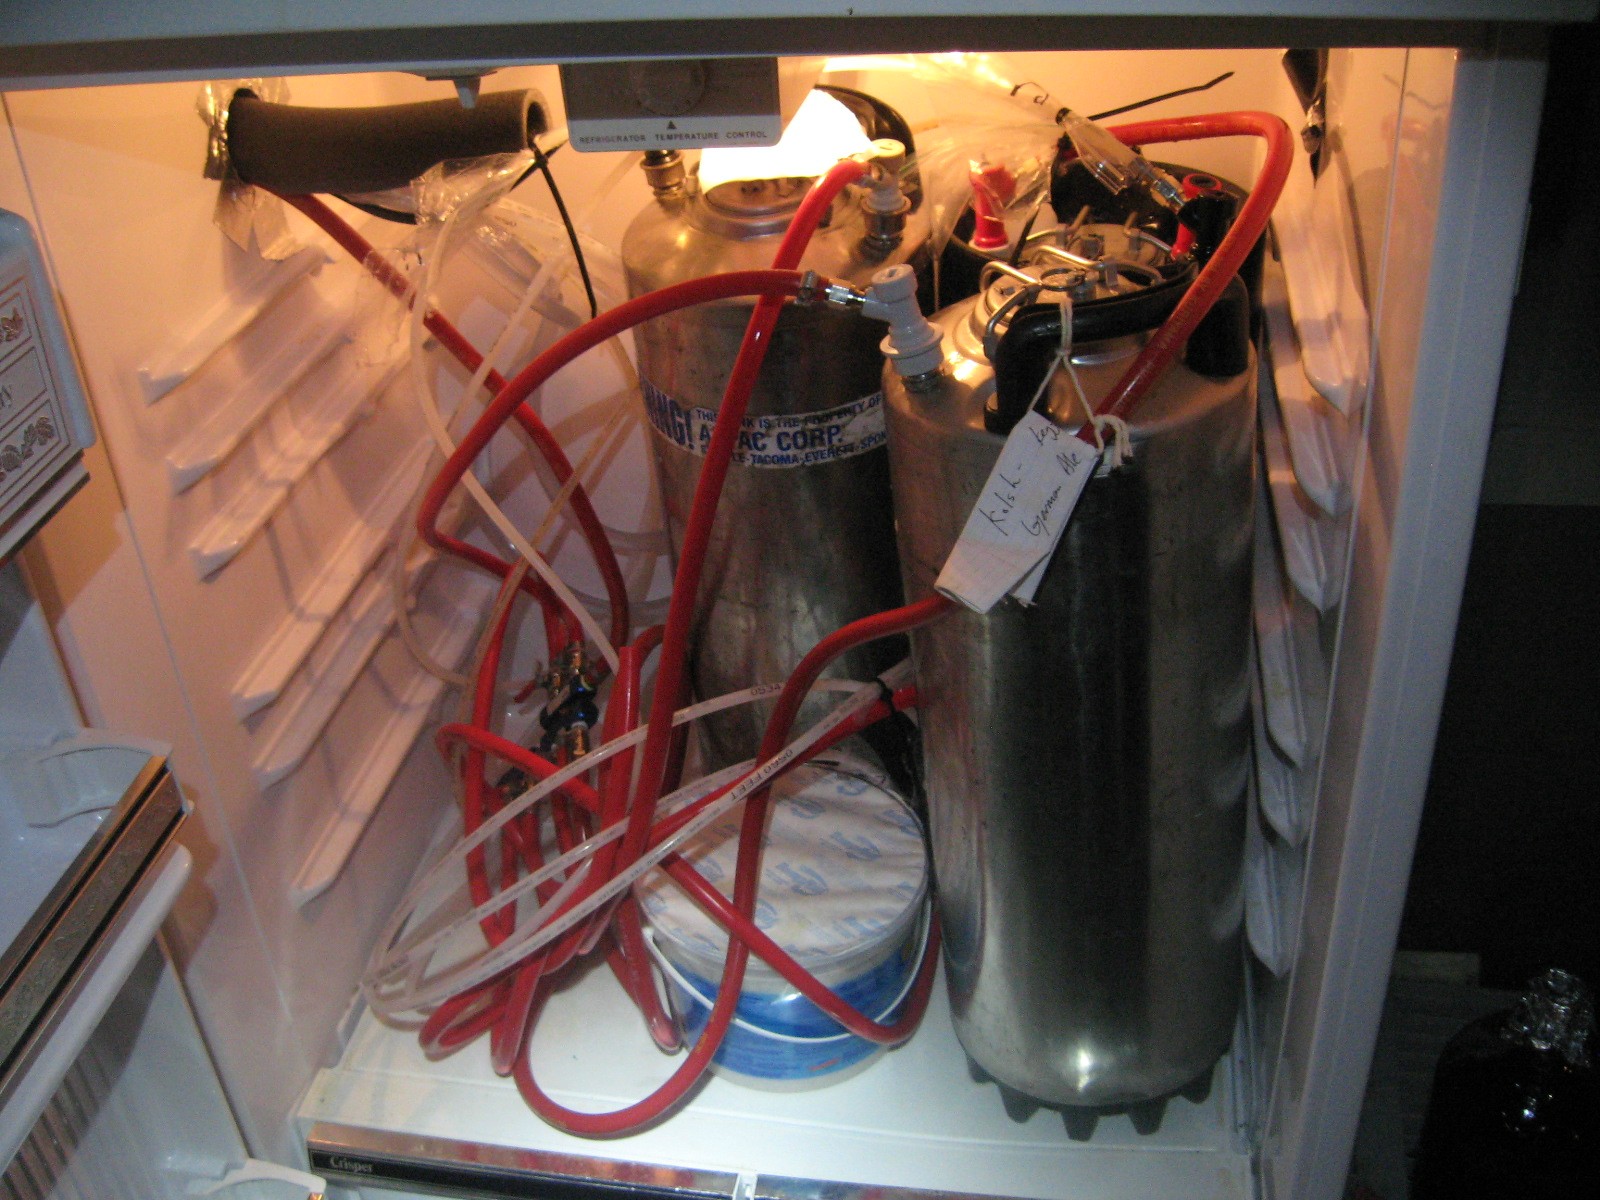
So I got an old 6 tap tower from a kind gentleman in Florida and I set about trying to get my giant 26 cubic foot freezer inside the house so I could make a keezer. Needless to say the house is too small and the freezer to big, so in a flash one late night I decided to put the kegs in the basement in a fridge and run a line upstairs to the tower.
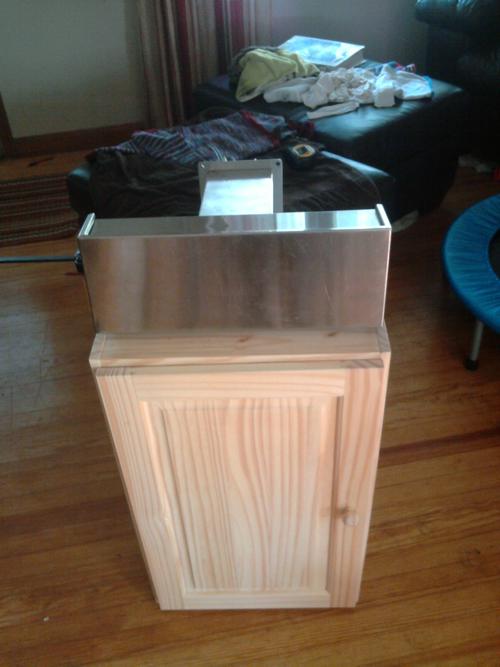
This is how it started – a cheap pine cabinet from Just Cabinets – I am not a woodworker( at least not a good one) and the tower.
G0Oyl.jpg

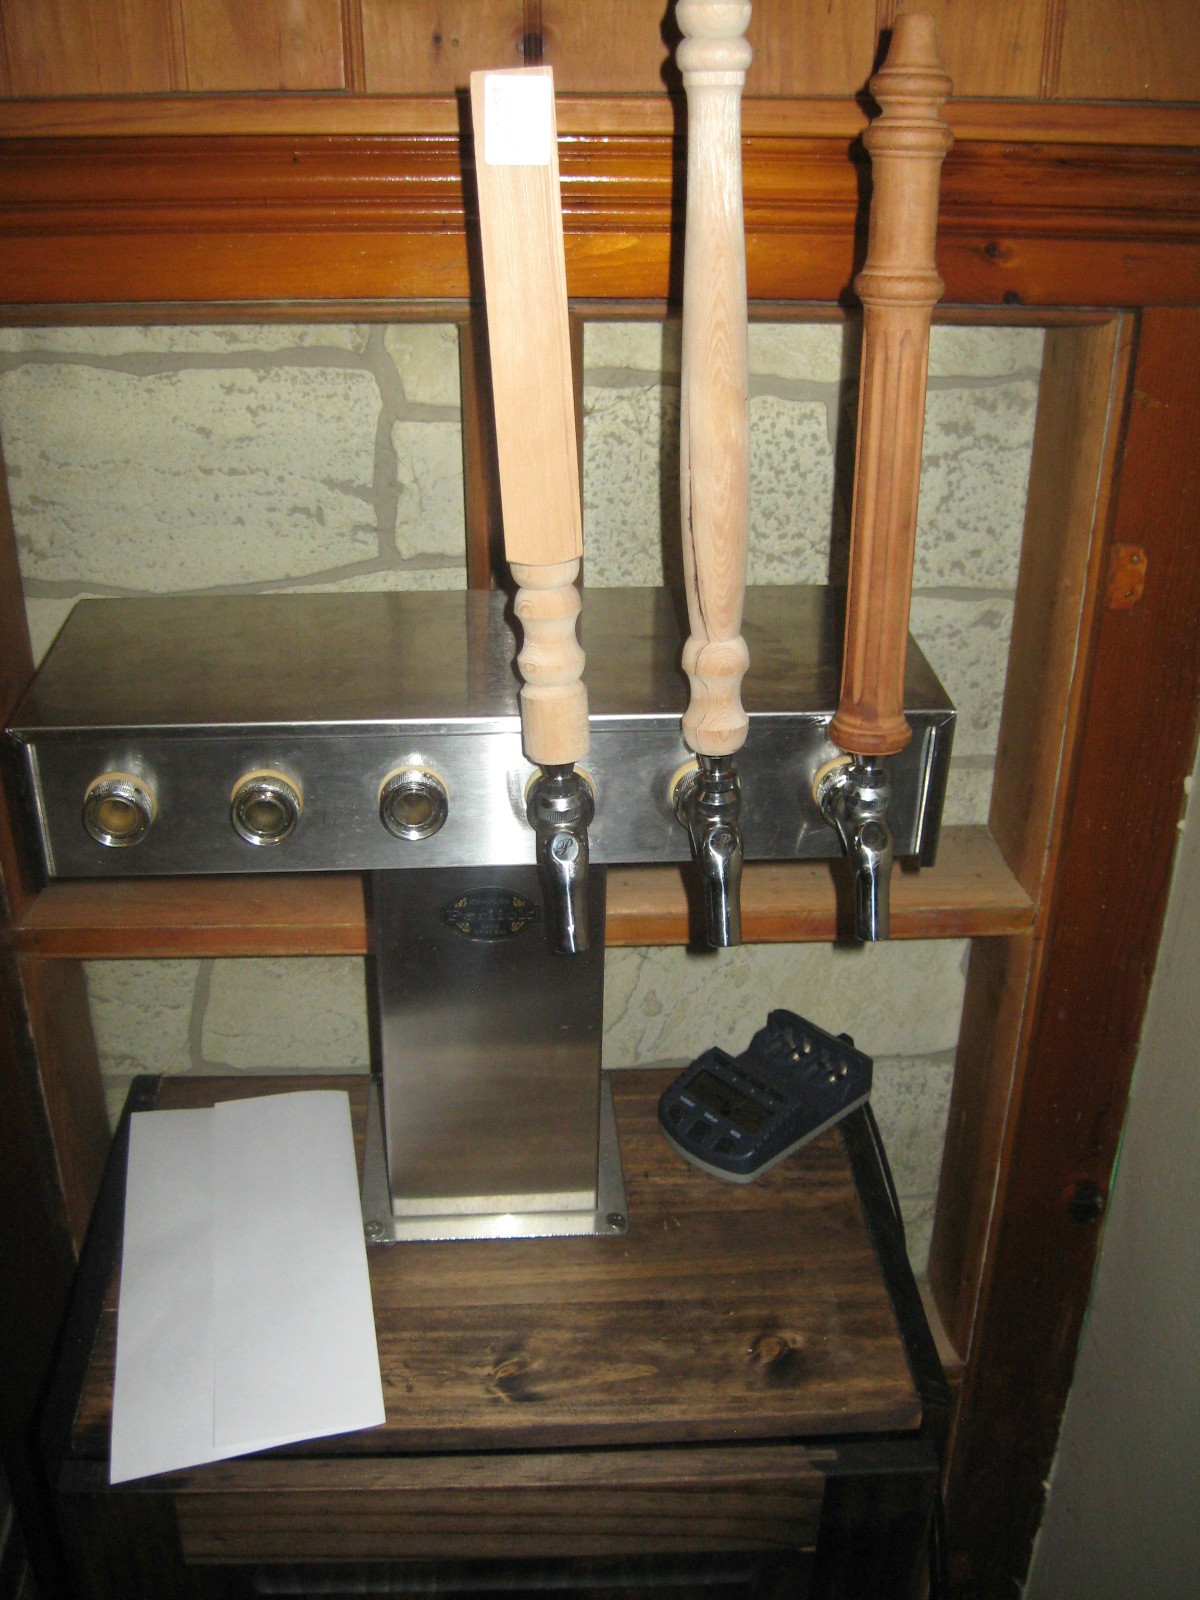
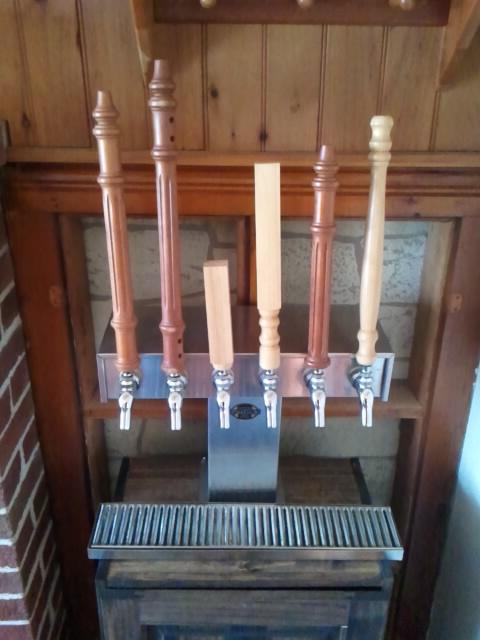
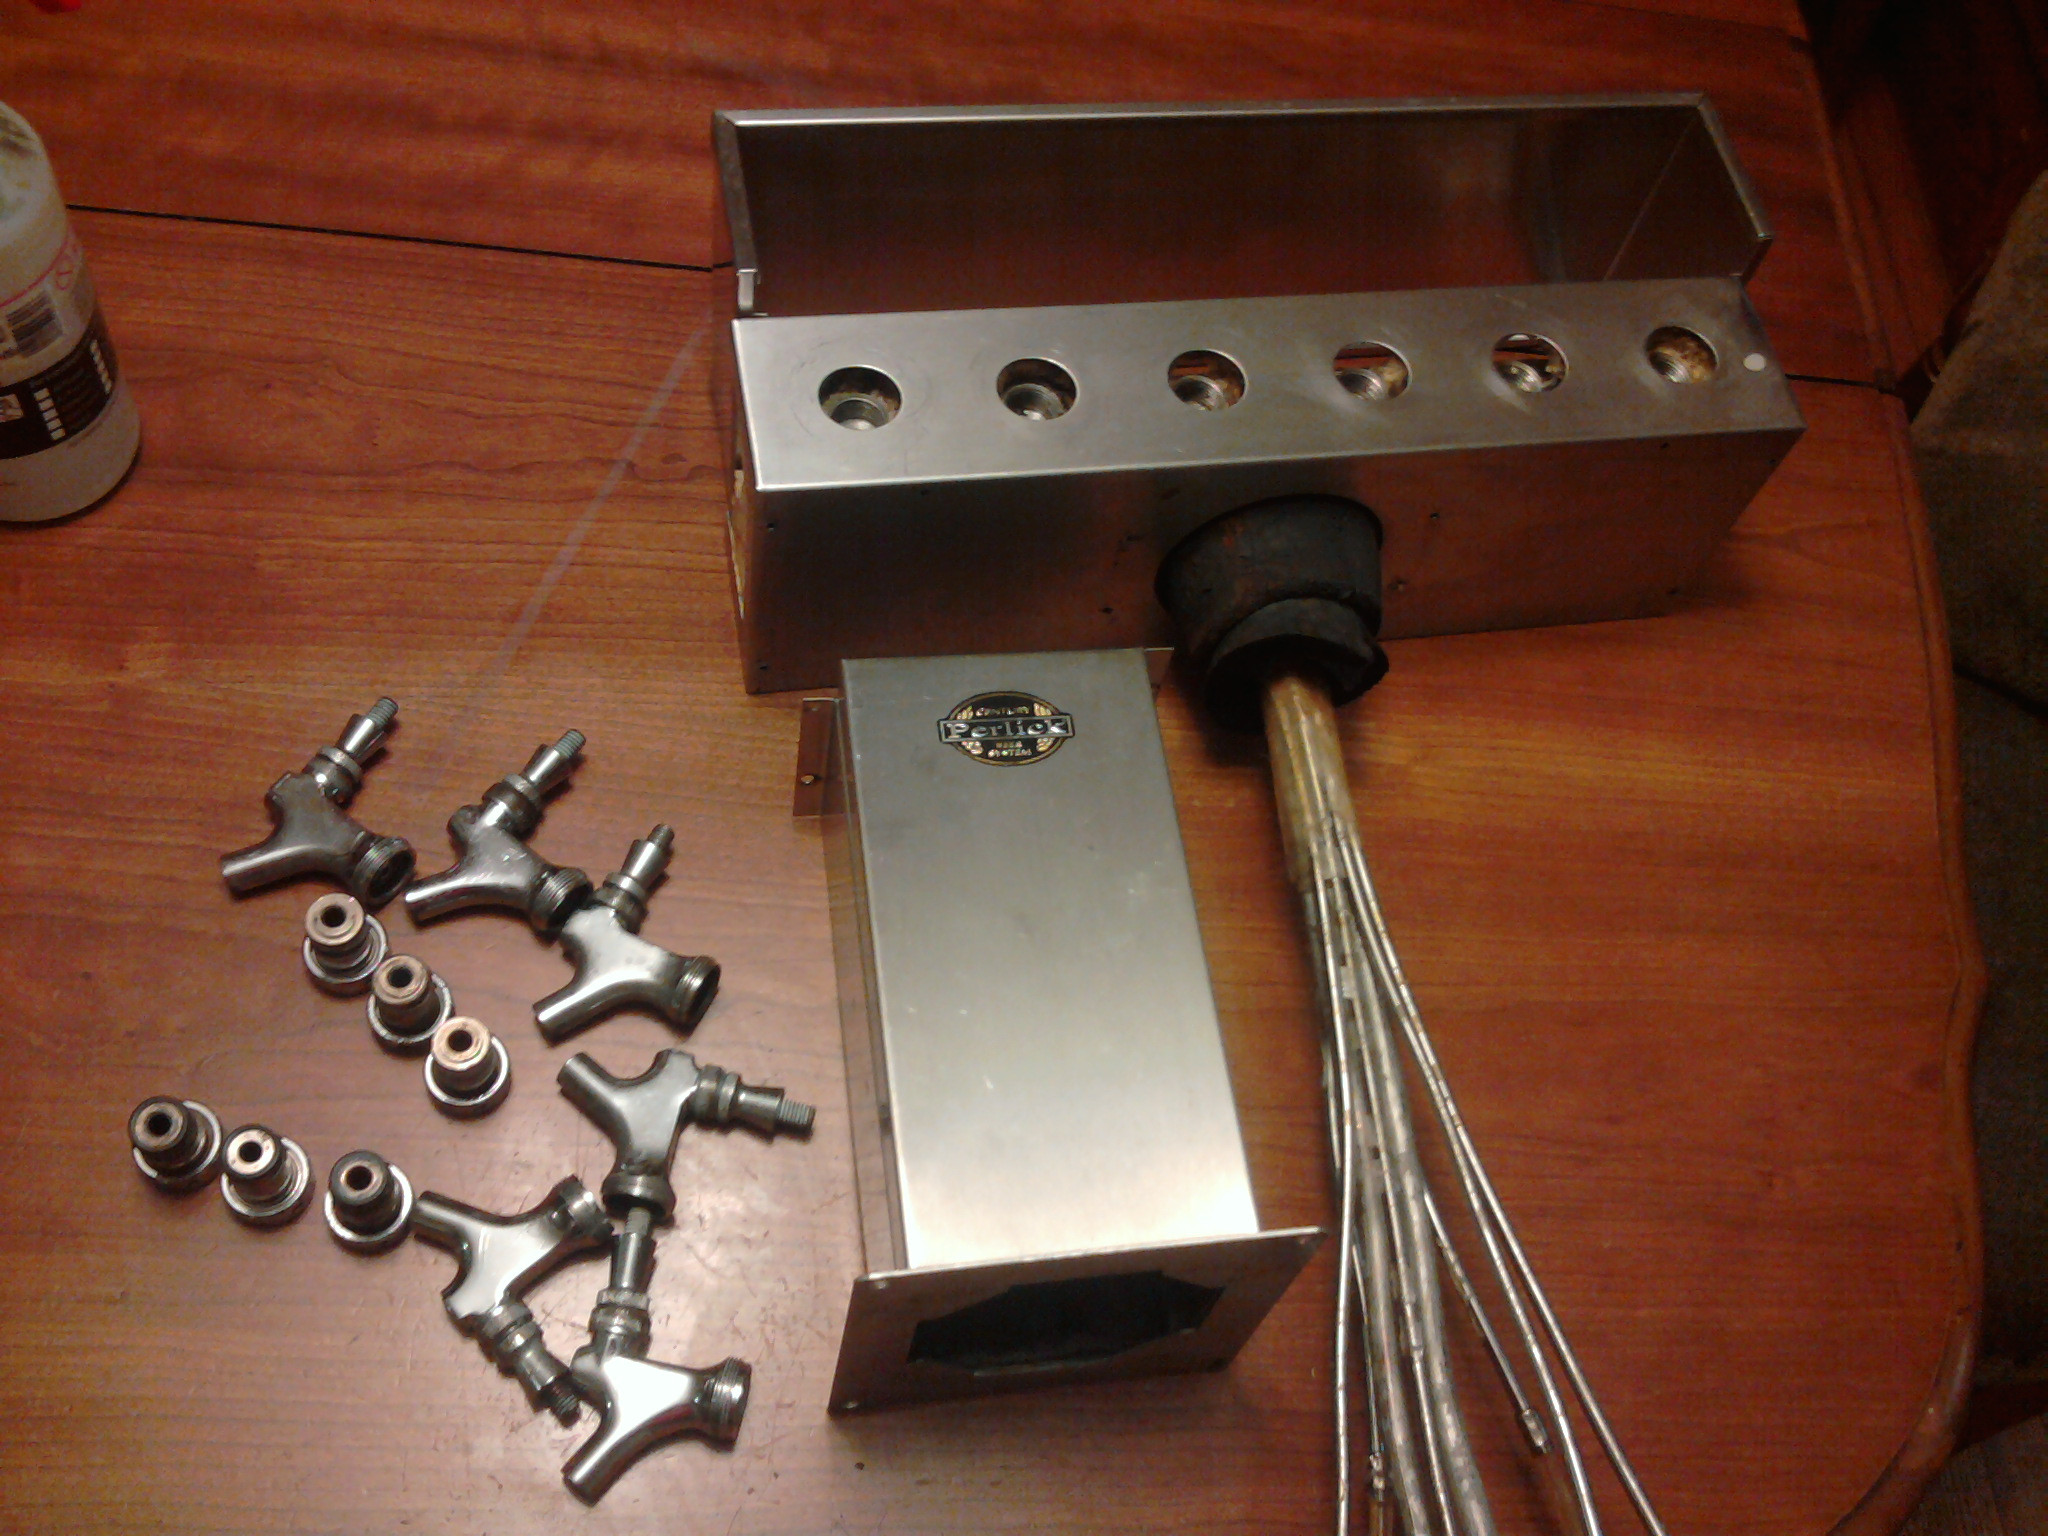
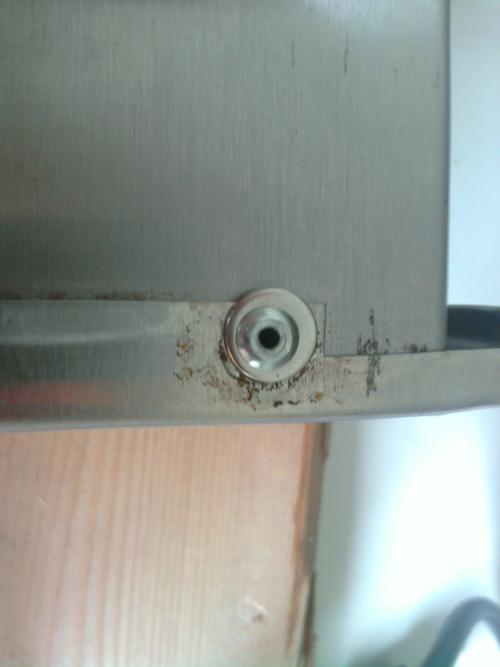
The original owner had dissasembled the tower for shipping, and after an hour in a hardware store searching for a bolt/screw that I thought would work I gave up and called perlick. They said haha you are dumb, not a screw, a pop rivet. So off to the pop rivet section I went. a few stainless washers and I was all set, what was once a rickety tower was now sturdy and solid.
sY3Ih.jpg

22Nlf.jpg


I ordered a 100 foot roll of that bev line offered by BirdManBrewing a while back in the vending section. That stuff is hard to get on the barbs but once on there it will not come off.
J1Qd2.jpg

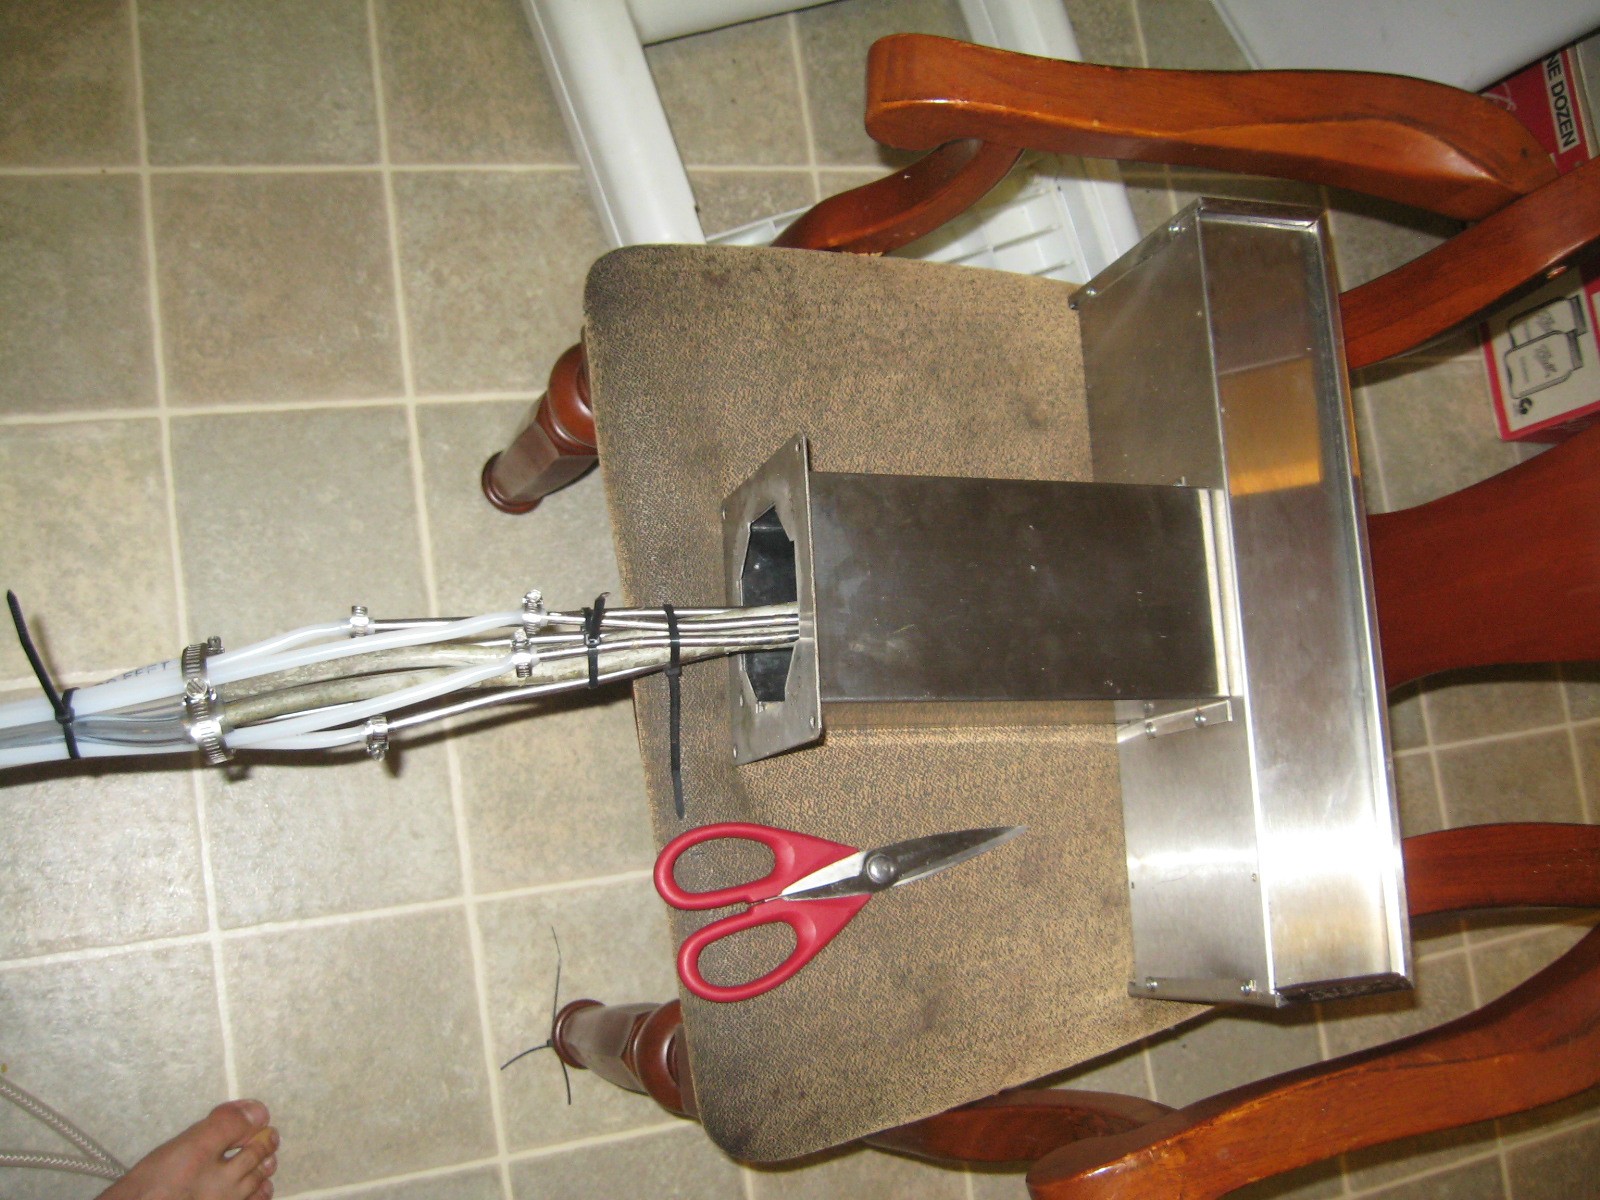
you can see that I added hose clamps - i was just trying to be cautious and as of right now with three lines running there are no leaks.

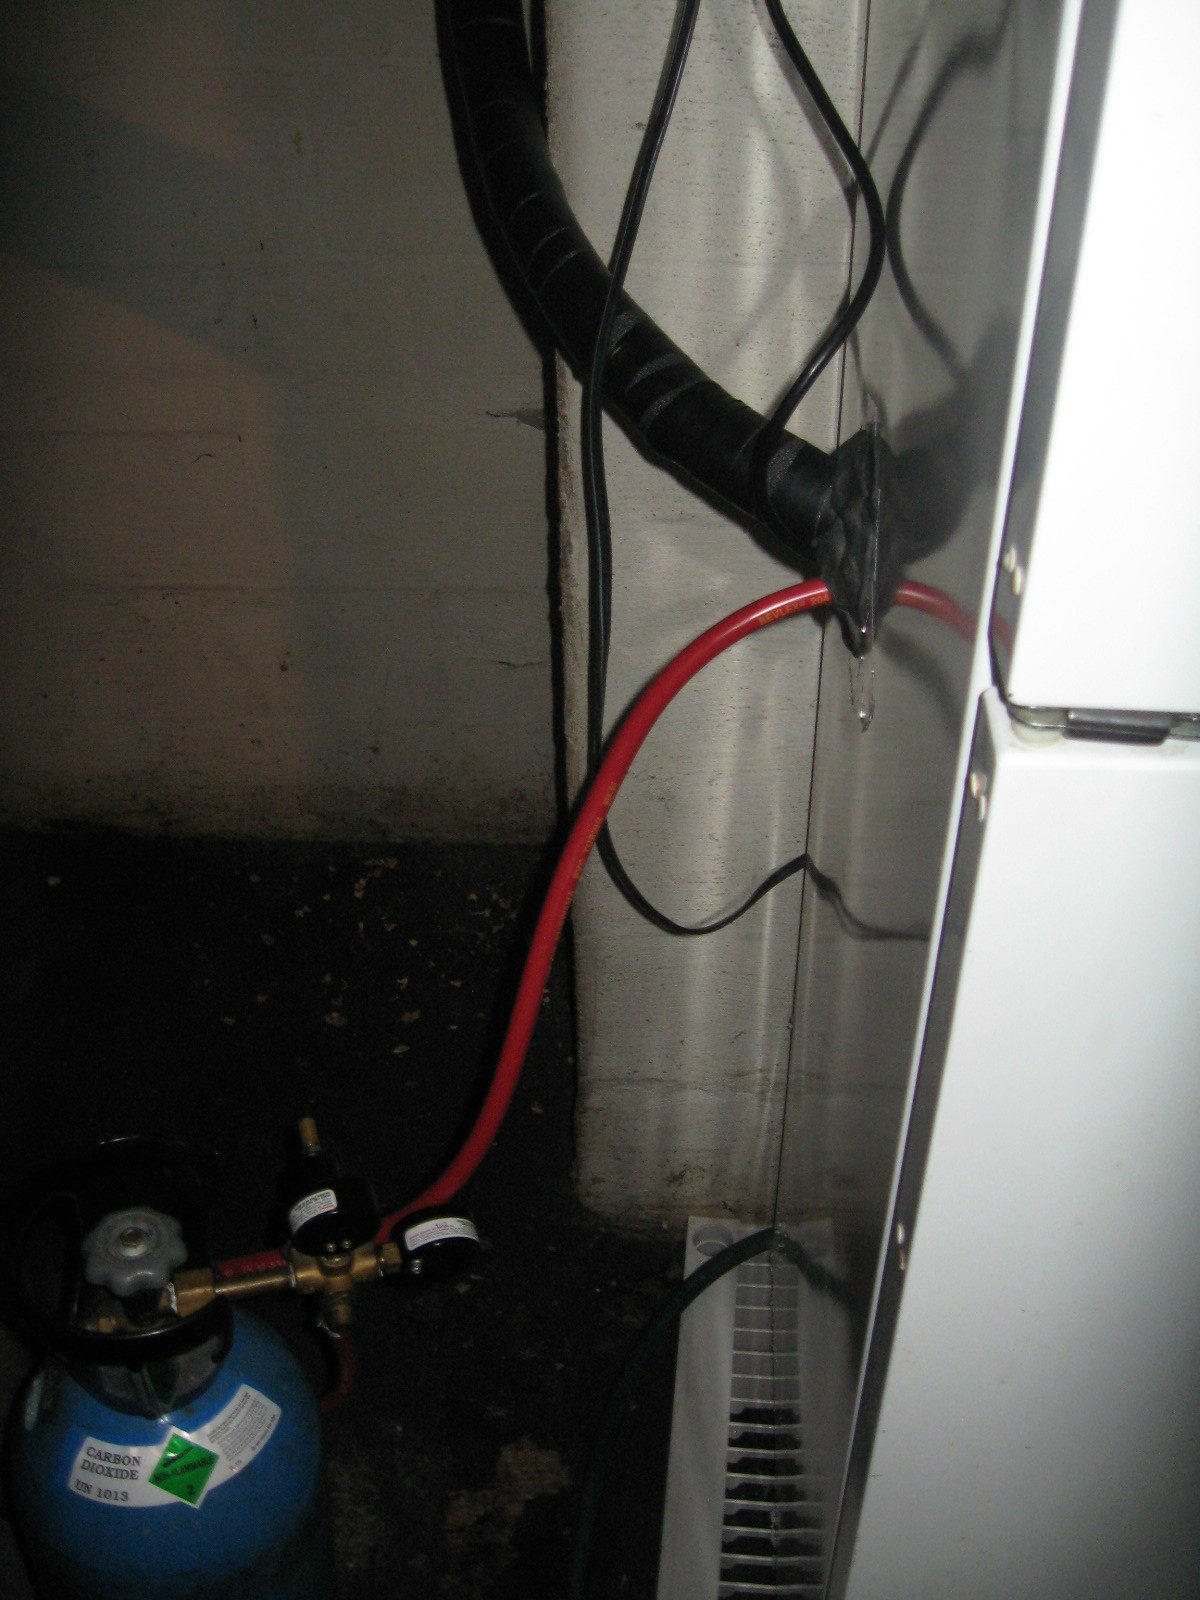
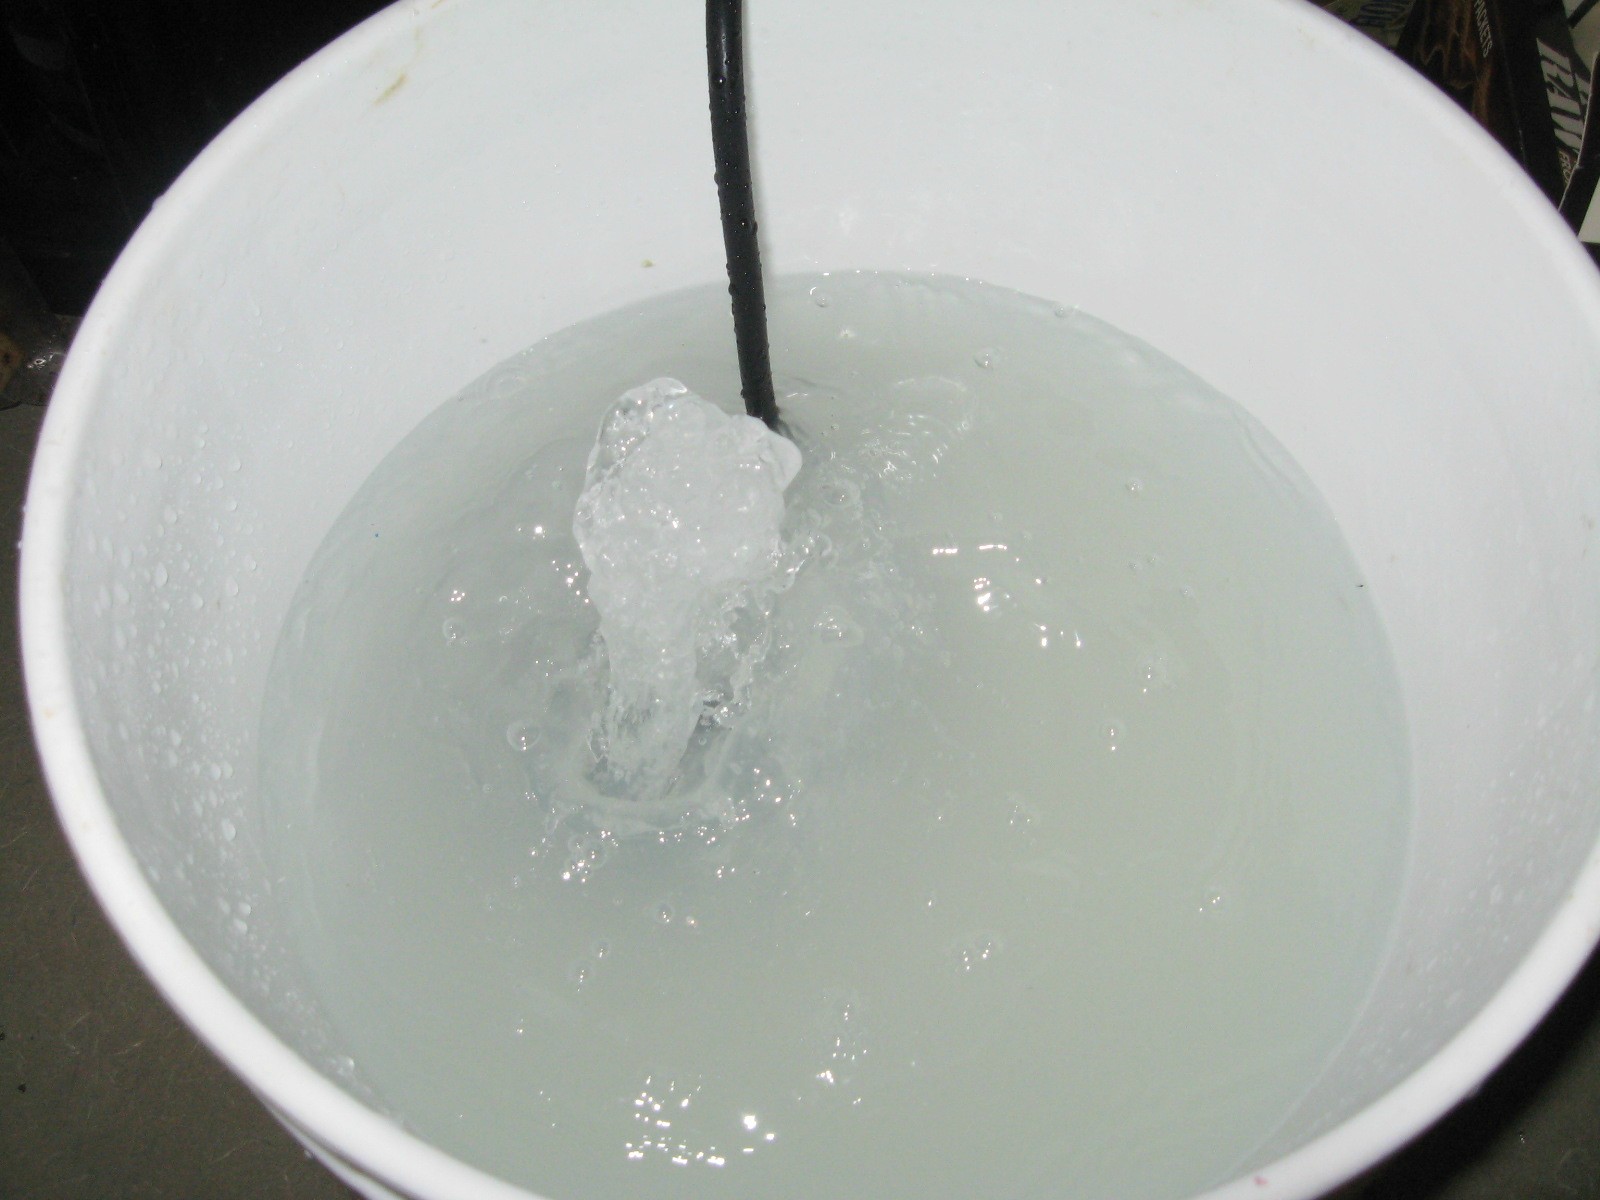
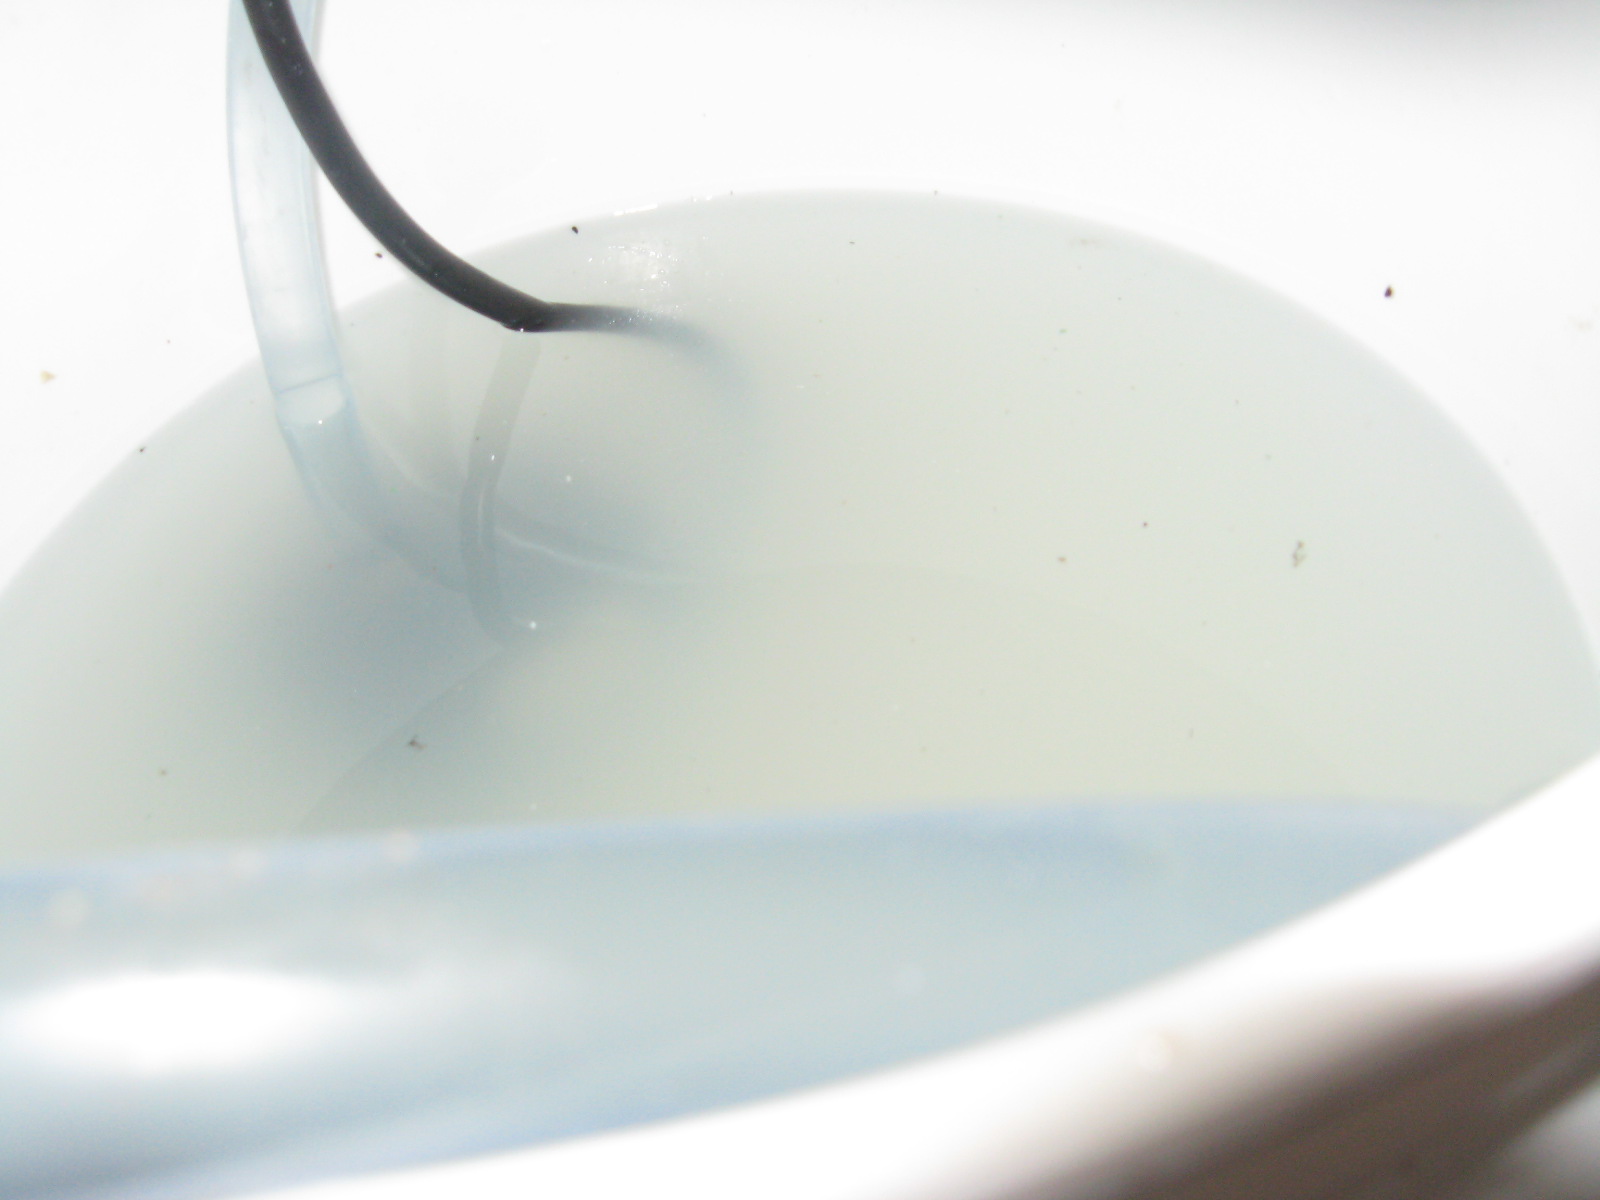
After reading about how to keep beer cool along the lines I was either going to use the glycol setup in the tower or use a fan, the space constraints got me to go with the glycol lines - instead of glycol I am using saltwater in a bucket in the freezer of my fridge downstairs and a 29 dollar pond pump from Lowes that advertised a head height of 4.1 feet.

XgWbR.jpg

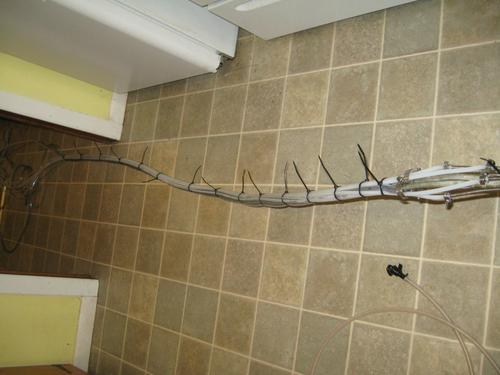
The glycol setup was made of copper while the beer lines were stainless steel coming out of the tower. Onto the copper glycol pipes I fitted 1/2 inch vinyl tubing - around 15 feet long on both the in and out - and onto the beer lines I put the accuflex bev tubing. Getting those on was tough and required lots of cursing and two pots full of hot water. A pro tip for using this stuff - use welders gloves to handle it after taking it out of the hot water.
AAlhO.jpg


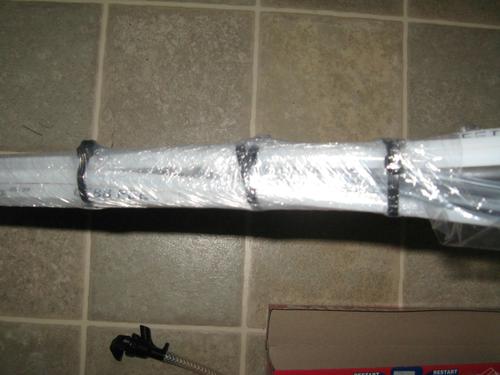
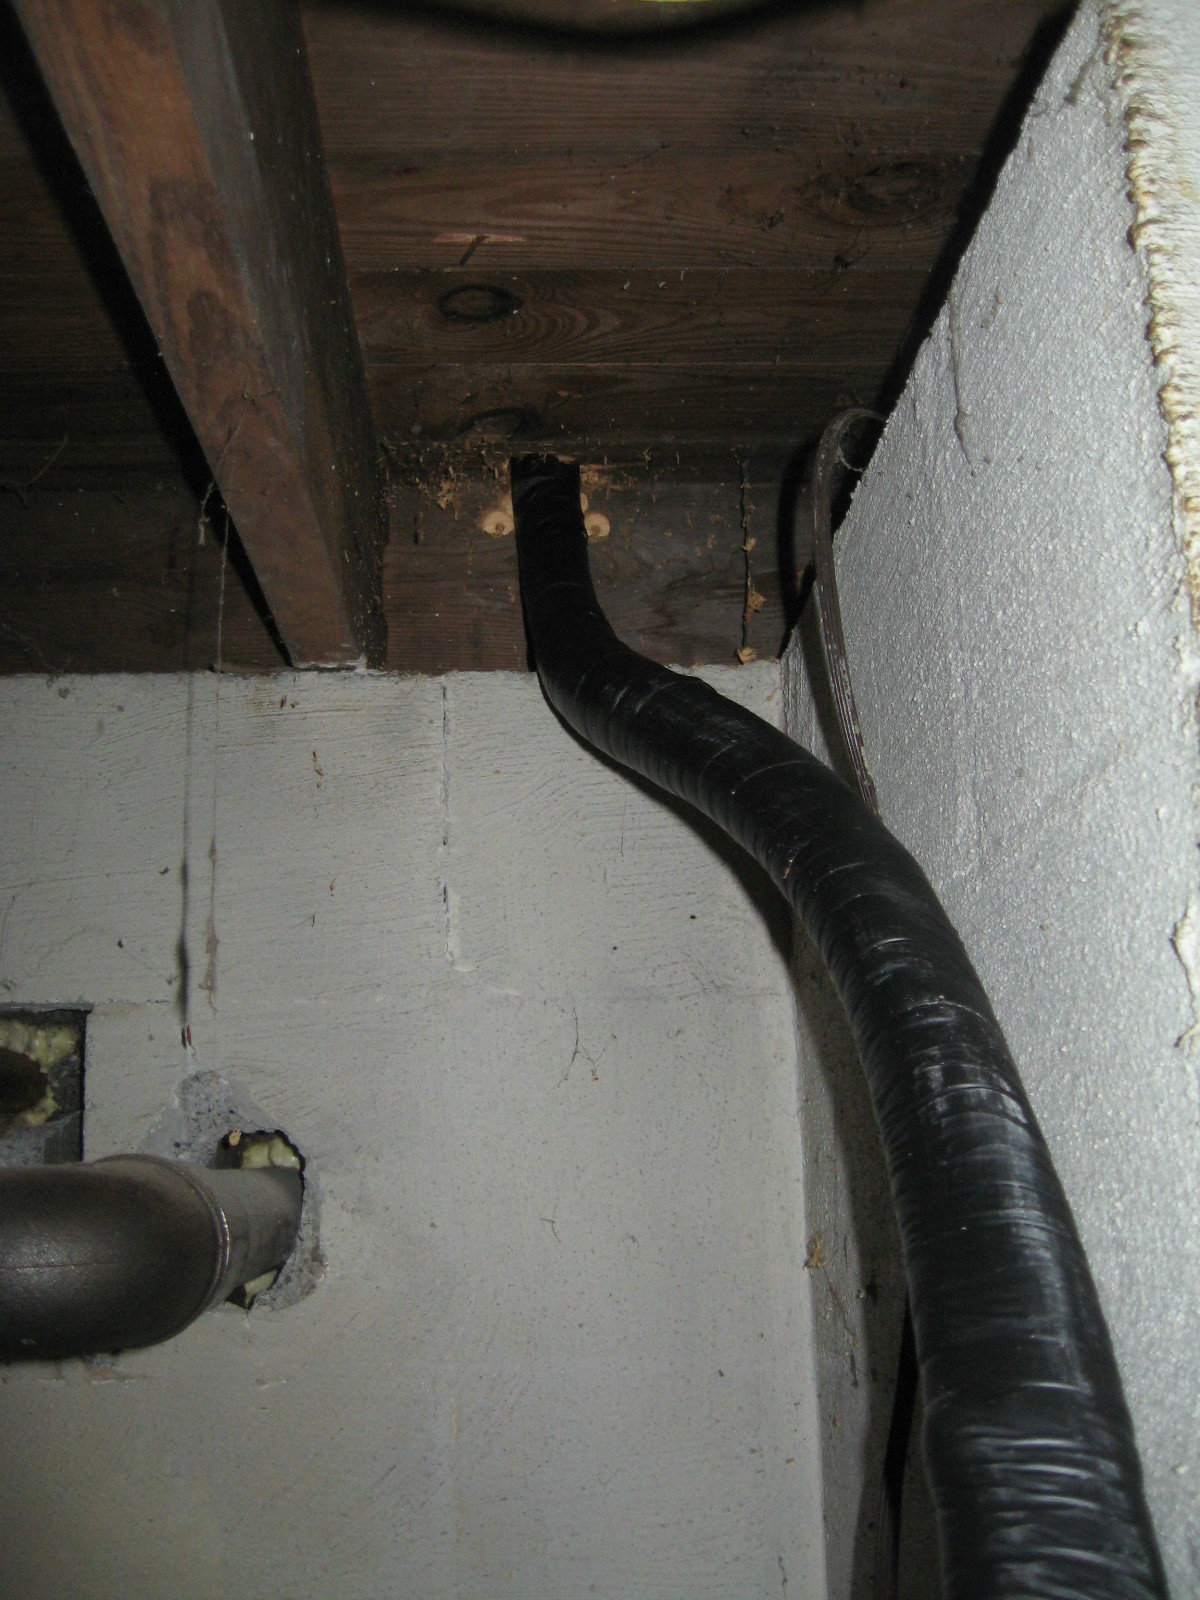
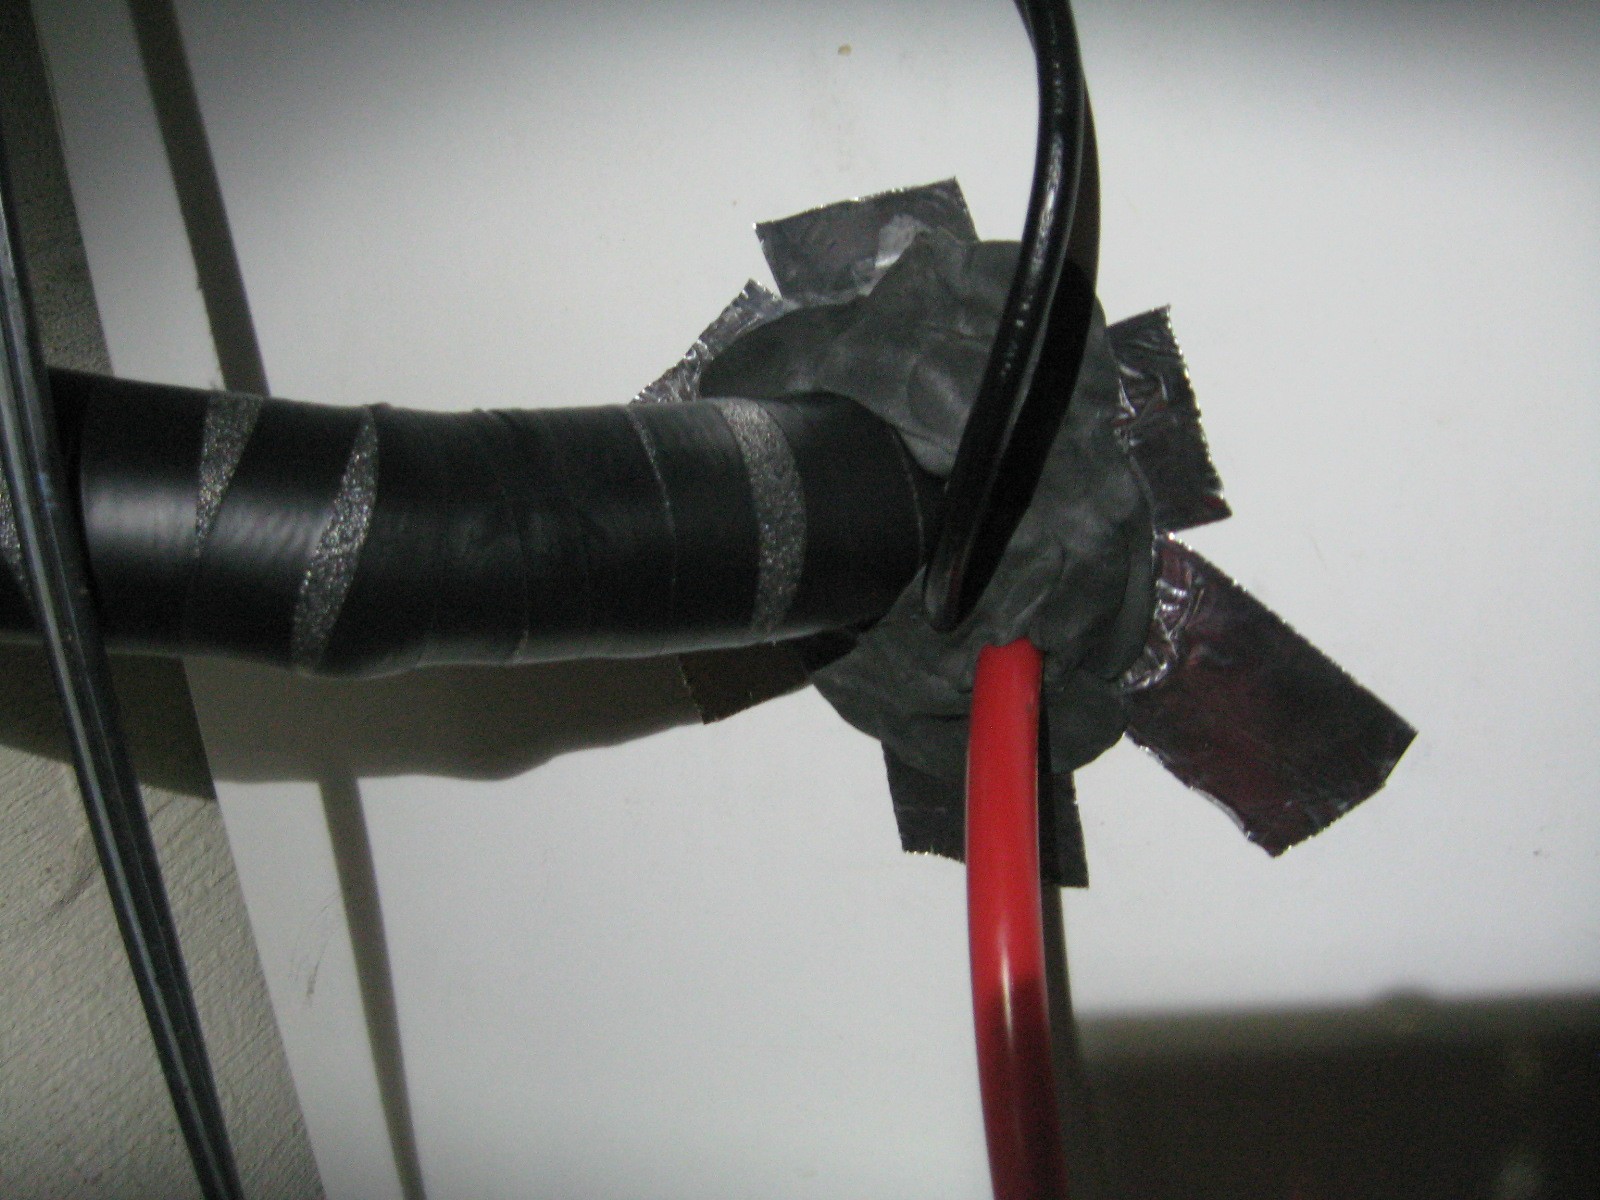
To make the trunk line - instead of buying one for 98 dollars a foot premade - I placed all the beer lines around one of the vinyl tubes(which had been arbitrarily chosen to be the "cold fluid to the tower" line in a semicircle to keep them in contact with the cold fluid and keep down foam. I secured the return line to the back of the cold line and secured them all together with zip ties every few inches. I know that professional trunk lines have a plastic interior, so I decided to make the interior easier to work with and try to stop condensation by wrapping the entire thing in saran wrap. worked pretty well and made getting the foam closed up easier than it could have been.

7sFff.jpg


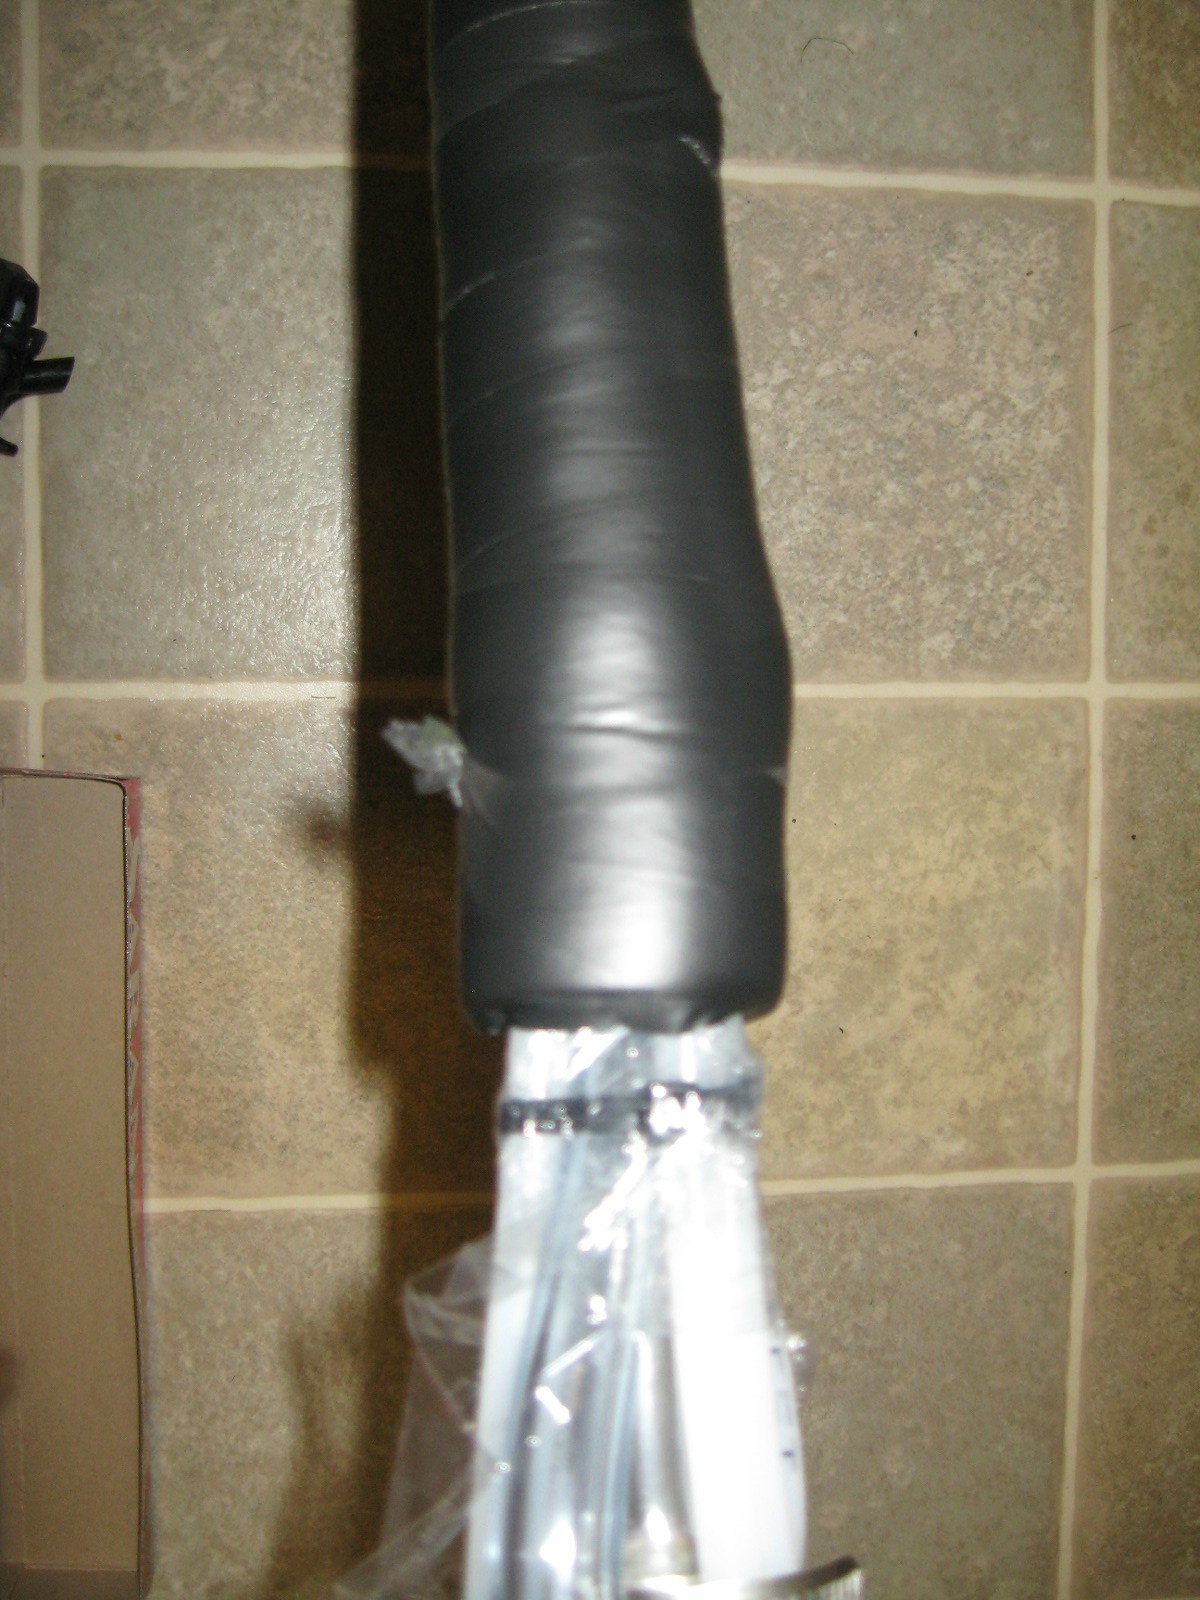
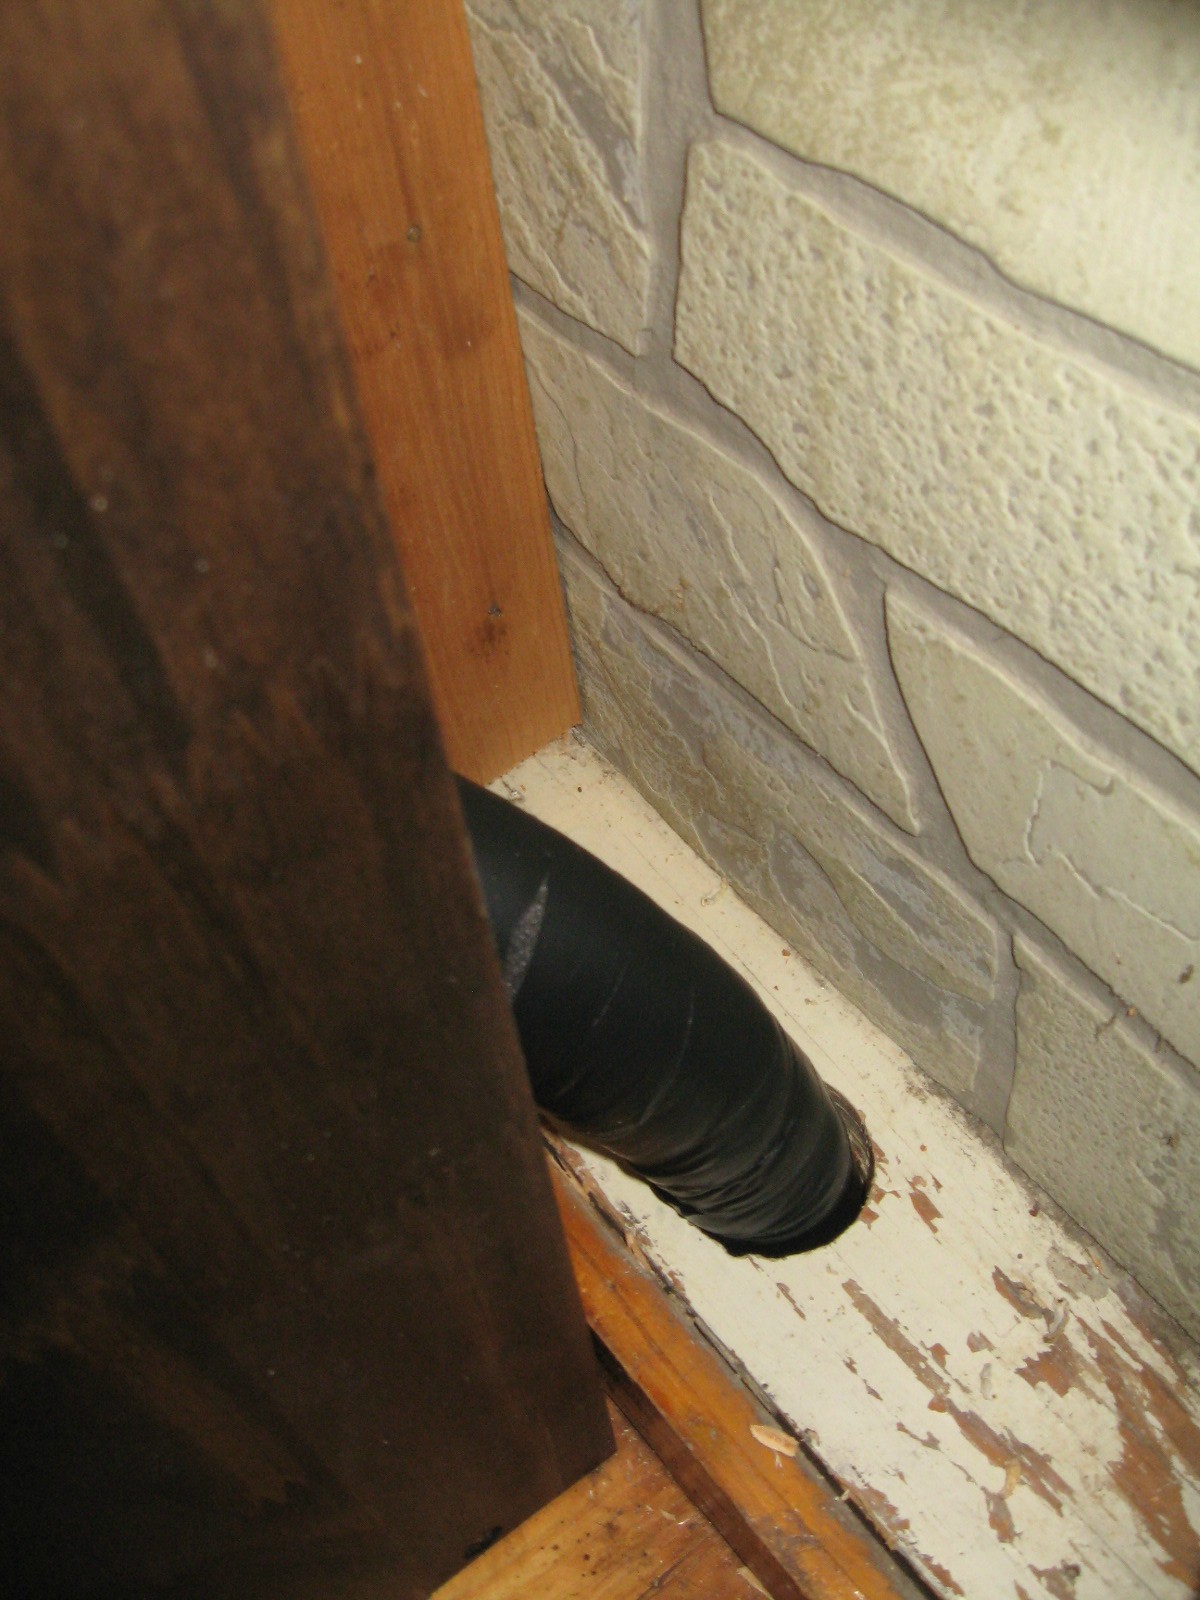
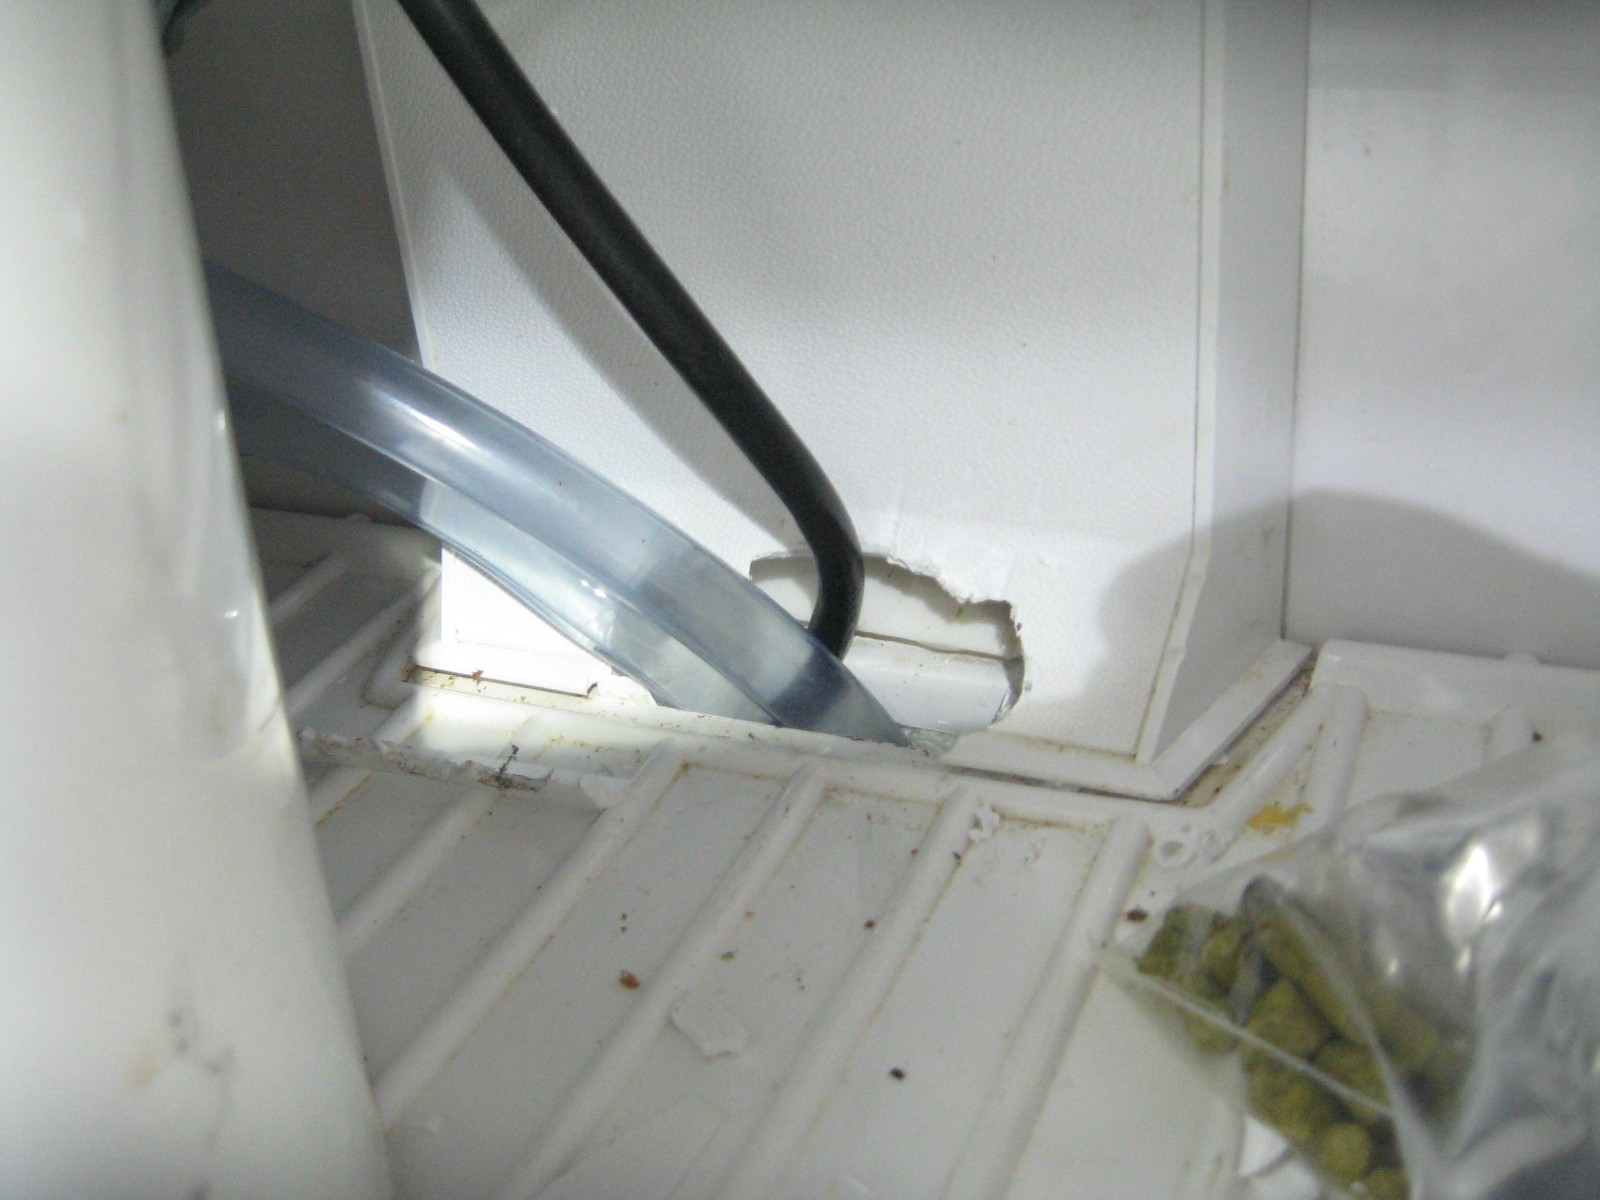
The foam had two self adhesive sides that stuck together to hold the tubing shut, I wanted more than that so I decided a wrapping with electrical tape would help - and it did. It made feeding the line through the hold I cut to the basement a lot simpler and rip free. I even had my son help me do it - and telling an 11 year old what to do with something like this while you yell commands and directions through the living room floor is not supposed to be as easy as it was.
owXUj.jpg

PWa5h.jpg

utohr


EDIT: I had one of the QD posts break off of the bev seal line and tried the boiling water thing to fix it( which involved a jet boil stove, a headlamp and me burning my fingers and some arm hair. I bought a heat gun for $20 from True value which made working with the tubing so much easier. A heat gun is a must for anyone using this tubing.
 
I was initially prepared to drill through our hardwood floors, then I thought about this hideous knicknack cabinet next to our fireplace one room of our house that we had previosuly had covered with a bookshelf, so I drill through that.
GxvBV.jpg

and into the basement along the foundation - lucky placement.
s4njU.jpg


I cut a hole in the fridge - I tried with a hole saw but quiclky went to my old friend the angle grinder.
The hole had some sharp edges but a flapper pad and some weather tape made me forget about those. I fed the trunk line through the hole, along with the co2 supply and the power cord for the pond pump(which I hope will function well in sub freezing temperatures) and sealed up the hole with duct putty.
vcrsi.jpg

73xx6.jpg


The inside of the fridge is an aweful mess - I have no idea how to organize the lines for the co2 distributor and the beer lines, I will figure something out if I really need to.
PWGwjs.jpg


I had thought that in order to fit 6 kegs in my fridge I would need to remove the door shelving, luckily this fridge is perfect and can fit 6 kegs without further modification( which is good because after three days of puttering with this stuff I was ready to drink and not work on planning to drink)
PWGwj.jpg

Chilling the Line
In the image below you can see the chilled salt water lines routing up to the freezer compartment
ydVsB.jpg

in order to power the pond pump seen working in its saltwater bath here
pc1CS.jpg


The pump and chiller work great, I have to dial in the temperature dial on the freezer so that I don't accidentally freeze any of my beer lines if they are exposed to sub freezing temps for long period of times( probably won't happen but who knows)

here is what it looks like when its running, you can see the return line on the top rim of the bucket( high tech I know) the flow is great, moves liquid well even though the top of the tower is easily 6 or 7 feet above the freezer. The faucets, not the tower, are cold enough to be drawing condensation already just a little while after chilling the salt water.
VrFtz.jpg


Below is the almost finished project ( i need 3 more Perlicks and need to make 3 more tap handles - as well as paint/stain the ones pictured here)
djnHw.jpg


I still need a drip tray for this thing - anyone know where I can get a cheap 18 inch long drip tray to put under the taps?

I will post a picture of my pours from my taps when I get all the kegs chilled down - initially the warm beer was foamy but as I continue to pour more testers its getting better and better
 
Here is a picture of the coldest beer I have pulled from the tower, they keep getting colder and man are those perlicks nice to use.

this is a honey belgian double that I made a while ago
Sw617.jpg
 
its this stuff: Accuflex Bev-Seal Ultra barrier line 3/16"
I bought from Birdman brewing supply through the vendors section.

The lines are each 15 feet long from tap to keg.
 
So i had the top freezer compartment on full blast all night, went down to check the salt water pump and its still flowing at a great rate. There is some condensation forming along the outside of the trunk line downstairs and I think i will have to do something about that - perhaps a dehumidifier down there or something.

The beer upstairs is coming out at around 33 degrees from the tap - think I need to turn down the freezer so the lines don't freeze.

but the Salt Water bucket and pond pump are still going strong and I think I have proven proof of concept for using that as a cooling system. I will probably replace the salt water every so many months and might go with propylene glycol at some point to help with longevity.
 
Nice. I'm planning something very similar. I'm also excited to here that you get nice pours of of that much line and going vertical. What would you say is the total distance in hight from the center of your kegs to the center of the shank?
 
At the moment I am 350 miles from home so a specific measurement is not presently possible. If I had to guess I would say 7.5 feet from center of shanks to the middle of the kegs, might be longer might be shorter. I was lucky enough to find the ideal place to put it and have the shortest travel of the insulated line, but you can see all that in this post. Let me know if you need any help with your build.

Cheers.
 
yeah, it works great, pumps all the way up and down, I did have to help it up the line the first time but after that its going like a champ


I would put a check valve on the line that runs up to the main floor. That way the line will stay full of coolant and you will not have to help it to flow in the future. Since the distance up and down are nearly identical the pump should have not problem moving the coolant.

Many aquarium pumps are designed for salt water tanks so this should not be a issue over the long haul.

Just my two-bits.

Albert

Are you suggesting that the return leg will act as a siphon of sorts to help the pump? I had not thougut of this and now feel better about the pump I just bought on eBay. 9' max head i think...
 
Are you suggesting that the return leg will act as a siphon of sorts to help the pump? I had not thougut of this and now feel better about the pump I just bought on eBay. 9' max head i think...

yes, it does act as a siphon and when this happens the only resistance working against the liquid is the friction from the interior of the tubing - as a few people told me when I started asking around on here about it, I initially thought I would need a 12 to 14 foot pump because that was my distance from the pump up to the tap and then back to the coolant tank.

I have a cheap pond pump from Home depot, the flow rate is great. if it fails I will either return it if I can or I will get something better.

I like the idea of a check valve in the line, just have to find one that fits into a 1/3 inch ID line
 
Nice setup. Never underestimate what a homebrewer will do to get his/her beer on tap!

Here is a link to a stainless 4" x 19" drip tray for $18.64 + shipping. this is the tray i have

http://www.katom.com/370-DTS419.html

I appreciate that, I have the remaining three perlicks waiting for me at home to install this weekend, I love having beer on tap, and Kombucha - fantastic.

THanks for the link to the drip tray, but the top of my cabinet is only 18 inches across, I don't want the tray sticking out past the edges as I have small kids and keeping them away from beer is usually a good thing.

If only I could find one an inch or two shorther:mug:
 
What kind of pressure do you have to use to push the beer that far and high?

Does it effect the carbonation in the kegs? i.e. continuosly carb them more than you would like?

Do you use a nitrogen mix to push that won't carbonate, just push?
 
What kind of pressure do you have to use to push the beer that far and high?

Does it effect the carbonation in the kegs? i.e. continuosly carb them more than you would like?

Do you use a nitrogen mix to push that won't carbonate, just push?

at the moment I have my 20 lb co2 tank set up pushing the beer at 12-14 psi. that's it. no issues with over carbing or anything so far. The beer pushes just fine, not really fast out of the taps but fast enough for me. that being said the system has been left alone unattended in my house for the last week while my family and I are on vacation, time to see if the whole setup can deal with being alone.

the next time I have my tank refilled I will look into beergas, but I don't know anywhere near me that does it
 
Are you suggesting that the return leg will act as a siphon of sorts to help the pump? I had not thougut of this and now feel better about the pump I just bought on eBay. 9' max head i think...

Exactly. The distance and and down are almost the same. The pump really has an easy job circulating the liquid but getting the liquid to the top when the lines are empty is a bit more of a challenge.

Albert
 
There is some condensation forming along the outside of the trunk line downstairs and I think i will have to do something about that - perhaps a dehumidifier down there or something.

How about a temp controller? Insert the probe in the middle of your trunk line setup, probably somewhere toward the top, and run the pump off of that. Will allow you to keep the lines cold, but not "too" cold, and also save on some electricity for the pump...
 
I suppose with a check valve preventing the backflow to the pump, the pump could shut off and no problem restarting. $25 temp controller and an extension cord, and you could put it anywhere...
 
I suppose with a check valve preventing the backflow to the pump, the pump could shut off and no problem restarting. $25 temp controller and an extension cord, and you could put it anywhere...

If the saltwater tubing is leak free, there should be no need for check valves. The pump end of the tube is under water, and if the return end of the tube is under water, there is no room for air to enter the line.
 
I was thinking more about if he wanted to change the salt water solution than about the day to day operation of the cooling system. I have an aquarium with a large filter system under the tank. Sometimes when I clean all the lines it can be a real chore to get the system to run again. But if the lines stay full of water it is easy.

Albert
 
Good point, hadn't thought about water changes. Even for that, he could just clamp the tubing off and change the water in the bucket. The tiny amount of water in the tubing shouldn't make much difference to leave in place when the comparatively large amount in the bucket is changed.

Then again, with highly saline water at sub-freezing temps, I don't picture much nasty stuff growing in there to really require frequent water changes... While the plumbing is similar, we're talking about vastly different water conditions from an aquarium (where you actually want certain types of bacteria to grow).
 
as for the temp controller - a good idea - it is too late for me to implement that - the trunk line is wrapped up and sealed, working on it would be difficult, and I don't think the condensation will be a major deal over time, if it is I will find another way to deal with it. The check valve isn't really necessary as since its easy for me to help the liquid along with a bit of suction, it ran by itself for 7 days without me home and there were no problems.
 
as for the temp controller - a good idea - it is too late for me to implement that - the trunk line is wrapped up and sealed, working on it would be difficult,

Yeah, I was wondering about that. Would definitely be easier to implement during initial construction than adding on after the fact. Probably not worth the effort or expense if you've got it all under control.

Still something to keep in mind if the condensation gets out of line during the summer months, or just an idea worth having here for others who may be searching the forums for ideas on their own builds....

One thing to keep in mind, though, is that the condensation is an indicator that you're wasting energy. Both your fridge and pump are working harder than they would have to.

Might also be worth looking into beefing up the insulation on the trunk line.....

really, putting it in the trunk line is only one option, the other option would be installing a temp sensor somewhere in the tower near the taps or right near the chilling block. Either way the system works great so I have no real need to do this at this point. Great ideas either way
 
I do have one question for you...

What made you decide to go with salt water? I suppose with enough salt there probably isn't much danger of freezing, but my first inclination would have been to use RV antifreeze.

I'm sure the salt costs much less, but were there any other factors in your decision? Just wondering since I might be looking at doing a project like this somewhere down the road.
 
well with most projects i am go go get it done i need results, rv antifreeze was a car trip away and i wanted results - plus i know salt water cleans up easily and is non toxic. the untested system also meant leaks were possible(but there were none luckily).
 
I made sure the water had reached the highest salinity I could get it to to avoid freezing, plus having the water in motion keeps the temperature above whatever temperature it would freeze at.

I managed to put two pounds of salt into the water solution, I am sure some will evaporate over time requiring topping off
 
so I had an accident and learned a lesson. I had the bucket pictured above uncovered in the freezer and the water had reduced by about 1/3 through evaporation. I refilled the bucket but in the process knocked the return hose out of the bucket(which i did not notice) return an hour later and the pump is running dry and the floor is wet.

so I learned that salt water will just empty out of the fridge and dry up on the floor - unlike some pre dyed glycol mixture which I would have had to scrub off of things. I also learned that I have to secure the lines in the bucket in the future.

(I turned the pump off, mixed a batch of new salt water, and refilled the bucket. The pump works fine- no burn out or anything and the system is still going strong. Also I got my remaining 3 perlick taps from farmhousebrewing supply and just got a drip tray in the mail today. Will post pics when I get a working camera.
 
Awesome build! I am planning on doing something similar if I ever get the time, running a couple taps upstairs from the basement.

I bought 1/4" bev-seal a long time ago for this project (3/16" was not available anywhere, I called). Do you think that will give me too fast of a flow?
 
I bought 1/4" bev-seal a long time ago for this project (3/16" was not available anywhere, I called). Do you think that will give me too fast of a flow?

Actually, my understanding is that for longer runs it's actually better to use the larger ID tubing. Otherwise you end up with too much restriction and you're back to having foaming issues again.
 
I have no idea, someone with more knowledge than me can tell you about the effects of tubing diameter on resistance and foaming , I know I have seen it on here somewhere. I believe it is also a function of temperature - perhaps my chiller is why mine works. dunno. I am still stoked every time I pull a pint because everything just worked on the first try - something that rarely happens with (my) projects.

A quick search turned up this gem: https://www.homebrewtalk.com/f84/beer-line-length-pressure-calculator-35369/

sounds like it might help.
 
Cool, ty. I just know this bev-seal has less friction. I'd be going up one floor as well, so the height difference would be probably 10' I was not sure what your height difference is. Also I'd probably try to keep mine at around 40-45 degrees as I don't like my beer super cold.
 
iwHe4.jpg


so I still don't have all the taps with beer on them yet but they all work. I made the remaining tap handles and epoxied the threaded inserts in the bases, they turned out better than I expected since I have about 15 dollars invested in all of them. None of my faucets leak and the chiller is still working very well.

My only problem is the drip tray, I don't have the metal working skills to cut it down to size without fear of screwing it up majorly so it sits on top and goes past the edges of the cabinet by about 1 inch on each side.

overall I am pretty happy with this project, its so nice to be able to go into the living room and pull a glass on demand.
 
Back
Top