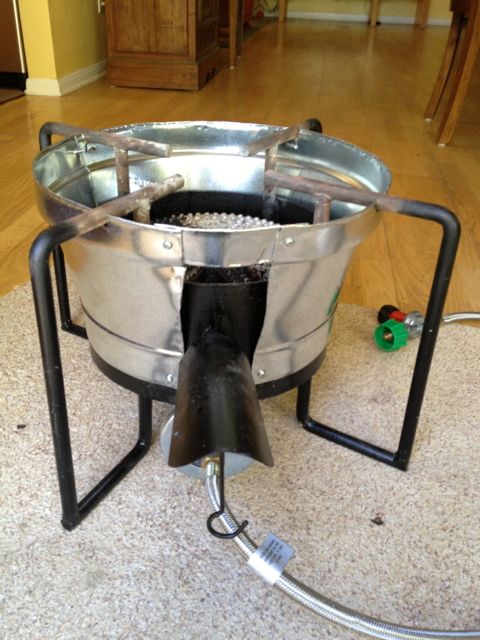
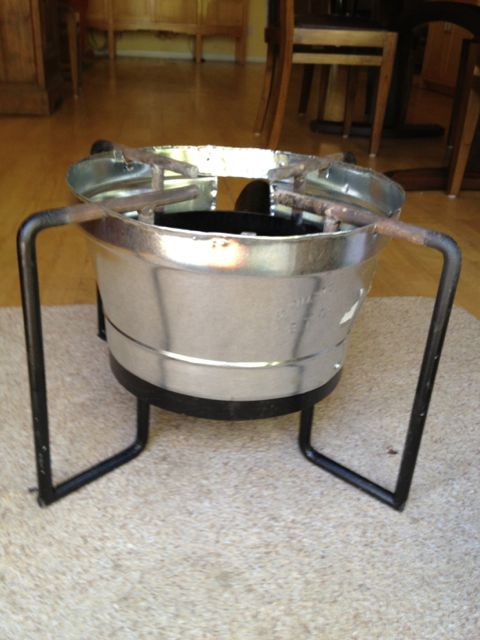
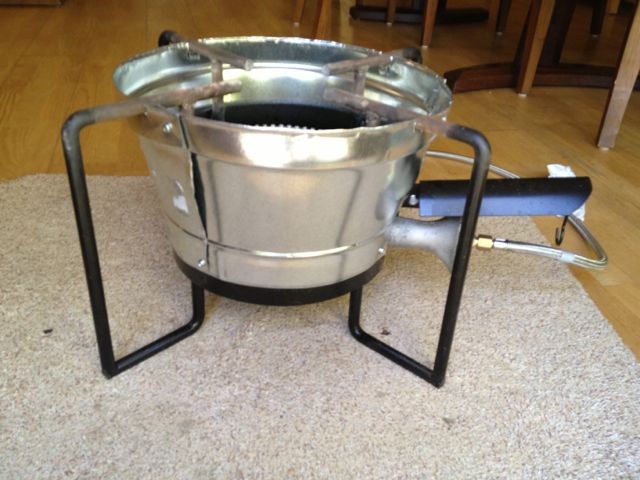
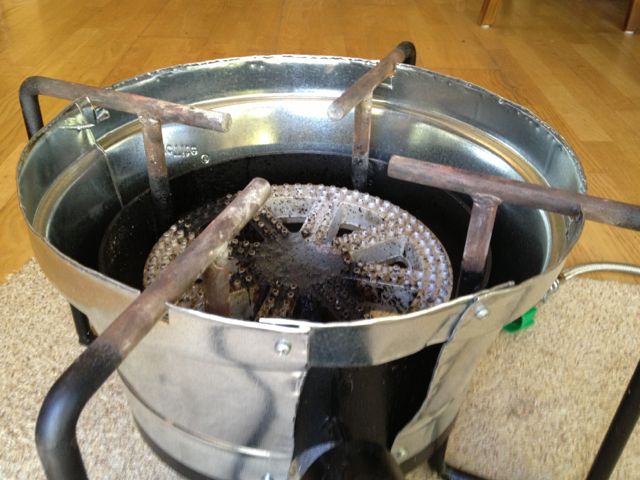
I just made a windshield for my KAB6 Bayou Burner out of two duct adapters from Home Depot (see pictures below). The purpose is to both protect from the wind (the existing windshield is far to short) and to direct the heat to the bottom of the keggle rather than around the edges. I think that the same modification could be done with a KAB4 (not sure). Also, looking at the finished project, it is possible you could cut the bottom out of a small metal bucket, cut it to open it, cut to an appropriate height and use it for a shield. In any case, this is what I did.
The project requires:
Two 8" to 10" metal duct adaptors (Ductite)
Sheet metal screws or small bolts (short 3/8" for connecting pieces of sheet metal and 1/2 or longer for connecting sheet metal to existing windshield).
Metal sheers, pliers, screw drivers (wrenches), drill, pointed object for piercing sheet metal.
Briefly (see pictures below):
1. Cut open the duct adapters along the weld line with metal shears and spread gently to open to diameter of the existing shield around the burner.
2. Put one in place with an end at the edge of the shield where the shank of the burner enters. I then measured the remaining length to complete the circle leaving a gap for the shank of the burner and leaving an inch for overlap with the other piece. In retrospect, the second piece could have been cut to leave room for the shank and connect to the first piece at both ends but I made a piece to span the gap out of scrap.
3. Remove both pieces and crimp the top edge and the ends of the two pieces that will abut the shank. This takes 10 min with a pliers but makes the metal pieces much more user friendly.
4. Put the pieces back in place and get aligned in their approximate position. I should have screwed the two pieces together at the top position of the joint before doing any further cutting because I made a few minor errors.
5. Mark each support bar 5" from the end as a guide for the approximate position of the top edge of the new shield. This will give a diameter of 15".
6. With the pieces in place and screwed together, position the shield tightly against existing shield around bottom with the top edge meeting the support bars at the marks you made in step 5. Now make a 1/2 inch cut in the top edge of the shield on either side of each support bar and bend the tab down to leave a gap for the support bar. This creates four points where the bars sit in the windshield and stabilizes the structure. It also makes a closer approach to the keggle.
6. Slip the shield up making sure it is tightly wrapped around the existing shield at the bottom and with the support bars in the gaps you just created.
7. Mark and drill a holes in the sheet metal pieces at the bottom of the abutting ends of the two pieces of a new shield. Also drill the existing shield at the position where those two pieces abut. The holes should be the appropriate size for the sheet metal screws or bolts you have purchased. Attach the two ends to each other and the existing shield.
8. Mark and drill holes at each end of the bottom of the shield and through the existing shield at the appropriate position. Use to attach both ends of your newly created shield to the existing shield.
9. If you left a gap, create a short strip of metal from scrap long enough to span the gap. Crimp the edges and then screw in place to provide both structural stability and to complete the ring. If you cut the metal to span, connect ends with a screw or bolt.
10. Enjoy your new windscreen.


