Keggle Conversion Project Finished

Homebrew Talk - Beer, Wine, Mead, & Cider Brewing Discussion Forum

Help Support Homebrew Talk - Beer, Wine, Mead, & Cider Brewing Discussion Forum:

This site may earn a commission from merchant affiliate links, including eBay, Amazon, and others.

mccumath

Well-Known Member
Joined
Dec 19, 2010
Messages
1,000
Reaction score
199
Location
Idaho
Well, a big thanks to everyone who has done this before me. I have all the pieces to finish my keggle, and put it all together last night. All stainless, weldless fittings. Thanks to Bobby from Brewhardware, and everyone else on here who had pictures and what not of their keggles!

Here it is! Now if only I could find another keg or two for the HLT and MLT...

Ryan M.

Keg1.jpg


Keg2.jpg
 
Very shinny man. That took some time, if you have free time ill buy the beer. :mug:
 
Very shinny man. That took some time, if you have free time ill buy the beer. :mug:

Sure, if you want to ship it to me... You may not get it back, but sure, will PM you a house nearby and have you ship it there...! :)

Hahahaha!

Thanks,

Ryan M.
 
You drilled a hole right through the middle of the EAGLE? Oh man...that's just not right.
 
That's what I think about AB... Yeah, I thought about that too, but it just happened that way... Besides, there is still a perfectly stamped, perfectly shiny eagle on the OTHER side...
 
That is pretty sweet! I have been working on my own keggle(s) for almost 2 years now, have all of the parts, most of the holes are drilled, tops are cut...just need to find the time to fire up the MIG welder and get it finished.
So tell me your secret...what did you use to polish that baby up so bright?
 
Man, that looks great. I think that's the first customer pic of the full weldless valve and stainless diptube I've seen. Mind if I snag the pics for my site? And maybe another one after you calibrate the sight glass?
 
Man, that looks great. I think that's the first customer pic of the full weldless valve and stainless diptube I've seen. Mind if I snag the pics for my site? And maybe another one after you calibrate the sight glass?

Bobby,

You can use that pic, absolutely. If you give me a few more days (after Christmas), I will calibrate the tube and take some pics with my DSLR. That was with the wife's point and shoot.

I decided that I was not going to polish with the number 5 stick, as it is just gonna get scuffed up and beaten around while brewing, and until I get a CIP type setup (all electric, eventually), just didn't see the point. The keg was still relatively new, so I got lucky there, only a few small dents/dings.

Had a little trouble with the getting the sight tube fitting sealed, but I think it was because I did not get the inside of the keg super clean before tightening it up. All good easy fix.

Also, if the hole is drilled 3-3/4 inches from the bottom skirt of the keg, it gives you 1/16 of an inch between the dip tube and the bottom of the keg. Very nice, left maybe 1-2 tablespoons of water behind. Will see how it works in the next few weeks with EdWorts Haus Pale Ale Recipe and the hop additions. I really need to brew!

And to anyone else out there that is thinking about drilling holes in your keg - it is VERY worth the extra cash to have new drill bits on hand. They eat through stainless like butter! The step-bit had a little difficulty, but switched the drill to high torque and low speed, used olive oil for cooling/lubrication (its what I had), and it ate that stainless for dinner. Life was good.

That is pretty sweet! I have been working on my own keggle(s) for almost 2 years now, have all of the parts, most of the holes are drilled, tops are cut...just need to find the time to fire up the MIG welder and get it finished.
So tell me your secret...what did you use to polish that baby up so bright?

Radical_Rick,

If you look under any post of Bobby_M's, you can see the Keg Polishing link there. That is where the inspiration comes from!

Thanks guys, and thanks Bobby for talking me into the compression fitting and the dip tube. Much easier to use/disassemble for cleaning. Turned out quite nice, and passed the water test last night.

I would buy from Bobby again anytime!

Ryan M.
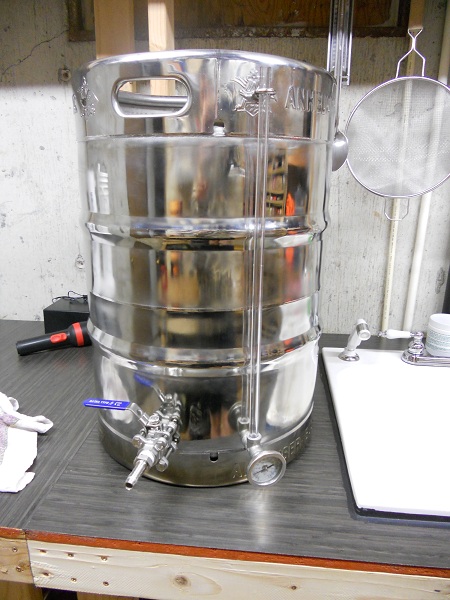
 
Just to make sure, did you have the gasket on the inside of the vessel for the sight glass? It looks like it from the picture. Tut tut....you didn't follow the instructions :) The gasket for the sight glass goes between the tee and the outside of the keg. It should be leak free with basically a hand tight connection. I would expect it to leak with the gasket on the inside.
 
Bobby_M said:
Just to make sure, did you have the gasket on the inside of the vessel for the sight glass? It looks like it from the picture. Tut tut....you didn't follow the instructions :) The gasket for the sight glass goes between the tee and the outside of the keg. It should be leak free with basically a hand tight connection. I would expect it to leak with the gasket on the inside.

Hey Bobby!

I just finished up my 2 keggles last weekend. Installed the sight glasses as instructed (great vid btw), but the ball valves came with no directions. I'm just wondering how you recommend connecting them... basically, where do the gaskets and washer go, and how tight should I make it? I had leaks in both until I took the washer out, but now the valves feel kinda loose.

Thanks!
 
mccumath

How big did you cut the top hole in your keggle and do you have a cover that will fit it well? I am close to cutting all 3 of my keggles and want as large a hole in the top as I can get and still be able to get a cover to fit nicely over it.
Thanks
Zeek
 
They are a little touchy like any other bulkhead that uses tapered "NPT" thread. On the inside, you should have the locknut and gasket. On the outside, you MAY have to use the metal washer or not. Note, you only use the one silicone gasket on the inside. The extra one is a spare. The key is to put plenty of teflon tape on the threads that will be going into the valve. You can put this on before inserting the bulkhead into the hole. If you still have leaks, the assumption is that the ball valve is bottoming out on the washer too soon before the threads seal. You can try one more time to put more teflon tape (or use the thicker pink/yellow type) and if that doesn't work, remove the metal washer.

When the valves are new, the ball valve seats are rather tight so it may seem like operating the valve puts a lot of torque on the weldless connection. As they break in, it's less of an issue. You can also put a tiny smear of keg lube or Vaseline on the ball to lube it.
 
mccumath

How big did you cut the top hole in your keggle and do you have a cover that will fit it well? I am close to cutting all 3 of my keggles and want as large a hole in the top as I can get and still be able to get a cover to fit nicely over it.
Thanks
Zeek

I cut mine to 11 1/2 inches. Therefore, I knew that anything that required a 12" lid would fit it nicely. I built a jig like Bobby's (go figure - see a trend?) using the inside of the valve housing to the keg, a 3 1/2-4" 3/8" bolt and lock washer/nut, and a couple of fender washers - see pics attached. Remove the dip tube, and inner guts to the valve housing, place your fender washers and bolt through and attach to the jig.

Hope this helps!

Ryan M.

Keg-Valve-D.jpg


Keg-Valve-D2.jpg
 
Just to make sure, did you have the gasket on the inside of the vessel for the sight glass? It looks like it from the picture. Tut tut....you didn't follow the instructions :) The gasket for the sight glass goes between the tee and the outside of the keg. It should be leak free with basically a hand tight connection. I would expect it to leak with the gasket on the inside.

Damn, you caught me! All good, now do you see why I bought EXTRA gaskets for them??? Gotta switch that around, only take a few minutes!

Thanks for your help!

Ryan M.

Edit: works great now that it is installed correctly. And it is calibrated. Will take pics when i get home in a few days!
 
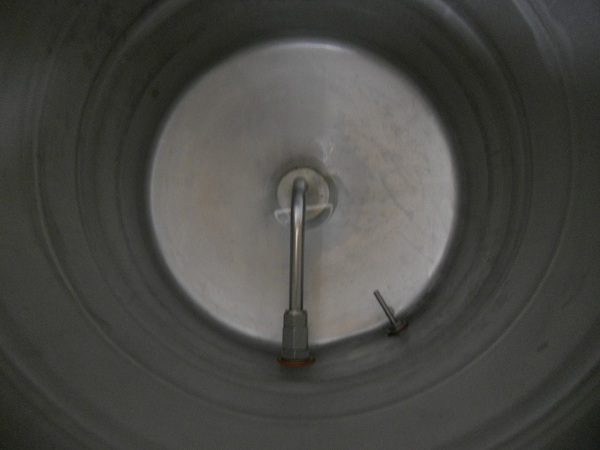
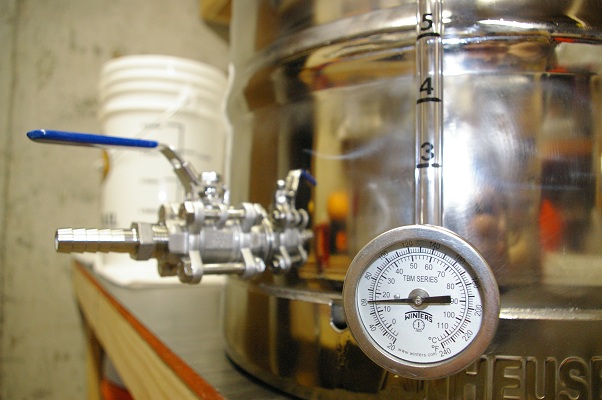
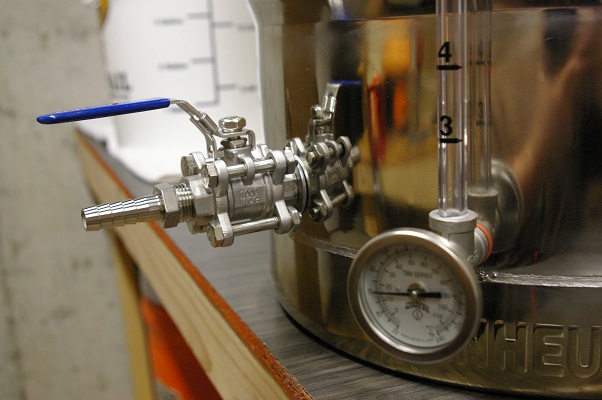
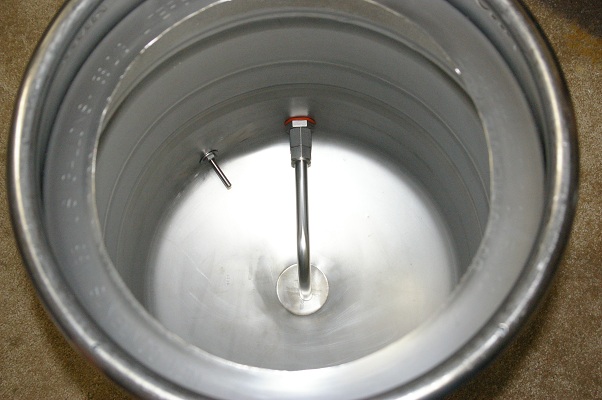
Here are a few more pics after it is completely finished... I kinda lied before. It is now calibrated, the top cut edge was sanded smoother, and is now cleaned up and ready for use.

Ryan M.

Keggle 1 Small.jpg


Keggle 2 Small.jpg


Keggle 3 Small.jpg


Keggle 4 Small.jpg
 
Ok, your pic gets front page coverage for being awesome.

Thanks man! I am honored! Just saw this the other day, was pretty ecstatic! I have a Bayou pot that I need to get converted (same parts) next until I can find another keg. Be easy enough to swap them over later. Sucks dumping water from the HLT into the mash tun with a saucepan. My HLT definitely needs some bling factor!

Thanks Bobby!
Ryan M.
 
Back
Top