Help with propane plumbing

Homebrew Talk - Beer, Wine, Mead, & Cider Brewing Discussion Forum

Help Support Homebrew Talk - Beer, Wine, Mead, & Cider Brewing Discussion Forum:

This site may earn a commission from merchant affiliate links, including eBay, Amazon, and others.

Tomtanner

Well-Known Member
Joined
Feb 26, 2011
Messages
364
Reaction score
6
Location
Tampa
Eye guys,

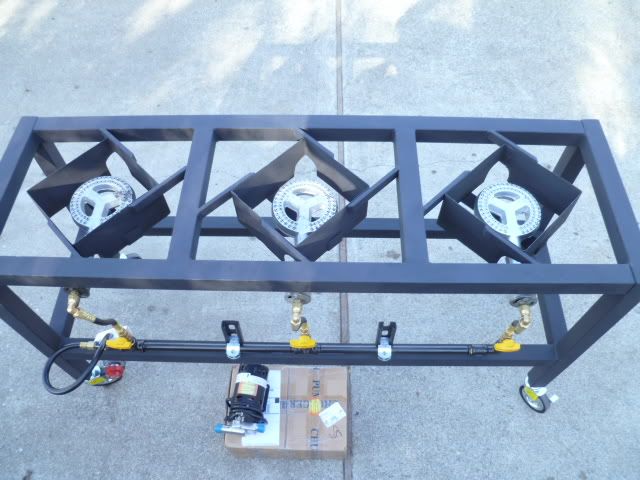
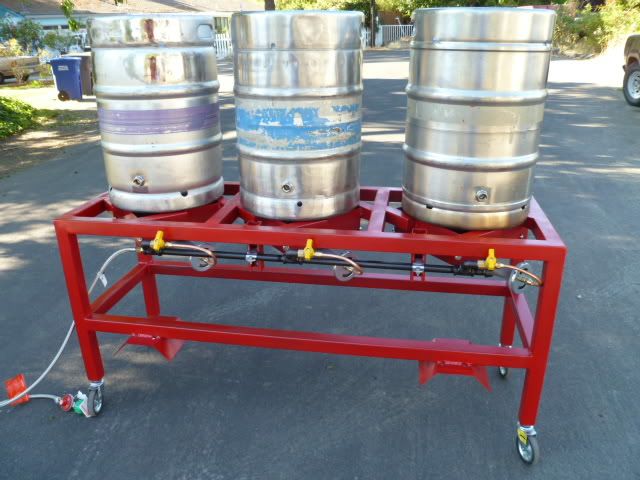
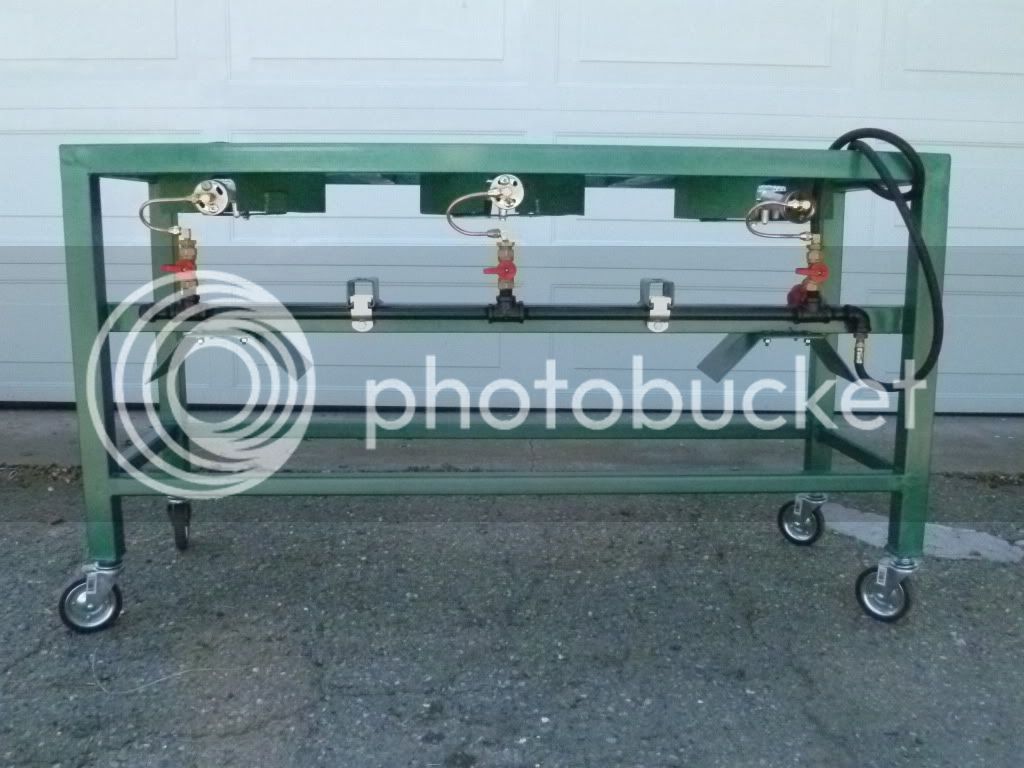
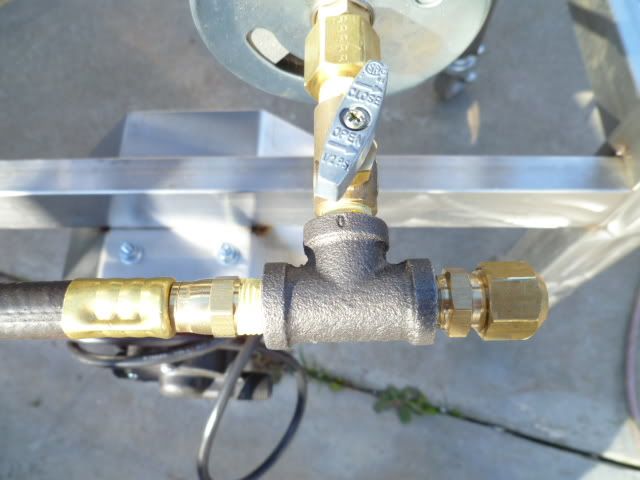
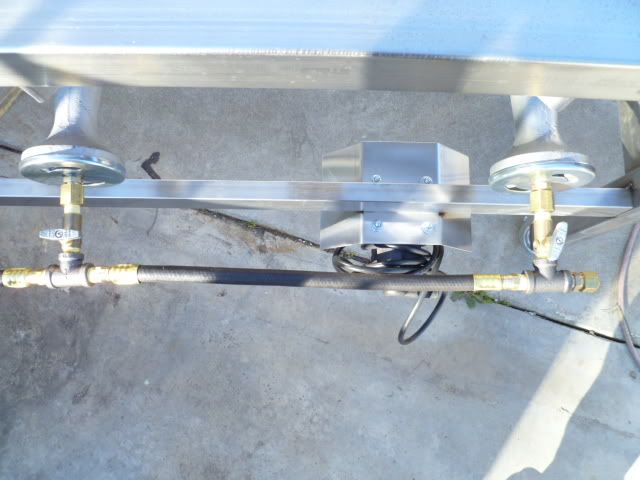
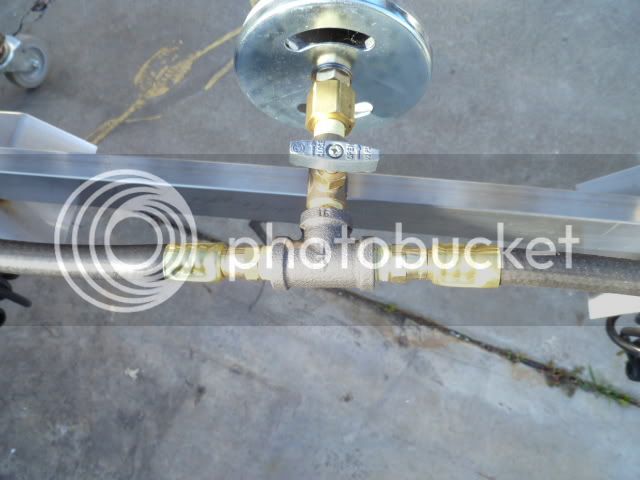
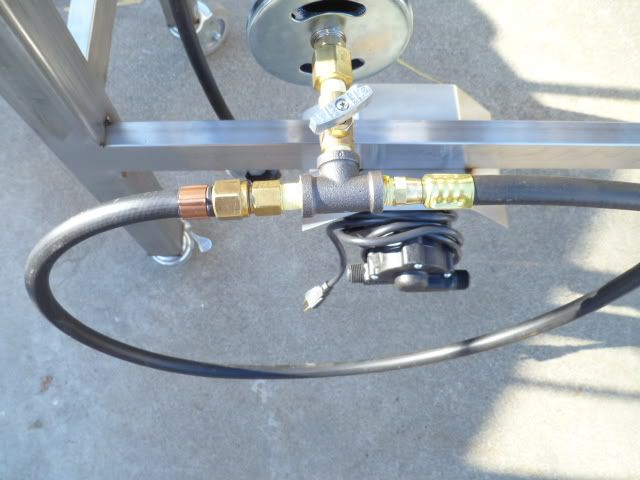
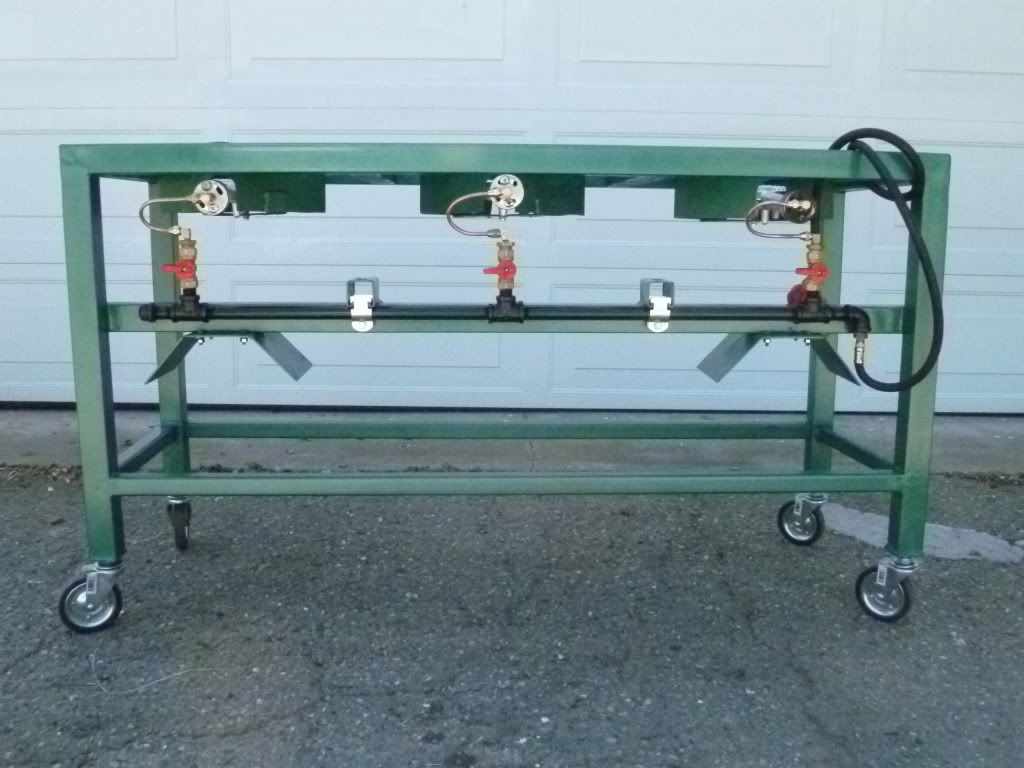
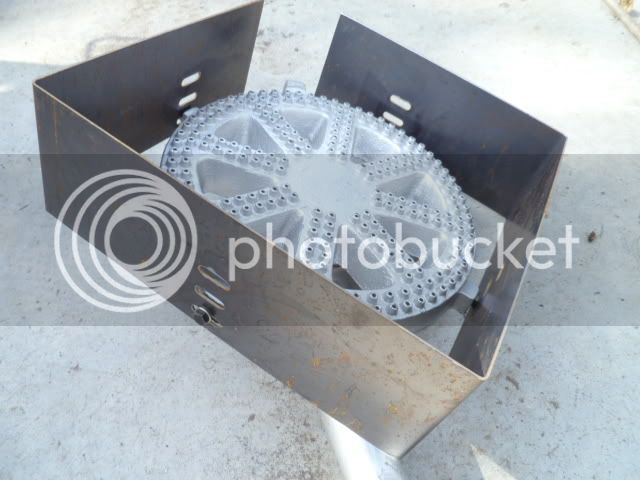
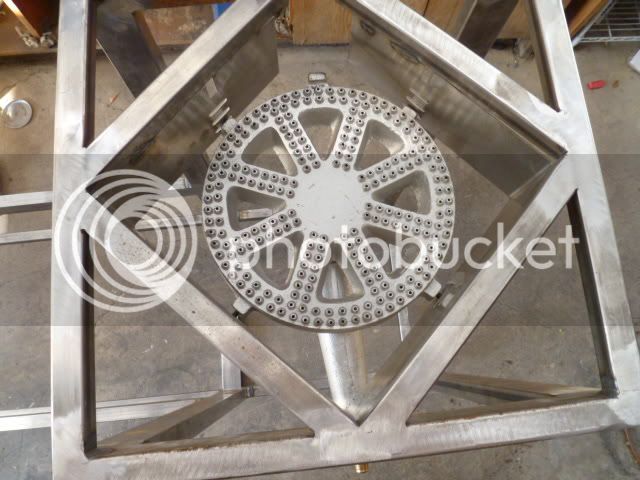
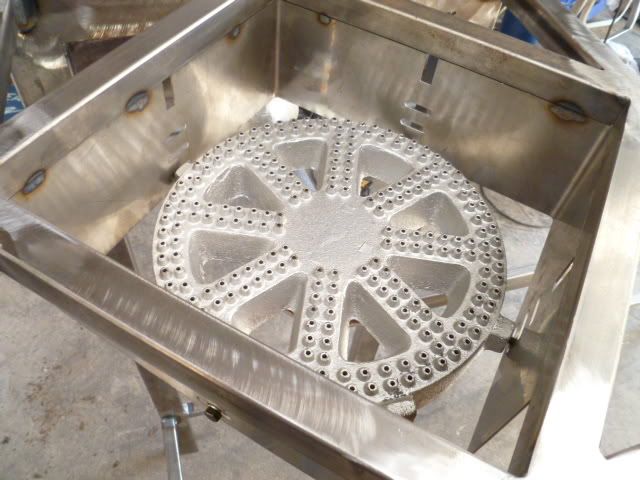
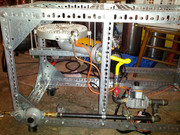
Can someone please help me with the propane plumbing for a single tier rig? I have three banjo burners and plan to do a direct fire rims system. I'm about halfway through welding my stand together and the next step will be mounting and plumbing the burners. I have zero experience with this kind of thing and was wondering if someone can help me ala step by step instructions and or pics with how to start. I will most likely keep it simple but have no problem paying extra to make sure it is done right and is safe. I would love to do something as simple as running these burners like you might run a grill in your backyard..... Can anyone help a guy out?
 
I'm using 1/4" copper coil for my setup, inexpensive, easy to work with, and supplies enough juice (remember that the gas comes out of the regulator via much smaller opening than 1/4").

Other's have used the tubing the single tier is made out of to route the gas, others use steel pipe from home depot (they'll cut it to size and can cut threads for you).

They all work just fine, what kind of look are you looking for and/or effort involved?
 
I used 1/2" copper and soldered my whole rig up pretty fast. Much easier than using black pipe. I can hook up one propane cylinder on the right side and run all three burners at once, if needed.

7075-gas4.jpg


7076-gas3.jpg


7077-gas2.jpg


7078-gas1.jpg
 
If you're using low pressure gas (either natural gas or propane), I'd suggest 1/2" black iron pipe.
1/2" black pipe is cheap as hell. Don't use galvanized on propane, The gas will eat the coating, causing it to flake off and probably plug orifices and such. Not good.
1/4" will restrict BTU output significantly on low pressure.
 
I have to disagree on the 1/4" restriction. The hose coming from the regulator on most propane tanks is 1/4" and the burner orifice is where the real restriction is.
We used to use 1/2" pipe. We found this to be much simpler and works great. The needle valves give the user a lot more control.

P1040543.jpg

P1040544.jpg

P1040545.jpg

P1040546.jpg
 
OneHoppyGuy said:
I have to disagree on the 1/4" restriction. The hose coming from the regulator on most propane tanks is 1/4" and the burner orifice is where the real restriction is.
We used to use 1/2" pipe. We found this to be much simpler and works great. The needle valves give the user a lot more control.

So do you control the flame with the valve you pictured here? I was under the impression that most people set the plumbing up on the backside of the stand and used a separate switch to control the flame from the front.

You see what I'm talking about? Zero experience on my end!
 
Gas for each burner is controlled by the valve attached to it. You may be confused by the flexible lines running to each valve. The hose is being used in lieu of hard pipe. In the last picture, the long hose is connected to the regulator and propane tank. Routing from the back of the frame often means the builder is using the frame for a gas manifold which is EXTREMELY unsafe. Where the feed hose is routed from (front, back, side) is irrelevant. It's a matter of personal preference. The cost of the components you see in the photos is comparable to that of hard plumbing. Less fittings are required and because we make up our own hose lines the fit is clean. Note that the plumbing is designed to be connected to the tank from either end of the stand.
Here is a more traditional approach:
P1000976.jpg
 
OneHoppyGuy said:
Gas for each burner is controlled by the valve attached to it. You may be confused by the flexible lines running to each valve. The hose is being used in lieu of hard pipe. In the last picture, the long hose is connected to the regulator and propane tank. Routing from the back of the frame often means the builder is using the frame for a gas manifold which is EXTREMELY unsafe. Where the feed hose is routed from (front, back, side) is irrelevant. It's a matter of personal preference. The cost of the components you see in the photos is comparable to that of hard plumbing. Less fittings are required and because we make up our own hose lines the fit is clean. Note that the plumbing is designed to be connected to the tank from either end of the stand.
Here is a more traditional approach:

Thanks for explaining! See this is why newbs need this forum. Do you sell your fittings/plumbing independently of your stands ?
 
Just my two cents, but the 1/2" black pipe is really easy to work with. Here are a few pics of my set up. You can get everything at Lowes or HD.

10 Burners.jpg

12 Burners.jpg

13 Burners.jpg

IMAG0252.jpg

Good luck!!
 
de3isit said:
Just my two cents, but the 1/2" black pipe is really easy to work with. Here are a few pics of my set up. You can get everything at Lowes or HD.

<img src="https://www.homebrewtalk.com/attachment.php?attachmentid=51656"/>

<img src="https://www.homebrewtalk.com/attachment.php?attachmentid=51657"/>

<img src="https://www.homebrewtalk.com/attachment.php?attachmentid=51658"/>

<img src="https://www.homebrewtalk.com/attachment.php?attachmentid=51659"/>

Good luck!!

Looks very nice, what are those grey boxes above your valve handles?
 
Tom,
He (de3isit) is using gas valve for automation. You didn't clarify whether you just wanted plumbing photos or automation.
For automation through gas valves, black pipe is the way to go to the valves. Coming from the gas valves you use flexible line.

Valve (bottom right)
1/4" Black Iron Tees
Adapter from 1/4" FPT valve to 3/8" 45 degree flare

The hose is 1/4" ID CGA 350 PSI with ferrules and 1/4" Barb x 1/4" MPT Swivel (we have our own crimper)
 
de3isit said:
Just my two cents, but the 1/2" black pipe is really easy to work with. Here are a few pics of my set up. You can get everything at Lowes or HD.

<img src="https://www.homebrewtalk.com/attachment.php?attachmentid=51656"/>

<img src="https://www.homebrewtalk.com/attachment.php?attachmentid=51657"/>

<img src="https://www.homebrewtalk.com/attachment.php?attachmentid=51658"/>

<img src="https://www.homebrewtalk.com/attachment.php?attachmentid=51659"/>

Good luck!!

Did you cut and thread it yourself?
 
Tomtanner said:
Looks very nice, what are those grey boxes above your valve handles?

Also curious, what kind of mounting is that to your frame and how is it attached? Looks good, I might have to replicate.
 
OneHoppyGuy said:
Tom,
He (de3isit) is using gas valve for automation. You didn't clarify whether you just wanted plumbing photos or automation.
For automation through gas valves, black pipe is the way to go to the valves. Coming from the gas valves you use flexible line.

Valve (bottom right)
1/4" Black Iron Tees
Adapter from 1/4" FPT valve to 3/8" 45 degree flare

The hose is 1/4" ID CGA 350 PSI with ferrules and 1/4" Barb x 1/4" MPT Swivel (we have our own crimper)

Ah I see! I think this first rig I'm going to keep it very simple. I don't even think I will use pilot lights. . I do have two pumps (actually bought one from you) So after taking care of the burners I will work on that. I would like to mount some switches for the pumps but that will be about as high tech as I get on this first project.
 
You guys this has been do helpful, I can't thank you guys enough for all your input and guidance. It all looks a lot more simple than I thought previously.

So if I got this straight I already have the three burners. I'll need the pipe three needle valves and a main regulator from my propane tank. Additionally I'll need to settle on a connection system directly into the burner. Is it really that simple ?
 
If it is ok I would like to piggy back onto this discussion. I am also building a brew stand with these same burners and have had these same questions, so thank you all. My question is how far away do you mount the burner from the bottom of the kettle? and, what was the easiest brackets to use to mount them?
Thank you
Cheers
 
How to mount and distance? Gotcha covered...
We will begin production on these next week along with a pump mount. They'll be for sale on our site.

P1040438.jpg

P1040437.jpg

P1040504.jpg

P1040505.jpg
 
OneHoppyGuy said:
How to mount and distance? Gotcha covered...
We will begin production on these next week along with a pump mount. They'll be for sale on our site.

Dude you do such amazing work.
 
This is the direction I'm headed. Seems to work pretty well.
Fire at the flick of a switch never gets old.


Yes, that is an excellent option but at a price tag nearing $400 complete (Gas valve, controller, pilot, transformer, enclosure for controller and transformer, regulator) Not to mention the time to install.

We install lots of these.

A low cost alternative for ignition is an electronic BBQ ignitor.
 
I used 1/2" copper and soldered my whole rig up pretty fast. Much easier than using black pipe. I can hook up one propane cylinder on the right side and run all three burners at once, if needed.

7075-gas4.jpg


7076-gas3.jpg


7077-gas2.jpg


7078-gas1.jpg

HOLY CRAP MAN....did you get any solder in the joints? I have seen 1st year apprentices do cleaner sweat joints.
just f in with ya:)
next time when it starts to drip...its full
 
Ok so rather than using the regulator at the tank, you guys are using the valves to control gas flow to each burner? Or are you using both?
 
Also curious, what kind of mounting is that to your frame and how is it attached? Looks good, I might have to replicate.

I currently use the gas valves for electronic ignition only, with the goal of automation in the future. ( trying to think ahead ) I measured all of the black iron pipe and bought it in the necessary lengths. The pipe hagers were purchased at Lowes. They look really clean when installed.
http://www.lowes.com/pd_302044-34146-AV302044_0__?productId=3223519&Ntt=split+ring+hanger&pl=1&currentURL=%2Fpl__0__s%3FNtt%3Dsplit%2Bring%2Bhanger&facetInfo=
 
de3isit said:
I currently use the gas valves for electronic ignition only, with the goal of automation in the future. ( trying to think ahead ) I measured all of the black iron pipe and bought it in the necessary lengths. The pipe hagers were purchased at Lowes. They look really clean when installed.
http://www.lowes.com/pd_302044-34146-AV302044_0__?productId=3223519&Ntt=split+ring+hanger&pl=1&currentURL=%2Fpl__0__s%3FNtt%3Dsplit%2Bring%2Bhanger&facetInfo=

Did you tap a whole in your stand for the hangers?
 
I drilled a whole all the way through and used a 2.5" bolt threaded into the hanger. Let me know if you would like a different angle pic to show it.
 
de3isit said:
I drilled a whole all the way through and used a 2.5" bolt threaded into the hanger. Let me know if you would like a different angle pic to show it.

Please. Thanks.
 
I added an extra nut on the opposite side to pull it snug to the other side. I think it makes it a little cleaner look.

IMAG0297.jpg
 
Hey, reviving this thread for similar questions.
I just got my hands on a sweet brutus with banjo burners. It will be arriving tomorrow so I dont have exact part numbers, but from what I understand the burners are the same as Blichmann burners, So I assume they are high pressure.
It has no fittings on the burners at all, just an open port for the adapter. I would like to have a blackpipe manifold type set up.
What adapter do I need for the burner? Where can I get it? (like the flare to mfl one)
What size black pipe should I buy?
Is there anything I should know when calculating pipe lengths?(so I don't mismeasure)
Do I need to teflon tape everything?
What do I need on the end of the gas pipe to attach it to the regulator?
Will this regulator work for this application? http://www.amazon.com/dp/B0033JF0GE/?tag=skimlinks_replacement-20
What kind/size needle valve do I need? Does it go straight onto the adapter, then the black pipe goes into it?

Any advice would be greatly appreciated. I'm going from electric to propane and have trouble believing its this simple.
 
Last edited by a moderator:
Does anyone know if the blichmann burner is high or low pressure? I just finished a gas manifold on my burners but found out the propane company installed a low pressure regulator. The flames on the burners on first fireup look a little small perhaps 1/2 inch. We did not attach the supplied high pressure regulator and we used 1/2 inch black pipe for the manifold.
 
it's a high pressure banjo burner by any other reseller. increased the orifice size by small steps (using small drill bits) until you achieve the desired results.
 
Are the systems you build high or low pressure?

The answer is: yes.
We are unique in that we build custom equipment. Almost every stand we build is to spec. So, whether it's high pressure, low pressure, electric, direct fire, RIMS, HERMS... we do it
We work with the customer to build just what they are looking for. That's why you won't find 2 identical stands in our photo gallery.
 
Okay then maybe you can answer this question for me... I plan on using the low-pressure 10" hurrincane burner set up, mounted in your mounts, but do not really want to use the combo orifice/valve units sold by williams or brewers harware. I would much rather use a needle valve, like the one you have pictured earlir in the thread, for flame control. But when i search for low-pressure huricane burner orifice google come up with nothing. Any idea where i might find these things?
 
Okay then maybe you can answer this question for me... I plan on using the low-pressure 10" hurrincane burner set up, mounted in your mounts, but do not really want to use the combo orifice/valve units sold by williams or brewers harware. I would much rather use a needle valve, like the one you have pictured earlir in the thread, for flame control. But when i search for low-pressure huricane burner orifice google come up with nothing. Any idea where i might find these things?

I think.. and someone can correct me if I am wrong on this because I am in the same boat as you trying to figure all of it out.. but I think you can drill the high pressure orifice out with a 3/32 drill bit and make it a low pressure. Someone please correct me if that is wrong.. to prevent me and others from making a mistake.
 
I think.. and someone can correct me if I am wrong on this because I am in the same boat as you trying to figure all of it out.. but I think you can drill the high pressure orifice out with a 3/32 drill bit and make it a low pressure. Someone please correct me if that is wrong.. to prevent me and others from making a mistake.

That's what I did and it works very well for me.

Here's a chart if you'd like to try something different. Just make sure you're using the correct column for NG or propane as your application requires.
I know the chart says for my application I'd "only" be getting 61460 BTU's, but for my 15 gal kettle, that's more than enough.
If you for some reason drill the orifice too large, a drop of solder will close the hole up and you can start over.
 
Back
Top