Cooler Mash Tun

Homebrew Talk - Beer, Wine, Mead, & Cider Brewing Discussion Forum

Help Support Homebrew Talk - Beer, Wine, Mead, & Cider Brewing Discussion Forum:

This site may earn a commission from merchant affiliate links, including eBay, Amazon, and others.

Seeves1982

Well-Known Member
Joined
Jun 27, 2009
Messages
50
Reaction score
0
Location
Follansbee, WV
Hey I'm thinking of going all grain and want to build my first mash tun out of a cooler. From what I've read 10gallon is the way to go to do 5 gallon batches of beer. How do you seal where to pipe comes through the cooler to connect to the valve? Does it have to be food service grade or can you skimp on this since it's pre-boil?

Thanks,
Mike
 
I'm looking for a manifold type design. I think I got if fingered out. I'm not sure how the manifold connects to the pipe and valve. That doesn't necessarily need to be a sealed connection though does it? As long as it doesn't come appart and the vaccuum from the liquid should hold it together shouldn't it?

Thanks,
Mike
 
I don't have a manifold, but my understanding is that you want to be able to take it out of the MLT for cleaning purposes (i.e., it should not be permanently soldered to the pipe and valve). I think Palmer's book or website had a discussion on mash tun manifolds. I also seem to think that he or someone else suggested soldering some of the copper parts used to make the manifold together (to lessen the chance of separation during the mash), but to keep other parts unsoldered, again, for ease of cleaning/storage.
 
Here's how I did it. 82% efficiency on first use.

It's made of CPVC, and just friction fitted together. I cut the slots with a Dremel cutoff wheel.

cbdb1e6a.jpg
c04bf8d9.jpg
59cee987.jpg
66e1a8d5.jpg


The second pic shows it in place.

I tried to make it the optimal diameter (volume inside ring = volume outside ring). It's a bit larger in diameter than I intended, but it's close enough.

There are no slots in the crossbars so that all the liquid is drawn, hopefully, in equal amounts from inside and outside the octagon.

If I were to make it again, I would not cut slots through the 45s and tees...unnecessary, and would encourage more flow further around the octagon from the crossbars.

In any case, I batch sparge so it's really not critical.

Only drawback is that it's kind of a pain to clean. Grain gets stuck in the slots. A soak in Oxi-clean would probably take care of it I guess.

Cost about $5 to make.
 
That's what I want. How do you connect it to the pipe and valve. Does the PVC thread on or is it a barbed fitting?
 
If you look at the parts list in the "Cheap & Easy 10 Gallon Rubbermaid MLT Conversion" thread linked a few posts up, you'll see that the part that's the connector on the inside of the MLT in FlyGuy's design is a 3/8” male barb adapter (Watts A-294). Pic below (borrowed from FlyGuy's thread):

7346-6_Assemble_Inner_r.jpg


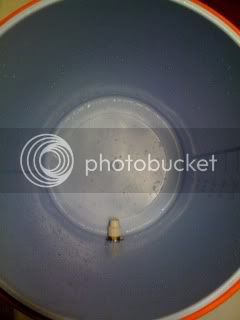
The plastic fitting you see on the inside wall of my MLT...
cbdb1e6a.jpg

...is a CPVC female 3/8" threaded to 1/2" CPVC female socket end fitting. It screws on to the brass ball valve fitting and the horizontal CPVC coming off the manifold just pushes into it. It replaces the 3/8" male barb adapter in FlyGuy's design. Other than that, I followed FlyGuy's design as posted.

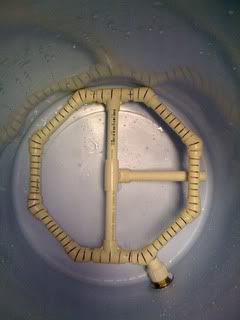
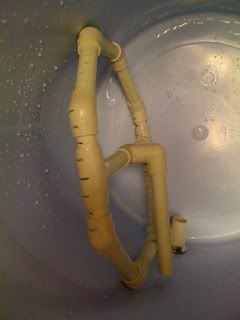
So to build a manifold like the one I did, you need:
(8) 1/2" CPVC 45 degree elbows
(3) 1/2" CPVC tees
(1) 3/8" CPVC FIP ADAPTER (female 3/8" threaded to female 1/2" socket end)
(1) 1/2" CPVC 90 degree elbow
(1) 1/2" CPVC 90 degree "street elbow" (same as the other 90 elbow but one end fits *inside* the center tee)
(1) 5-foot length of 1/2" CPVC pipe (a 10-footer costs about 70 cents more...worth it in case you need practice)
 

Latest posts

Back
Top