The great stainless single tier begins!

Homebrew Talk - Beer, Wine, Mead, & Cider Brewing Discussion Forum

Help Support Homebrew Talk - Beer, Wine, Mead, & Cider Brewing Discussion Forum:

This site may earn a commission from merchant affiliate links, including eBay, Amazon, and others.
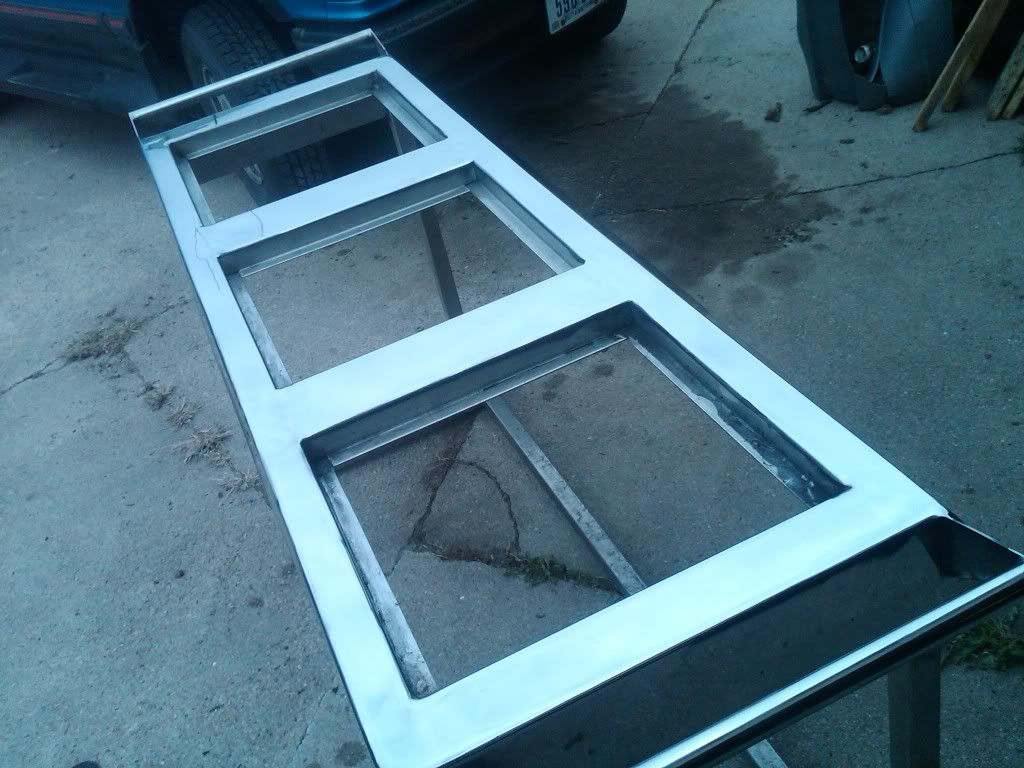
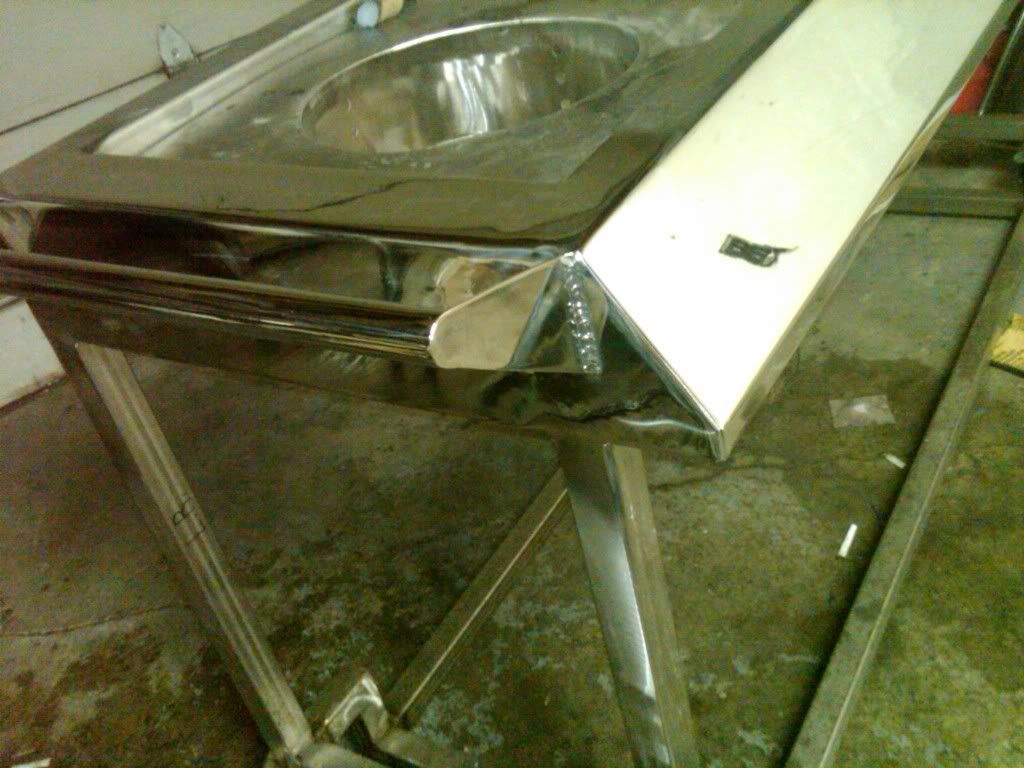
no this is not a mirror...... its a brewstand :) with some retards reflection in it....

brewstand144.jpg


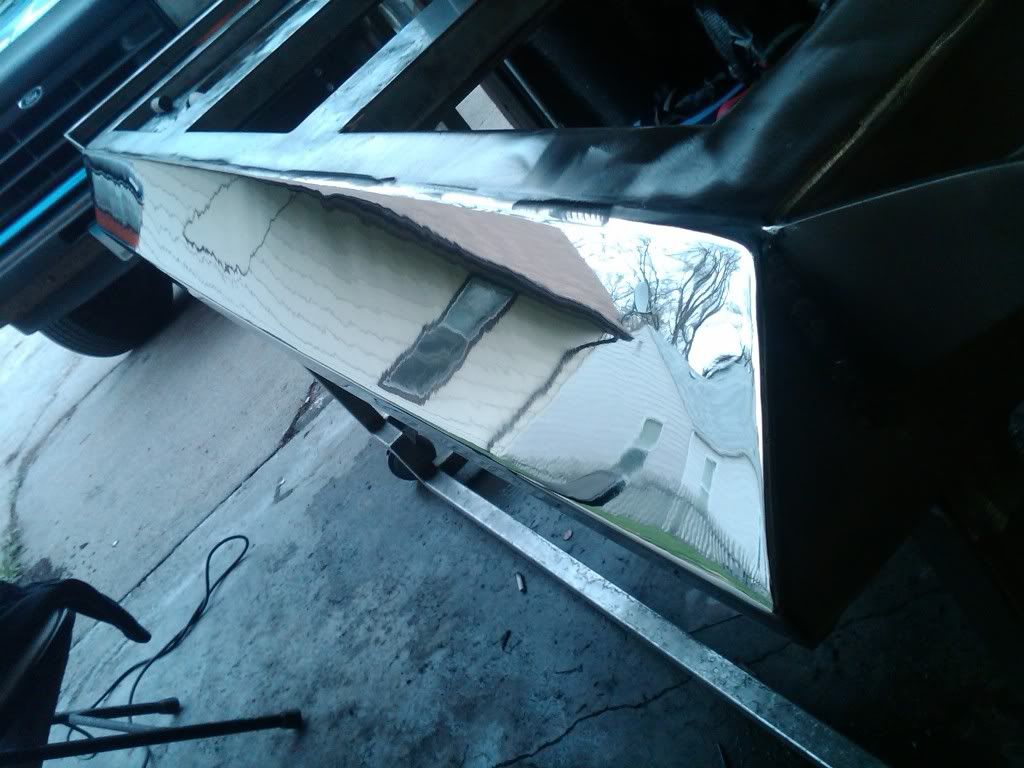
I started polishing today and ive got to say the gator grit stuff is pretty low quality, the medium and fine grit pads dont last long at all, and the metal insert that holds them in is a bad design as well, it makes it so you can only use the outer edge of the pad, and also grinder rpm is too much for the pad, it heats up and begins to melt its resin that the grit is embedded in. I will be getting 3m scotchbrite 4" hook and loop pads in medium, fine, very fine and super fine tomorrow, they are much cheaper as well @ $2 each. I also cant see somebody going from fine grit gator grit pad to the #2 compound, it leaves nasty scratch marks, after the fine grit i had to wetsand with 320 grit and 400 grit to remove the fine grit pad scratches. No more expensive gator grit for me....
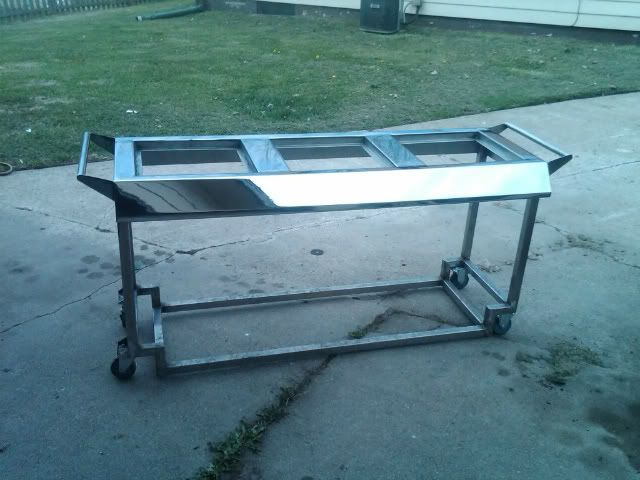
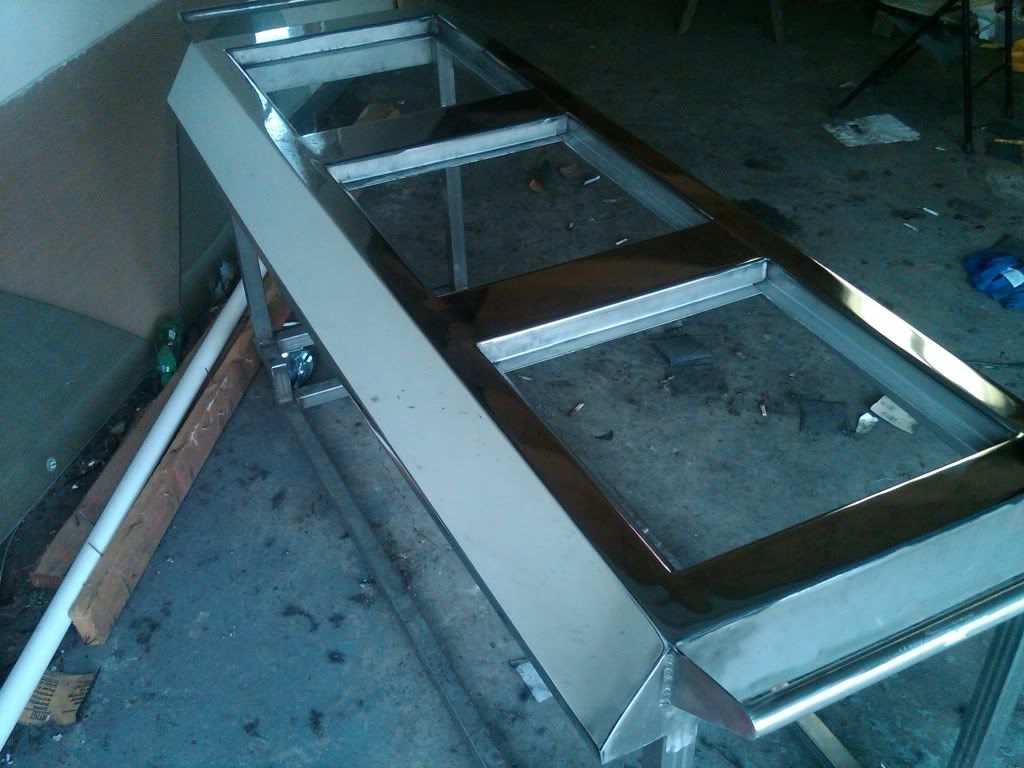
more progress
brewstand138.jpg


brewstand139.jpg


brewstand140.jpg


brewstand143.jpg


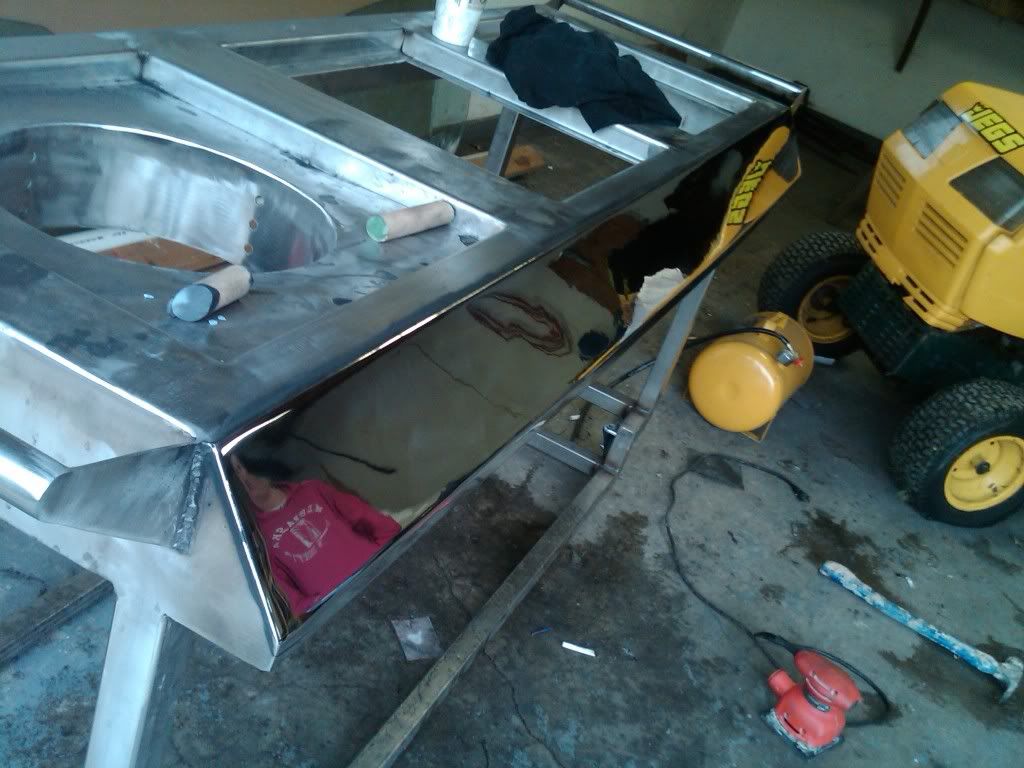
this is going to be a ton of work, my process is, 3m course 4" pads, then medium and fine gator grit, 320 and 400 grit wetsand, then #2 and then #5 on spiral sewn sisal wheels. With going with the very fine and super fine pads it will eliminate the need to wetsand with 320 and 400 grit, the super fine has a grit equivalent of 320-600 depending on technique when using the pad, and yes i used an electric random orbital sander to do the 320 and 400 grit wetsanding, was very carefull to not get any water in the sander lol i did hand wetsand it for about 10 minutes and then my arms started to give out....... so far i have about 5 hours into polishing, i imagine i will have probably 40 hours into it hopefully making it up to my brothers standards..
 
hopefully i will have almost all of the polishing done by the end of next weekend, im also going to do the polishing in 3 steps with the #1, #3 and then #5, going from #2 to #5 is too big of a jump in grit and is really hard to remove the #2's swirls with the #5
 
That is a serious mirror-like finish! Keep doin what you're doin, because the work you've done so far is SICK!:rockin:
 
Thank you for the compliments, but I think lehr has me beat, he is a very good fabricator by the looks of his pictures in his photo album. Hopefully this weekend I will have some more pictures to post, I have to pick up some more pads to continue polishing, gator grits wear out rather fast and will be going with scotchbrites
 
Looking amazing! You might want to consider venting the skirts on your keggles. This is what I did with mine:

ddfeacf042e9e129d5a2bd9fac7e27ba.jpg
 
Oh I always thought that was just the rim around the bottom, but I guess since his rig has the solid stainless top.....unless it's some diabolical scheme to get back at his brother for some childhood prank, like holding him down and farting on his head, and he's been scheming and planing since he was nine, bideing his time for the perfect revenge and....kableweee.......there goes the good doctor
 
It is just the rim around the bottom as far as the kaboom part goes. The kaboom post applies to keg that don't have the little holes drilled in the bottom of the rim, it doesn't apply here. However if there is insufficient venting combustion gasses build up under the kettle reducing the effectiveness of the burner. Although I think that is more of a problem with those wok burners that draw their air in at the base of each tip. If he is using a burner like that pictured by diatonic I don't think it is as much of a problem.
 
Sorry for the stupid question, but why vent? Just curious

I'm not sure how to describe this, so bear with me. He'll have the burner mounted in that cylinder, welded in to a flat piece of stainless. When he sets the keg on it he won't be able to see the burner. When the burner is running, heat will want to rise, but the only place it can go in the unmodified keg it the little drain holes in the lower skirt. On my rig some could escape at the corners, and it got *really freaking hot* there.

Venting the skirts will allow him to look at the burners to make sure he has a good blue flame, as well as exhaust combustion gasses and heat.
 
ah gotcha, makes sense. Not sure thats in line with this build though, he should fabricate some intricate part to vent the gas that nobody else could dream of every being skilled enough to fab and then polish the hell out of it till he can see god himself starein' right back at him. As for the visual on the flame dunno maybe high temp HD camera with LCD display mounted on the front of the rig :rockin:
 
I assumed stainless grating/bars in the recesses flush with the top and the kettles setting on top of that. Basically a highly polished stainless tic-tac-toe. I honestly have been waiting to see what he does there because I assumed he would be aware of the need for combustion gasses to escape.
 
wow, quite the discussion today, i do know the gasses need vented, the grating that the keggles will be sitting on will look like this
grate.jpg


the bottom skirt of the keggles will be vented as well, i will be able to see the burner through the vent in the keggle, i also may add a "special" vent on the keggles as well, but thats a suprise and in due time will see what i have come up with
 
I've read this thread 3 times now and I'm just in awe at your ability. Can I make you the same deal, I'll provide you with all the beer you want for the best brew stand in the world?????? Please please pretty please!!!!!
 
I've read this thread 3 times now and I'm just in awe at your ability. Can I make you the same deal, I'll provide you with all the beer you want for the best brew stand in the world?????? Please please pretty please!!!!!

how about this.... you have to give me the beer first.... :drunk:
 
the bottom skirt of the keggles will be vented as well, i will be able to see the burner through the vent in the keggle, i also may add a "special" vent on the keggles as well, but thats a suprise and in due time will see what i have come up with

Catt22 did some testing with the vented skirt and found reduced efficiency. The bottom skirt is already vented so I don't understand the need for big holes.
 
yeah im not sure if i will need vents on the keggles or not, i will test without them first to see how it works, i think my grating desin will allow enough gases to escape to work efficiently
 
You da man doctorsbro.

Your brothers gonna owe you big time.

I've got one request.

I want to see all the tubing polished too!

JK!
 
How do the backsides of your MIG welds look? I'm thinking about doing some stainless on my little MIG box.

if your considering mig welding sanitary areas i wouldnt do it, making a mig weld sanitary you have to have a belt grinder with a 1/4" wide belt and have to grind the entire weld smooth, and chances are there will be a few pits in it no matter how good you welded it, if you do decide to mig weld sanitary connections, by the time your done grinding one weld on one fitting youll wish you just had them tigged, plus mig welding leaves splatter like crazy on stainless which will also require removing. If your talking about just welding up a stand then 100% by all means weld it up, if the welds dont look great, grind em off and smooth them down....
 
if your considering mig welding sanitary areas i wouldnt do it, making a mig weld sanitary you have to have a belt grinder with a 1/4" wide belt and have to grind the entire weld smooth, and chances are there will be a few pits in it no matter how good you welded it, if you do decide to mig weld sanitary connections, by the time your done grinding one weld on one fitting youll wish you just had them tigged, plus mig welding leaves splatter like crazy on stainless which will also require removing. If your talking about just welding up a stand then 100% by all means weld it up, if the welds dont look great, grind em off and smooth them down....

Agreed 100% I did 3 tri clover connects with a mig and was not happy with the results. I have already replaced 2 of them, both leaked after grinding. and were ugly as my jr high prom date.
 
I just fell off my chair admiring your work. You be killing' em! Please post pics of that thing in action.
 
Back
Top