Brew Stand Fails!

Homebrew Talk - Beer, Wine, Mead, & Cider Brewing Discussion Forum

Help Support Homebrew Talk - Beer, Wine, Mead, & Cider Brewing Discussion Forum:

This site may earn a commission from merchant affiliate links, including eBay, Amazon, and others.

hepkat701

Well-Known Member
Joined
Apr 5, 2012
Messages
63
Reaction score
7
Location
Plainfield
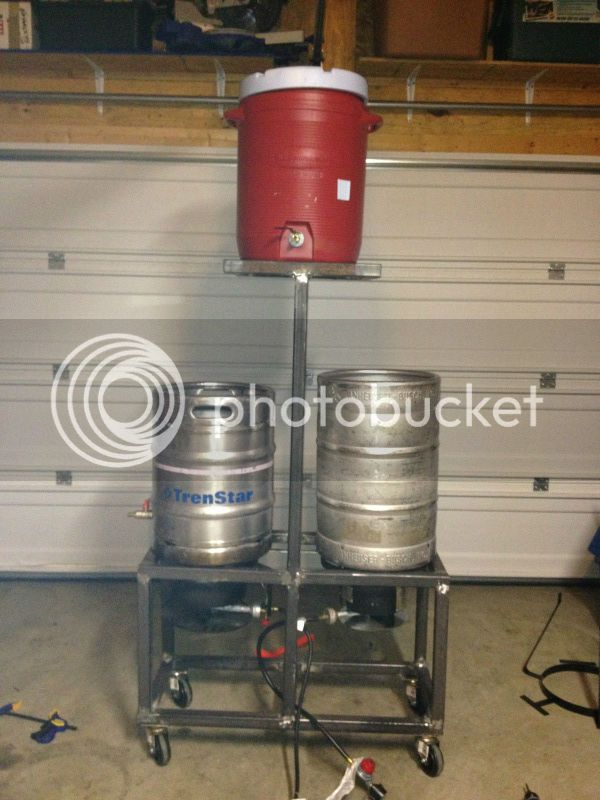
I'm getting ready to build my first brew stand, after reading dozens of threads on here and seeing all the really creative ideas I would like to know if there was something you would have done different what would it be. A lot of the threads on here people focus in what's awesome about their rig, I just thought it would be cool for everyone to point out their flaws so that we can all learn from those too. Post some pictures of what you would do differently or what you have already changed since your build. I will post a picture of my current set up along with links when I start my build.
 
OK.... my current set up. No stand equals a lot if heavy lifting.

ForumRunner_20121209_095207.jpg
 
I made mine out of bedframes I received for free. It didn't technically 'fail' but I certainly advise against my money saving strategy.
 
I made mine out of bedframes I received for free. It didn't technically 'fail' but I certainly advise against my money saving strategy.

How come?? I've been thinking of doing the same thing. I know the steel is not top quality.. but, then again, for 5 to 7 gallons we'r really talking less than 60#. I'd think with proper gusseting and good welds.. you should be golden.
 
I'm pretty sure I'm going the money saving route too but I'm going to use uni-strut. Its cheap, strong, and readily available. And there are a few great threads on here to go by.
 
How come?? I've been thinking of doing the same thing. I know the steel is not top quality.. but, then again, for 5 to 7 gallons we'r really talking less than 60#. I'd think with proper gusseting and good welds.. you should be golden.

It was just a pain to work with. Welding it was easy enough but drilling it was next to impossible (and yes I started small and worked my way up + cutting coolant, most bed frames are cast and don't take to drilling easy) and cutting it with an angle grinder was a pain. Again it came out fine but frankly for the extra time and material I had to spend reinforcing it I would have rather plopped down 75 bucks for the metal tube I needed. I think I was annoyed most that something that should have been completed in a summers evening after work took me 3 days with all the minor nuances.
 
I've got a pump, so the three levels wasn't intentional. It almost be and required though. When I was mashing out the power went out. It was out for 3 hours.
 
I've got a pump, so the three levels wasn't intentional. It almost be and required though. When I was mashing out the power went out. It was out for 3 hours.

I hope to get a pump for Christmas... and a coil for a HERMS system... as I plan to build a single tier system after the first of the year. With our 4th child being born a week ago mistakes are not an option as they can get costly, hence this thread.
 
my biggest fails:

-painted my stand but was using propane. the paint bubbled/peeled badly where it got too hot
-Keggle MLT = massive temp losses. had to rig up some HERMS to get it stable
-i built a TALL stand so my keggles would store inside it when not in use. that was a waste of time and cut it down this year to be lower/easier to use.
-i went with propane, but then migrated to electric (and never looked back)
-flipped from side valves and dip tubes to bottom drain (cut new keggles upside down)

Now that's what I'm talking about. If you would have known... how much $ would you have saved!??!
 
Now that's what I'm talking about. If you would have known... how much $ would you have saved!??!

i try not to think about it. ;)

the biggest part has been the new keggles.
new fittings for new keggles $50
new false bottom $100
all my propane gear now sits unused (2 burners + manifold + hoses + etc)

the HERMS was easy since i had an IC already (which i've now switched to a cfc, more $$$ ;) )

cutting the stand down didn't cost me anything, but it took a lot of TIME.

For me time is money! With 4 kids now time is premium.... I'm going propane herms . Using uni-strut to build my stand I hope my system can grow/ change as my skills & $ change.
 
Well again, mine works great, it was just kind of a miserable material to work with. I told myself I'd paint it one day, but I'd rather brew

Non fail! I like the proximity to the wash tub! Doesn't have to be pretty if it makes good beer!! Paint!??! Really!
 
slakwhere said:
i try not to think about it. ;)

the biggest part has been the new keggles.
new fittings for new keggles $50
new false bottom $100
all my propane gear now sits unused (2 burners + manifold + hoses + etc)

the HERMS was easy since i had an IC already (which i've now switched to a cfc, more $$$ ;) )

cutting the stand down didn't cost me anything, but it took a lot of TIME.

Interested in selling your propane stuff? PM me details if you are. Pics would be nice as well.
 
hepkat, i am out of town. let me get back home on wednesday and take inventory of what i have. seed, i will give hepkat first shot since it's his thread ;)
 
hepkat, i am out of town. let me get back home on wednesday and take inventory of what i have. seed, i will give hepkat first shot since it's his thread ;)

Sweet... for trade I have a first born male child... he real good at math.... alright I have a lil something left in the brewbank...
 
I built a gravity-fed 3-tier system. In this picture, you'll notice the MLT is perpendicular to the BK burner. When I was running the burner on high, it melted my MLT.

I've since moved it to the opposite side of the central post.

Also, when I upgraded to a banjo burner and a 15 gallon BK, the extra heat started the stand on fire. I had to knock off the chocks at the base of the BK shelf and slide the burner outward to get enough airflow back there.

image-1242555428.jpg
 
I built a gravity-fed 3-tier system. In this picture, you'll notice the MLT is perpendicular to the BK burner. When I was running the burner on high, it melted my MLT.

I've since moved it to the opposite side of the central post.

Also, when I upgraded to a banjo burner and a 15 gallon BK, the extra heat started the stand on fire. I had to knock off the chocks at the base of the BK shelf and slide the burner outward to get enough airflow back there.

See...this is what I mean!! We will all learn more from the fails than the pretty brew rigs! Thanks for the share!! And we thank you for showing us what u missed!! We learn from out mistakes!! Nice rig by the way..
 
Such a misleading thread title! I thought holy cow somebody was in mid brew when their stand collapsed!

Anyways in an effort to be helpful:
I had my honeywell valves mounted directly below my kettles, so during my first brew I dripped directly onto them. Luckily I didnt kill them and since have switched 180 degrees which way keggles are facing on the stand!

I made a drip box for my march pump, in an effort to protect it, which was barely larger than the pump and it got way to hot!

I thought it was going to be a fail not having locking casters, but on my flat driveway its been totally fine.

I cracked one of my flexible yellow gas lines pulling it to the max. Give yourself more line to work with than you might need.

My first brew heat was coming up past the keggles and got my thermometer really hot. Again luckily it didnt kill it and I made heat shielding around the bottom of the keggles.

Sweet stories! See that's what I'm talking about! I hope to get the stand that failed on here so we can all learn!! Oh... and pics please.. before and after if u have them!!
 
-flipped from side valves and dip tubes to bottom drain (cut new keggles upside down)
Would love to hear more about this? I am new to this and getting ready to make a brew keggle and like options. Please tell me more or directed a newb to where I can find more info.

Thanks
Jake
 
Drake, this only works for Electric elements. direct fired gas stuff would melt all the seals (since it's on the bottom where the heat is).

basically, you cut the BOTTOM out of the keg and leave the opening where the spear is. this acts as the bottom drain. then you add a kit like this from bobby @ brewhardware

http://www.brewhardware.com/valves/137-tcsanke

tri-clover and a gasket makes a liquid-tight seal. add a ball valve and maybe an elbow and there you go. requires you have some sort of stand (or a hole in your work surface) to utilize. but empties every drop out of the keg and makes cleaning in place a lot easier =)
 
I just got the burners on mine welded in, I'm sure I'll have some stories but I haven't done a batch on this yet. It still beats lifting kegs full of hot liquid or setting burners on shelving units. I still need a pump to move the water up to the MLT but I'll test it out using pitchers until I make sure everything is where I need it.

I used four spinning casters and already know that they wont work well so I'm gonna cut two off and use either stationary casters or a solid axle.

Untitled.jpg
 
KellyL said:
I just got the burners on mine welded in, I'm sure I'll have some stories but I haven't done a batch on this yet. It still beats lifting kegs full of hot liquid or setting burners on shelving units. I still need a pump to move the water up to the MLT but I'll test it out using pitchers until I make sure everything is where I need it.

Just a couple Qs. How high off the ground is the top of the MLT? Why did you make the shelf it rests on so tall?
 
Drake, this only works for Electric elements. direct fired gas stuff would melt all the seals (since it's on the bottom where the heat is).

basically, you cut the BOTTOM out of the keg and leave the opening where the spear is. this acts as the bottom drain. then you add a kit like this from bobby @ brewhardware

http://www.brewhardware.com/valves/137-tcsanke

tri-clover and a gasket makes a liquid-tight seal. add a ball valve and maybe an elbow and there you go. requires you have some sort of stand (or a hole in your work surface) to utilize. but empties every drop out of the keg and makes cleaning in place a lot easier =)

I was going to quote your original post about bottom drains. I though you were considering bottom drains a failure!!!
I bottom drain all 3 of my keggles. Couldn't be happier with them! Clean-up is a BREEEEEZE!
BREWERY%20ANGLE.jpg
 
i try not to think about it. ;)

the biggest part has been the new keggles.
new fittings for new keggles $50
new false bottom $100
all my propane gear now sits unused (2 burners + manifold + hoses + etc)

the HERMS was easy since i had an IC already (which i've now switched to a cfc, more $$$ ;) )

cutting the stand down didn't cost me anything, but it took a lot of TIME.

Why on earth did you shell out a Franklin on a new FB? See my pic above. Angle grinder w/cuttoff disk and a drill press with a few #40 drills, good cutting oil, and a few hours of time to drill ~1,200 holes. Works GREAT.
That is the Bottom dome of one of my keggles I cut out when opening the kegs up.

i'm with the OP, time is money. i had an existing FB from Jaybird and it's freaking awesome beyond words. so now that i need a new one, i got a fancy reverse hinge with the support so i can put 40 lbs of grain in the keggle :drunk:

i for sure could have made one, but i'd rather take that few hours and brew beer. plus, i plan to sell the old keggles at the LHBS or here when i am sure the new system does what i want, so i will get most of the $$ back on the old one. ;)

Huaco said:
I was going to quote your original post about bottom drains. I though you were considering bottom drains a failure!!!

hell no!! your keggles and others like them inspired me to build new ones, even though my current ones work just fine. i am so stoked for my new bottom drain setup. it wasn't applicable to me when i started (banjo burner, then single tier propane stand) but i'm bummed i have to rebuild new keggles to get bottom drains. but like i said, once it's all built i can sell the old stuff to recoup the losses.
 
Back
Top