Yet another Brutus Ten Build

Homebrew Talk - Beer, Wine, Mead, & Cider Brewing Discussion Forum

Help Support Homebrew Talk - Beer, Wine, Mead, & Cider Brewing Discussion Forum:

This site may earn a commission from merchant affiliate links, including eBay, Amazon, and others.

lucasbm

Well-Known Member
Joined
Jan 4, 2007
Messages
61
Reaction score
0
Location
Brandon, MS
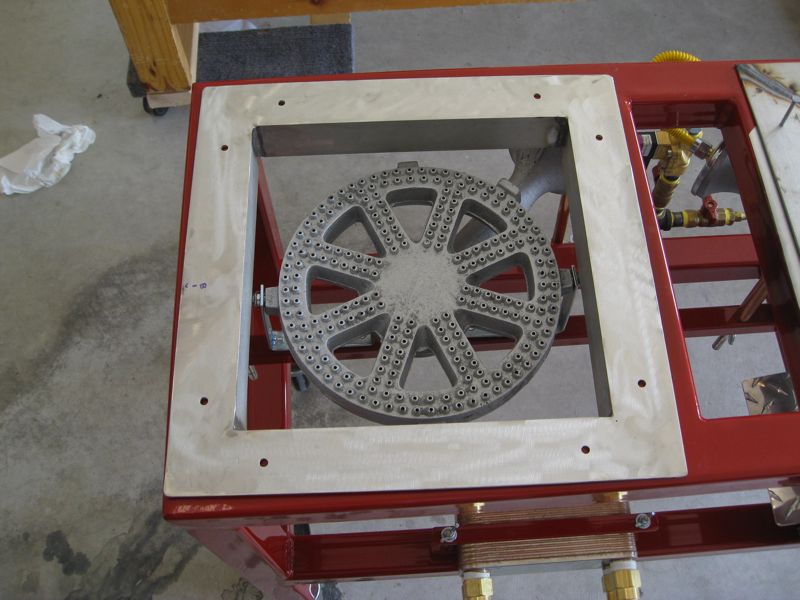
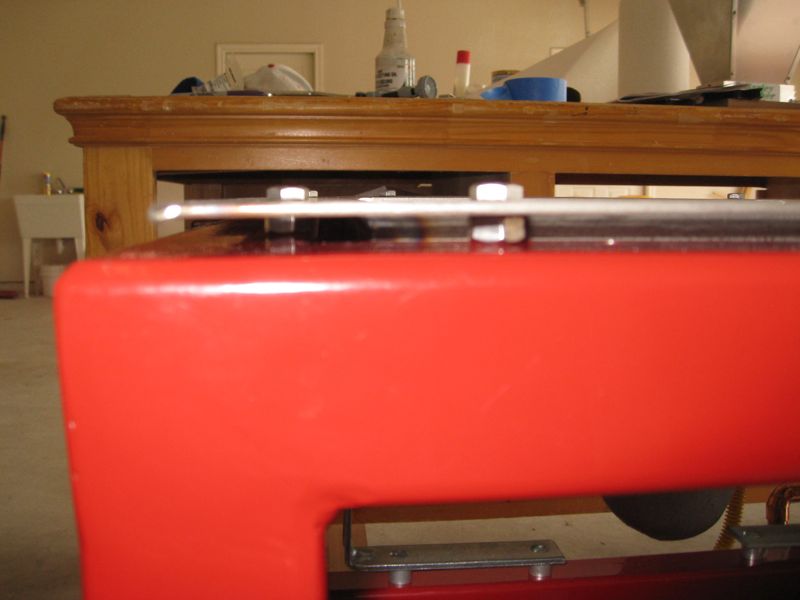
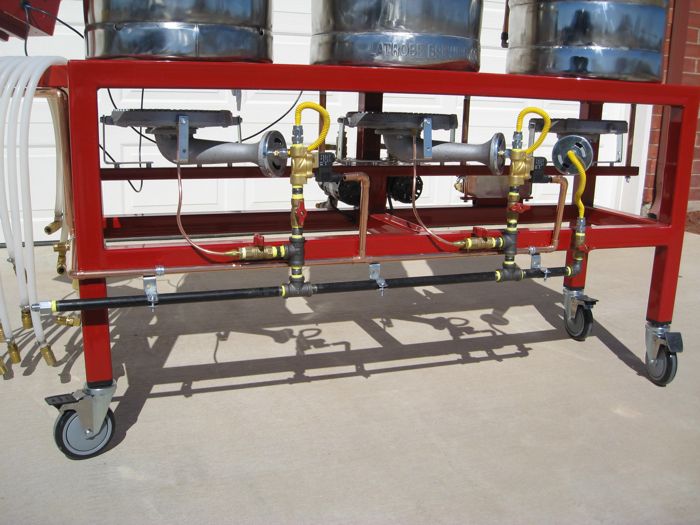
I started my Brutus build a few weeks back. :ban: I've cut and welded the frame, attached casters, mounted banjo burners, and tapped holes for the March pumps. The only difference in my frame is I attached the control arm to a hinge, so it's not in a static location. When I need it, it's there, when I don't it's pushed out of the way. Here are some pics.
web.jpg

web.jpg

web.jpg

web.jpg

web.jpg

web.jpg


My next move is to prime and paint the stand with high temp paint. I found some at Autozone that is rated to handle up to 2000 degrees.

Thanks for viewing and thanks for you input.
 
So have you painted your frame? I did a dry run of my rig and the paint in contact with the keg bubbled up and flakes. I'm not surprised, but curious what you're going to do. I think high temp grill paint is the way to go, but it's matte finish and not so pretty. I think I'll end up repainting the top with all grill paint instead of Industrial Rustoleum.

I guess if I wanted my rig to stay pretty I would have used SS. Let me know if your auto paint holds up.
 
I haven't painted yet. I plan to prime it this week. I found this primer and I was going to try it out. It claims to resist up to 2000 degrees. I found it at the local AutoZone. If this is the same Rustoleum your talking about, them I'll probably hit it will grill paint after it's primed. I WISH I could have made this out of stainless.

Primer.jpg
 
The High temp paint works if you "cure" it properly. The "cure" requires baking and cooling sessions. Make sure to read the instructions well. I don't know about you but my oven is not big enough to fit my Brutus frame into. I thought I could "cure" it by slowly heating the burners up, but that equals fail. My high temp paint bubbled and flaked off where it was close to the burners.
 
Lucasbm,
I powder coated my brutus. Flames with paint don't mix. I found a solution though.
Snake10

IMG_2041.JPG.jpg


IMG_2042.JPG.jpg


IMG_2043.JPG.jpg


IMG_2050.JPG.jpg


IMG_2051.JPG.jpg
 
I brewed a 10 gallon extract on my Brutus this past weekend for teach a friend to homebrew day. Man-o-man those banjo burners put out some heat. I was on uneven ground, and Leveling my casters worked great as well. I'm on the road for work, but plan to take the week after thanksgiving off. Hopefully I can get a lot of work done then. Thanks for all the advice, and keep the input coming.
 
Got a lot of parts in for the brutus. I have the ball valves, sight glass, and thermometer bulkhead. I'm going to have some (maybe all) of them welded in next weekend. I also have made the plumbing for the propane, but I'm thinking about installing it in the front so I have easier access to the ball valves. Haven't figured it all out yet. I'll have plenty of time on the first week of December. I have a whole week to work on it. :)

web.jpg
 
The keg's are welded. There is still some cleaning I need to do to finish them and attach the ball valves and other parts. I will have all week to finish the kegs, and finish the propane plumbing. :rockin: Pics will be coming soon.:mug:
 
Ran into a slight problem. Long story short, the guy who welded the couplings for me attached a barb fitting into one my boil kettle (where the ball valve goes) while it was still hot, then cooled it off real quick with water. I'm assuming he was doing a pressure test. So, the coupling shrunk around the barb fitting. I caught hell getting it out, and it messed up the threads in the coupling. I ordered a tap for 1/2 in npt, so hopefully soon, I can re-tap the coupling and be on my merry way finishing my brutus.:ban:
 
Ran into a slight problem. Long story short, the guy who welded the couplings for me attached a barb fitting into one my boil kettle (where the ball valve goes) while it was still hot, then cooled it off real quick with water. I'm assuming he was doing a pressure test. So, the coupling shrunk around the barb fitting. I caught hell getting it out, and it messed up the threads in the coupling. I ordered a tap for 1/2 in npt, so hopefully soon, I can re-tap the coupling and be on my merry way finishing my brutus.:ban:


Bummer - hopefully re-tap'ing it works out. Anxious to see how the build turns out.
 
Got my thermometers in today. I ordered 3 inch thermometers with 2.5 inch stem. I got 3- 5 inch thermometers 2 with 2.5 inch stem and 1 with 3 inch stem. They are freak'n huge. I should not have a problem seeing the temp. I promise pics are coming soon. I'm waiting to see if I can re tap my boil kettle.
 
Hey Lucas,

Where'd you find those nuts to go on the nipples (next to your ball valves)?

tia
 
Where'd you find those nuts to go on the nipples (next to your ball valves)?

I'm sorry...but this post is awesome in a 5th grade humor type of way.

I am so jealous. When you are making these things, what material are you "cutting"? And I am amazed at how many people know how to weld.
 
I'm sorry...but this post is awesome in a 5th grade humor type of way.

I am so jealous. When you are making these things, what material are you "cutting"? And I am amazed at how many people know how to weld.

HAHAHA

Yeah, I'm from Mississippi. :mug:

We're dumb rednecks that can do just about anything, just don't ask us to spell or tell you how to do anything using proper english.

One of the guys I work with on the railroad can't read or write. I learned this by asking a measurement and he literally kept his thumb on the on the 56 1/2 inch mark and brought the tape measure to me. I giggled and said, "you're messing with me right?" he said "no. I can't read or write." Yeah......he is a superior. Got to love unions.:rolleyes:

Welding is really not hard. If you can glue paper, you can learn to weld.

I got all my ball valves, sight tube, etc. from:

http://www.greatbargain.net/order/shop1.html
 
I re- "tapped the keg":D No leaks, worked great.

I did learn a lesson yesterday. I was getting low on teflon tape so I didn't put as much on the fittings. Two thermometers and 1 ball valve were leaking. Now I get to undo some of my work from last night and teflon it properly. So, what did I learn??? Get your lazy ass up, go to lowes and spend the whole $1 for teflon tape!

Here is the tap that I got if anyone ever needs it.
http://www.drillspot.com/products/574014/mibro_group_-the-_788416_mm_1_2-14_npt_pipe_tap

I'm starting to see the light on the whole project. I'm really hoping to complete it enough to start brewing at the beginning of the year. Seems like I take 2 steps forward and 1 step back every time I start to work on it.:(
 
finally got some pictures.

Finally no leaks :mug:

web.jpg


HLT:
web.jpg


Mash Tun:
web.jpg

web.jpg


Boil Kettle:
web.jpg


Next...
I'm not 100% happy with the gas line, so I'm going to do a little more work on it. Then paint, then pump #2, then quick disconnects from Mcmaster carr. At that point, I should be brewing, but I will still have to get the electrical components for the system.
 
Luke, your temperature guages are WAY too small, man. I suggest you get some at least twice the size.

(Nice build!)
 
Got my thermometers in today. I ordered 3 inch thermometers with 2.5 inch stem. I got 3- 5 inch thermometers 2 with 2.5 inch stem and 1 with 3 inch stem. They are freak'n huge. I should not have a problem seeing the temp.

I know you were joking, but wanted to restate the above :)
 
L,
On your gas line, just make a loop with it instead of bending it where it doesn't want to go. Those gauges are cooool!
Bart

gas2.jpg
 
Yeah, I wish I would have made the frame a little wider to compensate for the larger banjo burners. I had to turn my boil kettle burner to the front. Oh well, Im going to make access to that burner's ball valve in the front. Making lemonade out of lemons. Will probably work on the gas lines over the Christmas vacation.
 
I ordered my disconnects from mcmaster.com.
I got:
14 Each 6739K59
Hose Couplings for Coolant Plug, 1/2" NPTF Male, 3/8" Coupling Size

12 Each 6739K68
Hose Couplings for Coolant Sleeve-Lck Sckt, 90 Deg Barb, 3/8" Cplg, 1/2" Hose ID


I really hope I got the right disconnects!

I also ordered 40' of High Temp Silicone tubing & my 2nd March pump from Rebelbrewer.com

I'm still a ways from being completely finished, but I'm VERY close to brewing my first batch on this system :)

I can't wait!
 
So have you painted your frame? I did a dry run of my rig and the paint in contact with the keg bubbled up and flakes. I'm not surprised, but curious what you're going to do. I think high temp grill paint is the way to go, but it's matte finish and not so pretty. I think I'll end up repainting the top with all grill paint instead of Industrial Rustoleum.

I guess if I wanted my rig to stay pretty I would have used SS. Let me know if your auto paint holds up.

I primed mine with 3 coats, and then added 3 coats of high temp grille paint from walmart that i paid like 6-7 bucks a can for. After about the 2nd time using it the paint has all but flaked off around the burner area.
 
I primed mine with 3 coats, and then added 3 coats of high temp grille paint from walmart that i paid like 6-7 bucks a can for. After about the 2nd time using it the paint has all but flaked off around the burner area.

I still have not painted. I'm think I'm going to hold of on painting for a few months. Let the temp warm up some.
 
It doesn't matter when you paint your frame. Wait forever if you want. Global warming, whatever! To make paint work/ powder coat work, you have to put an insert in your frame to insulate the frame from the burner. I built a stainless insert frame for my powder coated frame with 2x2 stainless and inserted into my brutus 10 frame. A powder coat frame! I can touch my frame even after a 90 minute boil and its warm not hot. My insert is 3/8 smaller all around than my brutus frame. I'm on my laptop with no pics, sorry. I have over 20 brews on my frame with noooooo paint problems. My powdercoat is as awesome as the day is was applied. Rustoleum, weeeeeK? Wake up!!! you knew that when the flame hit your frame it would melt! stop dreamin! Do it right so your paint/powder coat will last. You guys are wearing me out.
Snake10- Brutus 10 builder
 
I've seen your system, and it's definitely the way to go if you have a steel frame. I intend on building a SS insert in the future. The "Let the temp to warm up some" comment was intended for me not the frame. It's been too freak'n cold the past couple of weekends :) The only reason why I'm putting off building the SS sleeve is I'm ready to start brewing!

Rustoleum, weeeeeK? Wake up!!! you knew that when the flame hit your frame it would melt! stop dreamin! Do it right so your paint/powder coat will last.

You remind me of this guy.
shamwow_guy.jpg
 
Got my quick disconnects, pump, and hose in today. Now I have to get my lazy ass out in the garage and finish it. Hoping to have it brew ready in a week.

web.jpg

web.jpg


I want to say these are the same disconnects that bobbyfromnj has in his youtube video.
 
Lucasbm,

I like the "sham wow" thing!

You will really like those QD's. It makes the whole process easier, for sure. Today , I brewed an 11 gal batch of Robust Porter. Guess what I'm trying to say is that its fun to brew on the Brutus, you will love it. If it weren't for Bobby posting those QD's on his video, I would still be looking for them. Or trying to figure out how to read the Mcmaster Carr catalogue. That guy is awesome. sounds like you are getting closer to completion. I'm excited for u.

Bart
 
Nice build! I was just curious where you guys are getting the flex yellow gas tubing from and do you have to add fittings onto the ends specifically to attach to the burners you're using?
 
knight,
The stock yellow flex stuff can be gotten anywhere. I got mine from true value hardware. Home depot would surely have it( probably hot water heater section). It comes in a zip lock bag sorta. It also has large flared fitting attached to it. When you open it, the hose looks like one piece,but the end (flared fitting) is removable. I removed the flared fitting end and placed it on my 1/2 black pipe. That piece now connects my black pipe to my propane bottle hose. The rest off the hose connects perfectly to the 1/2 gas valve (female end) and my burner orifice (male end). Open the bag at the store to check it out. It comes in a bunch of different sizes. Don't forget the yellow gas teflon tape for the threads.
Snake10
 
I got my yellow flex hose from the water heater area at Lowes.

I'm going to work on the brutus again today. I'm really hoping I'm taking it on a test run this afternoon.
 

Latest posts

Back
Top