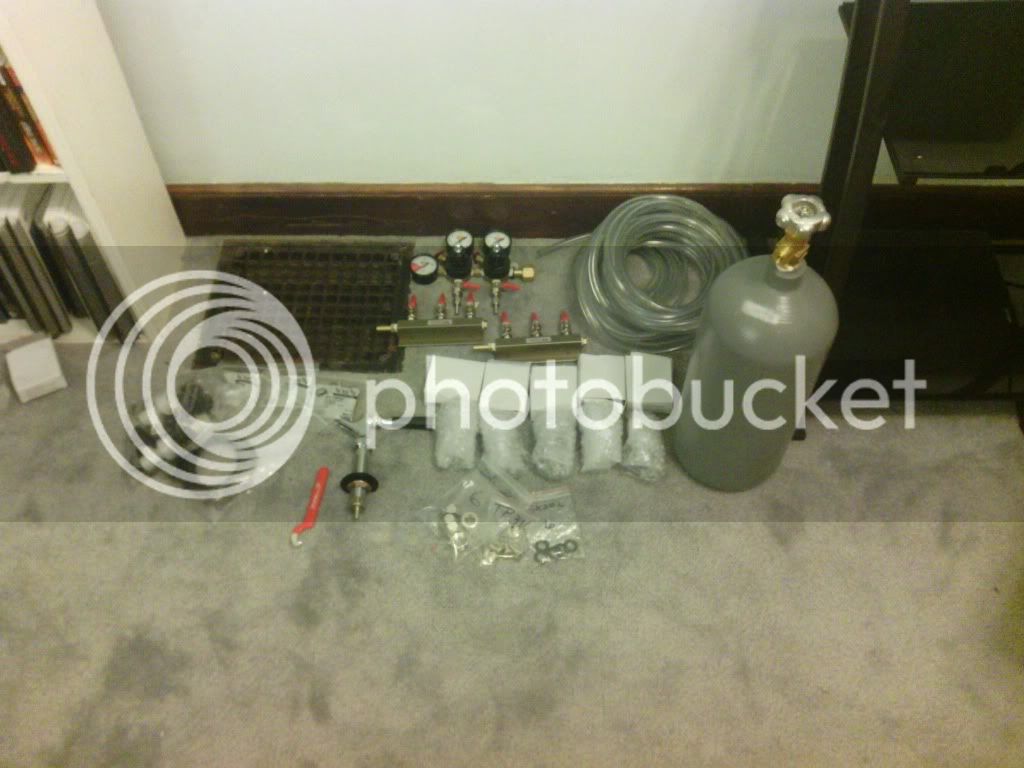
A two way regulator, two three way gas distributors with valves, 43’ of ¼” beverage line, 12’ of 3/16” beverage line, 12 ball lock connectors(6 gas, 6 beverage), 30 hose clamps, 10 lb co2 tank, 6 faucets, 6 tap handles, 6 four inch shanks, 6 shank nuts, 6 ¼” barbed fittings, 6 faucet washers, 6 keg rebuild kits.
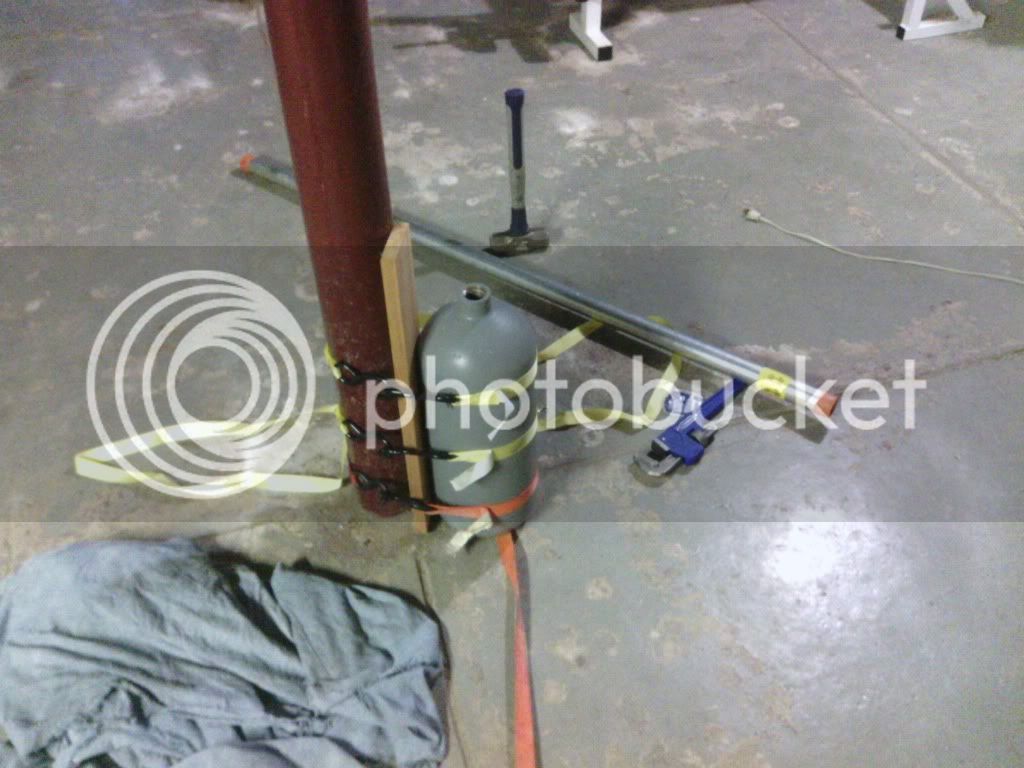
Co2 tank with valve removed. In order for the co2 tank to function horizontally the tank must be modified. I used a crescent wrench and cheater bar to remove the valve.
I added an anti siphon tube that goes just to the point in the tank where cylinder diameter has leveled out. You want the end as close to the wall of the tank as you can without rubbing. The tank must be re-certified after you do this.

Tubing cut: 3 7’ lengths of ¼” beverage line for low pressure beers, 3 4’ lengths of 3/16” beverage lines for high pressure beers, 6 3’ lengths of ¼” gas line, 2 2.5’ lengths of ¼” gas line.
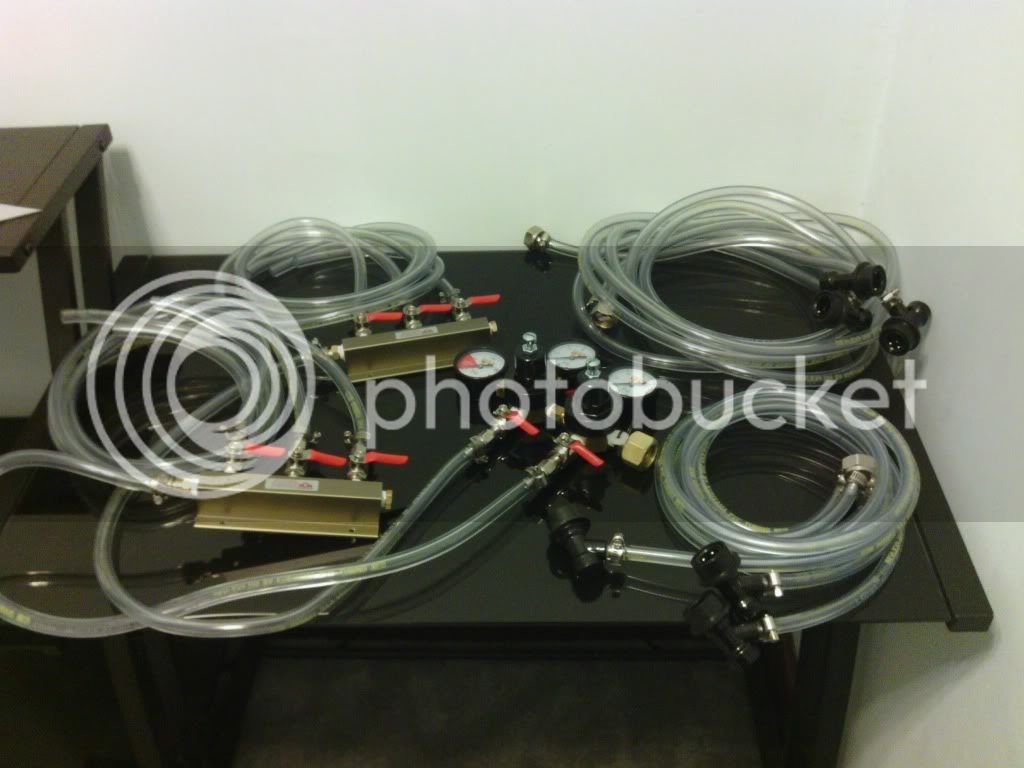
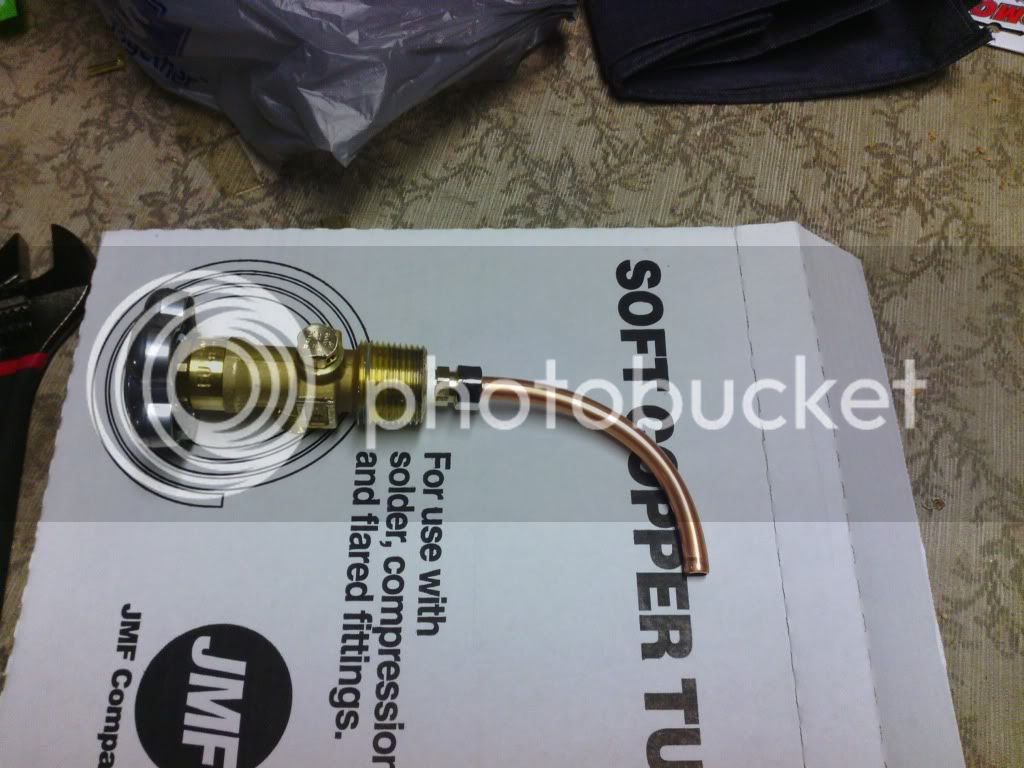
I connected the shank nuts/barbed ends and liquid disconnects to my serving lines with hose clamps. I connected the 2 2.5’ lines from my regulator to the two distributors with hose clamps. I connected the 6 3’ lines to the distributor outputs with hose clamps. I did not install the gas disconnects because they will not fit through the gas line cut outs I make later on.

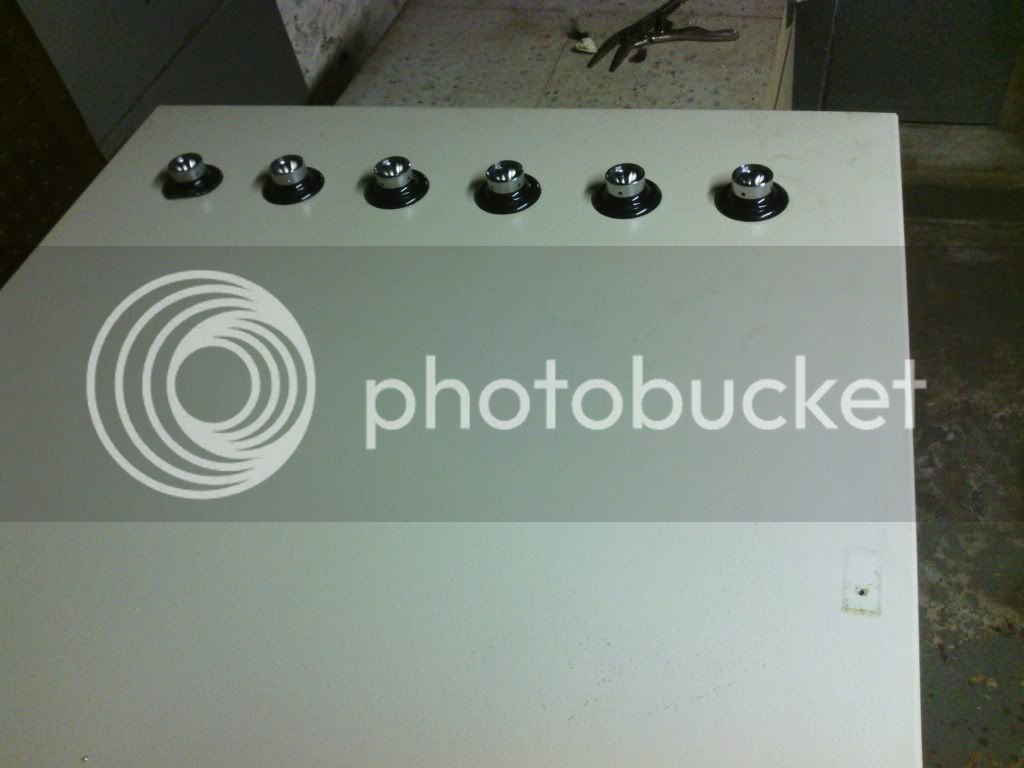
Fridge door removed for easier drilling. I have marked out equal spacing. I installed the taps low enough to come into where the butter and egg trays used to be in the fridge. I made sure to come far enough down and in from the edges to have a mostly flat surface to tighten the shank nuts to. Once mapped out I used a metal punch to mark the drill sites, this will keep the drill from walking on the next step.
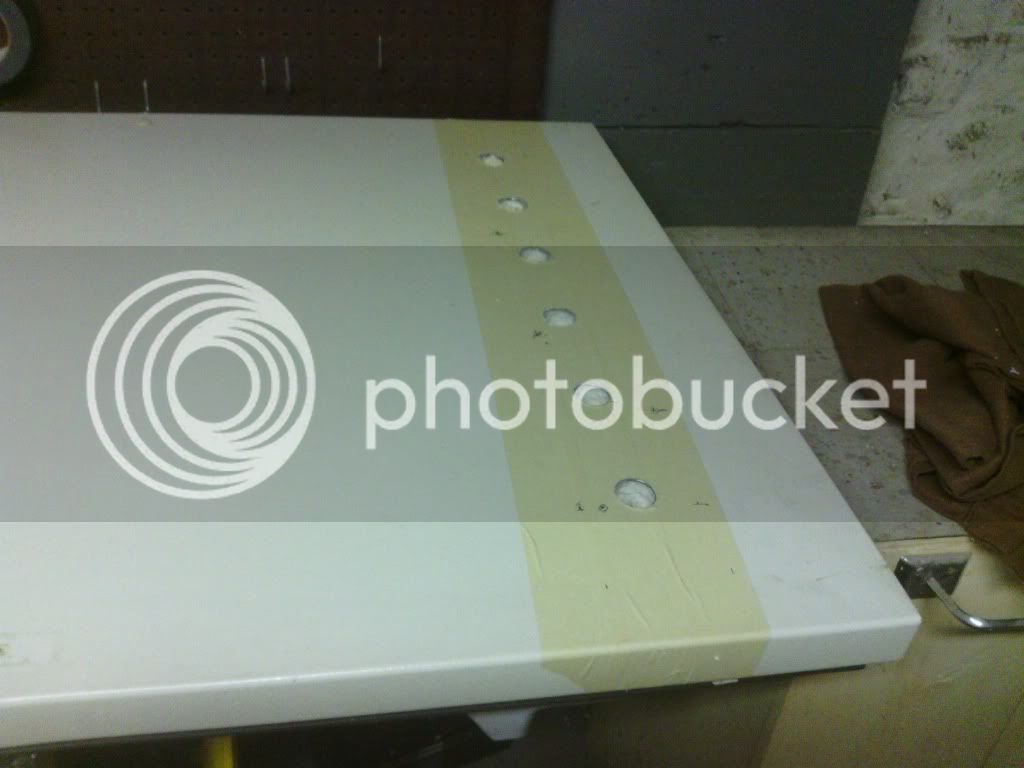
I used a 1” hole cutter from Lowes for drilling. It was made for wood so by the 6th hole it was pretty much toast but it was only $6 and I couldn’t find a metal one. I used a metal file to clear burs from the hole edges after drilling.
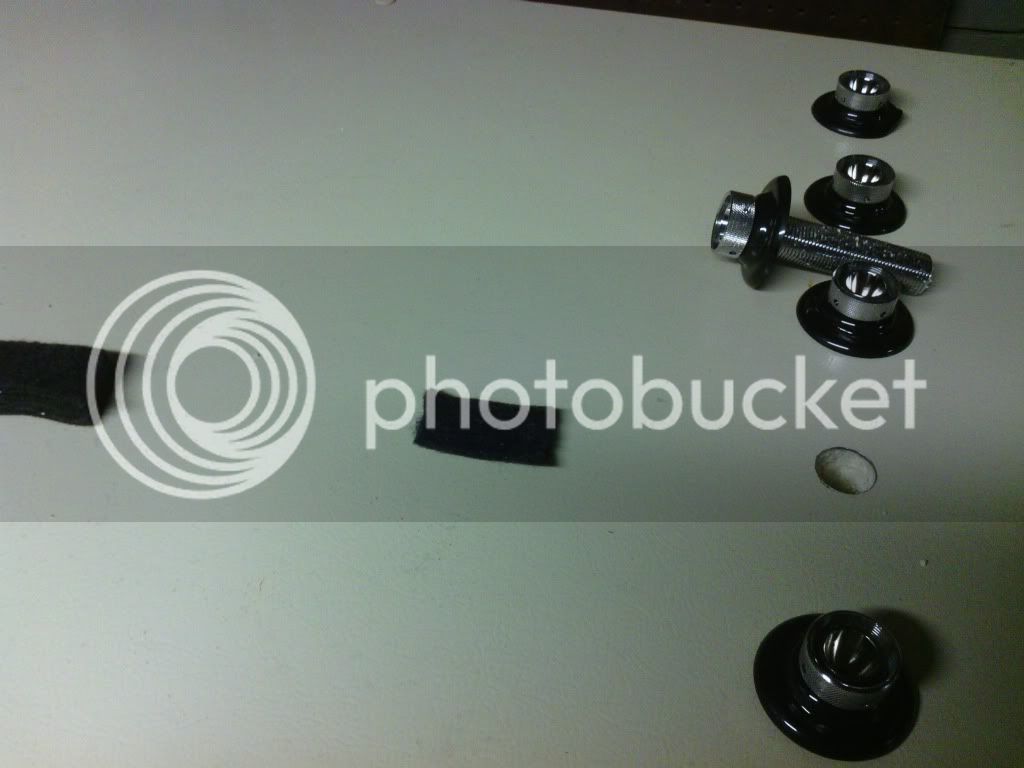
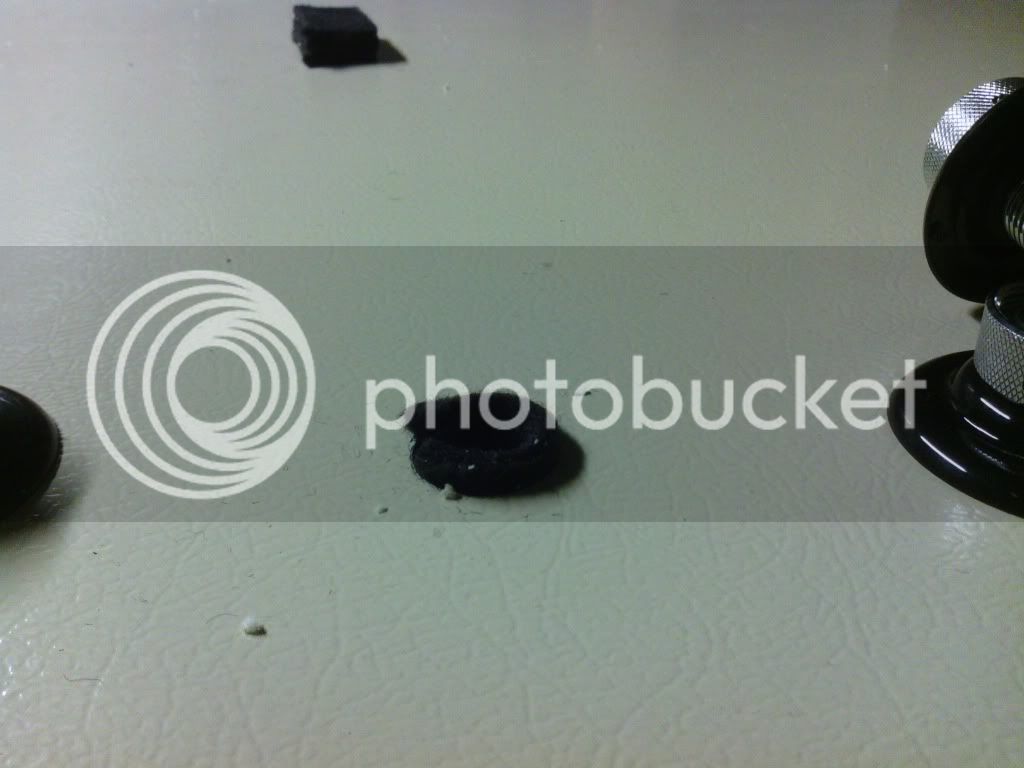
The holes were a little large so I cut 2” pieces of weather stripping felt that I had in my shop.
I inserted them like this and threaded the shanks into the holes. It was tedious but everything was very snug once complete.
Shanks threaded through the felt/door.
Then I flipped the door over and installed the nuts. This completed the modification of the door.
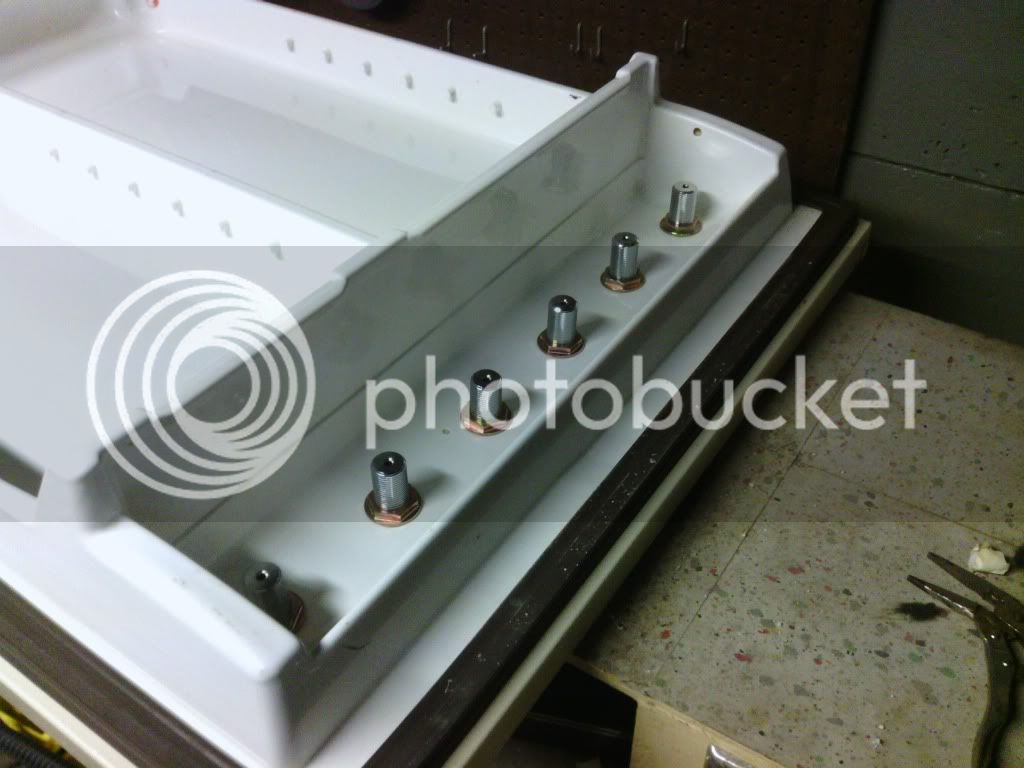
This is the bottom shelf of the fridge. I cut one set of vents out on either side of the center support piece to run the gas lines through.
I drilled 1/32” holes in the rear hump of the fridge just deep enough to get past the plastic, no deeper because the compressor and lines are located in that hump. These holes will act as guide holes for the screws. I used some 1” screws to mount into the plastic. The one on the right is mounted higher so that the gas line doesn’t hit the body of the one of the right.
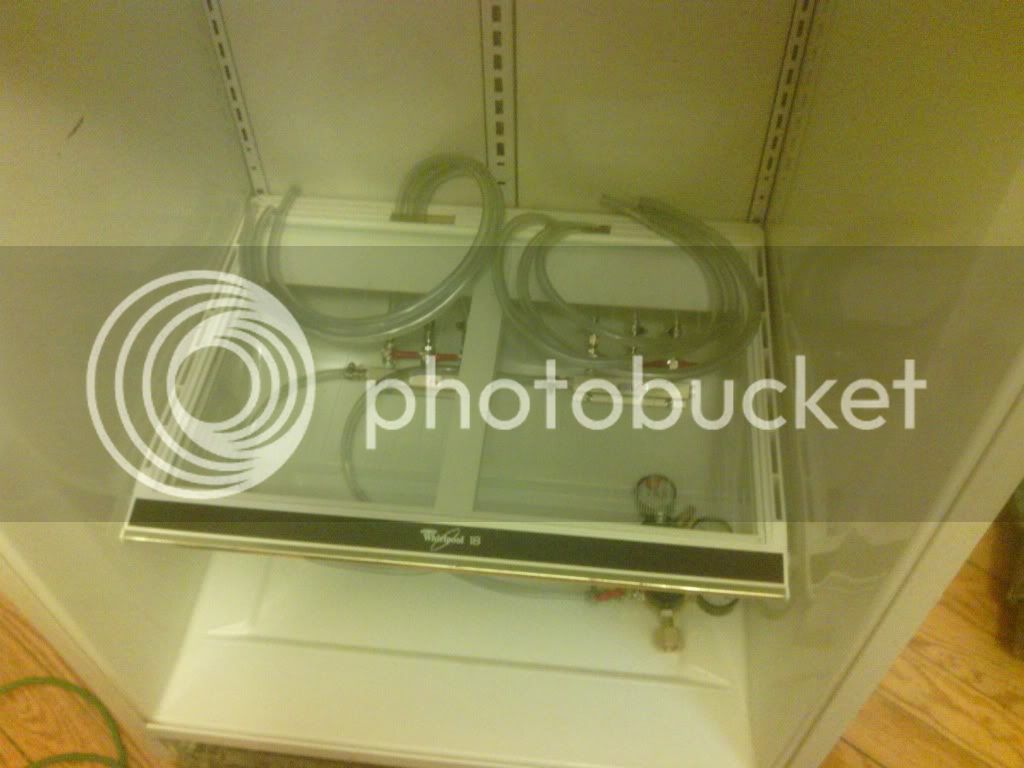
I installed the shelf and ran gas lines through vent holes.

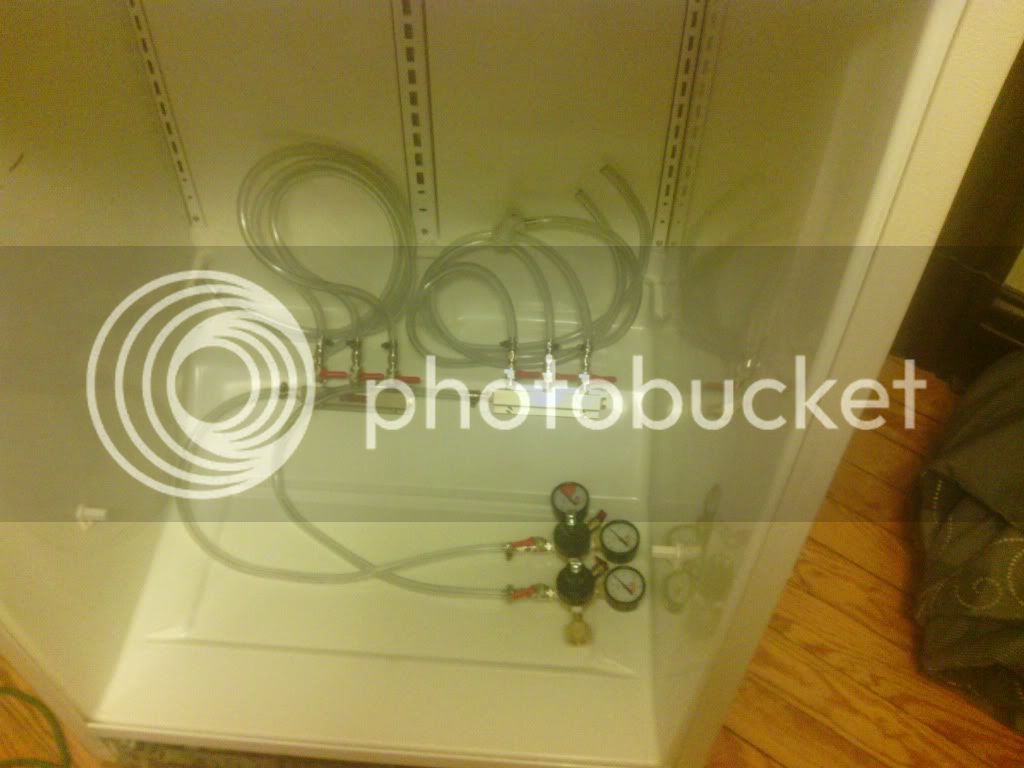
I then attached the gas disconnects with hose clamps.
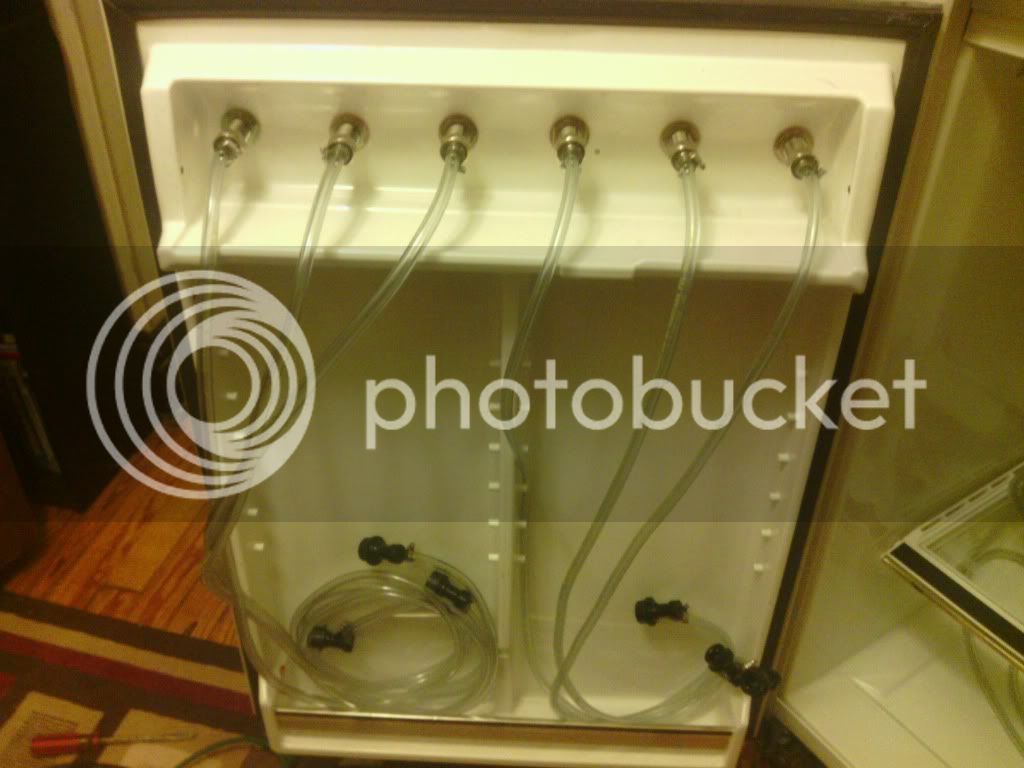
After getting the gas lines installed I reinstalled the door and tightened the beverage lines to the shanks. The 7’ low pressure lines are on the left so I have plenty of slack to open the door. The bottom shelf of the door does a pretty good job of storing unused lines for now.
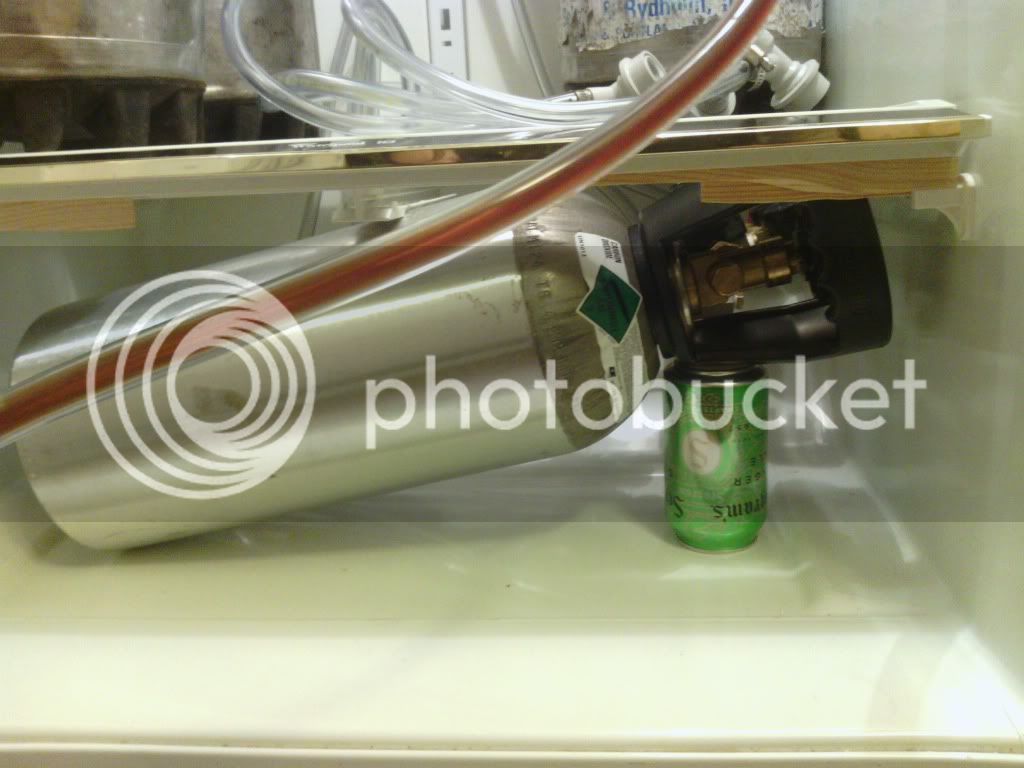
I could not find a place that filled tanks, only swapped them. On the plus side I ended up with an aluminum one, on the down side all my tank mods were for nothing. You should never use a co2 tank on its side, you run the risk of liquid co2 ruining your regulator. I tested at various angles without the regulator on to see at which point liquid co2 was expelled. Do this outside or in a well ventilated area if you are going to. As it turns out a soda can provided me with just enough tilt. I had to elevate the front of the shelf to accommodate this angle which gives the shelf a slight back slant now but it all worked. I do not recommend anyone doing this. It is in here mostly as accurate reporting of my process.

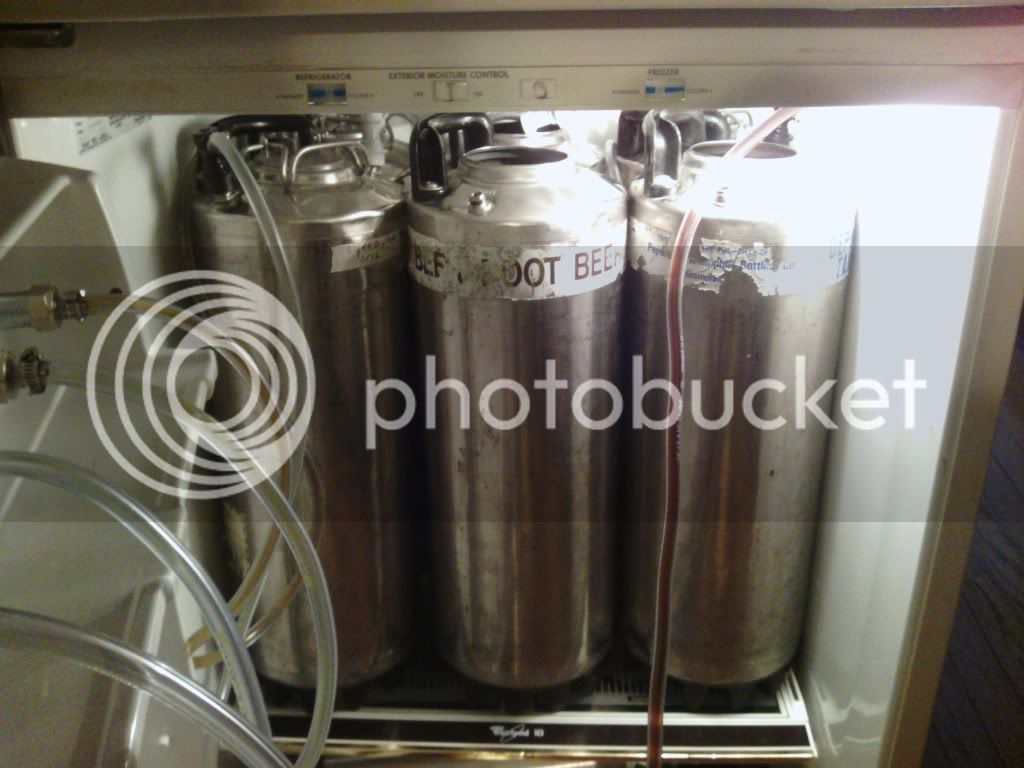
I connected my gas and liquid disconnects to the three kegs I had ready and waiting. The fridge will fit 3 more with a ½” clearance. It is a tight fit but I did dry fit them to make sure all of my math was correct before tapping the door.
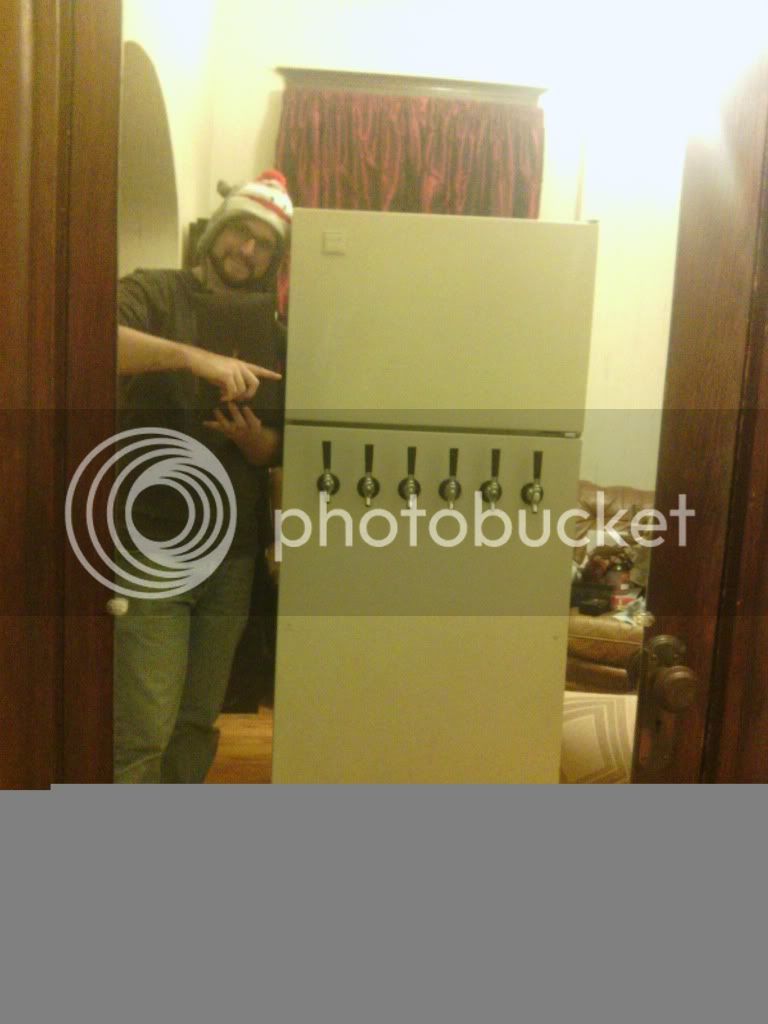
Then I smiled.
***Added Details***
The system is balanced for 37 degrees. The high pressure taps are 12psi and low pressure taps are 6.5 psi.
")