
I would like to thank everyone for all the quality threads and posts on Coffin Keezers. I have read a ton of them to make sure that I had a decent idea what I was doing! Hopefully this is one more thread that inspires someone.
This project took me 4 weeks start to finish once I started buying stuff. That does not include any time Ive spent reading other threads / learning. I would have had it done quicker except some personal issues came up that didnt allow me to work on it much for a week or so.
Budget:
My initial budget was 1,500. This was a project to replace a Perlick kegorator from the 70s that my wifes grandpa passed down to me. As far as budget goes I went over on some categories but didnt do too bad. I would estimate I have about 1750 in it including all parts and misc. purchases (some which I didnt really need of course!)
Tools:
I used a chop saw, circular saw, drill, tile saw, and nail gun as primary tools. Had to buy a 4 hole saw (4.5 was 20 dollars more!).
Details:
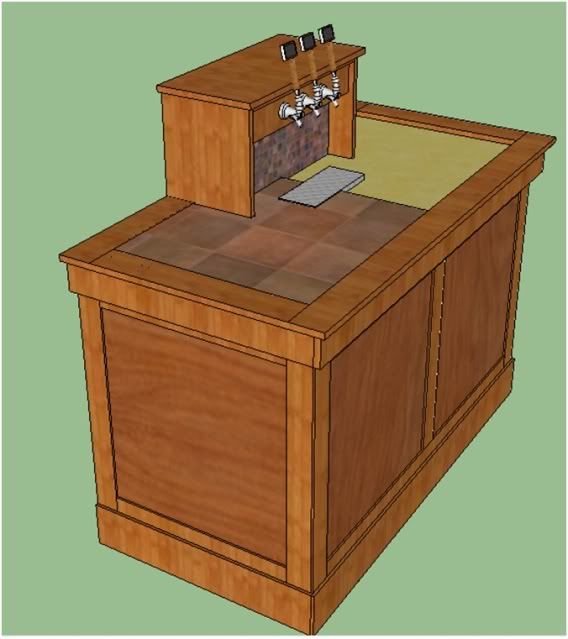
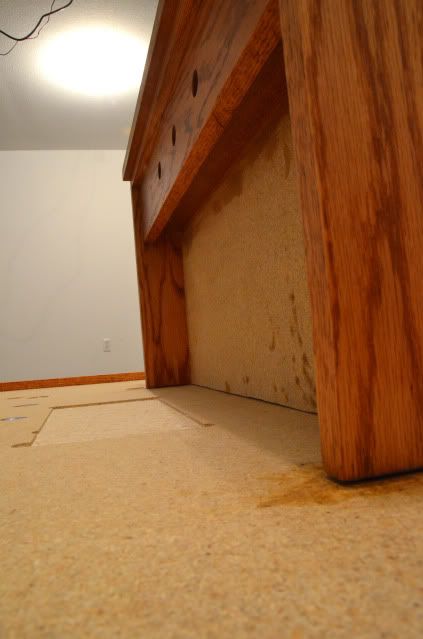
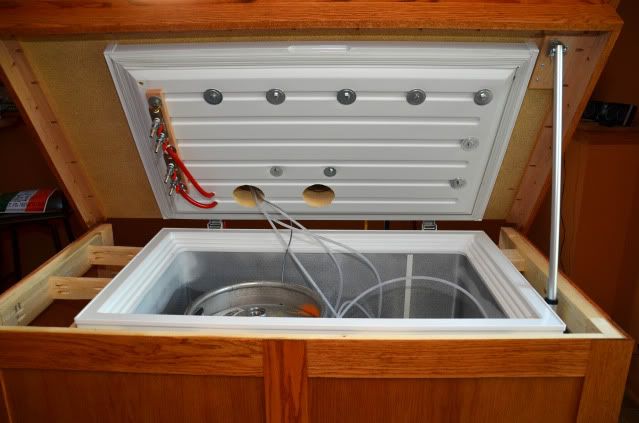
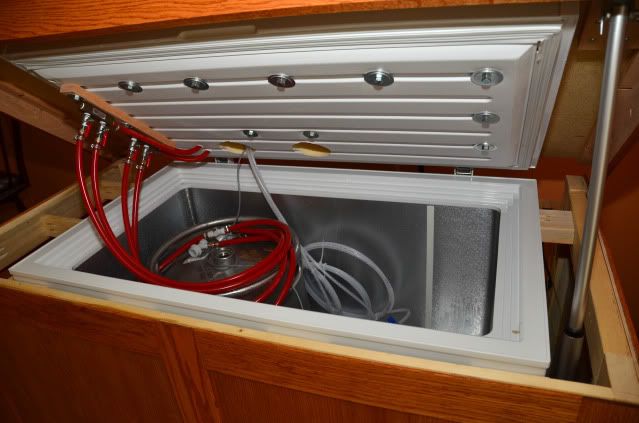
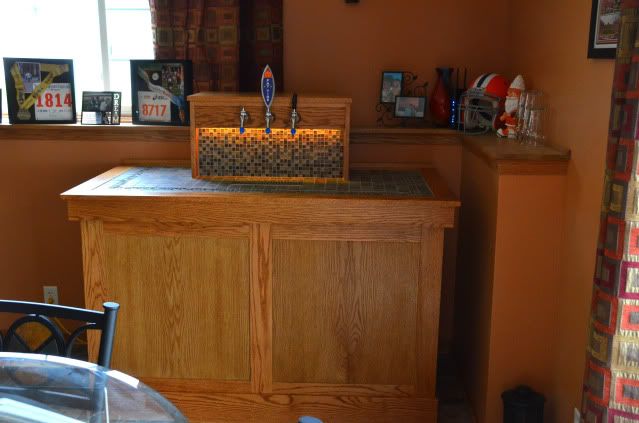
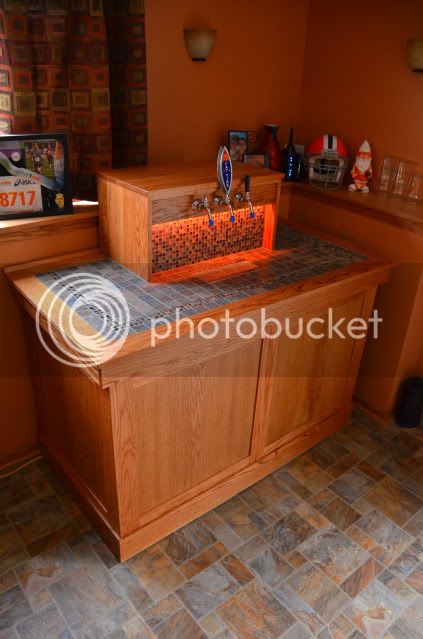
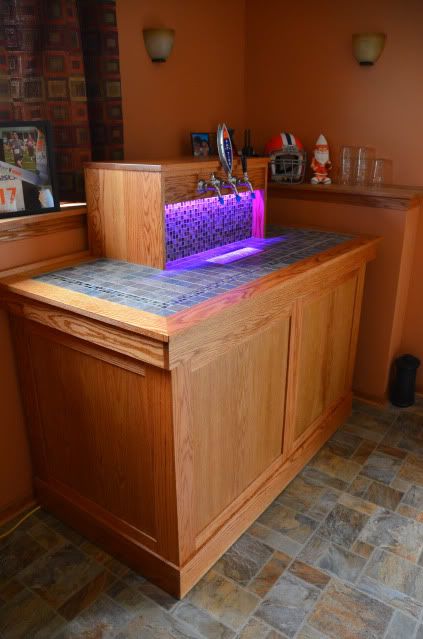
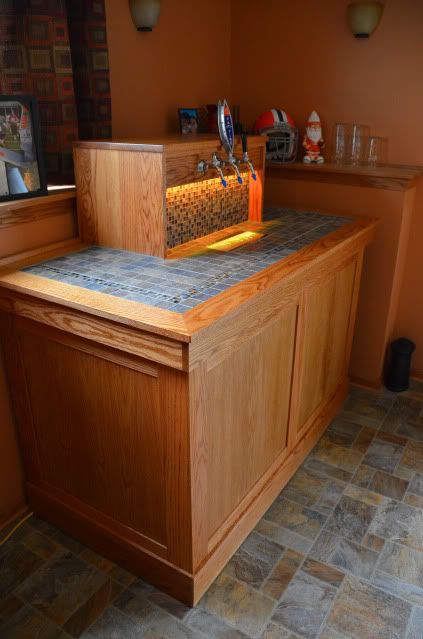
24 Linear Actuator from Firgelliauto, 10A power supply
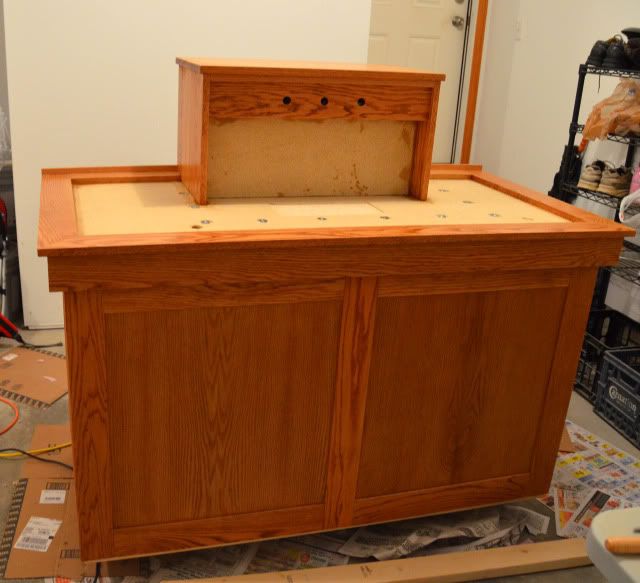
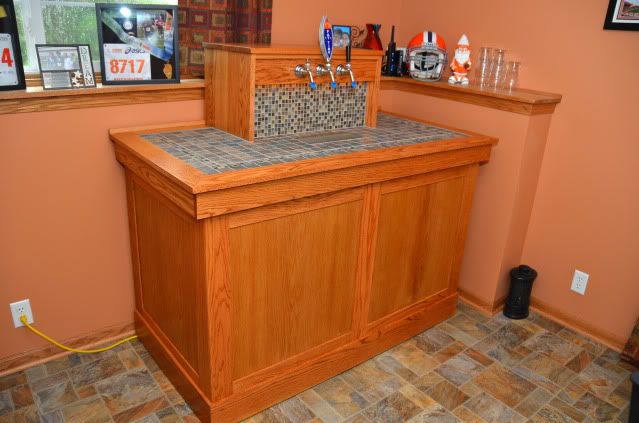
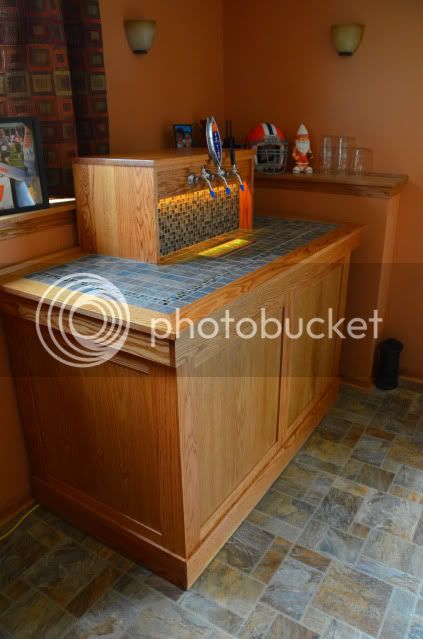
Solid Oak trim
¼ oak panels on base
4 x ¼ trim around base (casing)
6 x ½ trim around bottom base
Top trim is 4 x 1
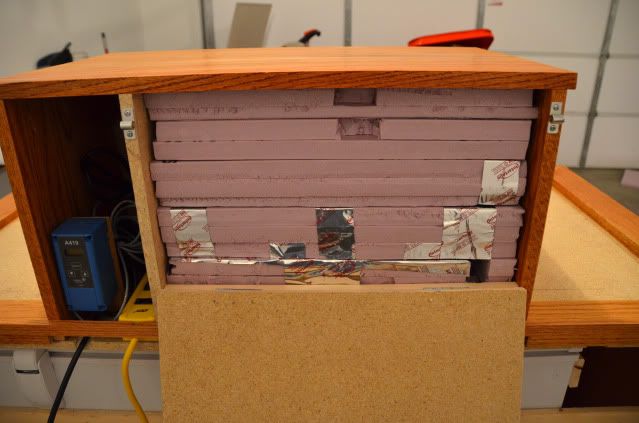
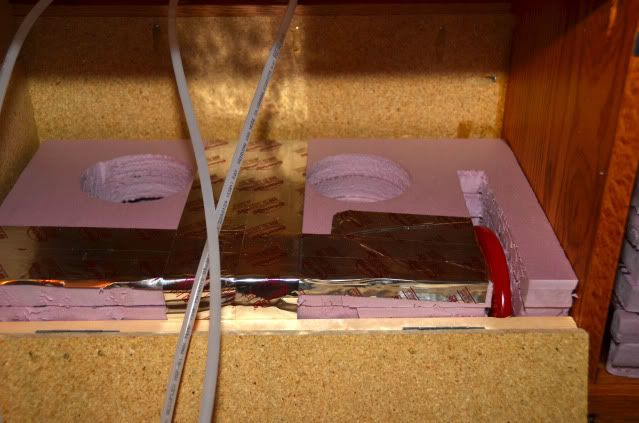
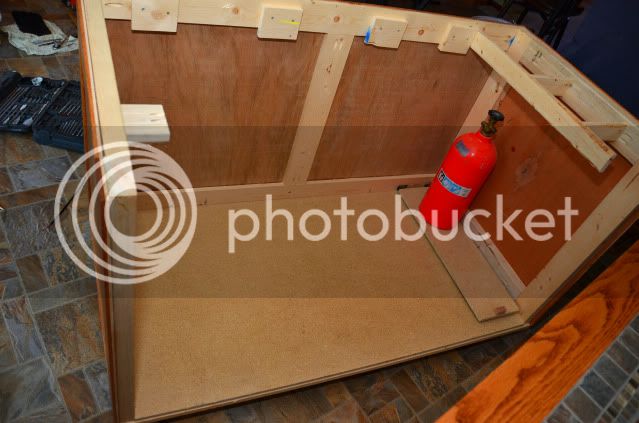
5/8 Plywood
5/16 cement backing board
3/8 T-nuts to attach top
12 SS drain
Perlick taps w/ all SS shanks / tailpieces
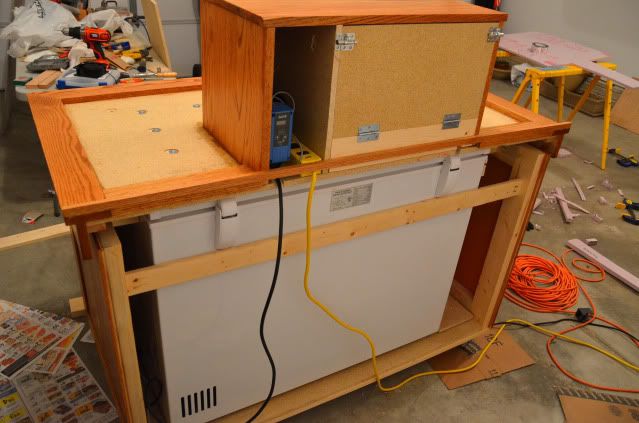
10.2 cf professional series freezer (I think) from Menards
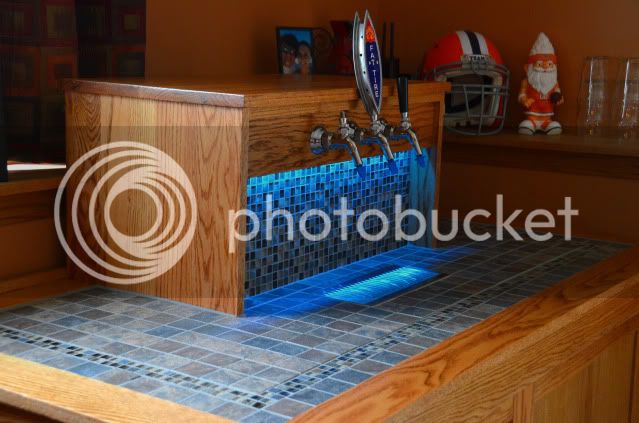
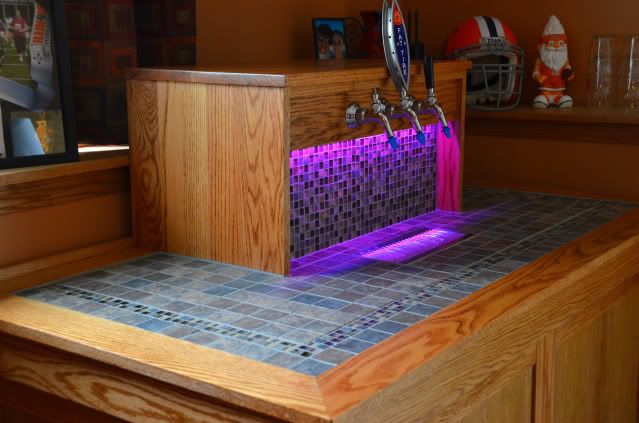
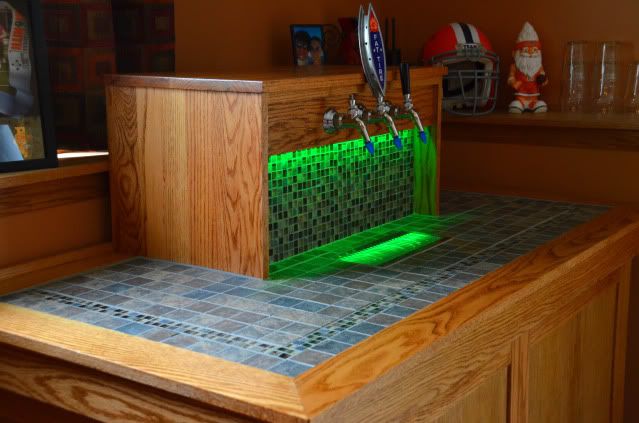
24 RGB LED strip light w/ remote
6 x 3 wheels w/ 110 lb load rating each
Will post the pictures with brief explanations.
If you have any questions, Ill do my best to answer them.
Thanks!
Zach
This project took me 4 weeks start to finish once I started buying stuff. That does not include any time Ive spent reading other threads / learning. I would have had it done quicker except some personal issues came up that didnt allow me to work on it much for a week or so.
Budget:
My initial budget was 1,500. This was a project to replace a Perlick kegorator from the 70s that my wifes grandpa passed down to me. As far as budget goes I went over on some categories but didnt do too bad. I would estimate I have about 1750 in it including all parts and misc. purchases (some which I didnt really need of course!)
Tools:
I used a chop saw, circular saw, drill, tile saw, and nail gun as primary tools. Had to buy a 4 hole saw (4.5 was 20 dollars more!).
Details:
24 Linear Actuator from Firgelliauto, 10A power supply
Solid Oak trim
¼ oak panels on base
4 x ¼ trim around base (casing)
6 x ½ trim around bottom base
Top trim is 4 x 1
5/8 Plywood
5/16 cement backing board
3/8 T-nuts to attach top
12 SS drain
Perlick taps w/ all SS shanks / tailpieces
10.2 cf professional series freezer (I think) from Menards
24 RGB LED strip light w/ remote
6 x 3 wheels w/ 110 lb load rating each
Will post the pictures with brief explanations.
If you have any questions, Ill do my best to answer them.
Thanks!
Zach

")
