sTiNkFiZzle
Well-Known Member
Ok... I thought I would post some pictures of my current eHERMS build in progress. I figured if maybe I could help at least one person it would be worth sharing. Not much original from as I used ideas from several different systems on the forums. I got lots of ideas from Kal, Electric Brewing Supply, and countless others.
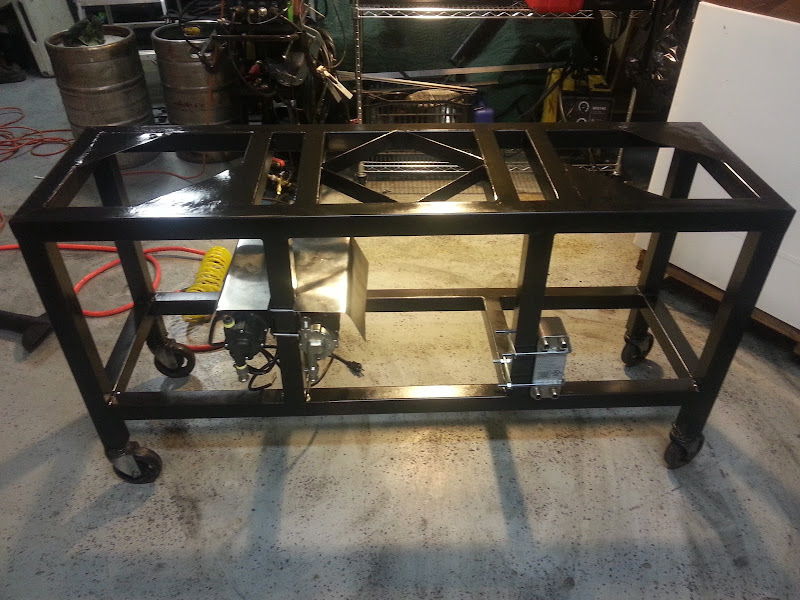
This has been almost a year going project. I have taken pics of different parts of the process except welding of the Brutus 10 frame. That has been documented several times and not sense in beating a dead horse. I chose to go with the Brutus frame because I was going to go gas. I then decided to switch to electric but liked the idea of the stand being portable with the lack of space in my garage.
My system:
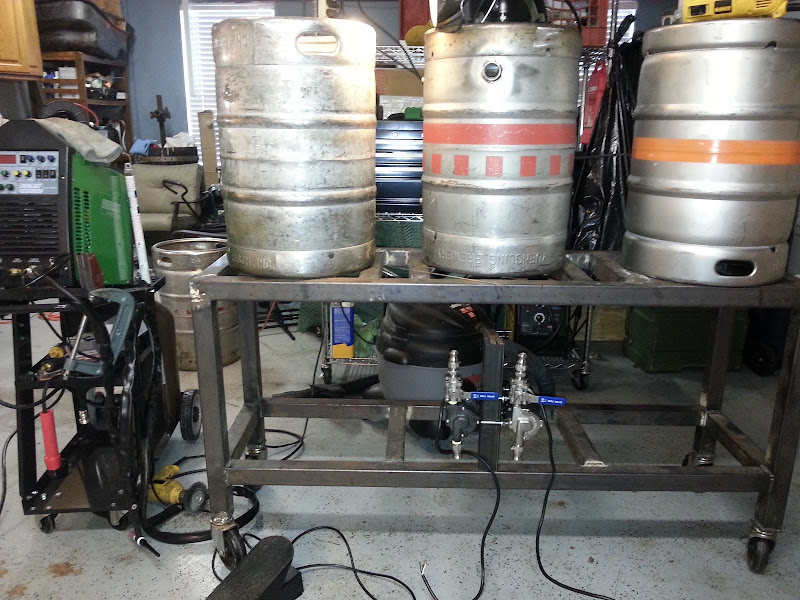
Single Tier Brutus 10 Clone
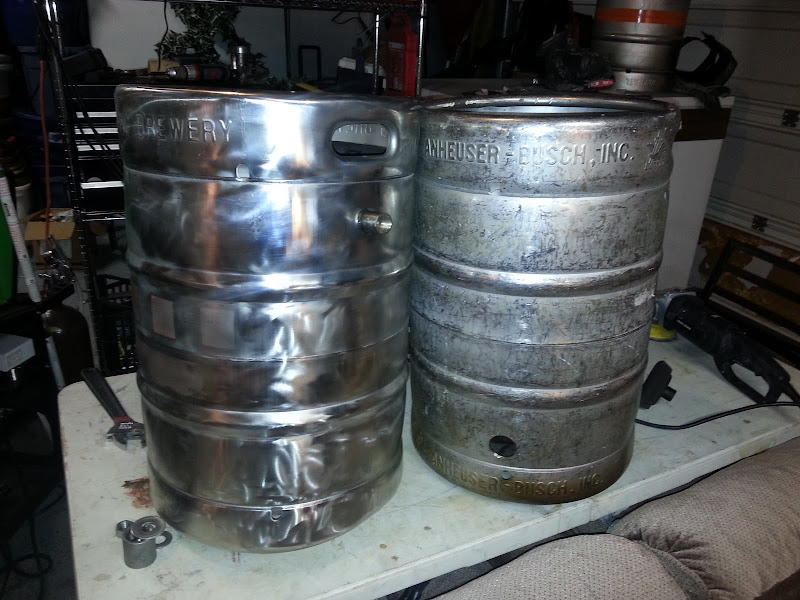
3 Keggle (HLT, MLT, Kettle) All Bottom Drain.
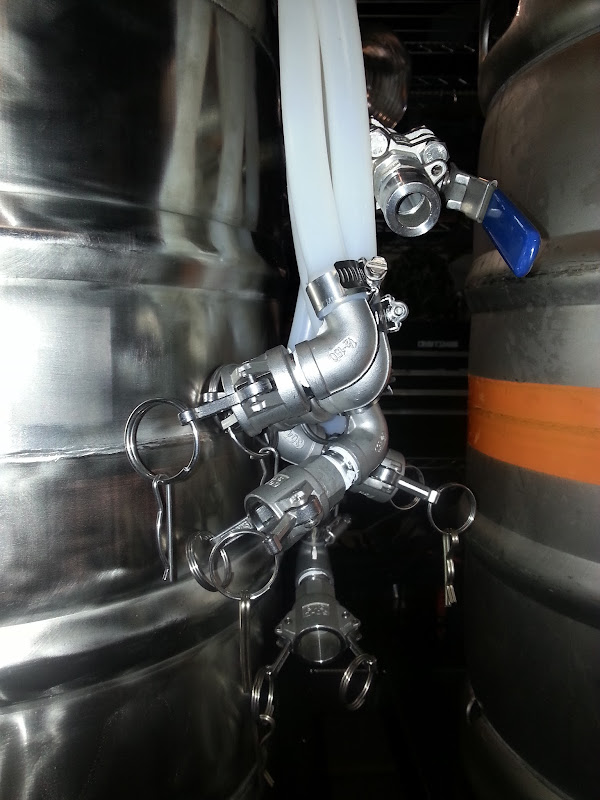
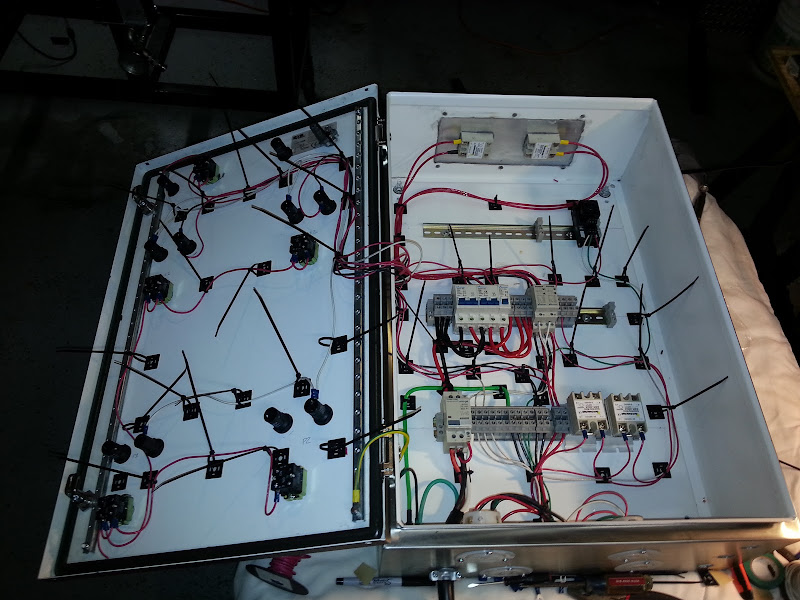
50 amp, 2 element, 2 pumps, BCS-460 Controller. With potential for back to back brewing. I have TIG welded all the fitting/couplers myself. The project inspired me to relearn to TIG welding(I did it in HS).
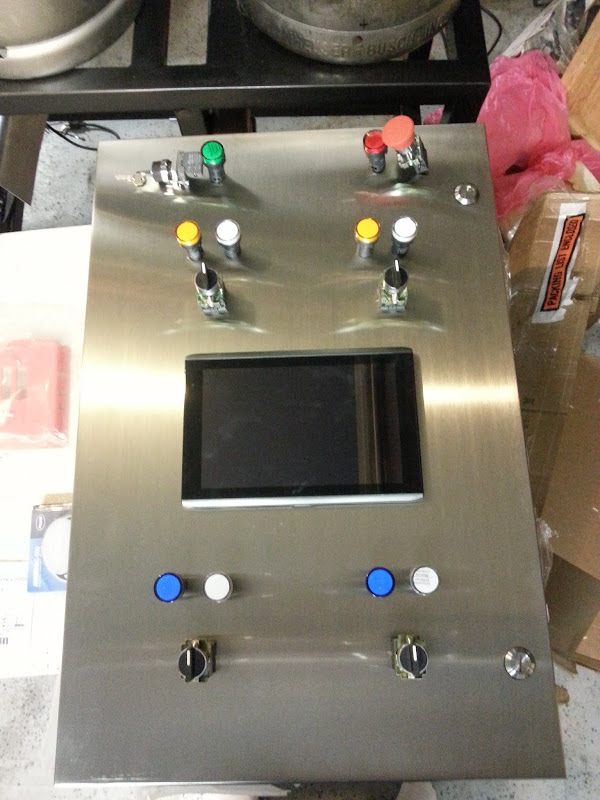
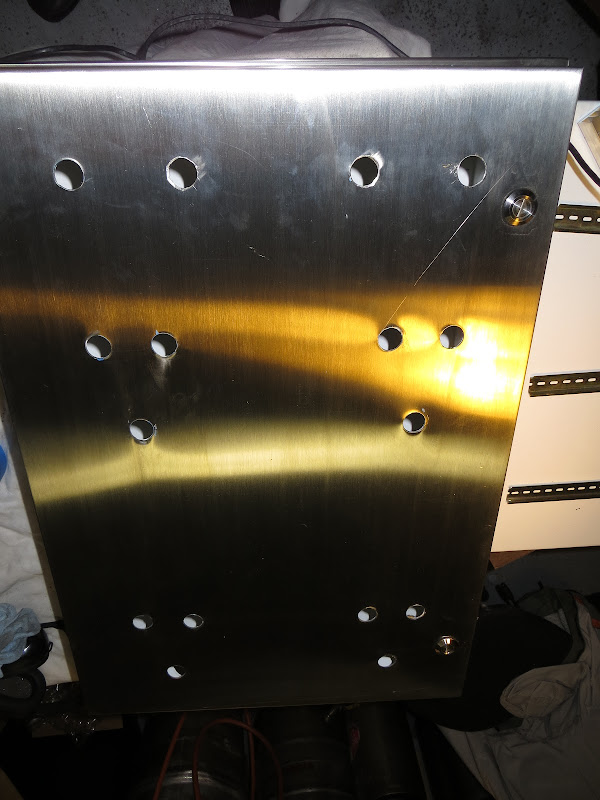
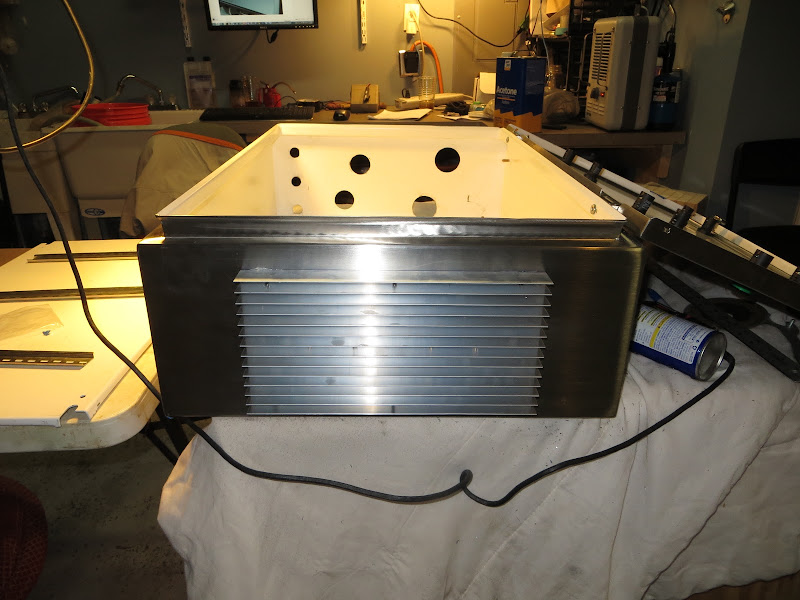
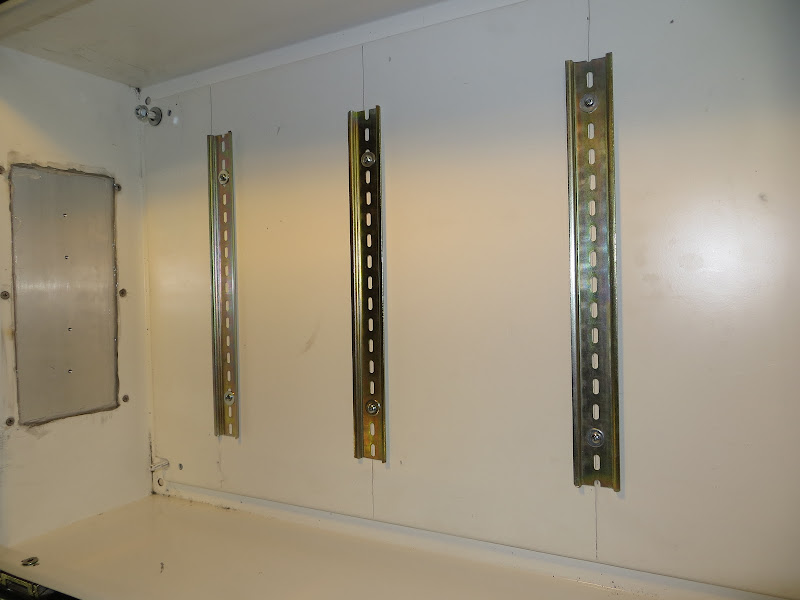
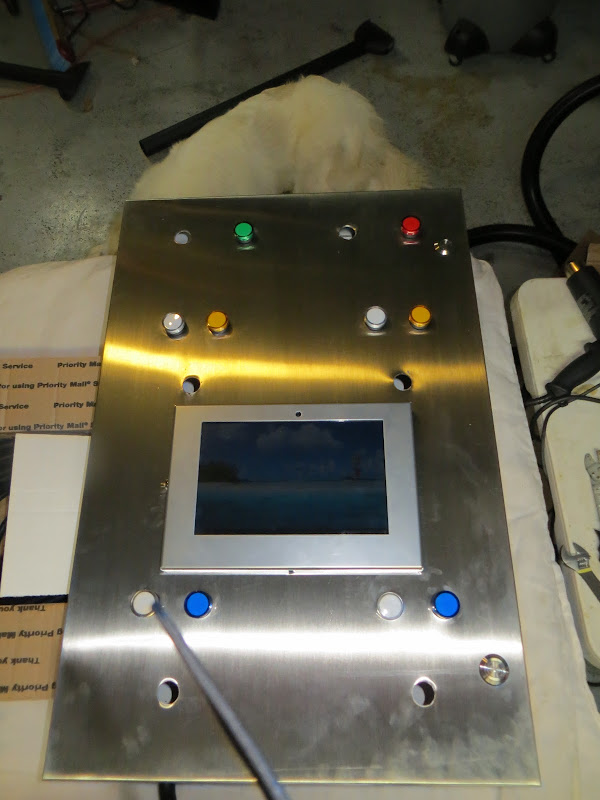
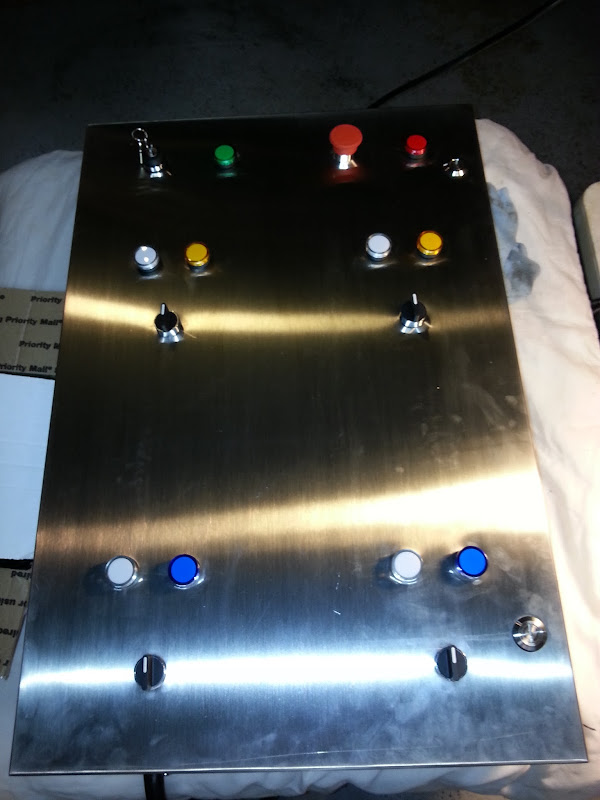
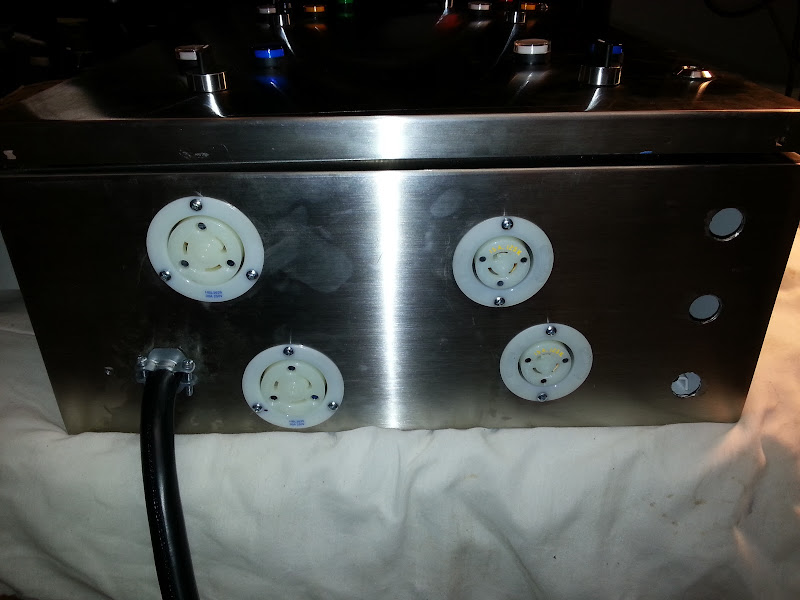
Control Panel: 30x20x8 Stainless Steel Enclosure w/ 10" Touch Screen
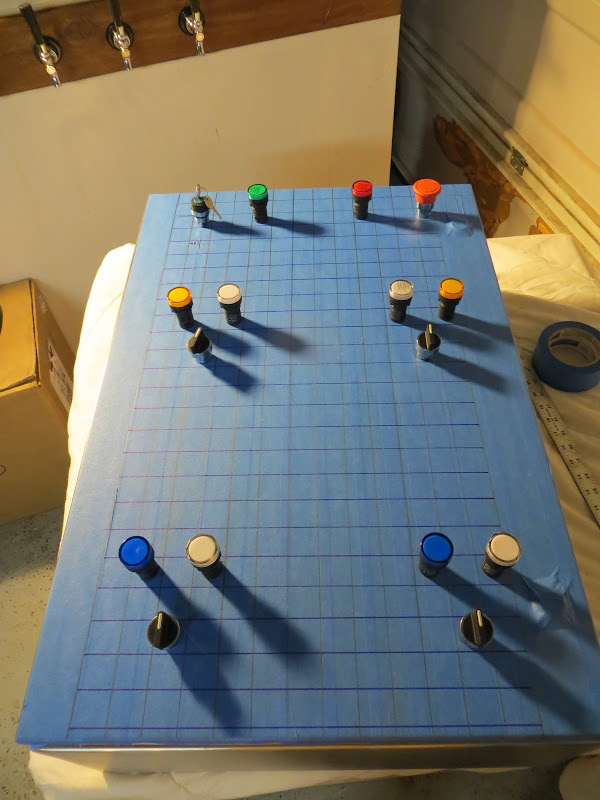
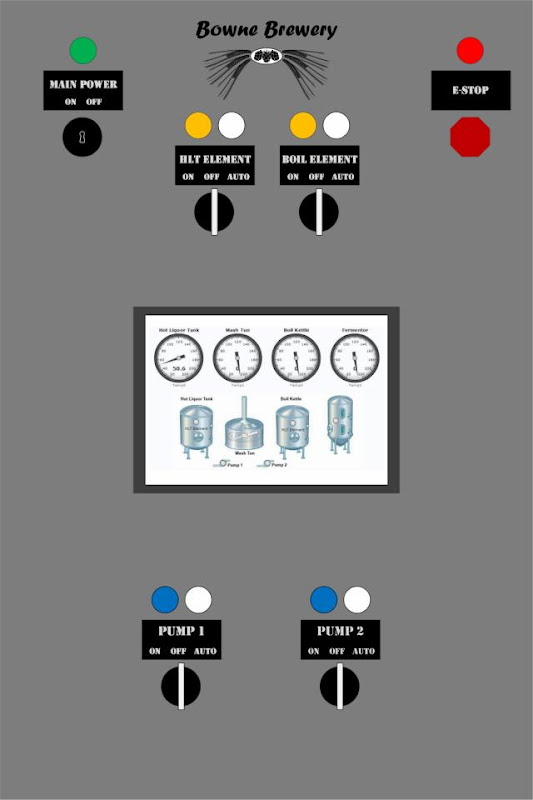
Concept Control Panel:
Brutus 10 Plans(not mine, thanks for who shared them! And ignore pots, I am using Keggles):

Wiring Schematic(Thank you Electric Brewing Supply):

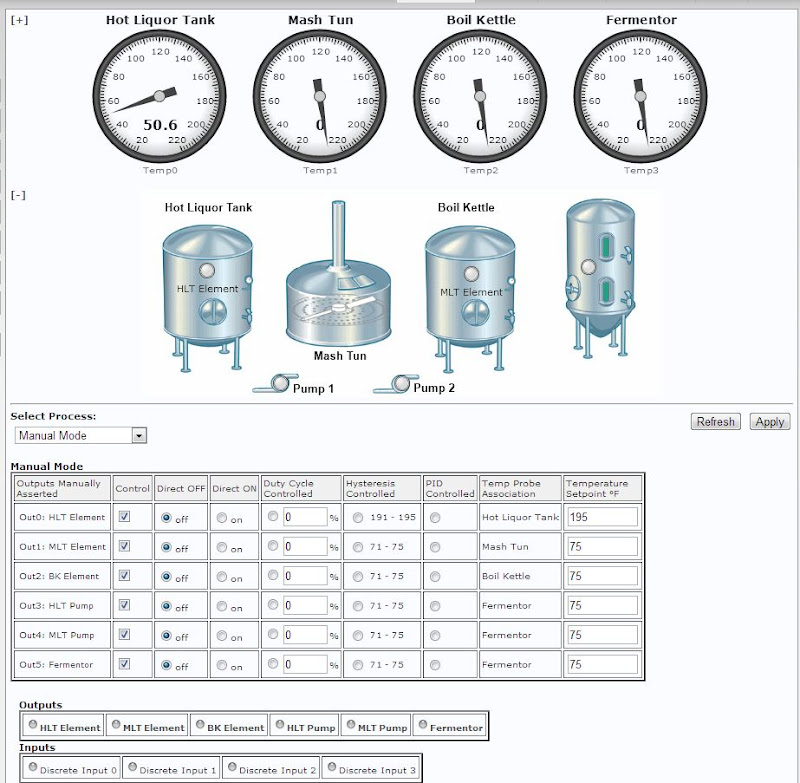
BCS-460 Setup(not done yet):
Also Building Fermentation Chamber
IMG to Follow
This has been almost a year going project. I have taken pics of different parts of the process except welding of the Brutus 10 frame. That has been documented several times and not sense in beating a dead horse. I chose to go with the Brutus frame because I was going to go gas. I then decided to switch to electric but liked the idea of the stand being portable with the lack of space in my garage.
My system:
Single Tier Brutus 10 Clone
3 Keggle (HLT, MLT, Kettle) All Bottom Drain.
50 amp, 2 element, 2 pumps, BCS-460 Controller. With potential for back to back brewing. I have TIG welded all the fitting/couplers myself. The project inspired me to relearn to TIG welding(I did it in HS).
Control Panel: 30x20x8 Stainless Steel Enclosure w/ 10" Touch Screen
Concept Control Panel:
Brutus 10 Plans(not mine, thanks for who shared them! And ignore pots, I am using Keggles):
Wiring Schematic(Thank you Electric Brewing Supply):
BCS-460 Setup(not done yet):
Also Building Fermentation Chamber
IMG to Follow