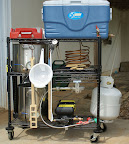
Thanks Lil' Sparky!
I got the material from the container store for a pretty decent price.
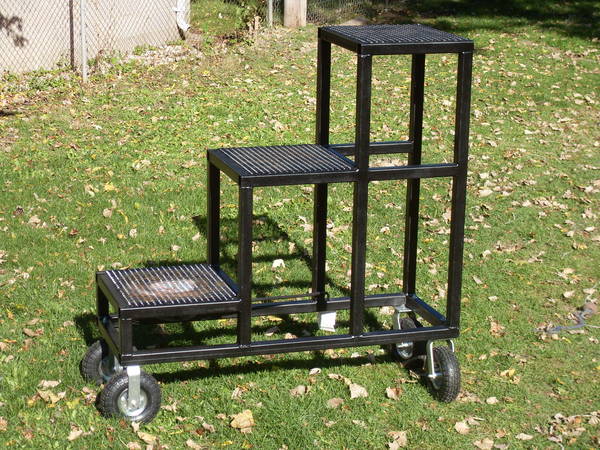
I never would have thought those shelving units were strong enough to hold all that weight.

Thanks Lil' Sparky!
I got the material from the container store for a pretty decent price.
I never would have thought those shelving units were strong enough to hold all that weight.
I never would have thought those shelving units were strong enough to hold all that weight.

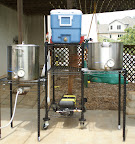
Not as fancy as Nate's but it does the job.
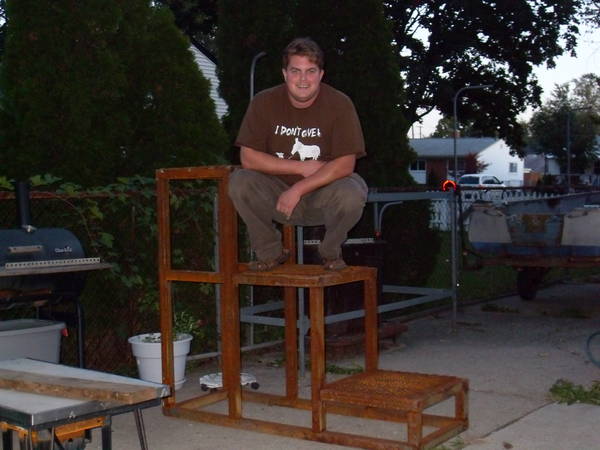
Nice sculpture Nate, you've got the real deal!


Thanks Lil' Sparky!
I got the material from the container store for a pretty decent price.
The most expensive part...

What is that stir motor from?


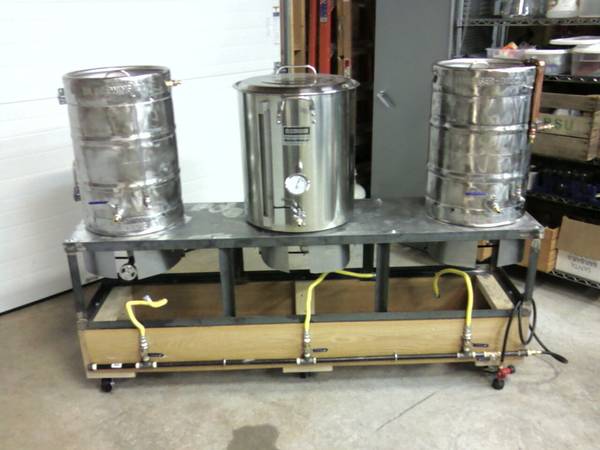
Sculpture building aborted due to a deal from Craigslist too good to pass up for now....so here it is, my brand new, just brought home this evening, three tier extra heavy duty brew stand...
Kevin; that's a clean looking stand congrats plus the help you had from
"The Power Of Blue".
The 1"x 2" tube is plenty strong but I have a question. Why did you settle on having the kettles resting on the weak side instead of the strong side of the rectangle tube for your frame? Don't get me wrong it's a simple and clean design overall.
 So you never know I guess. But mostly the first response.
 I'm in the early stages of planning the good old erector set style 3 tier 10 gallon. I'm hoping to make it partially collapsible. Updates and pictures to follow.

It's a work in progress. Here it is on the first day of the build. The burners mount on clips directly below the kegs. The project is nearly complete and is scheduled to brew on saturday.
 So...are you Malay or Indonesian? And should'nt it be "GilaMinumBir?"
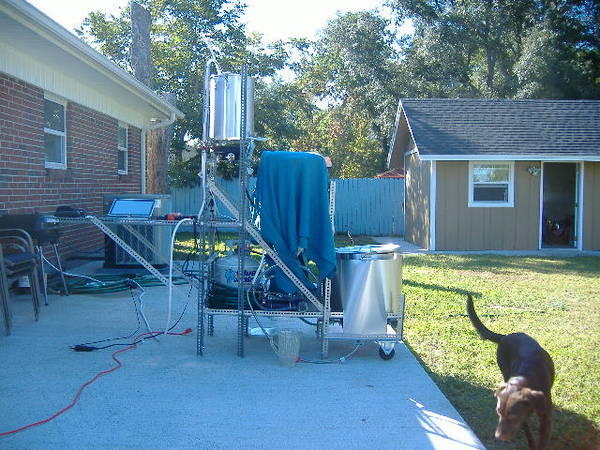
Huh. Looks great. I never thought of feeding a bit of spent grain to my dogs...anybody else do this?


Enter your email address to join:


