Soldering Stainless steel

Homebrew Talk - Beer, Wine, Mead, & Cider Brewing Discussion Forum

Help Support Homebrew Talk - Beer, Wine, Mead, & Cider Brewing Discussion Forum:

This site may earn a commission from merchant affiliate links, including eBay, Amazon, and others.
So, I just got my keg tool parts in today. Is anyone else having an issue of it making the dimple too big? I'm using bargain fittings couplers and they fit loosly in the dimple. When I say loosly, I mean they don't stay in at all.

At first I thought I was screwed. But, I just took a hammer and lightly tapped around the protrusion side of the dimple to reduce it a little. Then I pressed the coupler through to a nice tight fit. I just wanted to see if anyone else was having this problem. I don't know if I should take the reducing coupler and grind it down a bit or what.

Watch Joe's (Nostalgia) video, it really helps to explain things a bit.

 
Last edited by a moderator:
well in Joe's video if I remember correctly he pulls the reducer all the way through the vessel. that IMHO is no good for at least half of us doing this and the reducers OD is slightly larger than the coupling OD thus creating a sloppy joint that needs to be hammered back into place.

great video for some one has hasn't done this, but if your coupling is slightly smaller than your reducer you will not get a tight like a virgin on prom night Fit.

just sayin'


-=Jason=-
 
Yeah I watched and followed the video to a T and the result was that the coupling is smaller than the reducer.

Thanks Flomaster for the lube idea. I didn't think of lubing the reducer to be able to get it out. I did try stopping it before it was fully through, but I couldn't get it out at that point. I ended up having to pull it all the way again. I'll try the lube next time. Thanks!
 
use a piece of wood and a hammer or use a rubber mallet to get the reducer out. I just bang it back into the keggle.

-=Jason=-
 
This method sure does make nice joints. For a keggle, you really need 2 people though. I couldn't watch the torch and the solder at the same time. Heh
img_0396.jpg

img_0399.jpg

img_0404.jpg
 
Yes, I probably should have mentioned that some other NPT couplers are a bit smaller than the McMaster-Carr ones and you can't pull the reducer through all the way. Apologies for that.

This method sure does make nice joints. For a keggle, you really need 2 people though. I couldn't watch the torch and the solder at the same time. Heh
Or you can try the high-tech webcam approach :) Your solders look great!

solder_laptop.jpg


solder_setup.jpg


-Joe
 
Thx! I thought they turned out well. First 2 dimple solders i have ever done. I think it helps if you get silver soldering down first before trying this though. I soldered 4 locknuts 4 bolts 2 bushings and 6 washers before these.

I'll def consider the webcam approach.
 
with the keggle on its side I and hold the torch and look into the keggle and watch for the solder to melt. I first preheat the coupling before I need the solder or flux. then I apply heat to the coupling only because its thicker and takers longer to heat up. one the coupling is up to proper temp the solder will just melt. remove heat and let cool before cleaning

-=jason=-
 
Yeah, I've done it both ways, it's way easier to have your brother hold the torch and yell at him when the solder starts to flow.
 
Yeah, I've done it both ways, it's way easier to have your brother hold the torch and yell at him when the solder starts to flow.

yeah for sure having a second person holding the torch or telling you when the solder turns to liquid is the way to go for sure.

-=Jason=-
 
Well I did 6 more dimple joints over the weekend. All but one were in kegs. I must say, dimpling a stock pot is much easier than dimpling kegs. The WD-40 on the reducing coupler made it easy to knock out. Also, having another guy helping was definitely much easier.
 
How about a combination of welding and soldering? Think it's overkill?
This is in a scrap keg top.

I started by tigging the "Outside":
IMG_3575.jpg


"Inside" after the weld:
IMG_3580.jpg


"Inside" after filling the gap with solder:
IMG_3593.jpg


Ed
 
That's pretty hardcore there. I guess if you want more of a sanitary fitting the solder on the internal surface would help with this. Otherwise, for a keggle the solder just helps to make it look more pretty.
 
Less able to collect crap on the backside of the coupling filling it.
Now if your double jointed you would of Tigged the inside or kept the wife happy.
I'm picking on ya Ed. :D

I know in keggles this all ends up being boiled so the crevice is probably not a big deal. Several folks commented on the welded fittings that the backside might collect "crap" so I thought I'd see how this went.

On another note, I went down the same wrong path several others have... After the coupling was welded, I tried using past flux that I picked up at Lowes. That didn't work and it was a pain to clean. I picked up the Stay Brite kit from AirGas and gave it another shot using a MAPP torch... another mistake. I heated the coupling, but by the time the solder started to melt the joint continued to heat up and the flux overheated. Cleaned it up yet again and used a propane torch.

So, as so many have recommended... use liquid Stay Brite flux and propane.

By the way... I picked up 2 Stay Brite kits at AirGas yesterday. The price on the sticker said $6.45, the register rang up $24.+. When they checked it out, the price has increased to $11.~ each and they had not updated the price on the shelf. They told me they could not sell it below their cost and I didn't feel like making a big issue so it ended up costing me $7.49 each.

BrewBeemer - Using my touch screen phone and Tig Welding are two things I've learned cannot be done by touch. I'm sure someone can weld the inside and I'm also sure it's not me. To be honest, I'd be disappointed if you DIDN'T give me a hard time.

Ed
 
Ed,

Just a comment for you. Your TIG welding on the fitting is just plain "a work of art".
Awesome!

Thanks PJ.

To be honest, it's pretty much the "Blind Squirrel" syndrom... I got lucky.
The dimpling tool and fantastic advice from the true weldors on the forum get all the credit.

I guess the other good reason for the solder is a backup to my welding :D

Ed
 
Ed, if you are planning on doing this procedure for others, you should consider buying a pound of solder and 32 oz of flux. Way cheaper than buying those kits at $11 each now that they've upped the price. I went through a kits worth of solder on 8 or 9 fittings using a double ring of solder on each.
 
Yes, and it works just fine. I don't know about the long-term issues with dissimilar metals, but they solder together without any issues.

-Joe

I doubt Copper (or Brass for that matter) would be reactive enough to make much of a difference when soldered to Stainless Steel. Where's John Palmer when you need him??
 
I doubt Copper (or Brass for that matter) would be reactive enough to make much of a difference when soldered to Stainless Steel. Where's John Palmer when you need him??

Because he is a Metallurgist, it would be nice to pose the question to him.

I was listening to a Brewstrong podcast yesterday and Palmer was discussing the reactions between dissimilar metals. If I remember correctly he suggested that it would not be a great idea to use an aluminum fitting on a stainless kettle but on an aluminum pot it's fine. Other than that he did not think copper or brass fittings would be a problem in stainless or aluminum kettles.

His reasoning behind this was that placing an aluminum fitting (high corrosion potential) within a stainless kettle (low potential) will corrode the fitting quickly. However, aluminum fittings in an aluminum kettle spreads the potential corrosion over a large area and is not a problem.

I'm sure I miss quoted him but this was the just of what he was saying.
 
Because he is a Metallurgist, it would be nice to pose the question to him.

Sorry not totally impressed, I learned thru a machine shop with a welding and fab department 35 years ago at NASA Ames Research. It must not be an exclusive "metallurgist" only knowledge thing provided one has the ability to look listen and learn.
 
Sorry not totally impressed, I learned thru a machine shop with a welding and fab department 35 years ago at NASA Ames Research. It must not be an exclusive "metallurgist" only knowledge thing provided one has the ability to look listen and learn.

Didn't say he was a Metallurgist to impress anyone, nor did I say that the knowledge was exclusive to that field. (That would be a silly assumption.) Not sure what you're getting at here, but it seems you're attempting to discount something I've said or maybe something Palmer has said?

Help me out here, I'm grasping at straws. :confused:
 
No disrespect Danny my reply wasn't aimed at you or to be taken wrong.
After working with many "propeller heads" at the Berkeley and Livermore Rad Lab plus the Sandia test facility
i've learned how to work around these odd thinking.
 
Understood, just was a little confused.

Your thoughts on the dissimilar metals being soldered together? Any issues with longevity?
 
Understood, just was a little confused.

Your thoughts on the dissimilar metals being soldered together? Any issues with longevity?

Examples, a 3/4 hp vertical mount well pump bronze impeller inlet stub, sandy soil wears this inlet stub OD to pump base ID over years of service dropping pumping efficiency.
Machined down the stub then soldered on a SS sleeve, machined to a tight clearance to pump base, going on 35 years no problems plus SS a gummy material vs bronze.
A commercial grade hot tank for boiling heads and blocks the high dollar bronze pump was worn down internally and not pumping as new. Machined out the body then soldered in a sleeve tightening up the internal impeller clearances tighter than factory new. It's pumping hot caustic chemicals daily 5 plus years under high heat conditions. The bronze finish is now black.
Granted this is in extreme conditions so is a $2K pump head.
Not to sound like a wise ass, with a Bridgeport mill and lathe on the property I can fab, repair or weld items considered junk. It ain't junk junk until I say it is.

So does this all mean you don't see an issue arising or that you would avoid it.
 
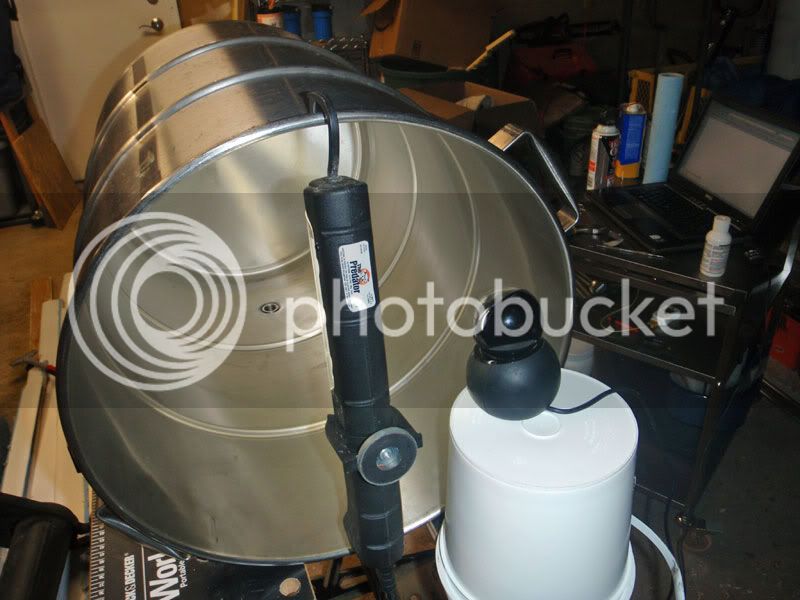
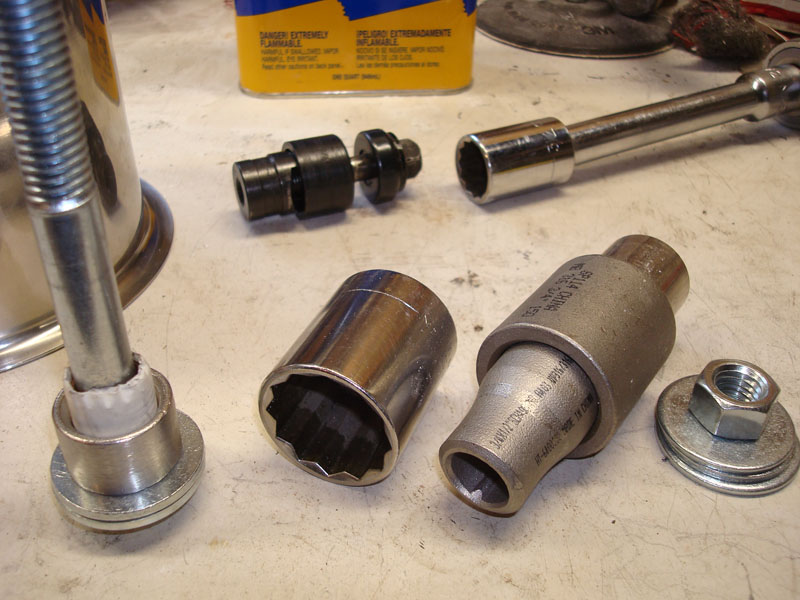
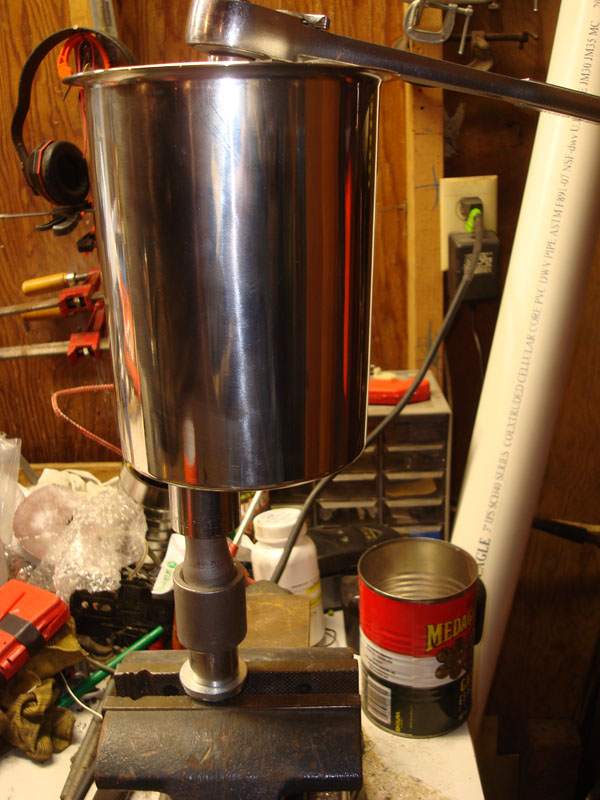
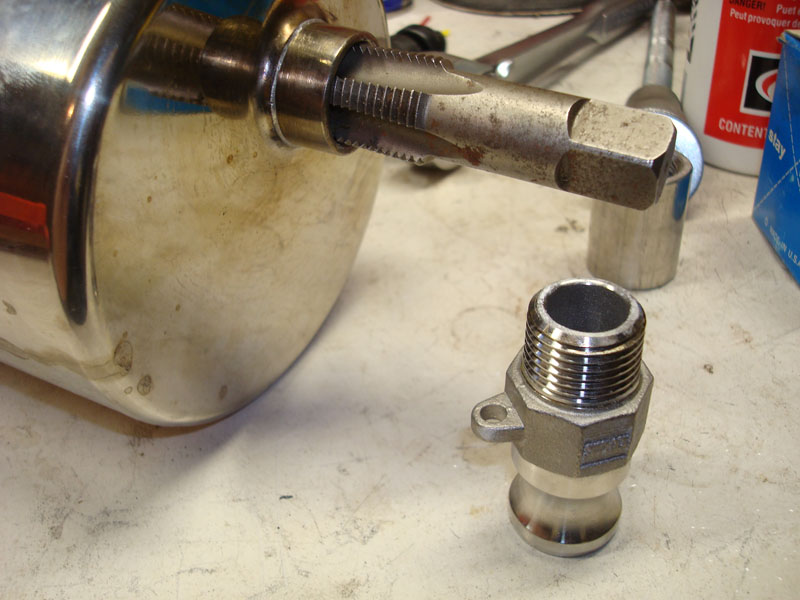
I'd like to add my bit to this otherwise most excellent thread. I just did my first dimple solder today. I decided to start with the grant because it is the least expensive vessel should things go wrong. The grant needs a bottom drain with a Camlock male. I will be installing a 1/2" half coupling. Here I have cut a hole with a 1/2" conduit punch (7/8" dia) and pulled a dimple with the tool set up as shown. I use a 1/2" bolt so a 1-1/16" socket for 1/2" square drive makes a great self-centering receiver. The remaining pieces on the bolt are just spacers for the long bolt. It is so long because I hope to later pull dimples and pull in couplings in one step, like Green Monti. Notice the piece of 1/2" copper pipe with masking tape on top of the grant.
GrantSolder1.JPG


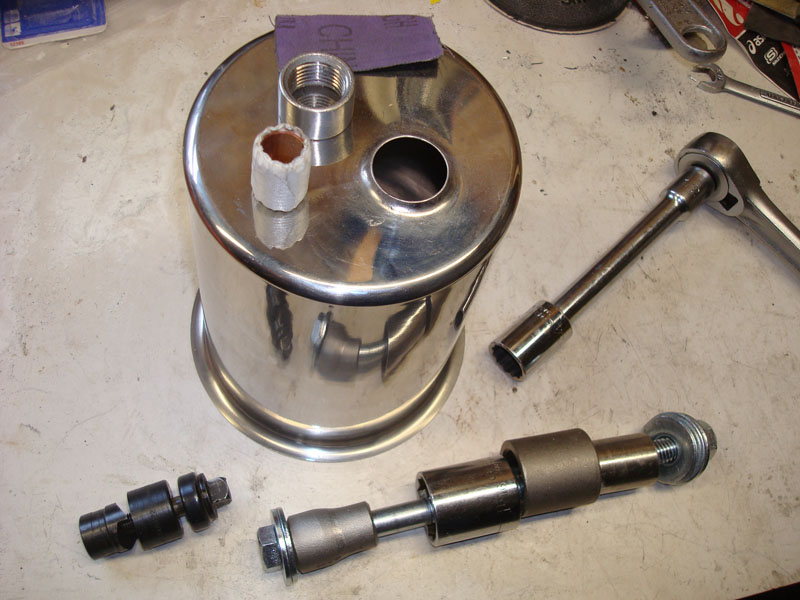
After having pulled the expansion piece partially through, i reassembled the tool to pull the half coupling through. The piece of 1/2" copper pipe with masking tape is a snug fit inside the coupling which centers it on the bolt. Parts go on the bolt from left to right.
GrantSolder2.JPG


I put the nut in a vice which made it a lot easier to work the wrench with both hands.
GrantSolder3.JPG


The joint has flux and a solder ring is in place, almost ready for heat.
GrantSolder4.JPG


Before I put in the solder ring I filled the dimple with flux. It works like a spirit level so I can modify the mounting of the grant until it is plumb.
GrantSolder5.JPG


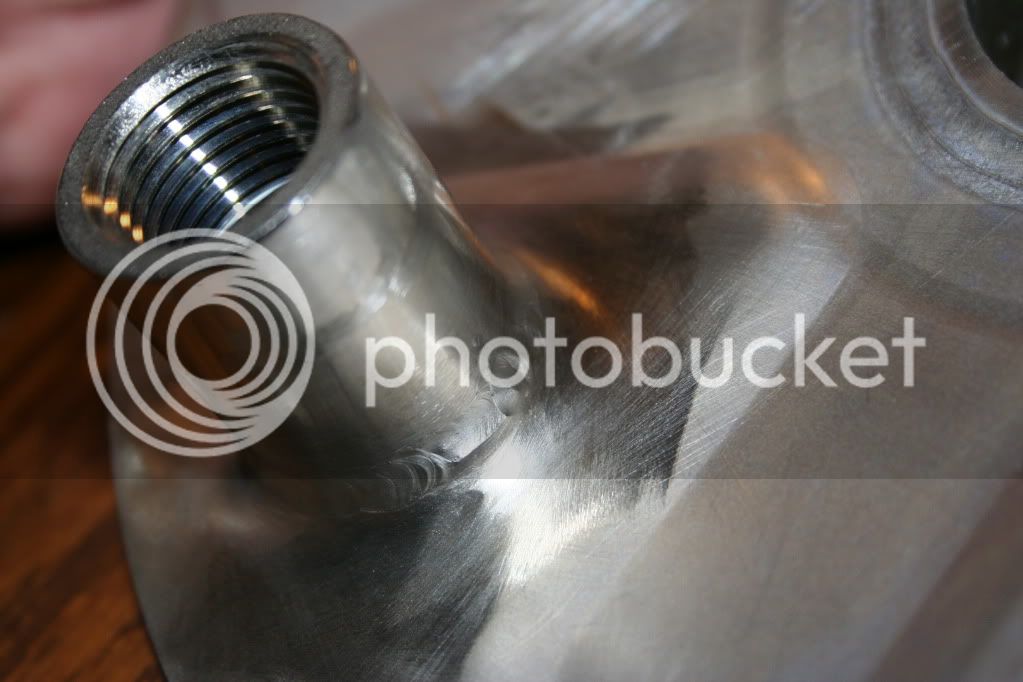
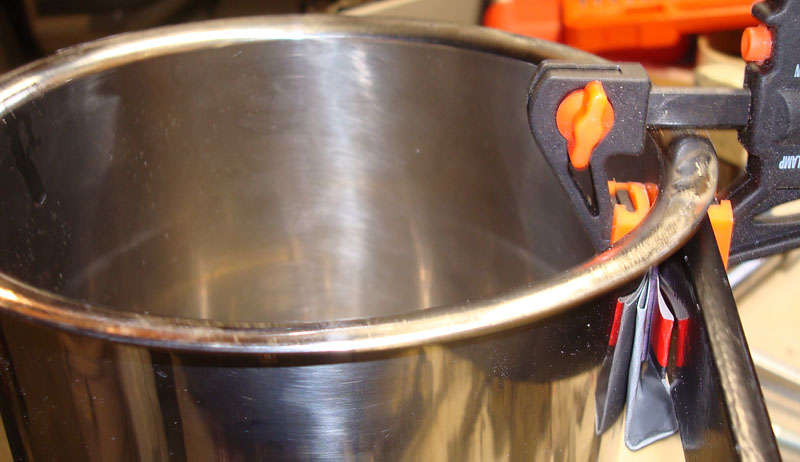
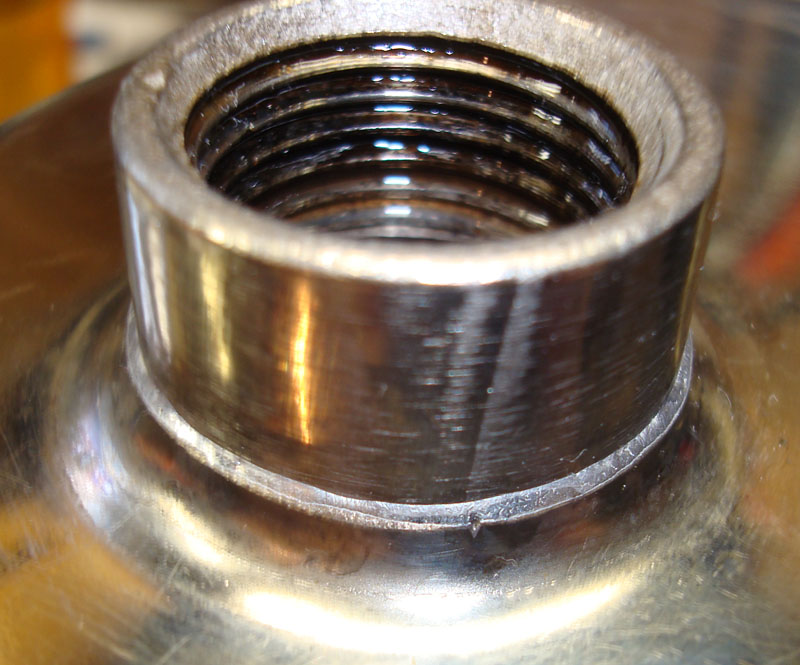
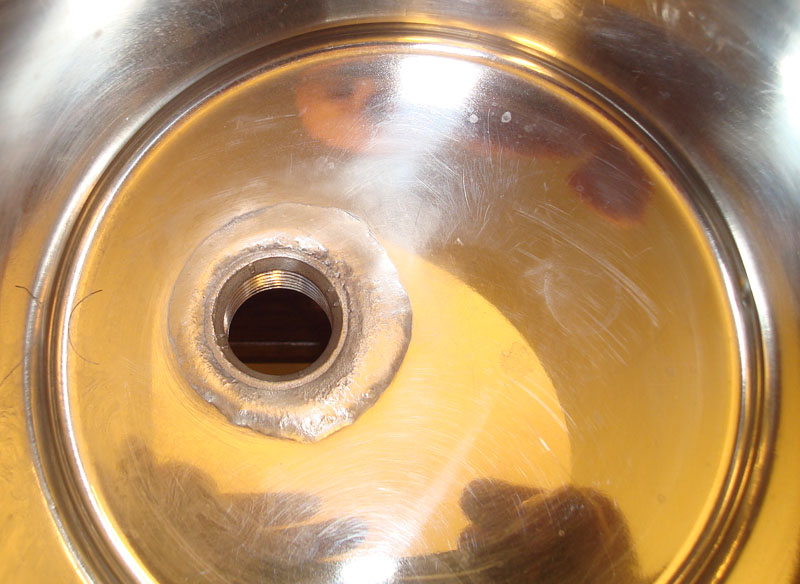
After applying heat with a MAPP gas torch. The solder has flowed through the joint and a bead shows up around the coupling. This alone verifies that the joint is sound and leak free. The inside of the joint is now mostly an esthetics issue, which is still worth doing right. By the way, notice the buildup of hardened flux in the threads.
GrantSolder6.JPG


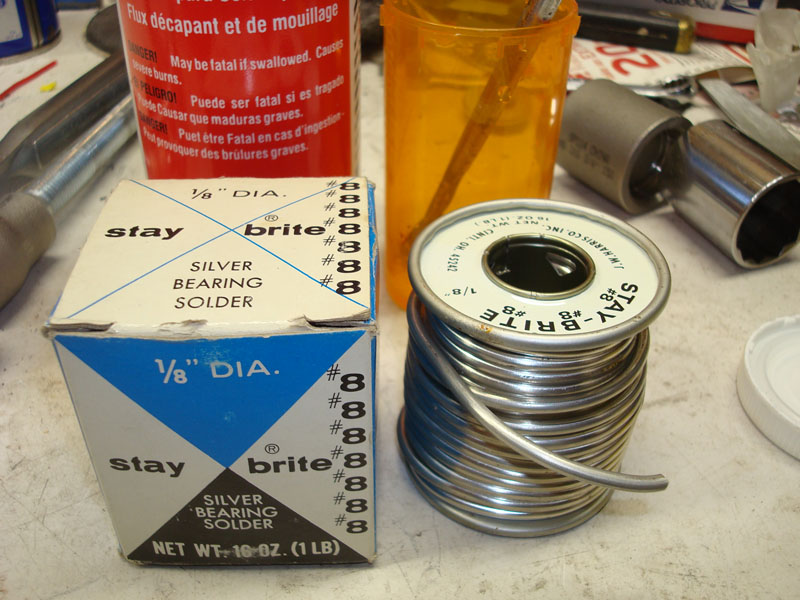
Here's the stuff I used; Stay-Clean liquid flux applied with an acid brush, and Stay-Brite #8 solder.
GrantSolder7.JPG


The flux in the threads was hard to get out with just flux on a rag. I eventually used a 1/2" NPT tap to chase the threads out; the flux had turned to almost glass in there. The tap pulled out crunchy flakes.
GrantSolder8.JPG


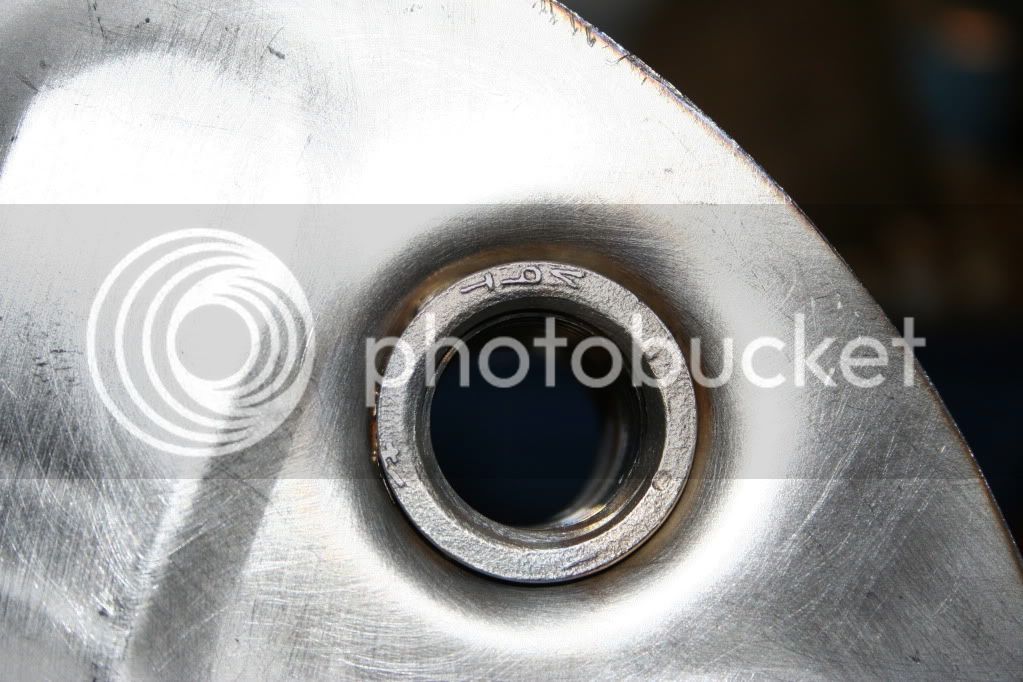
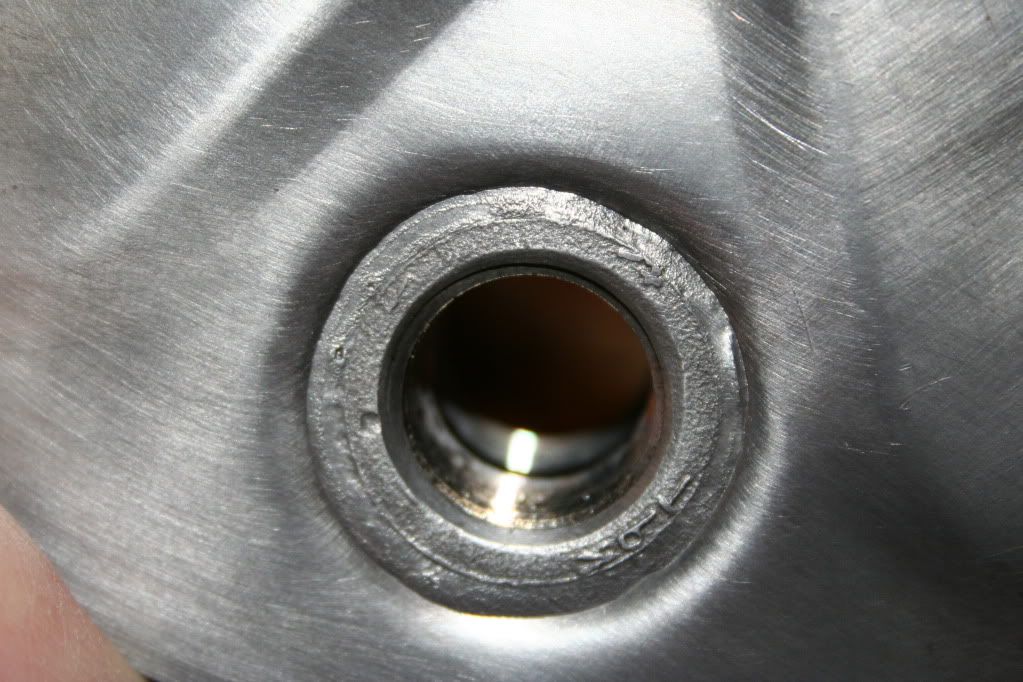
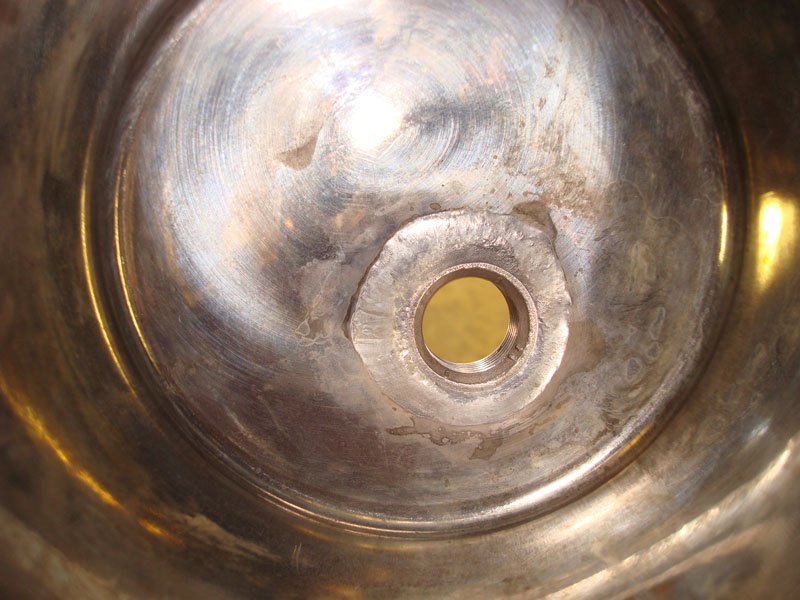
Here's what the inside joint looked like after cleaning with flux, then soap and water. There is more solder than I would have liked. I think next time I'll use 75% of a ring and cut it in half to spread it around a little. Also there are stains remaining which do not look so hot. I tried to remove them with a green scrubby pad. It started to remove the stains but it scratched the metal surface so I stopped.
GrantSolder9.JPG


The solution to the flux stains turned out to be Bar Keepers Friend on a wet paper towel. I had an unopened can sitting around since I read rave reviews about BKF here on HBT. It did not let me down, I am a fan too now. The scratches you see are from the green scrubby. There are some faint marks left from the flux which I believe are etched into the surface so they will not come out. Removing the flux sooner may reduce these etchings.
GrantSolder10.JPG


That's it for me. Thanks all who have contributed to our common knowledge.
 
Word of warning on the dimple tool. Check your bolt and nut every once in a while to make sure they are in good shape. I had done about 20 fittings with this nut on the hardned bolt from McMaster. After pulling a half coupling through, when I was trying to back the nut off, it jammed. That's right, I could back it off about 1/4 inch from pulling it through and then it wouldn't move at all.

img_0456.jpg


I spent the next 45 minutes cussing, dremeling, hammering, and wedging it off the bolt so I could finish soldering the coupling. Managed to bruise the tip of my thumb in several places where I missed the punch I was using to wedge it apart. Fun times.
 
Ya, I used up a handful of stainless nuts. As soon as one started binding a little, I chucked it and grabbed a new one.
 
Finished my keggle a couple of weeks ago but I just managed to get the pics on the PC.

I cut the top of the keg off with an angle grinder and then dimpled and soldered a coupler in place. The whole process was incredibly easy. There really is no reason that someone with no experience and just the slightest bit of common sense couldn't do this. Here's a [ame="http://www.youtube.com/view_play_list?p=40264571DF6C6DD1"]playlist[/ame] of how-to videos I watched beforehand. Nastalgia's dimpling and soldering video was definitely the most helpful. I put the keg tool together mostly with borrowed parts from work. I ordered the reducing coupler and 1 in coupler from McMaster. I actually ordered the wrong 1 inch coupler. I ordered a threaded one. The threads were not an issue. These pics are before final cleanup. The discoloration on the coupler came off right away with a little BKF. It looks brand new again.

I ordered a ball valve kit and a side-pickup tube kit from Bargain Fittings. All stainless and < $50. The Bargain Fittings coupler fit into the dimple sort of loosely but not enough that I hammered the dimple in, as discussed in earlier posts so I could get a tight fit. While soldering, some flux seeped through because it wasn't CH tight. That's what the discoloration is.

Altogether, I finished this project for a hair under $100.

image.jpg


image%282%29.jpg


0411111916.jpg
 
Quaffer: I'm not sure how to prevent the splitting. Maybe pull slower? I pulled out about halfway through to check the progress before I finished. What about lube? I didn't use anything fancy. I used a little olive oil. I think Nostalgia uses WD-40 in his video. Also, on your grant, I think you could have gotten away with a little less solder.
 
Quaffer: I'm not sure how to prevent the splitting. Maybe pull slower? I pulled out about halfway through to check the progress before I finished. What about lube? I didn't use anything fancy. I used a little olive oil. I think Nostalgia uses WD-40 in his video. Also, on your grant, I think you could have gotten away with a little less solder.

I used WD40 and went slow. I think it split because of metal fatigue or something.

Years ago I had tried to braze a 1/2" male copper adapter to this hole, and it was a struggle with futility. In retrospect I probably used the wrong flux; I picked the first one on the shelf basically. It was white powder that burned into black peanut brittle and soot. I attempted repairs which held up for one or two brews until I finally gave up and went weld-less. I think I must have done something to the material then to make it split now; too much heat or too many heating cycles. The brazing rod needed a much higher temperature then the solder I use now.

I ended up using two rings of solder last night because it was leaking out through the crack. Finally I flipped the keg over and capped the crack with solder, and so far so good. I will test it with heat this weekend to see if it is going to hold up.
 
There was one more thing about that half coupling. I checked it twice, still the "genius" pulled it in backwards. Luckily I had a 1/2" NPT tap. I am now the owner of the world's shortest full coupling. :cross:

The next full coupling went in without issue. HLT only needs a dip tube and a sight glass now.

Then I cut my brand spanking new Bayou 15.5 gallon kettle and put in a full coupling. Easy peasy. The thin metal of this pot stayed hot a lot longer than did the keggle. I let it cool for almost two minutes then tried to brush of the joint with flux. The solder was still liquid and I messed it up. It is still sound but not as pretty as could have been had I been patient.
 
Back
Top