my 15 gal conical

Homebrew Talk - Beer, Wine, Mead, & Cider Brewing Discussion Forum

Help Support Homebrew Talk - Beer, Wine, Mead, & Cider Brewing Discussion Forum:

This site may earn a commission from merchant affiliate links, including eBay, Amazon, and others.

defenestrate

Senior Member
HBT Supporter
Joined
Sep 9, 2008
Messages
1,024
Reaction score
7
Location
edgewater
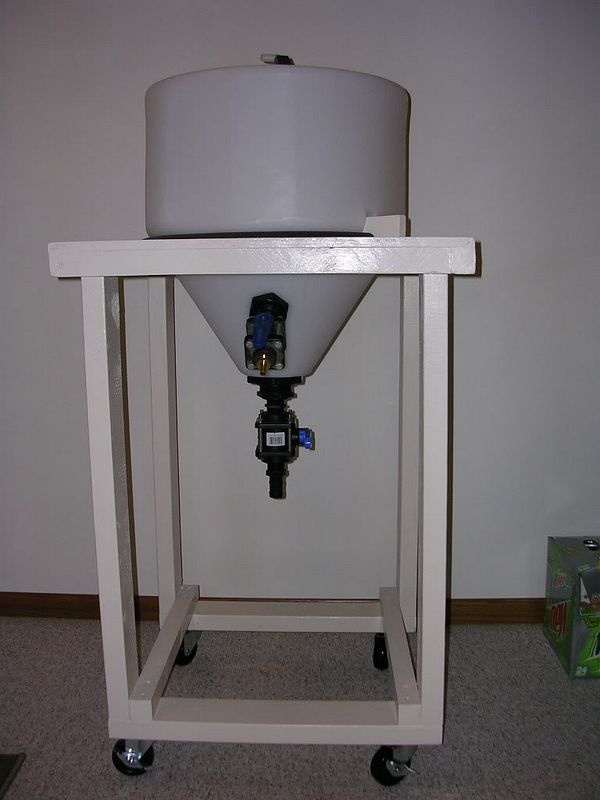
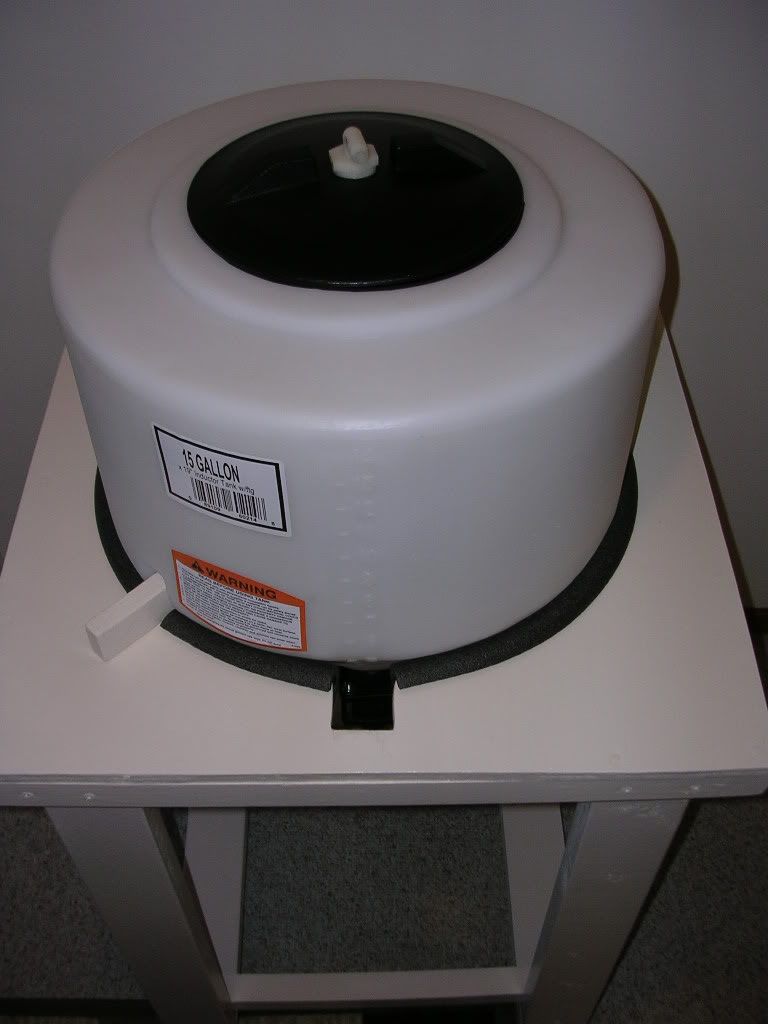
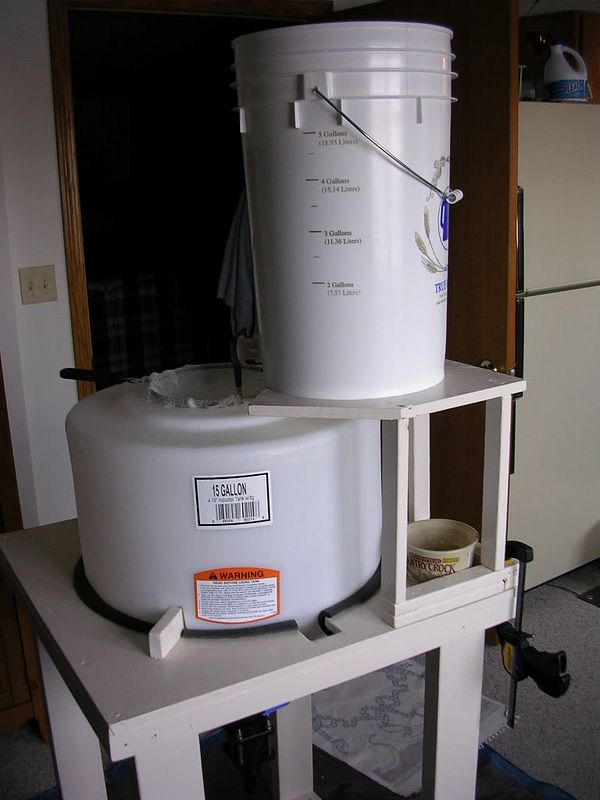
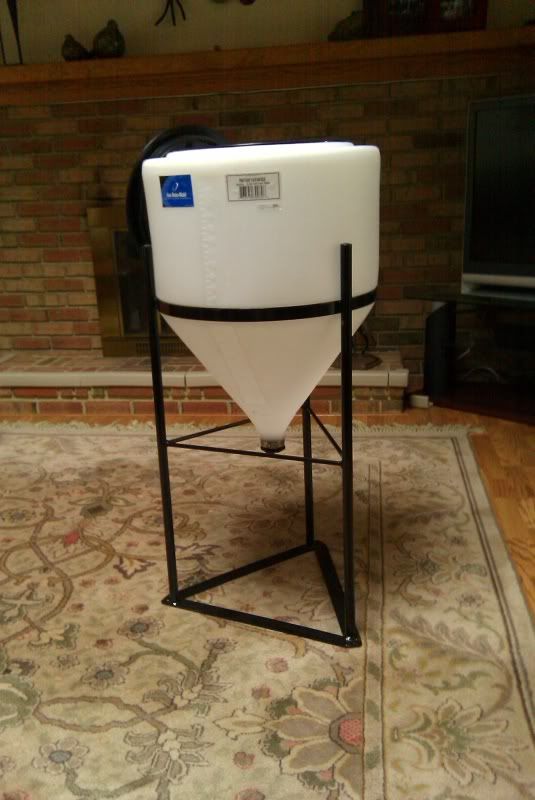
i bit the bullet and ordered a 15 gal conical from plasticmart. this is the fully draining version, 1 1/2 in. outlet. 170 shipped.
SatJan30163847EST2010.jpg


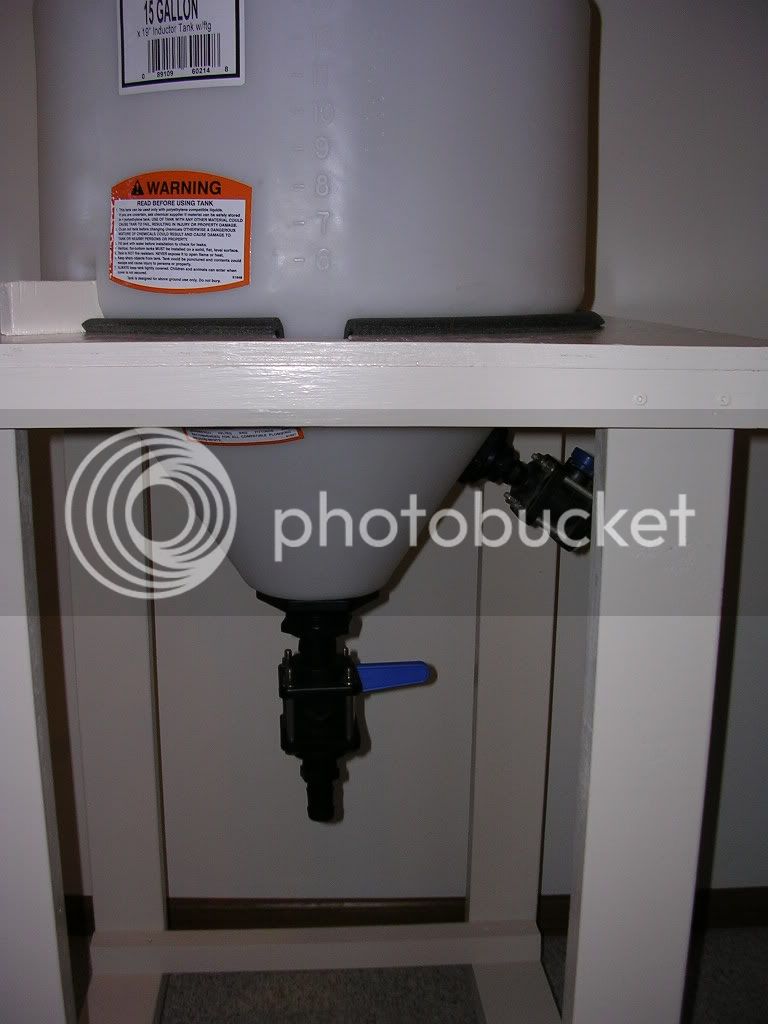
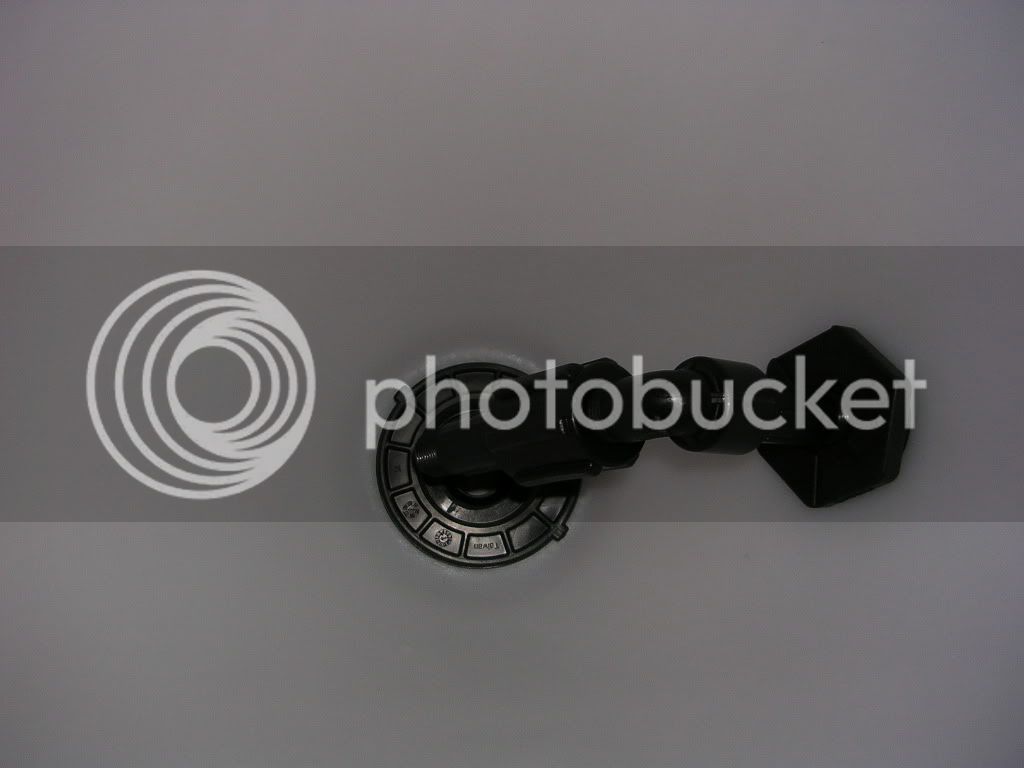
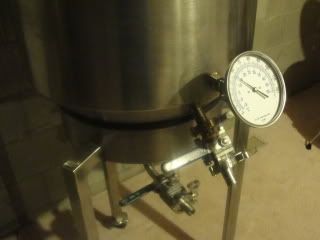
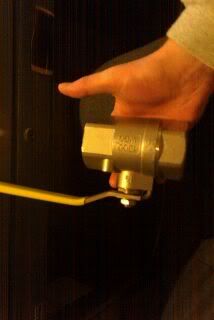
i picked up this 1 1/2 in SS ballvalve on ebay for 14.99, 23 and change shipped. pretty good deal, its in great shape.
IMAG0015.jpg


next will be a nipple to thread on the valve. i havent decided if i'm going to put a racking arm on or not just yet.
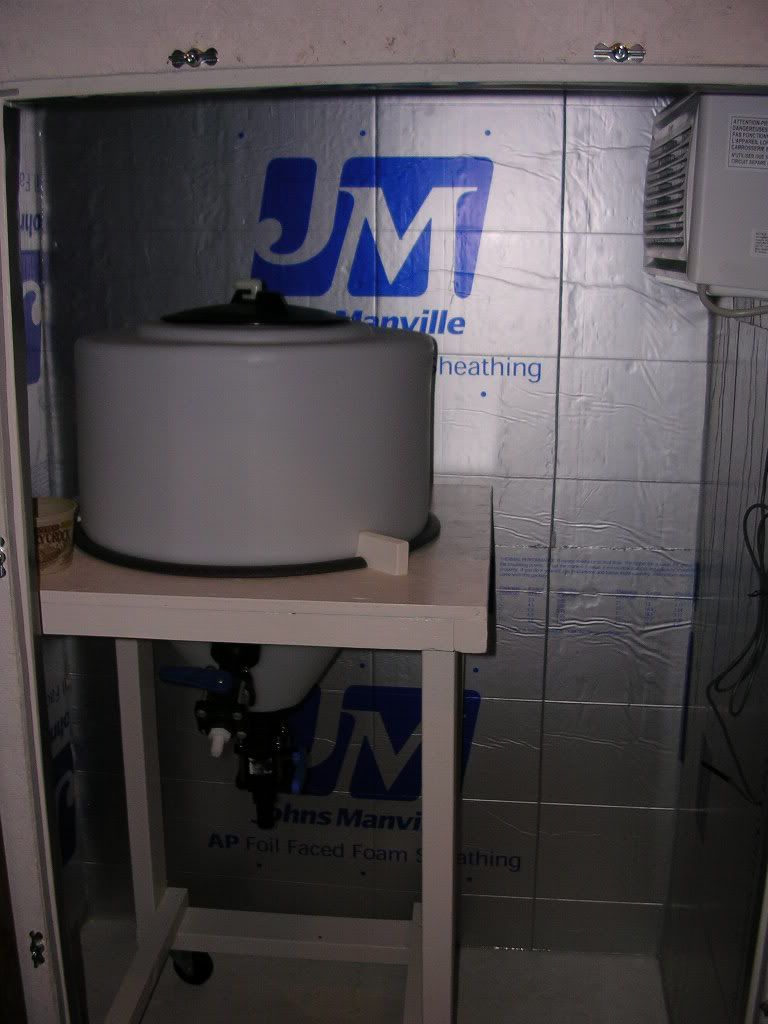
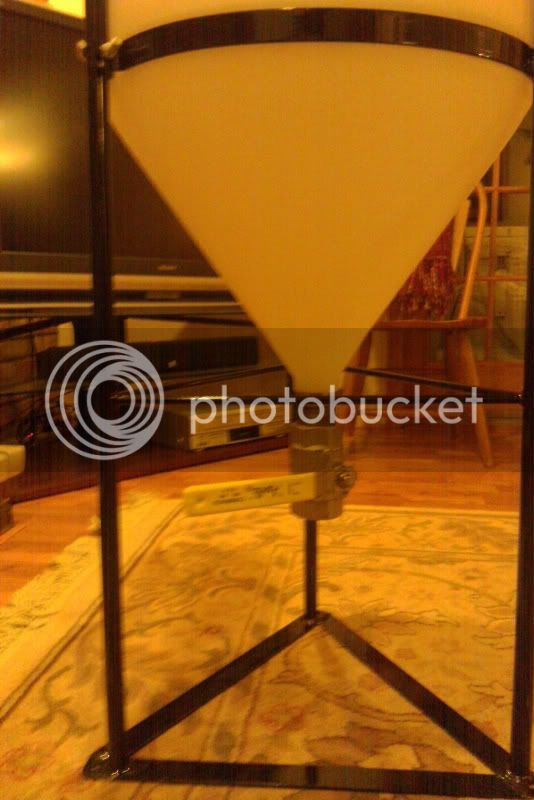
i think i will be propping this bad boy up on some milk crates so i can gravity feed into kegs/secondaries.

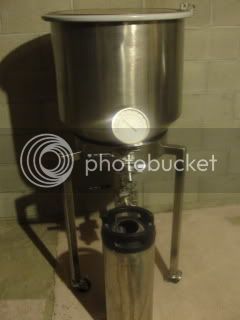
edit: complete with racking port! total cost
conical w/stand:170 shipped
1 1/2 SS valve: 23 shipped
1 1/2 in cpvc nipple: 1.40
1/2 inch plastic bulkhead: 3.99, 11 shipped
1/2 in CPVC nipple: .75
1/2 in SS 3 pc ballvalve: 15.99 shipped
1/2 x 1/2 nipple: 4.99 shipped

so the total bill was around $230. works for me.
 
Be sure to post up how you like it! I have a pair of 6.5 gallon minibrew conicals and love them. I'd sure like something in the 15 gallon size as well.
 
I was REALLY close to getting a 14 or 15 gallon plastic, but I'm just going to hold out for a SS conical.

That looks very nice, though.
 
I was REALLY close to getting a 14 or 15 gallon plastic, but I'm just going to hold out for a SS conical.

That looks very nice, though.

i would love to have stainless, maybe one day.

i got this as more of a "testing" vessel. i'm flirting with the idea of a nano and would like to use these conicals down the road, so i got a smaller one to see if i'm satisfied with them and also to iron out a few recipes via 10 gal batches in the process.

i'm sure in the long run it will prove handy... especially when doing big warm weather batches :mug:.
 
i stopped at home depot yesterday and they do not carry pvc nipples... my only option was galvanized steel (atleast in store) i'm going to order a pvc or stainless one online but i was just too anxious to see the valve threaded on that i had to pick it up :eek:

MonFeb01210125EST2010.jpg

MonFeb01210208EST2010.jpg


with the valve attached the outlet is only about a ft off the ground so its definitely going to have to be raised.
 
fermenting my first batch in this currently, 11 gal of a common. i cleaned/sanitized the s@#t out of it and ended up picking up a cpvc nipple. everything is going well so far, i actually top cropped some yeast out of it yesterday. i put a 7/8 hole in the lid with a hole saw for the airlock, its not bubbling so the lid isnt sealed too amazing but oh well. i'm going to add a valve on the cone once i'm content with where i know the trub/yeast will be, right now its looking a little over 1/2 gallon. i was planning on just using a 1/2 in SS weldless kit for a keggle, any ideas?
 
fermenting my first batch in this currently, 11 gal of a common. i cleaned/sanitized the s@#t out of it and ended up picking up a cpvc nipple. everything is going well so far, i actually top cropped some yeast out of it yesterday. i put a 7/8 hole in the lid with a hole saw for the airlock, its not bubbling so the lid isnt sealed too amazing but oh well. i'm going to add a valve on the cone once i'm content with where i know the trub/yeast will be, right now its looking a little over 1/2 gallon. i was planning on just using a 1/2 in SS weldless kit for a keggle, any ideas?

Really love what you're doing with this. Question: is there any way to get the lid to seal on it using a homemade gasket or giant o-ring of sorts?

As far as a solution for cropping in the cone section, these dudes in San Diego have a nano operation that could work as a really neat blueprint on a lot of ways. There's a section on modifying the conicals.

http://hessbrewing.blogspot.com/2010_07_01_archive.html

It's sort of down the page a bit. Took a while to find it. Pretty neat blog.

Keep us updated, this is really cool stuff.
 
i planned on just using the dump valve to get the yeast out of the cone; i only top cropped because i needed yeast now. the beauty of the cone is that when you first dump you will empty out the trub, and then you will get the clean yeast. i just planned on giving this yeast a rough wash with some boiled water and keeping the rotation fresh.

as far as the lid, i have seen some people sealing it with a home made gasket, but i'm not too worried about it-most of my buckets have tiny leaks so i'm not going to go crazy trying to seal it.
 
well i love the conical. i had an extremely small leak at the valve, i just need to clean it all up and re tighten and it should be good. i took some pics of the yeast from the cone to show everyone, i love it- just dump out what i need for a batch, no starter, right in with some o2 and it takes off :D as long as its fresh its great. i used qt mason jars for the pics. first i dumped almost 2 qts of trub before i was positive it was pretty much yeast coming out. the first shot is the 3rd qt right after dumping.
IMAG0238.jpg
the second picture is after being in the fridge for 24 hrs. the yeast and trub on the bottom was still pretty clean, but i figured why not go for the best stuff still in suspension and i poured this off into another jar.
IMAG0239.jpg

and here is the final shot a day later of the yeast settled. no trub, very clean and more than enough fresh for a 5 gallon batch, used this amount with no starter for a blonde hybrid (its cali lager) and it took off like a champ
IMAG0240.jpg


i will do the same with the remaining cone once i take the last 5 gallons off of it and make starters with that yeast. the yeast cone was right about at 1/2 gallon so i think i will be adding a racking port @ 3/4 gallon. i'll update with that addition.
 
it took me a while but i finally got the racking port added. a couple posts above there is a link posted from hess brewing when they converted their conicals (thanks hedonist91).

i went ahead and ordered the 1/2 inch bulk head they used from tank depot. after drilling a 38 mm hole like they recommended, i put it in. to my horror it was too big of a hole (in the build thread above, they said it was a tight fit and they had to force it through... i had atleast a 1/4 inch of clearance around the outlet. however, the gasket on the inside of the conical is more than enough to cover the hole, and since there is no turning back at this point :drunk: 
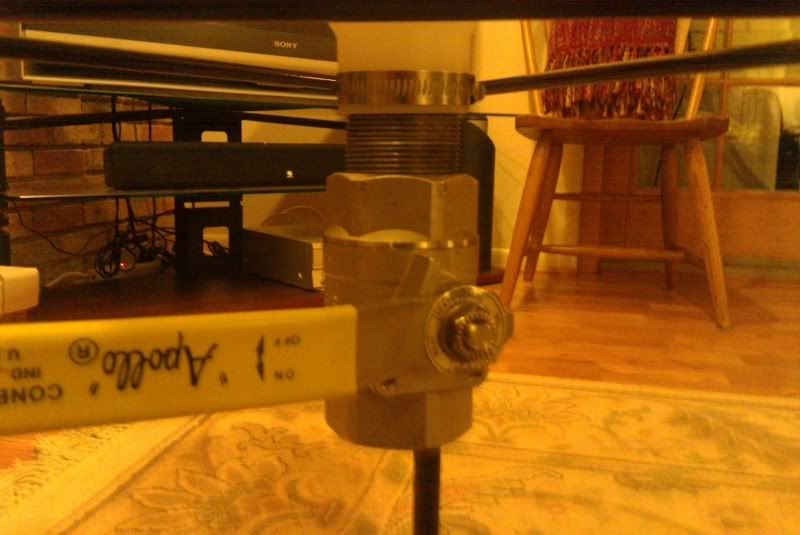
i went with it. the bulkhead is only supposed to be hand tight as well.

i picked up a close 1/2 cpvc nipple, and ordered a 3 pc 1/2 SS ball valve and 1/2 inch x 1/2 inch hose barb, and after wrapping the sh*t out of the threads, put it all together after a test fit.

an hr in and no leaks let, so i'm happy so far... we will see over night.

IMAG0269.jpg

IMAG0270.jpg

IMAG0272.jpg
 
I've got one of these tanks (minus the stand, gonna try and make my own) on order, so looking forward to seeing how this turns out. Planning on using triclover fittings on the bottom, in case I decide to upgrade to a stainless tank down the road...

Is there any reason folks are using the PVC bulkheads, as opposed to just using a standard keggle weldless setup?

honestly, i dont know. my original plan was to go with a weldless bulkhead, but then when i saw the nano guys using the pvc bulkhead i just went that route, plus the 3.99 price didnt hurt (although $9 shipping did :mad:). one of the things i do like is that it only protrudes about a half inch into the fermenter which is nice.

if i build another one of these down the road, i will also opt out of the stand, and i would also go with a butterfly dump (tri clover if possible?) for the bottom outlet... that 1.5 inch ball valve for 23 shipped was a steal though and it works.

i will need to raise the fermenter to use the racking port funtionally, so i will most likely just put together a wooden stand to sit on rather than welding extensions on :drunk:

im also flirting with the idea of trying to pressurize this thing for racking...maybe go with like 5 psi or something, with a corny post in the lid??
 
If you need one of the black bulkheads for the racking port and don't want to pay shipping, look for a quality pet store that has some saltwater aquarium items. those bulkheads are used widely in the aquarium hobby.
tom
 
I just bought two of these from The Tank Depot: Ace 15 Gallon Full Drain Biodiesel Tank / Wine Tank Part Number: A-INFD15-19
:ban:
My idea was to have two ballvalves at the bottom of the tank and have the top valve open during fermentation the bottom one closed during fermentation, after fermentation close the the top valve and open the bottom valve to empty the trub and yeast out, also instead of drilling a hole into the conical to drain beer I would either attach a hose or just drain right from the bottom to the keg.
The vessels are arriving today so Any comments, suggestions, repsonses are welcomed. :mug:
I will be building a stand to accomodate the two vessels after i decide the height the vessels need to be to drain into a keg :)
 
I built one very similar a few years ago. I used polypropylene ball valves. 1/2" for the racking port & reduced the 2" dump port down to 1" . Everything was bought from a farm store. Total cost ~$100. Here are some pics. Cheers!!!

Note: The brass barb was replaced with a polyethylene one.
ConicalFermenter001.jpg


ConicalFermenter003.jpg


ConicalFermenter005.jpg


ConicalFermenter006.jpg


ConicalFermenter011.jpg


In the Fermentation Box
DSCN1281.jpg
 
My work has a couple these laying around, I might see if I can buy them at the end of the project. I do have one question if one wanted to dry hop,
1. Do you poor the yeast off and dry hop in the same container?
2. Rack to a secondary and dry hop in that.
3. Or it really doesn't matter both way are ok.
I've dry hopped batches in the conical if I was planning to bottle it. Once the primary fermentation is done just dump some yeast, and use a white women's knee high stocking & tie a string to it & to the conical so it doesn't sink to the bottom. Otherwise I just throw the nylon full of hops in the keg & forget about it until it's empty. Cheers!!!
 
Hmm. So are folks using PVC, CPVC, or Poly bulkheads on these? I'm assuming that PVC is fine, since nothing's going to be hot in here, but just wanted to verify...

Also, how are people getting to their kegs from these? I've seen builds where the stands are tall enough that folks just slide the corny under the dump valve, and pour in from there, and other folks (like hamilton there) have a racking arm? I was kinda thinking that since the conical will be directing all the trub to where the racking arm sits in the conical, you had to be able to rotate it up and out of the way until after you dump trub/yeast? (Be nice to be able to push with CO2, but I imagine trying to pressurize these will result in a loud bang and a serious mess!)
After the trub & yeast are dumped what's left is shaped like a cone just like the conical, with the end of the racking cane right in the middle. I'll open the racking port & run off about 6 oz. and that clears the yeast out of there. It's permanent, as in it doesn't rotate nor does it need to. I attach a tube to the barbed port and the other end goes into the bottom of the CO2 flushed keg. When one keg is full I just move the tube over to the next one. When I see yeast flowing I shut it off. What's left in the conical is maybe a quart or two of slurry. That's when I capture the yeast for the next brew. Cheers!!!
 
Hmm. So are folks using PVC, CPVC, or Poly bulkheads on these? I'm assuming that PVC is fine, since nothing's going to be hot in here, but just wanted to verify...

Also, how are people getting to their kegs from these? I've seen builds where the stands are tall enough that folks just slide the corny under the dump valve, and pour in from there, and other folks (like hamilton there) have a racking arm? I was kinda thinking that since the conical will be directing all the trub to where the racking arm sits in the conical, you had to be able to rotate it up and out of the way until after you dump trub/yeast? (Be nice to be able to push with CO2, but I imagine trying to pressurize these will result in a loud bang and a serious mess!)

thats what i thought about pressurizing until a saw a thread on here where guys were pressurizing normal fermenters... but intentionally not making them air tight. by letting them leak slowly on purpose they were able to still maintain enough pressure to rack, while obviously pissing some co2 into the air...
 
Nope, carbon steel rusts. Bad scene using that to contain your precious wort.
 
Here is a large stainless conical that I have been working on and off for about a year. Just finished the stand right before Christmas. Still need a seal for the top, it is the same diameter as a 55 gal drum, so I will be ordering some EDPM seals from McMaster. I am also using a drum band clamp to seal the stainless lid. I have never been able to find a stainless band clamp, but I am still looking. All of these parts were bought at a scrapyard except for the castor wheels. The tank just sits on a rubber channel gasket on the stand. It has a racking arm attached to the top valve. You just loosen the tri clamp and rotate the arm up and down. Not sure if I will ever use it because it is so damn big. I don't have that much into it though, I got the conical tank used for $70, the lid was $15, the stand I found was already built $20, I just had to lengthen the legs, the valves were $5 each and the large thermo $5. I frequent this place often, but It took almost a year before all the parts came together. It can hold up to 30 gallons and still has about 7 inches left to the rim. I am also concerned about temperature control, I would have to build a fermentation chamber to keep it cool in the summer. I was wondering if I only filled it with 20 gallons of wort if the large headspace would be a problem. I feel it would be O.K. as long as the seal is good and the airlock bubbles, the co2 would still be on top of the beer right?
fermenter002.jpg

fermenter003.jpg

fermenter004.jpg
 
No worries even with a 5 gallon batch as Co2 is heavier than air and will make a Co2 blanket protecting your fermenting wort.
The large sealing area plus limited pressure during fermenting as well limited perssure applied to transfering to a corny, think about it before going into it too deep out of pocket.
 
Is that a screwoff top on that? Does it seal?

the lid has a plastic ring it screws into. The plastic ring is screwed down to the connical vessel. I may take the ring off and replace what looks like drywall screws with some stainless steel bolt/nut. I haven't yet fermented in it yet so for the first time i will just twist the lid on a little and see if it leaks enough to release pressure during fermentation.
 
:rockin: I just purchased two 1 1/2" SS ball valve's to go allong with my build. So at the bottom I will have a 1 1/2" x 2" SS nipple connecting the 1 1/2" ball valve at the bottom, a 1 1/2" x 1" reducer connecting a 1" x 4" SS nipple to the 1" SS ball valve. This will determine how tall to make the stand to hold both of my tanks This should be sweet. :ban:
 

Latest posts

Back
Top